renovation

efficiency, ENS, Home renovation

• Happy Haul-idays • 5 Tips To Declutter This Season

Happy Haul-idays! This blog is sponsored by 1-800-GOT-JUNK?

My decluttering journey started a number of years ago. I was gifted the Marie Kondo Book “The Life Changing Magic of Tidying Up” over the holidays and the book truly resonated with me in a big way. I started the process of simplifying my home, donating access items and creating more space for friends and family in my home.

This holiday season, I invite you to join me on this ongoing journey - get your junk hauled away and create more room for holiday cheer this season. Here are a few tips I incorporated into my home that I think will make a huge difference in your spirit levels this Christmas.

If It Doesn’t Spark Joy To The World- Let It Go Go Go

When I applied this principle to my closet, I was able to gift, donate or toss the access away without any pain. I just held the item in my hand and if it sparked joy I held on to it. No joy - it went in the donate bag.
Who doesn’t take advantage of those amazing deals during the holidays? Making room in your closet this time of year can help for when you bring home all those pieces you stood in line for during those save the tax events! By using the “Spark Joy” tip, I now have so much more room in my closet for those holiday parties and dinners!

Holly Jolly Decluttering! All Similar Things Go Together

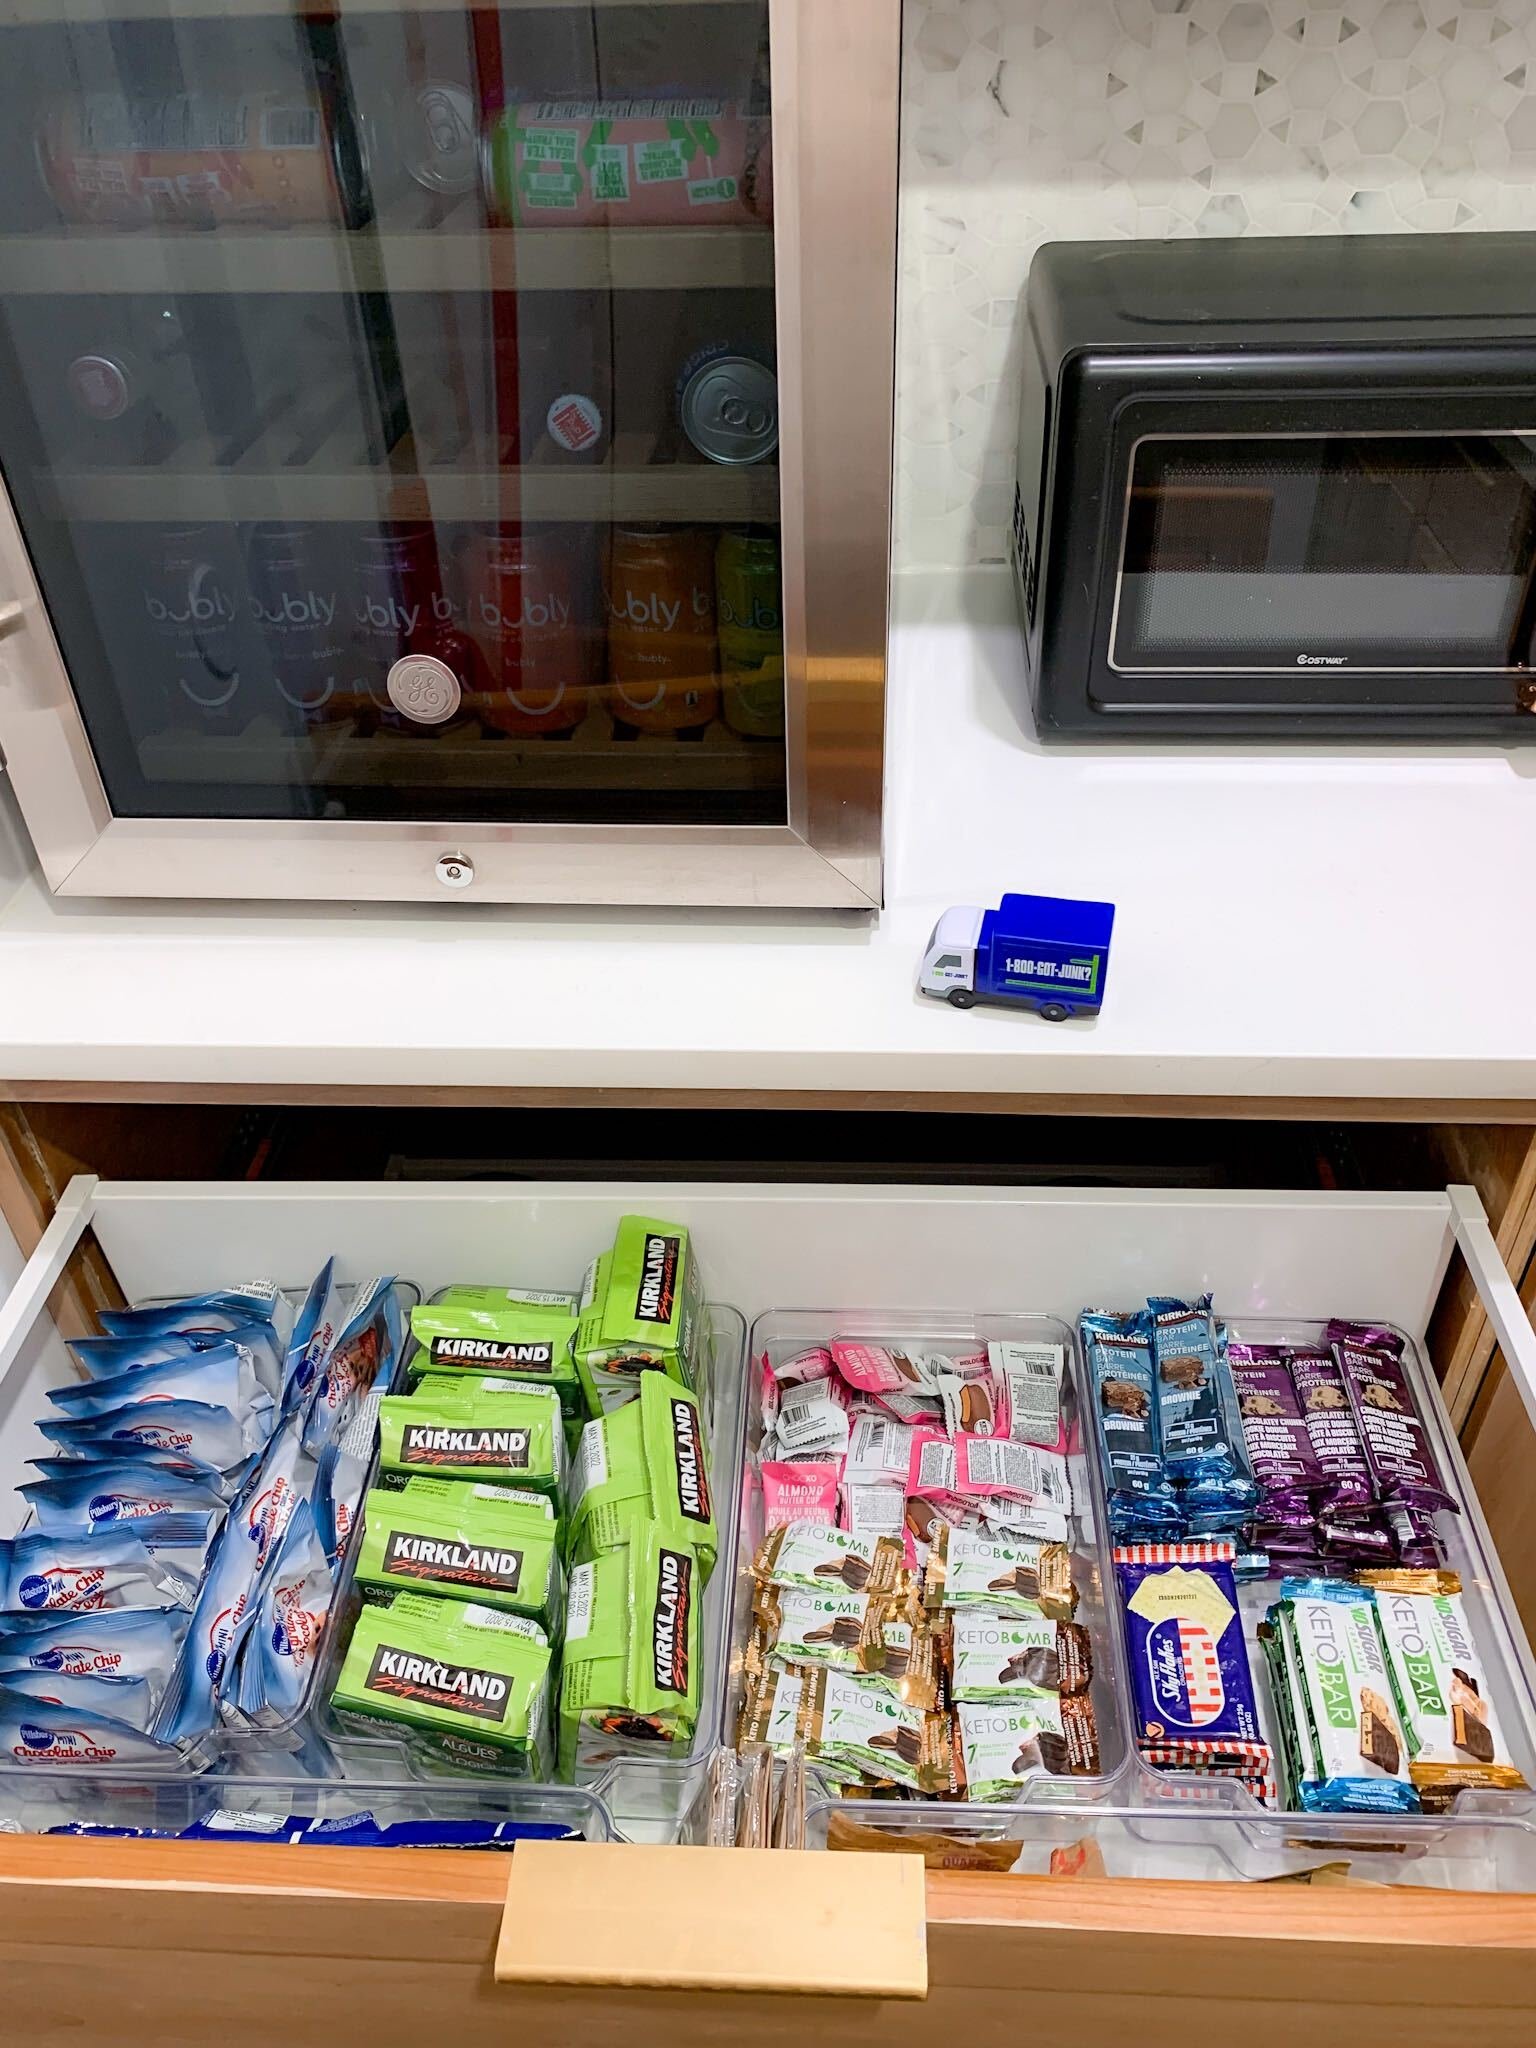
Not only does decluttering give my brain more space to live whole heartedly but my life has become so much easier when I am not panicked and looking for my car keys all the time. This is a very easy principle to start your decluttering journey. It’s simple really. All the Tupperware are in a single drawer in the kitchen and all the snacks in another. Bags go inside of bags, purses inside of purses. Once you get all the same things together, you can see how much you have and can get rid of the access! Doing this also creates a sense of ease for your guests, so they can find everything easily!

Happy Places, Happy Faces!

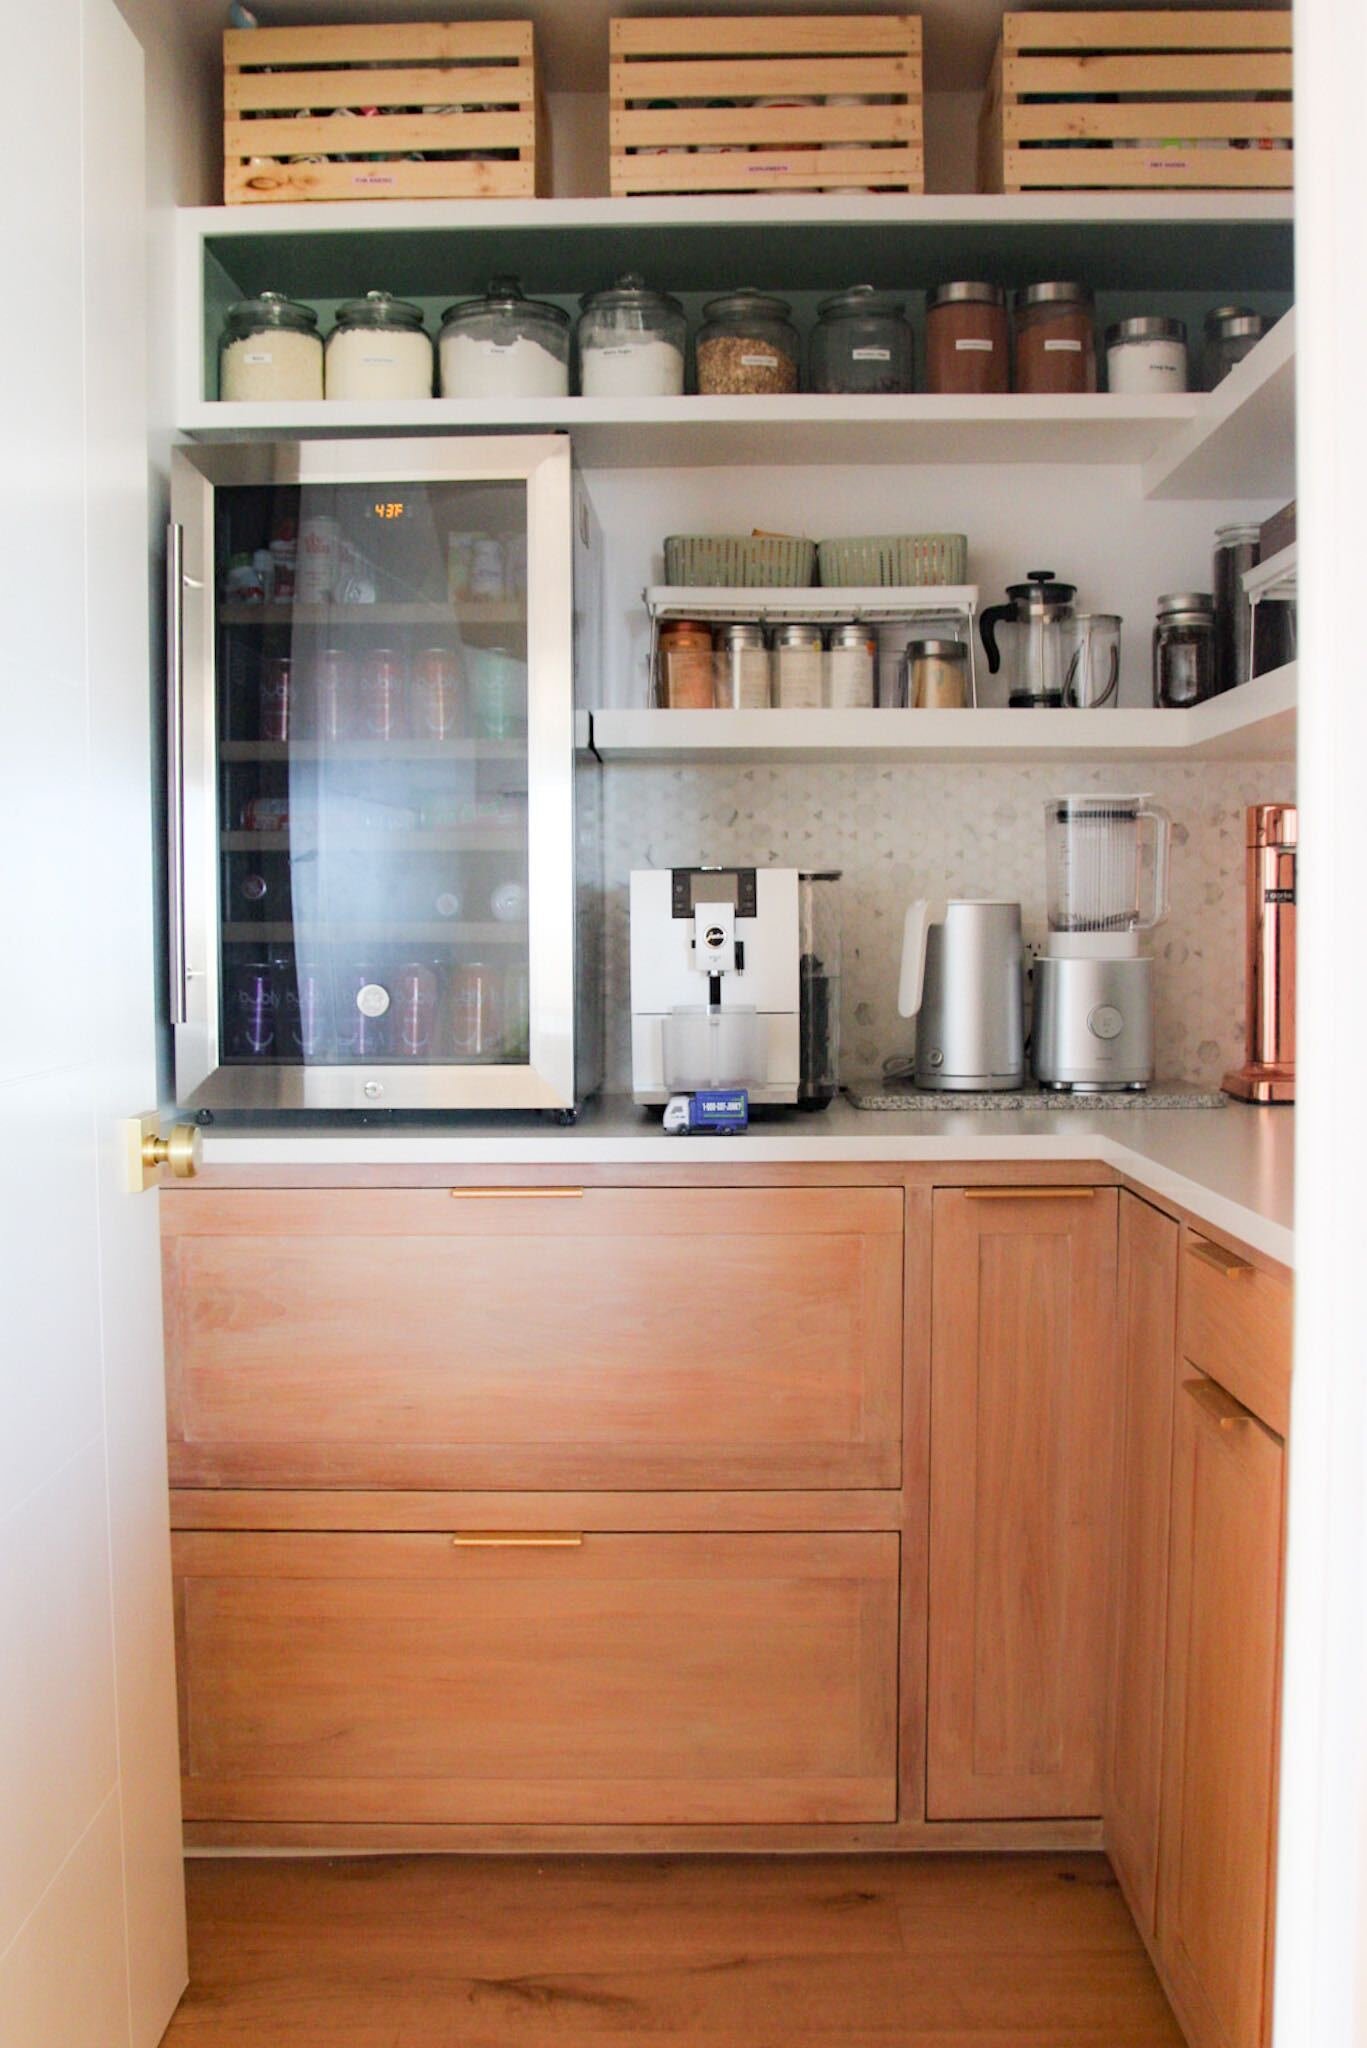
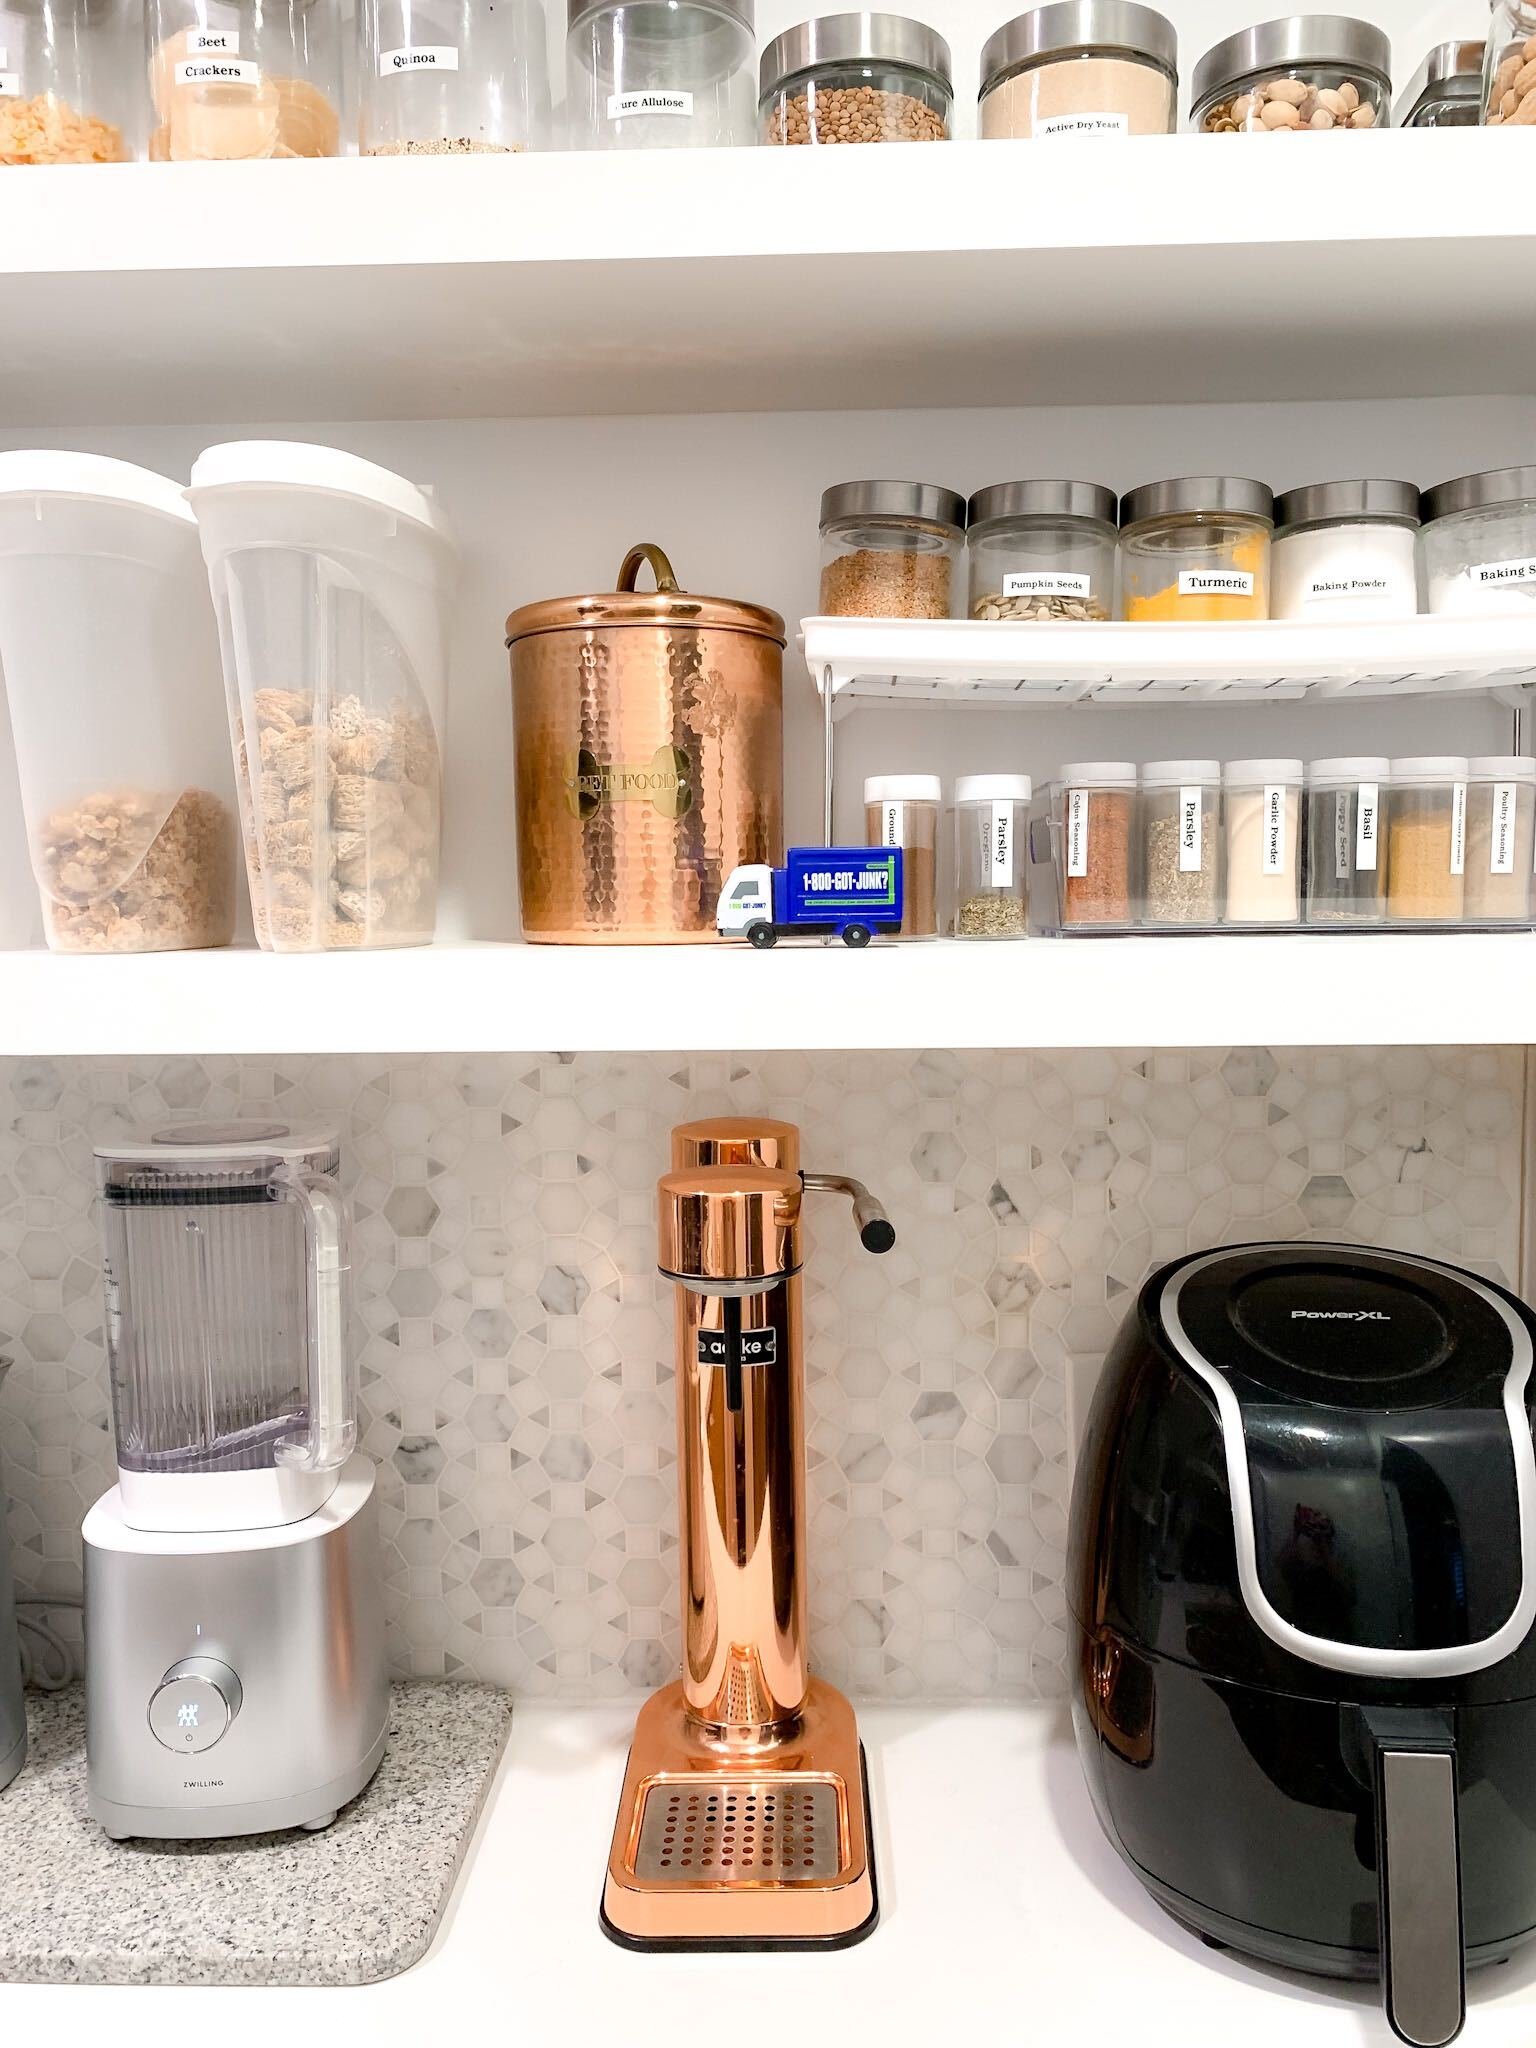
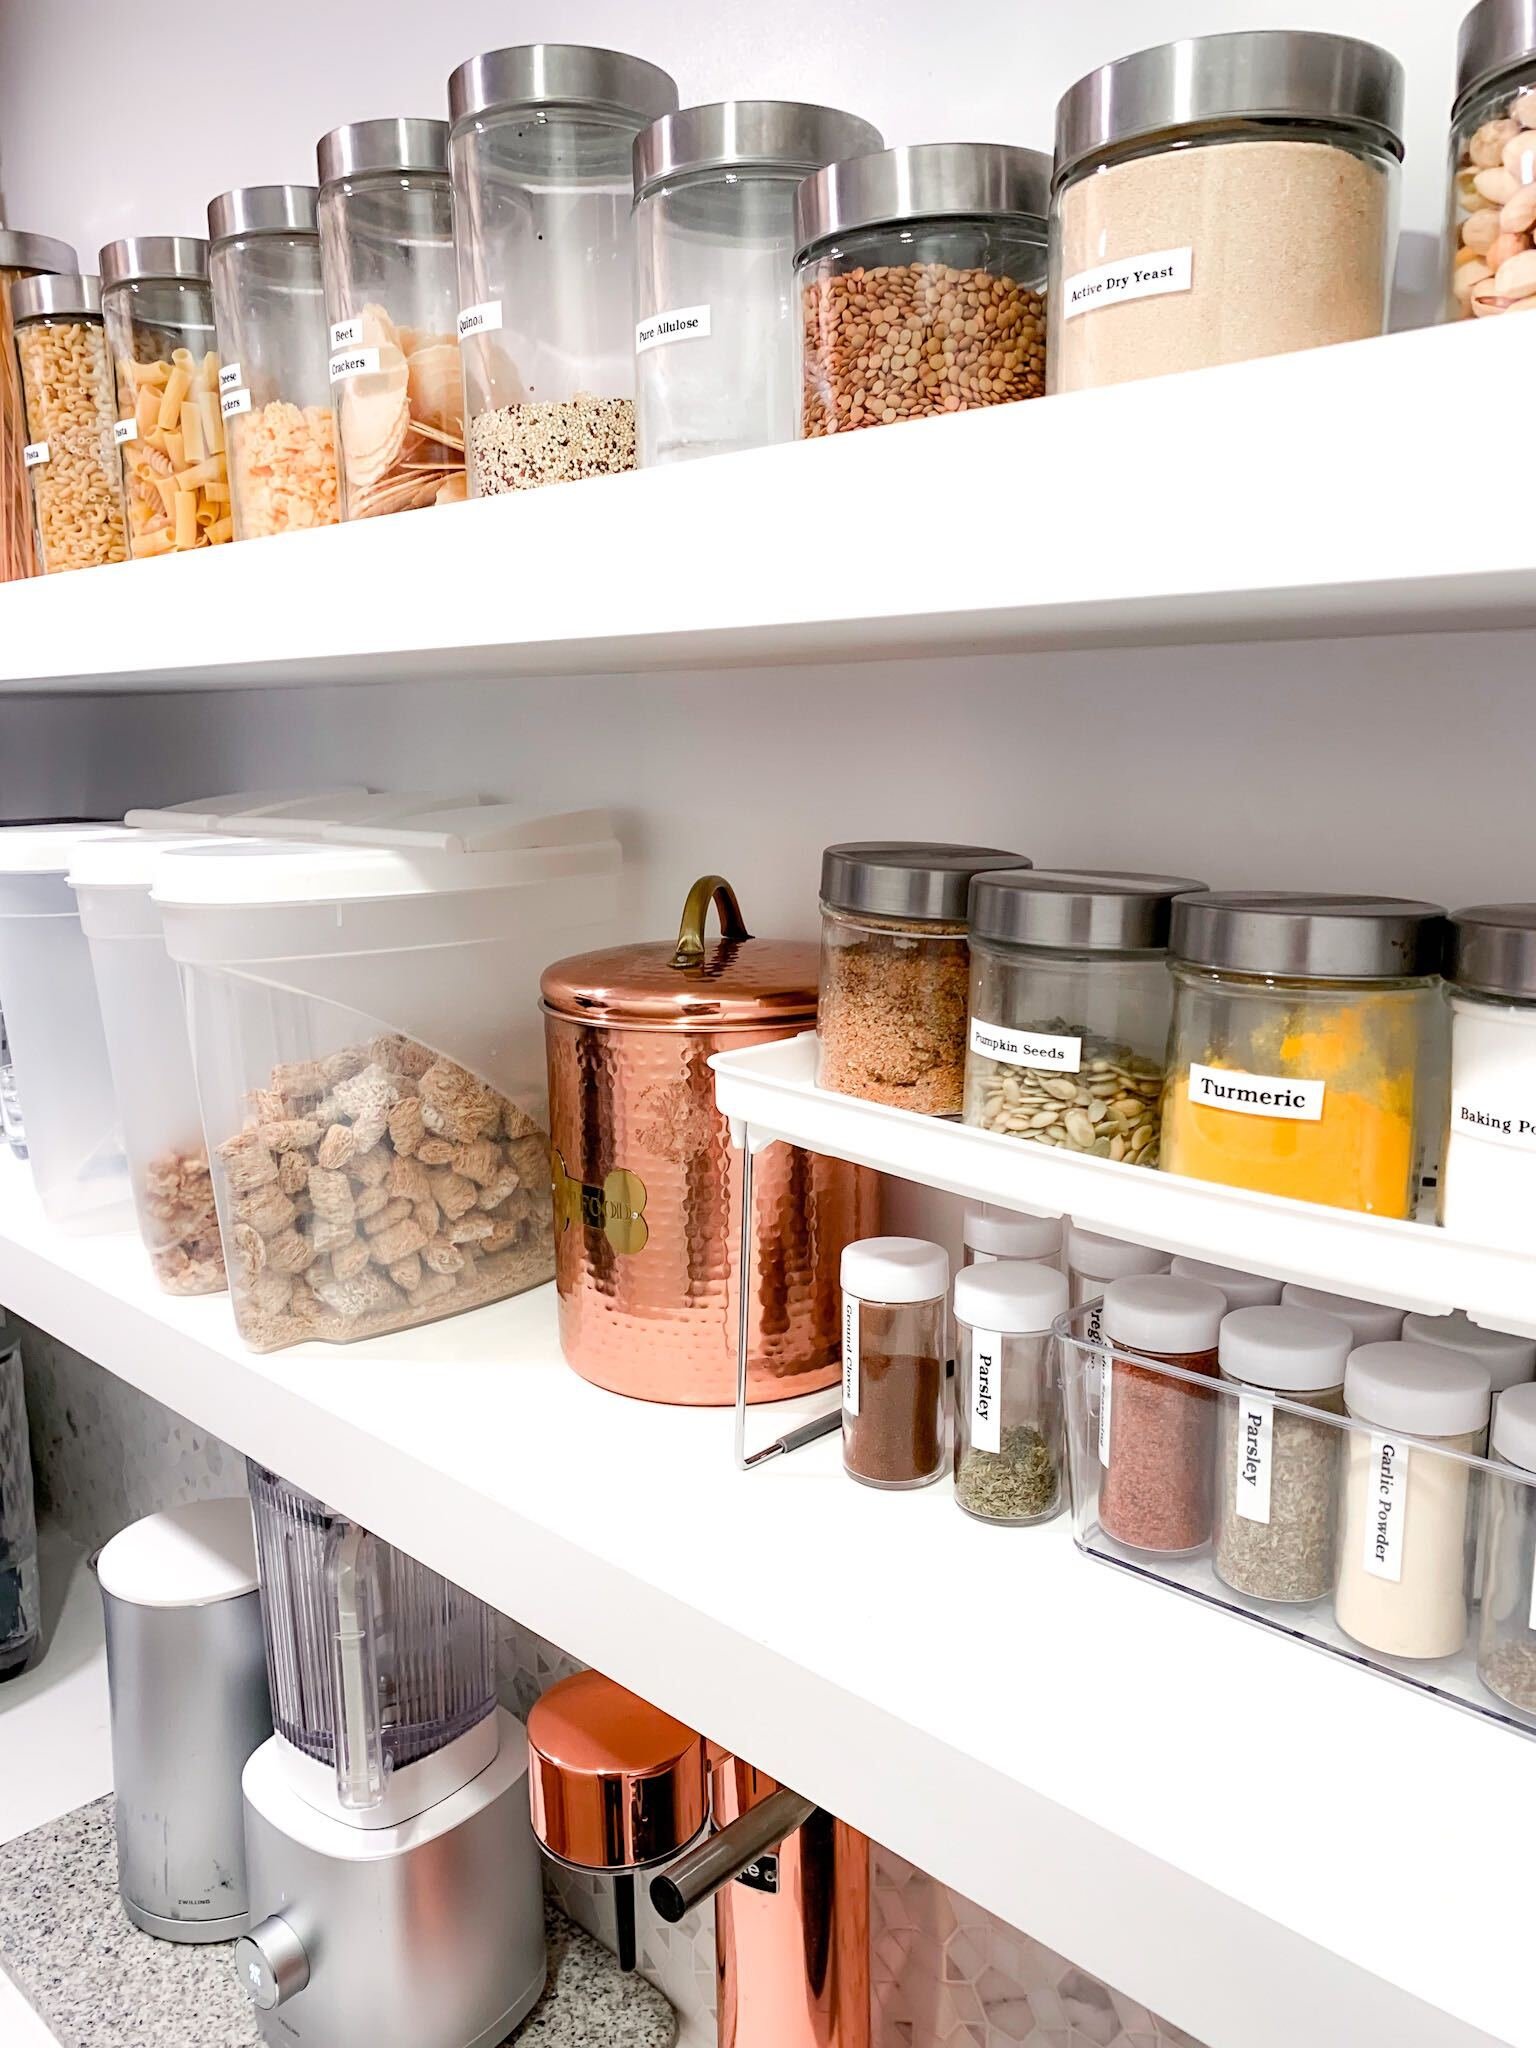
With so many different cooks in the kitchen during this time of year, making sure everything is easy to find, accessible and organized is incredibly helpful. Doing things like putting ingredients into clear containers, so you can see what you have. Putting all like items such as spices, baking items, tea, coffee, etc in their own little baskets or clear containers helps to keep things together. Last but certainly not least, labelling is life changing. When you label what things are, it makes life so much easier, not only for you, but for your guests too!

Now for a few personal tips that I have garnered along the way.

Tis’ The Season For Giving - Declutter & Donate When Your Kids Aren’t Home!

Lennon has outgrown so many clothing items or no longer plays with certain toys. Now is the perfect time of year to donate her once loved items to other children. How many times have you gone through yours kids old clothing and toys, put them into bags, only to have them tear back through them and pull out various items? Lennon’s classic line is “I want to save that for my kids!” Really? There are a few sentimental items I don’t mind holding on to in a small box or chest for her, but trust me, those sneakers you wore the rubber out on, are not going to be worn by my grandchildren.

This pattern of me bagging all the clutter up and her unloading it back onto the floor has happened one too many times, so now I know. I declutter when she is out of the house, and make sure it is hauled away before she gets back! Out of site, out of mind. Just the other day her closet got a major face lift when she was at school and she has not mentioned a single thing she thinks is missing.

Lennon’s Closet AFTER

Lennon’s Closet BEFORE

GIVE THE GIFT OF SPACE!

It’s a great time of year to clean out the closet, get rid of the clutter and open up your space and your home to guests. My entry way and mud room are usually filled with so many coats and shoes, bags and every day items, but as the seasons start to change, I know I need to make room for family and friends. Having open coat hooks, spots in the closet and places to put shoes make guests feel at home and like they aren’t taking up any of your personal space.

If you need help making your clutter disappear, it’s easy with 1-800-GOT-JUNK? All you have to do is point and junk disappears! Not only is 1-800-GOT-JUNK? happy to help, they’ve been a trusted junk removal since 1989!

Here are just a few reasons why I love donating my junk to 1-800-GOT-JUNK? :

  • They work on your schedule - They come when it's convenient for you.

  • They do all the heavy lifting - just point and the junk disappears.

  • The World’s Largest Junk Removal Service

  • Whenever possible, they donate the donatables, and recycle the recyclables!

  • When Got Junk has finished helping you declutter, your home will sing a happy song!

    Goodbye Junk - Hello Relief!

efficiency, ENS, Home renovation

• How Efficiency Pays Off! •

Are you planning on doing a renovation? Make sure you take the time to build in energy efficiency and get the most out of your reno. Keep reading to hear all about my personal tips and recommendations for cashing in on Efficiency Nova Scotia’s rebate programs when you are renovating a house!

Rebekah Higgs DIY MOM in front of her mid century modern pink front door

*This blog is sponsored by Efficiency Nova Scotia

Where Do We Begin?

You might think planning the design of a home is the most intimidating portion of renovations. Surprisingly, it’s actually much more intimidating to figure out how to run the house efficiently. There are so many options for heat sources out there - it’s hard to know where to start!

For my mid-century modern home, my top priorities were efficiency and saving a bit of money. Fortunately, Dave at Acumen Home Assessment was so helpful. He pointed me in a direction that would help me with both. Here are some great ways that I am able to see important savings, both environmentally and financially!

Reimagining Spaces

Space is precious, and as I love to host friends and family, I knew I needed a space for them. As you might have seen in Season 4, I decided to transform my furnace room into a guest bedroom.

I made my home so much more energy efficient by taking out the oil furnace, adding insulation into the attic and installing two mini split heat pumps. Doing this not only saved me energy costs but allowed me to utilise the space so much better.

Making changes like this to your home not only adds visual appeal and utilises the space better, but also helps the environment.

Big Statement, Big Savings

Front Door After

Front Door After

This pink door is not only a statement piece, but due to the materials used during insulation, it also keeps the heat in and the cold out. That might not shock you, but what might is that it came with amazing rebates!

This is what my front door looked like before!

Front Door Before

Front Door Before

NEED HELP?
If you need a little extra help making your home more efficient, my big tip is to book a Home Energy Assessment for someone like Dave to assess your home before doing a home renovation project. Doing this can steer you in a direction you might not have considered before. Energy Advisors know how to help you save on emissions, costs, and your households environmental footprint! It was well worth it to have Dave come by early in the process, and together we came up with a plan to maximize rebates and make my home more energy efficient.

Once I finished the renovation of my property, Dave came back to give me a final home energy assessment. My rebate cheque is in the mail and I am continuing to look for new innovative ways to be eco-conscious in my own home and all other home renovation projects I have on the go.

Instant in-store product rebates

Efficiency Nova Scotia also offers year round in store rebates. Save up to $400 at the checkout and long-term on your energy bill.

Examples of this are:

Washer and Dryers- $75 off per appliance

Dimmer switches- $3 off per unit

Smart Thermostats- up to $100 off

For the full list of in store instant rebates click here:

diy mom back yard halifax nova scotia

I hope you are inspired to look for ways to make your home more energy efficient while renovating. Feel free to email me with your questions or watch my Youtube Video below to see the before and after of my efficiency makeover!


We can all do our part to help our planet by being more energy efficient. No effort is too big or too small, so why not start with booking your energy assessment with Efficiency Nova Scotia today!

XOX

DIY MOM

Create your dream mid-century modern table with these budget-friendly hacks

Have you ever had your heart set on a table you saw online or maybe at a designer shop, but you just couldn’t stomach the price tag? When looking for the perfect dining table to fill my mid-century modern open concept living space, I kept running into this problem.

Rebekah Higgs - DIYMom - Dining Table 4.png.png

When taking on a renovation project, budgets can be tight, a lot of your funds often get soaked up by construction costs. This leaves less money for decorating but the pieces you bring in to furnish and style make such an impact on the way you feel and function in a room. It’s key to look for areas you can save. When it came to the dining table, I knew I needed to save some pennies, but I didn’t want to sacrifice design. I had envisioned the table as a statement piece, so I decided to get crafty and create my own. With a bit of elbow grease, a solid vision, and some tools, I was able to achieve the look I wanted at a fraction of the cost. Now I have a beautiful place for our friends and family to gather around for a meal, conversation, or games.

Rebekah Higgs - DIYMom - Dining Table 3.png

Old doesn’t mean useless, and this is often the case for me. I love searching secondhand places for great finds that I can transform into unique, custom pieces for my home. I started looking for a second-hand wood table to kick off the project. Fortunately, I found just what I needed on Facebook Marketplace. After negotiating a bit and solidifying a pickup time, I was able to secure the base of this project for $90.

TIP: If you see something you like on Facebook Marketplace, act quickly, be direct with pricing, and know that time is of the essence. Pieces go very quickly; I don’t want you to lose out on what you are looking for.

Rebekah Higgs - DIYMom - Dining Table 2.png

Next, was the elbow grease step. With a few cuts, some sanding and varnish, the top came out exactly how I had envisioned. I couldn’t be happier about how the legs turned out - the dowels make the perfect statement. They hide the outdated look of the previous legs, making it match the rest of my open living space. To see the full tutorial so you can create this look in your home, watch the complete transformation here.

To create this table on your own, you will need the following tools and supplies:

  • Belt sander

  • Palm sander

  • Skill saw

  • Chop saw

  • Router

  • Nail gun

  • Sandpaper (do you want to suggest grits?)

  • Wood glue (do you want to say the type?)

  • Screws

  • Varnish

  • Pre-used wood table (we found ours for $90!)

  • Wood dowels (we chose oak) 

Then you can begin construction…

———————————

For the top

1.    Remove the braces and legs

2.    Sand down old varnish using the belt sander and palm sander

3.    Cut the edge with a skill saw

4.    Glue the leaf inserts into the table

5.    Use a router to create the new desired angle

6.    Sand with finishing sand paper

7.    Apply the desired varnish

———————————

For the base

1.    Create race track structure with leftover wood as cross braces

2.    Cut half-round oak dowels to the correct height with a chop saw

3.    Secure dowels with a nail gun

4.    Toenail top to base with screws

5.    Finish with more sanding and varnish

Rebekah Higgs - DIYMom - Dining Table 1.png

This piece finally got the facelift it needed and is now the center of a beautiful space we use to gather for food, conversation, and games. To complete the look, I paired the table with some cute IKEA chairs. Lennon and I have already created many memories around this table and we can’t wait to create more.  

xox DIY MOM xox

____________________________________________________________________________________

To learn more visit www.diymom.ca and support me by following, liking, and sharing my content on:

DIY MOM, home ideas, Home Improvement, Home renovation, mommy blog, kids art, kids crafts, home life, Kids activities, mom blog, Summer, tutorial, bedroom decor

• DUVET • IT • YOURSELF •

What’s one thing a bedroom needs? A bed, definitely. Forever the centrepiece of these self-titled rooms, beds act as a comfortable place to rest while doubling as great decorative pieces. Often, beds set the standards for the rest of the rooms decor. However finding an affordable piece of art to lounge over your mattress can be quite challenging. Purchasing even a simple duvet cover from a retailer could cost a fortune, regardless of the quality and material. Well I’m here to tell you to cut out the middle man, and DIY. Duvet It Yourself.

AirBNB, Air BNB, Bedroom Decor, Boho Home, DIY MOM, home ideas, Home Improvement, Home renovation, DIY project, DIY staircase Runner, Staircase Runner

• DIY • ONE - TWO • STEPS •

During my recent Attic renovation, I decided to design and create my own pillows and bedding for the cubby beds in the space. (The above photo is the final look). On my last blog I shared about how I made round pillows with pom pom’s. Today I am sharing the process of making hand painted lumbar pillows with an invisible zipper. Once you know how to insert an invisible zipper, you can sew all kinds of pillows and blankets.

AirBNB, Air BNB, Bedroom Decor, Boho Home, DIY MOM, home ideas, Home Improvement, Home renovation

•PAINT • YOUR OWN • PILLOWS •

During my recent Attic renovation, I decided to design and create my own pillows and bedding for the cubby beds in the space. (The above photo is the final look). On my last blog I shared about how I made round pillows with pom pom’s. Today I am sharing the process of making hand painted lumbar pillows with an invisible zipper. Once you know how to insert an invisible zipper, you can sew all kinds of pillows and blankets.

Boho Home, Bedroom Decor, Bathroom decor, DIY MOM, Home renovation, Home Improvement, Kitchen Renovation, Smart Home

• WHY OLD WINDOWS ARE • EXTRA • SPECIAL •

Getting rid of old windows might seem like an obvious step when renovating an old home but there are actually several good reasons to keep old windows and integrate them into your design plans. Before you begin the huge project of replacing old windows, here are a few reasons why you might want to consider keeping them.

Home renovation, Kitchen Renovation, Kitchen Design

KITCHEN BEFORE & AFTER

The old wood panelling had to go, to bring new life and light into this home! See my amazing kitchen transformation and how i selected the finishings for this space.