It’s no secret that pink, makes my heart sing. I’ve incorporated it in some capacity in every home I’ve ever owned. I suppose on some level, it’s the colour that most resonates with my overall disposition and outlook on life–rosy, harmonious, in perpetual search for inner peace.
Exterior Home Before
Although I had a clear idea of what I wanted to do with the interior of my new home, the exterior remained a mystery to me for quite some time.
I knew I wanted to highlight and celebrate the charming, covered porch and scalloped shakers and dormers. And since many of the hundred-year-old cedar shakes were nearing the end of their life span, I decided to look into a pre-painted cape cod wood siding option.
Originally, my plan was to move forward with a soft white exterior pallet–a pleasant, creamy colour made popular by Pinterest and social media. I looked into various shades of white, cream, and black, but quickly realized that the classic craftsman style of the home could handle something a little more interesting.
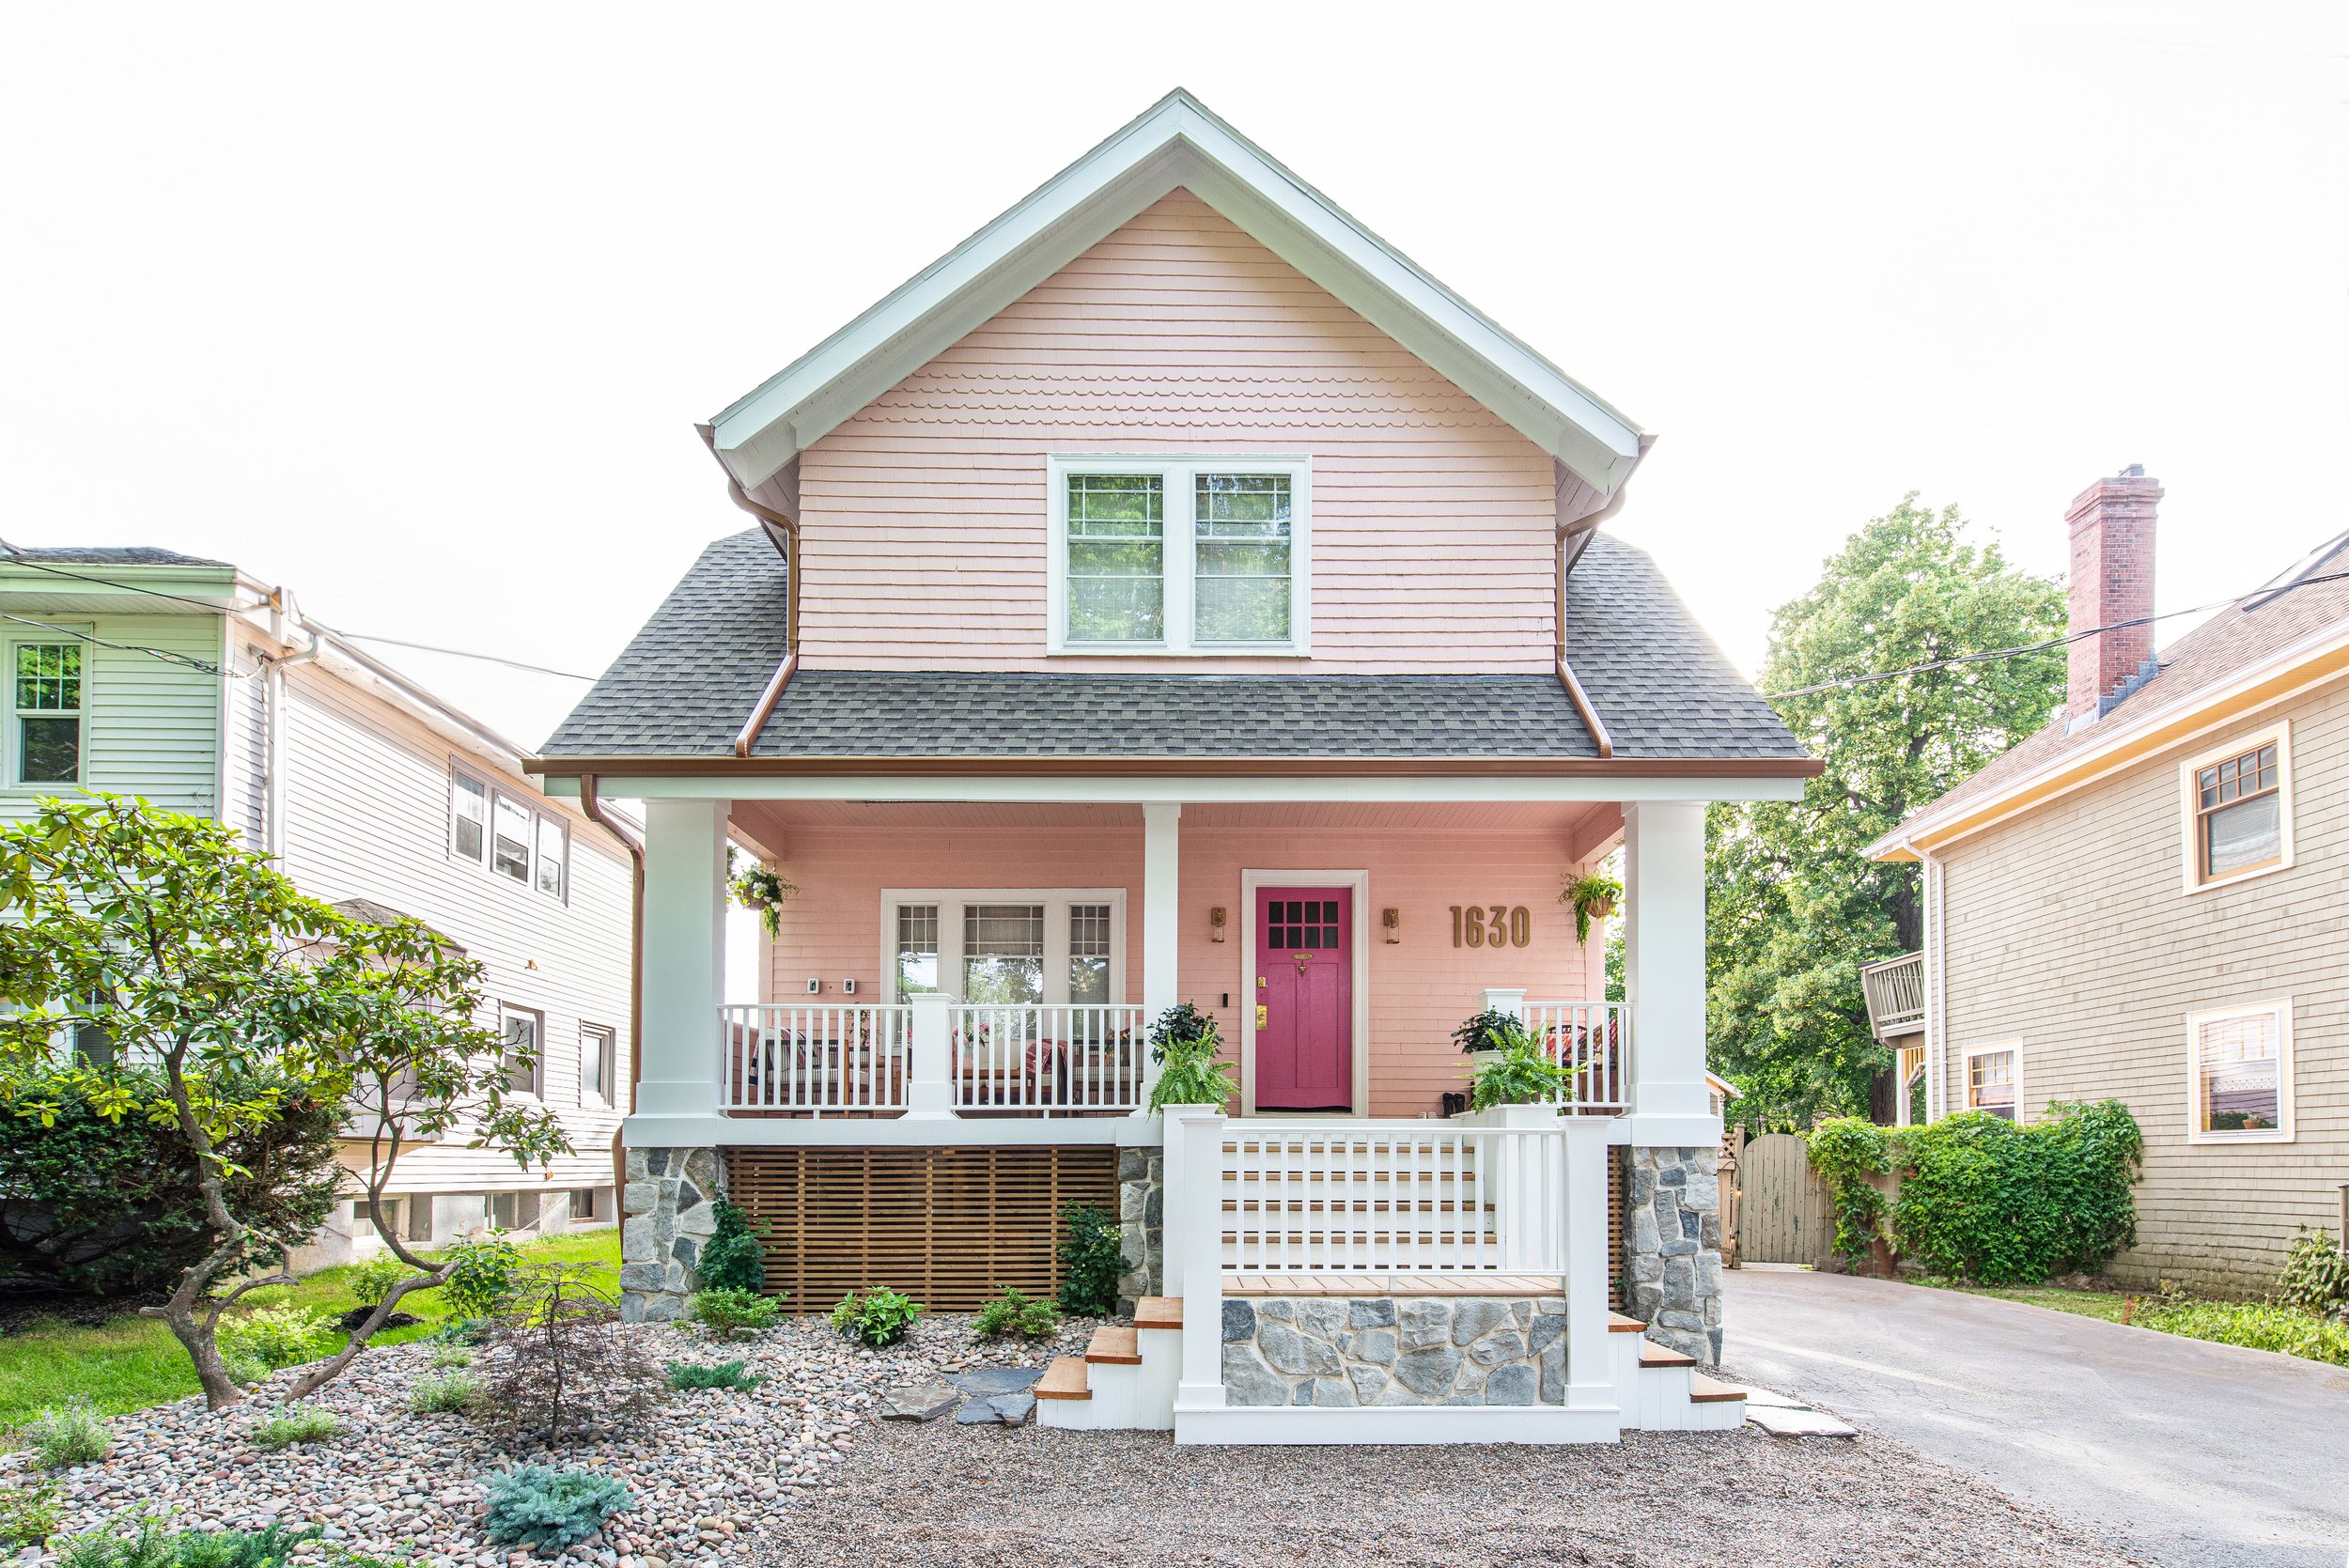
When my daughter’s grandmother was visiting and mentioned her deep-seated love for the colourful homes of Halifax, I knew that my new home was destined to be one of them! I began diving into my favourite shades of pink and finally landed on the same one I chose for the front door of my Lynwood property–Dulux Rose Petal. I should have known from the very beginning that my favourite colour would, once again, take centre stage. Lesson learned.
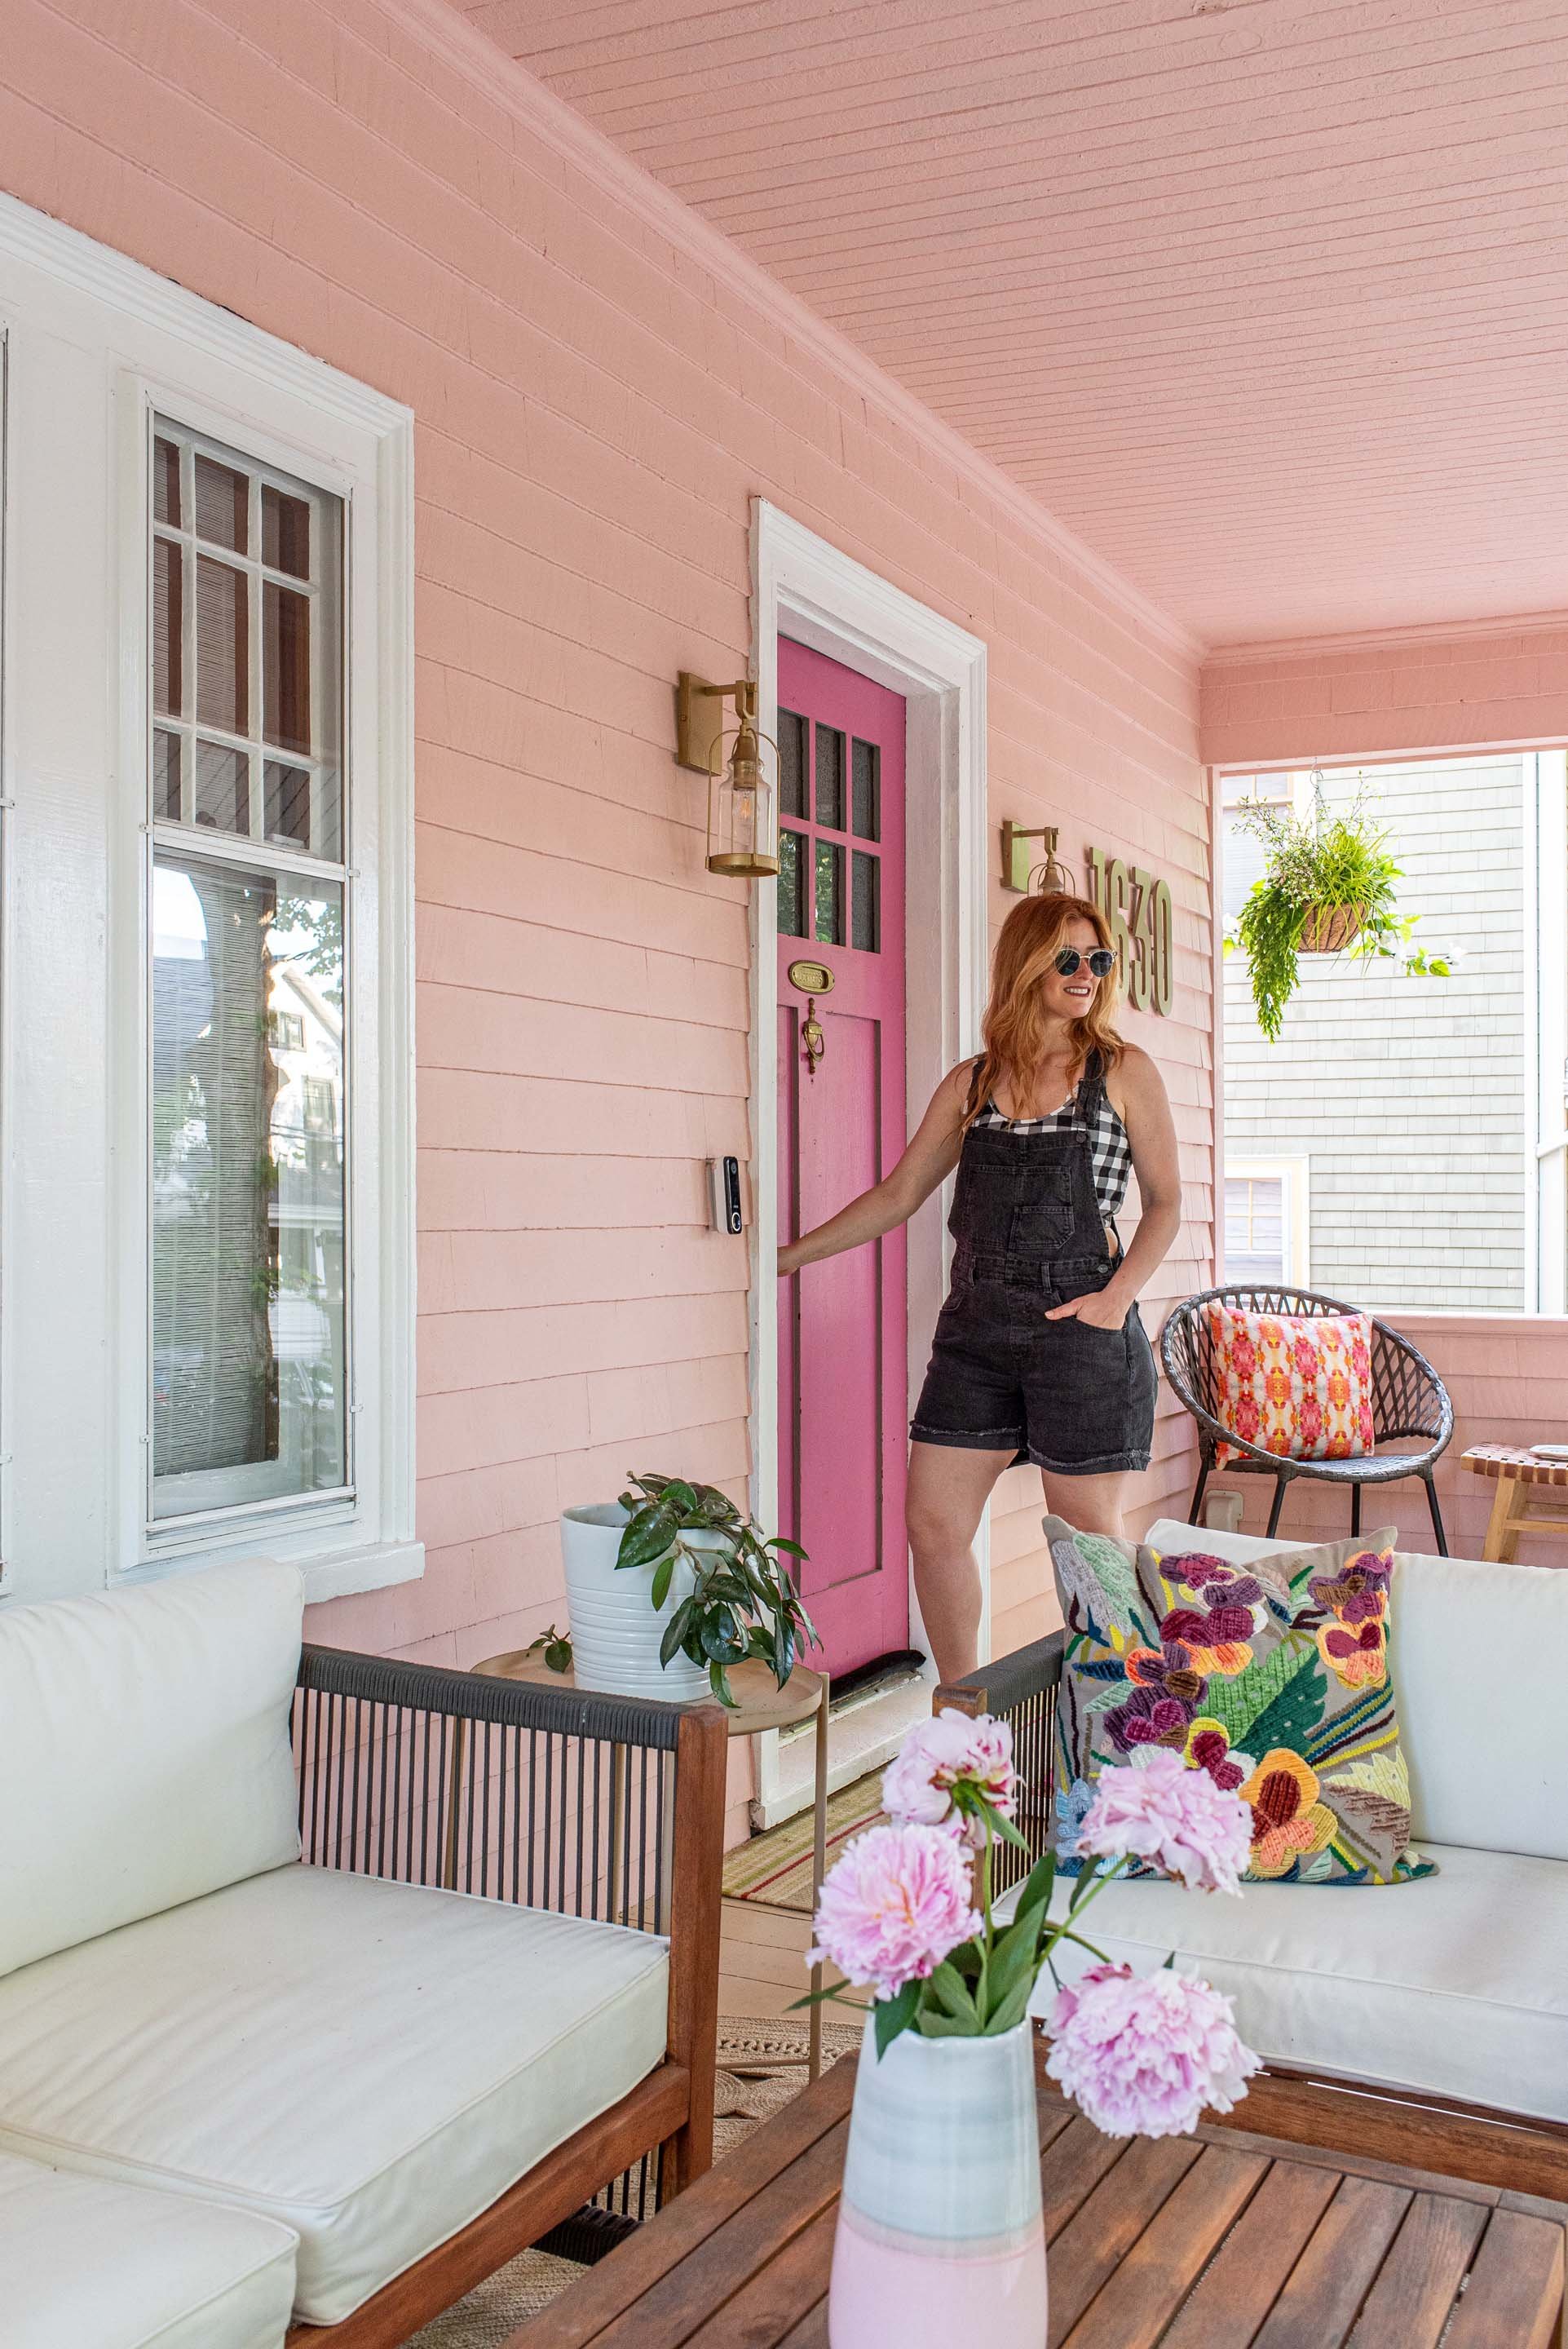
The original home came with a dark, fuchsia pink front door, equipped with an adorable letter pass through knocker. Although I’ve ordered a larger wood door with glass transom and sidelights, I still plan to incorporate the pink front door into my space. It’s too sweet to part with and it’s one of the reasons I fell in love with this character-filled home to begin with. I think it would make a punchy addition to my shed/ carriage house in the backyard, don’t you?
Lifting the house 2 feet provided me with an opportunity to make the foundation stand out with beautiful stone work. After looking around for the perfect stone I was delighted to come across a Canadian company called CSI - All Things Stone reached out to them. Their team helped walk me through a number of different options and helped me select the product to meet the performance needs and design aesthetics for my home. The stone I selected is from Cultured Stone®, and it is the Echo Ridge® color in the Dressed Fieldstone style. Besides the look of the stone, what I really love about Cultured Stone® is that they have been around for nearly 60 years and truly are the pioneers of manufactured stone veneer.
Another great thing about Cultured Stone is its versatility. It can be used indoors and outdoors, so if you want to continue the look throughout your home or add another element to your fireplace or feature walls, it can be easily done! The grey tones in the stone perfectly compliment the shade of pink on my Cape Cod Siding. The stone veneer suites the age and craftsman style home and mimics the look of the original stone foundations of that era.
Before we installed the stone, we prepped the exterior with DELTA®-DRY & LATH. The innovative 2 in 1 product combines the technology of the DELTA®-DRY rain screen with the fibreglass lath for a complete one step moisture control lath system. The DELTA®-DRY & LATH completely eliminates the need for metal lath, providing easier and safer handling for the installer, as metal lath sheets are tricky to handle and easily cut the installer, whereas the delta dry is a fibreglass lath that is on a light weight roll and can easily be installed in minutes.
As a home owner on the east coast of Canada, I am so happy to have the peace of mind of tried and tested rain screen and lath that allows for proper drainage and wall ventilation. With our up and down, wet and dry climate, it’s great to know my house is well protected!
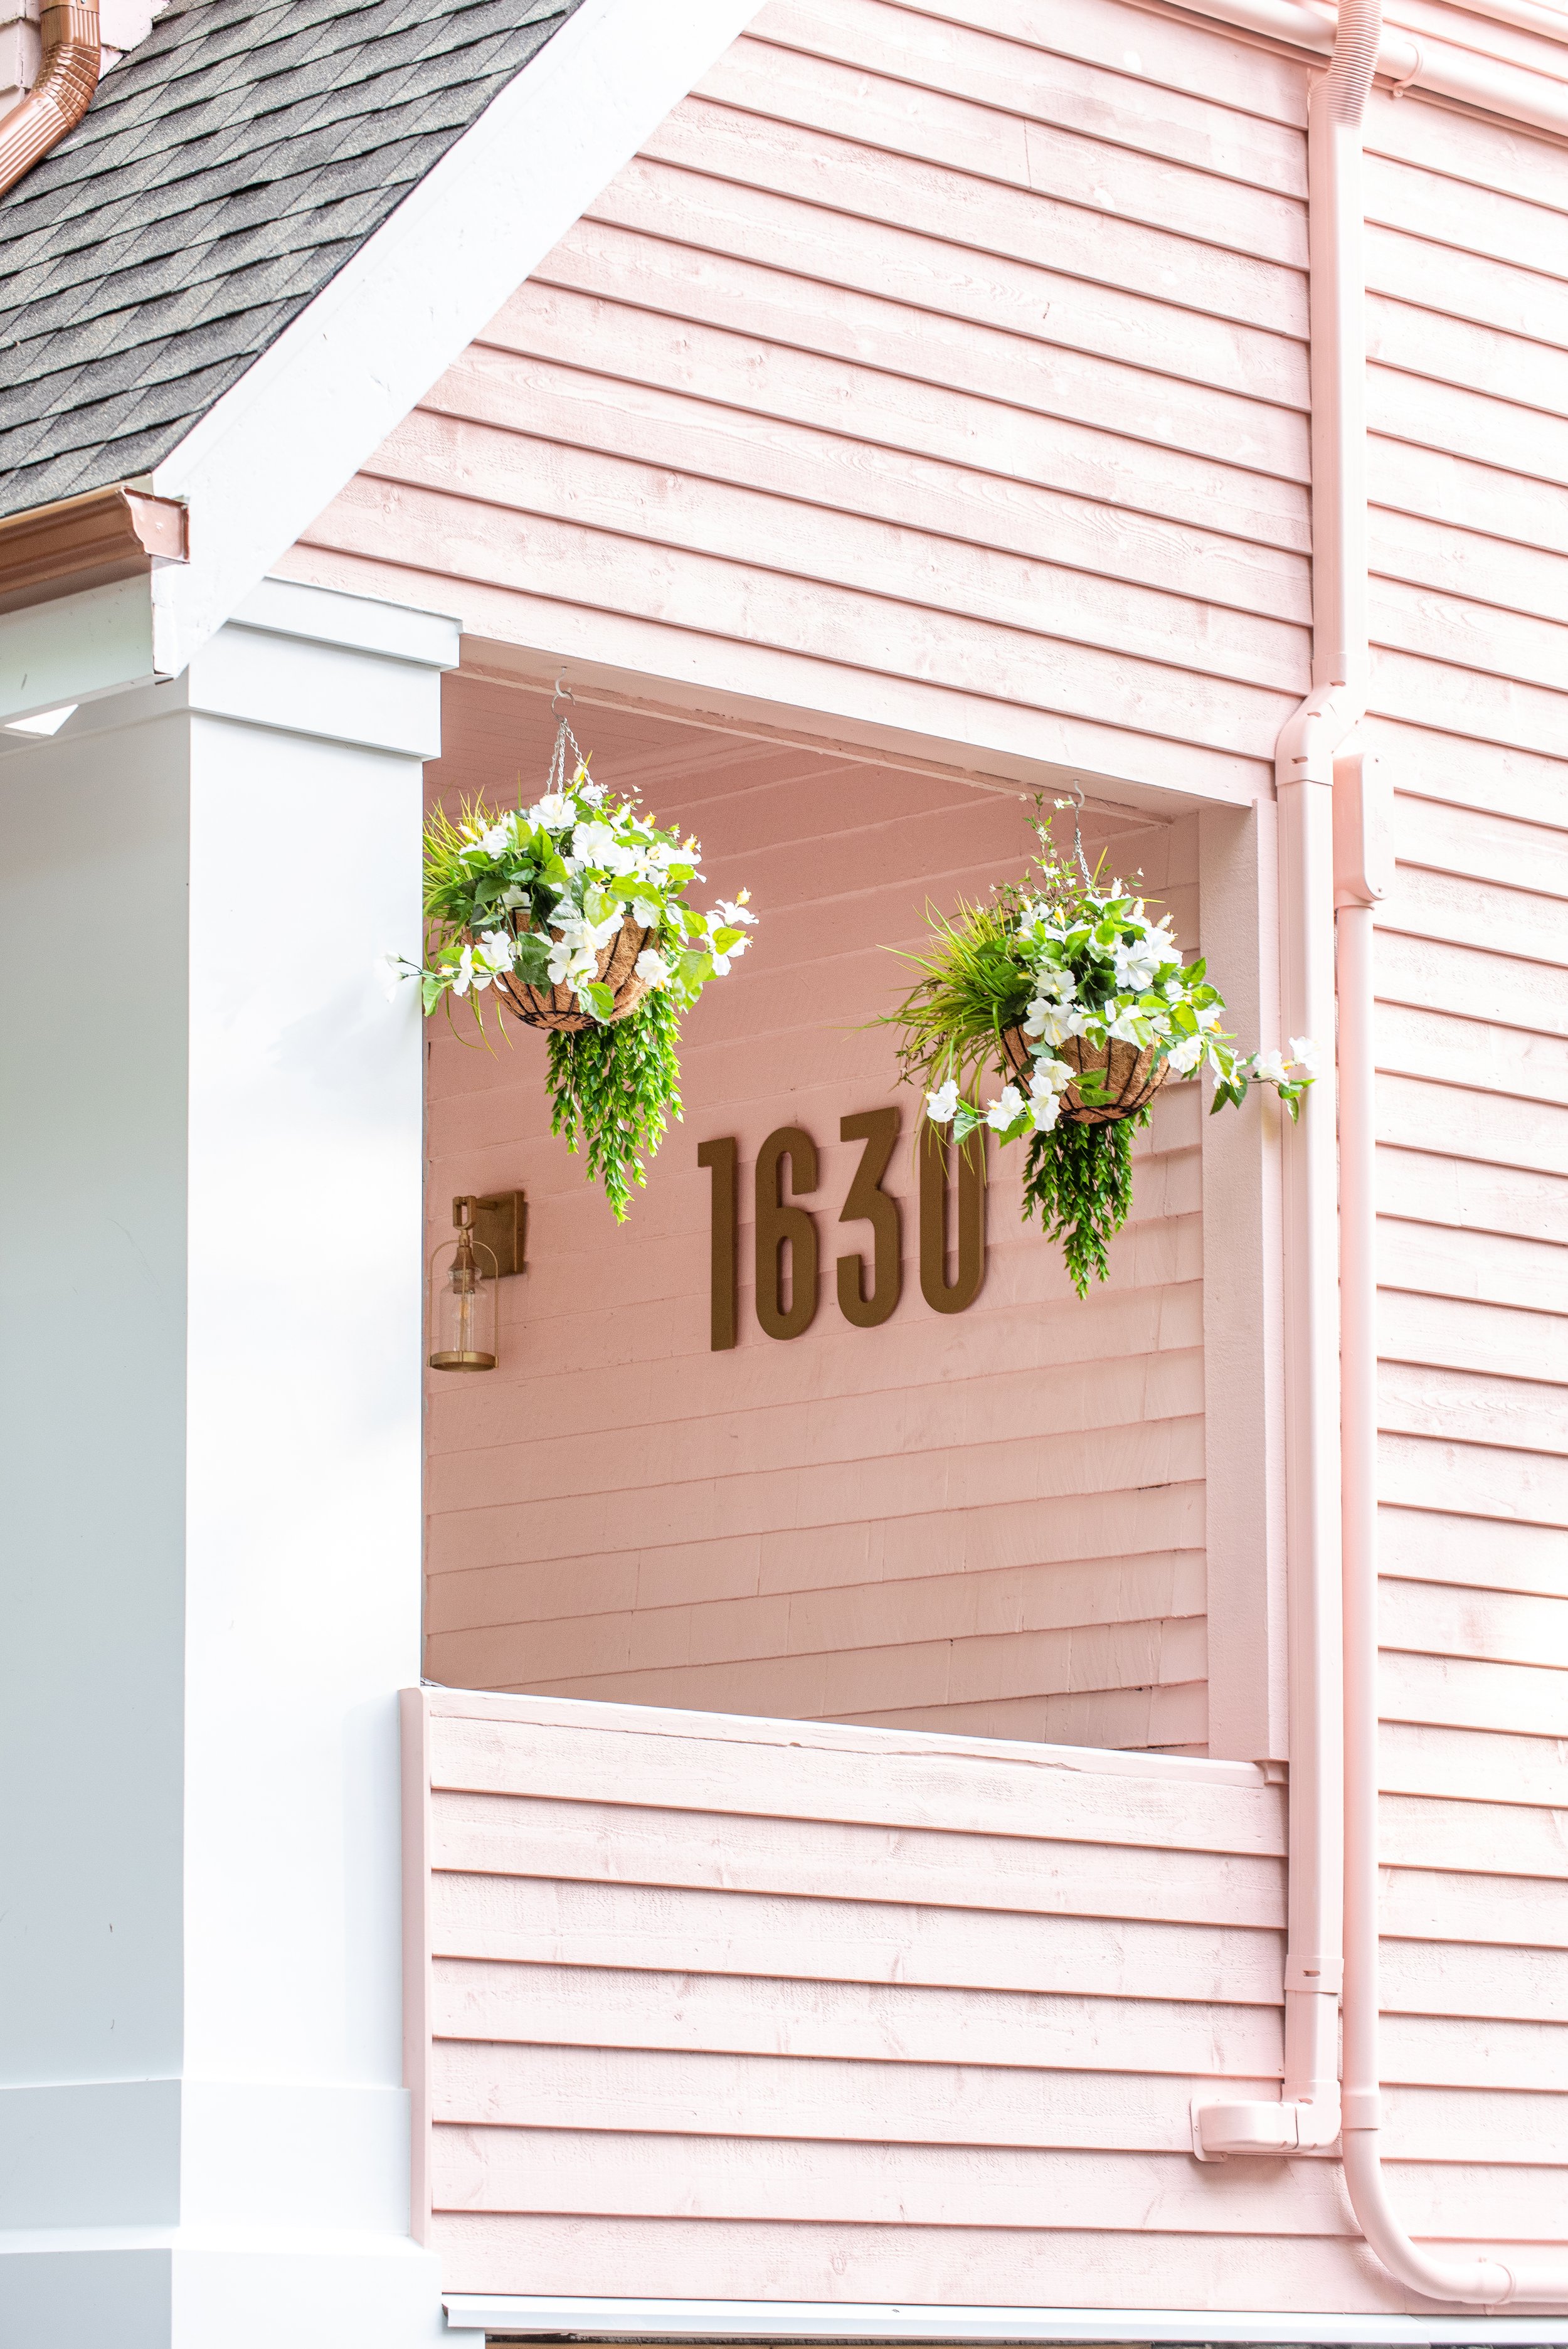
The oversized house numbers pictured above, came from Modern House Numbers. You can customize the size and font style on there website to suit your home. I went with 15 inch horizontal Matte Brass number in the Back Bay font.
I’ve also received quite a few questions about my “Rose Gold” or Copper gutters. These are imitation copper gutters from Gentek. They have a few options for that Copper look, I went for a more muted aged look. There is a significant cost saving when doing imitation copper instead of real copper, but I also like that these gutters will remain as they are without any need to maintain or polish them. A copper gutter is a unique way to add a 3 colour to your home, if you are looking for that historic look.
FRONT PORCH
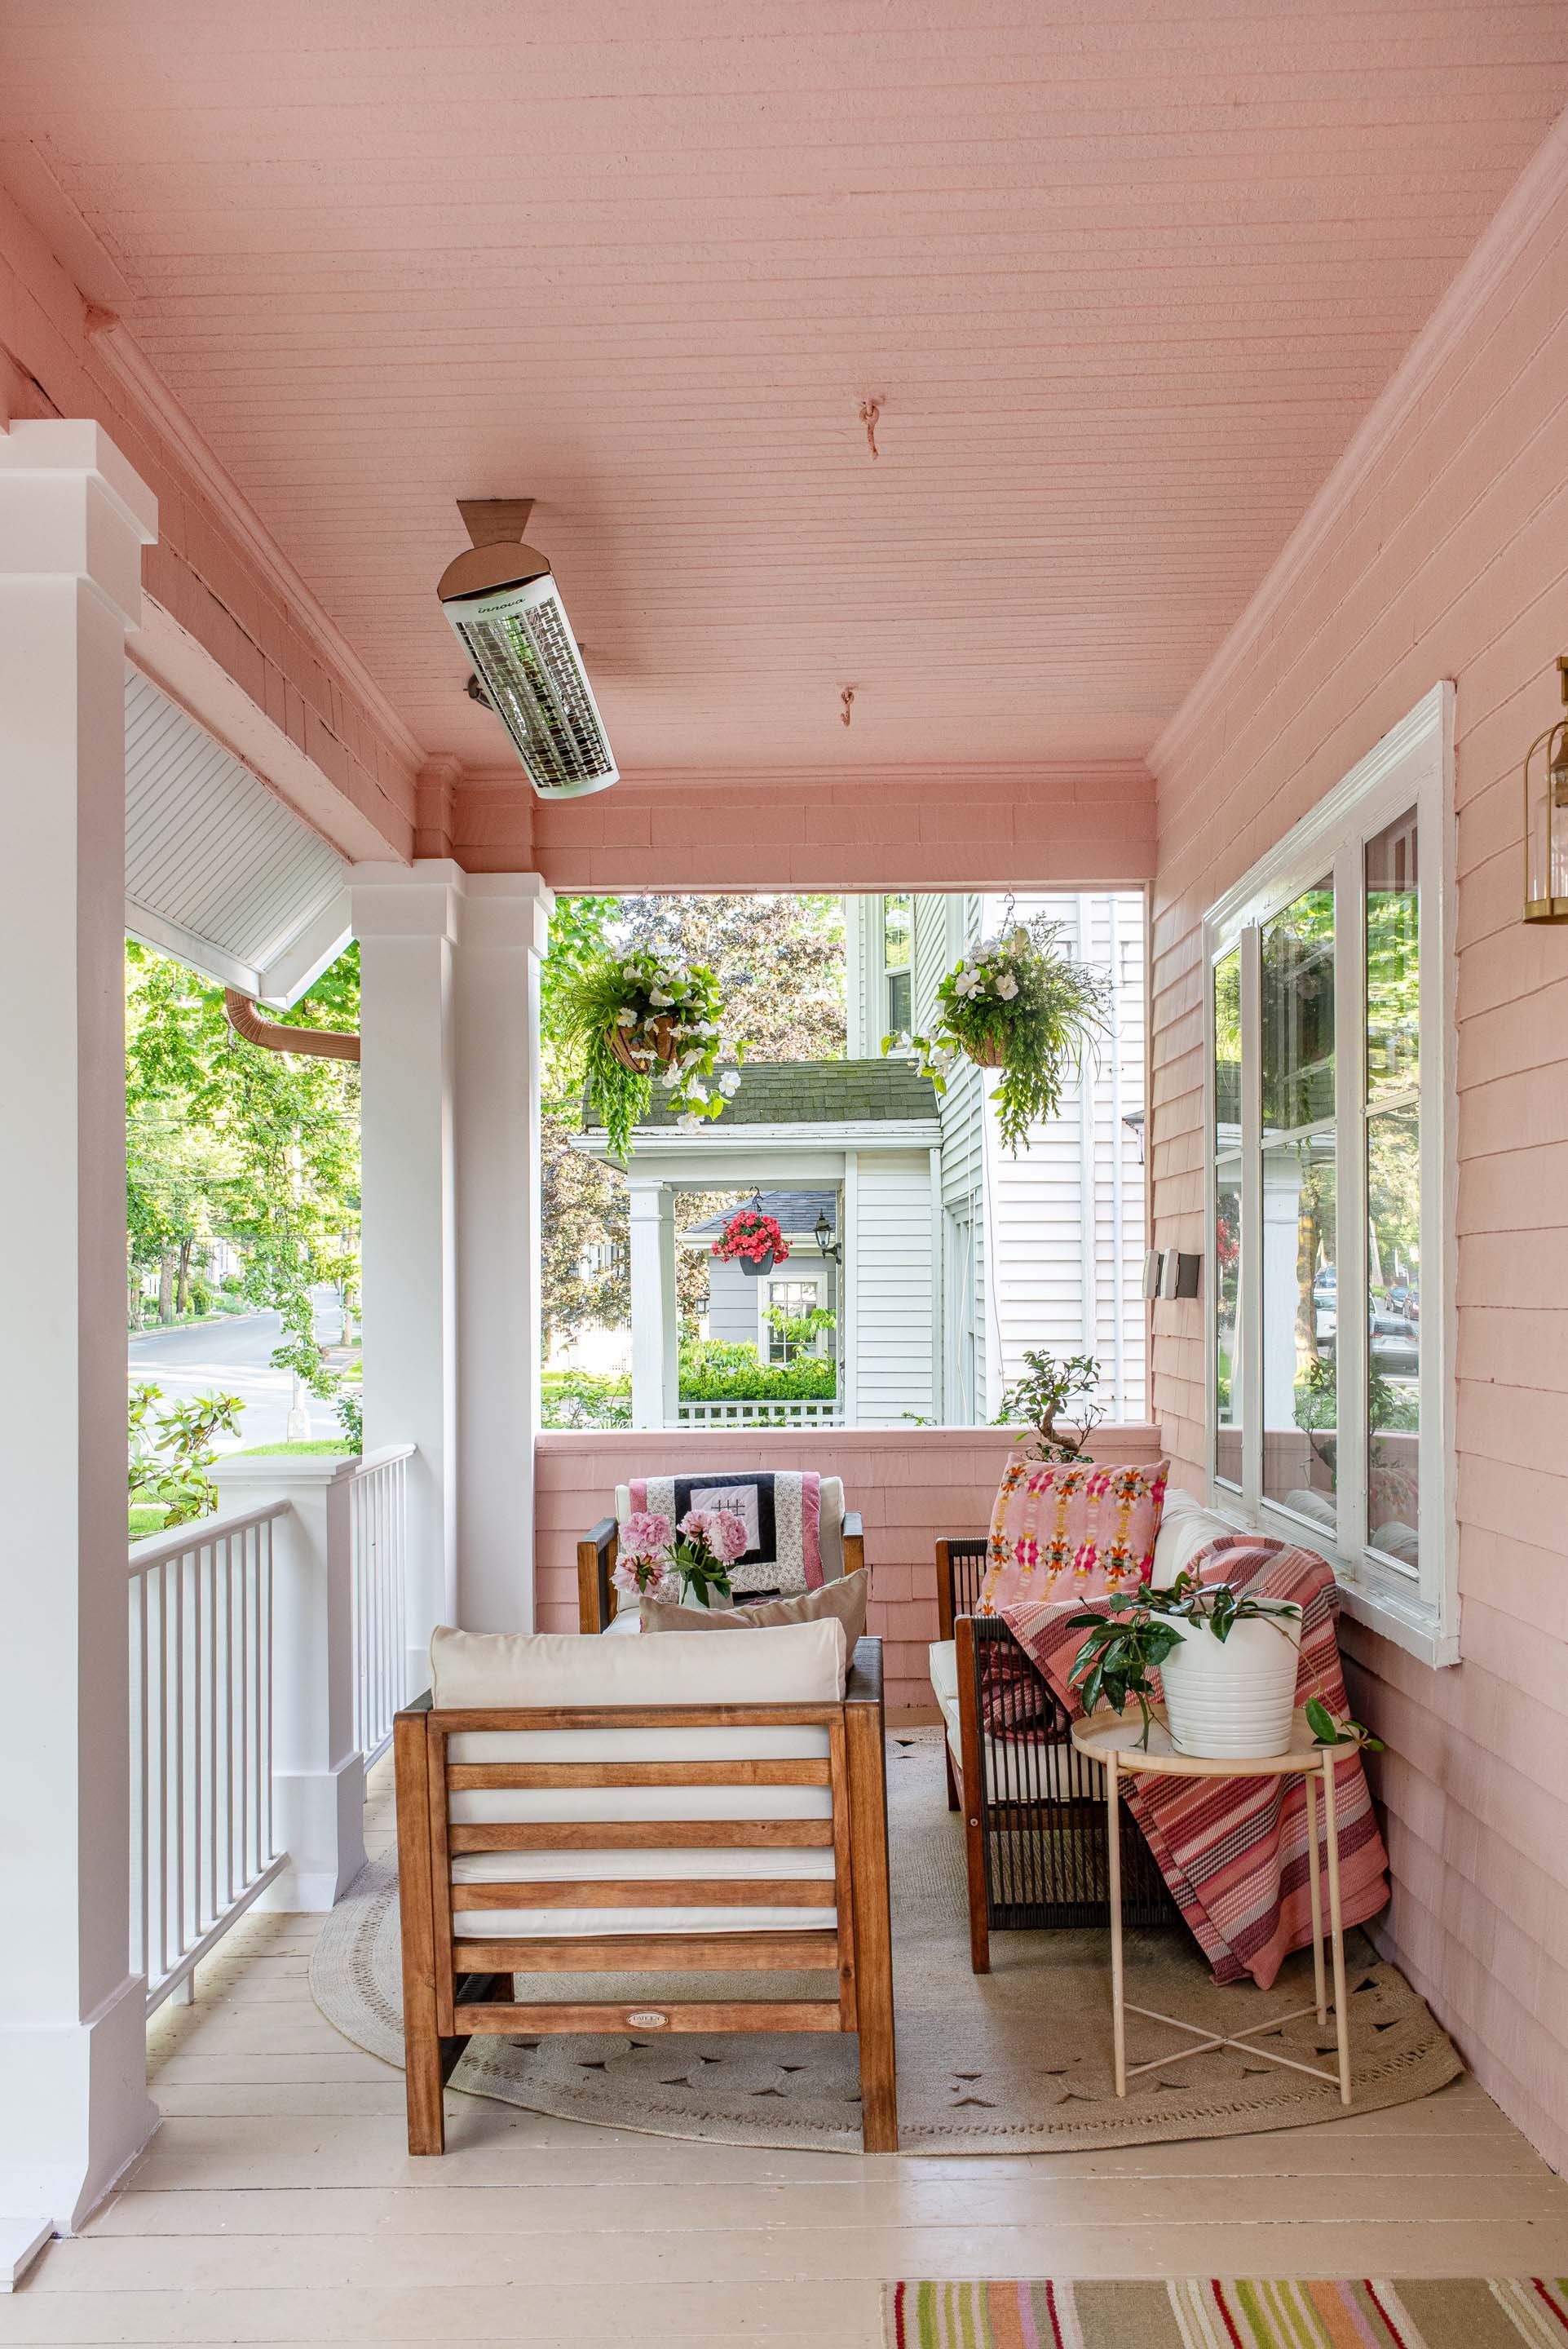
Since I had never designed a covered front porch before, I found myself taking afternoon drives through old south end neighbourhoods for a better sense of how exterior spaces were finished. What did the posts look like? How were the rails and balusters and pillars finished? I wanted a comfortable spot to enjoy my morning coffee, while paying homage to the charming history of my little pink house. In the end, I decided to leave the sides of the porch covered in the original shingles and use a wooden rail system for the front view. Opening up the front allowed more light to come in through my front window, and my motto has always been, the more light, the better!
Dressed Fieldstone by Cultured Stone in Echo Ridge
Adding four steps to the front of the house meant the walk up would be quite long. To create symmetry, I decide to run the rail across the front, have the steps go both ways, and create ledges on either side to allow for plants. This allowed more of the beautiful stonework to shine through and provided a balanced exterior. I completed the look with perennial shrubs, rhododendrons, azaleas and hydrangeas from Kents Garden Centre, and hanging faux hibiscus baskets from Décors Véronneau on the other side of the deck.
Front Porch After
Front Porch Before
Faux hanging plants are low maitenance stay in bloom all summer and don’t need to be watered!
Adding four steps to the front of the house meant the walk up would be quite long. To create symmetry, I decide to run the rail across the front, have the steps go both ways, and create ledges on either side to allow for plants. This allowed more of the beautiful stonework to shine through and provided a balanced exterior. I completed the look with perennial shrubs, rhododendrons, azaleas and hydrangeas from Kents Garden Centre, and hanging faux hibiscus baskets from Décors Véronneauon the other side of the deck.
Pressure treated wood was cut in strips to skirt the deck in and cover the exterior heat pump units.
BACK YARD
These over sized french doors were salvaged and reused for my back steps to the garden.
With the house higher from the ground then it once was, my backyard feels sunken in and private. Eventually I would love to create a low deck or stone patio for hosting summer family gatherings. In the meantime, I used inexpensive pea gravel and small stepping stones to provide a pathway through the lawn.
Stepping stones and pea gravel were an inexpensive solution for now.
No one will ever know my hanging baskets and trellis are faux, with all the lush plants I have surrounding my gardens.
The original chain link fence also provided limited privacy so I was excited to discover expandable trellis from Décors Véronneau that I could zip tie to the fence for instant, year- round privacy. The faux trellis is lush and realistic, and make the whole space feel cozy and secluded. I think one of the best things about summer is being able to spend uninterrupted time with your loved ones, and although the backyard isn’t finished yet, I love the things I’ve put in place to help make the exterior space feel more comfortable. Being a DIYer means I’ve learned to live with, and even enjoy, most stages of the renovation process–including the periods of transition when things aren’t always perfect. Plus, string lights, cozy blankets, potted plants, and cute pups always make a backyard look and feel more like home. I plan to curl up back here with my daughter and enjoy every single second of summer in Halifax!
Chain Link fence covered in Faux Trellis from Decors Veronneau
Check out the Cultured Stone installation video below and let me know what you think of the final look of my pink craftsman home!
BEFORE & AFTER
Back of house before
After extensions and changes made to the exterior of my home.
Read more about my budget saving Renovation Tips here.
xox
Rebekah
Check out the full before and after video on my youtube channel!
Your fireplace is the natural centre point of your home, so why not make a statement by doing a floor to ceiling stone install?
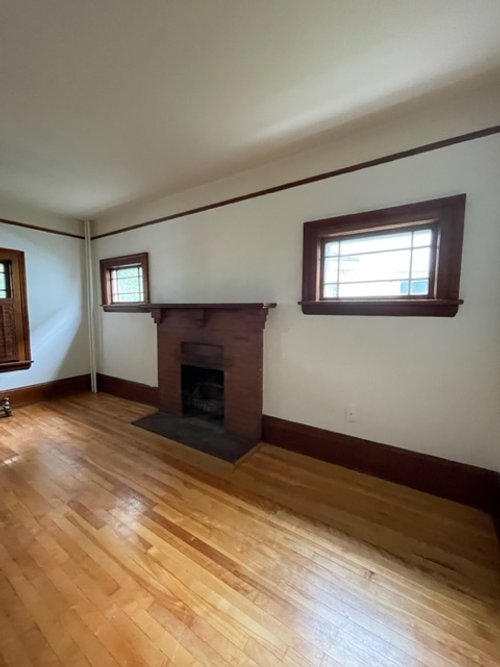
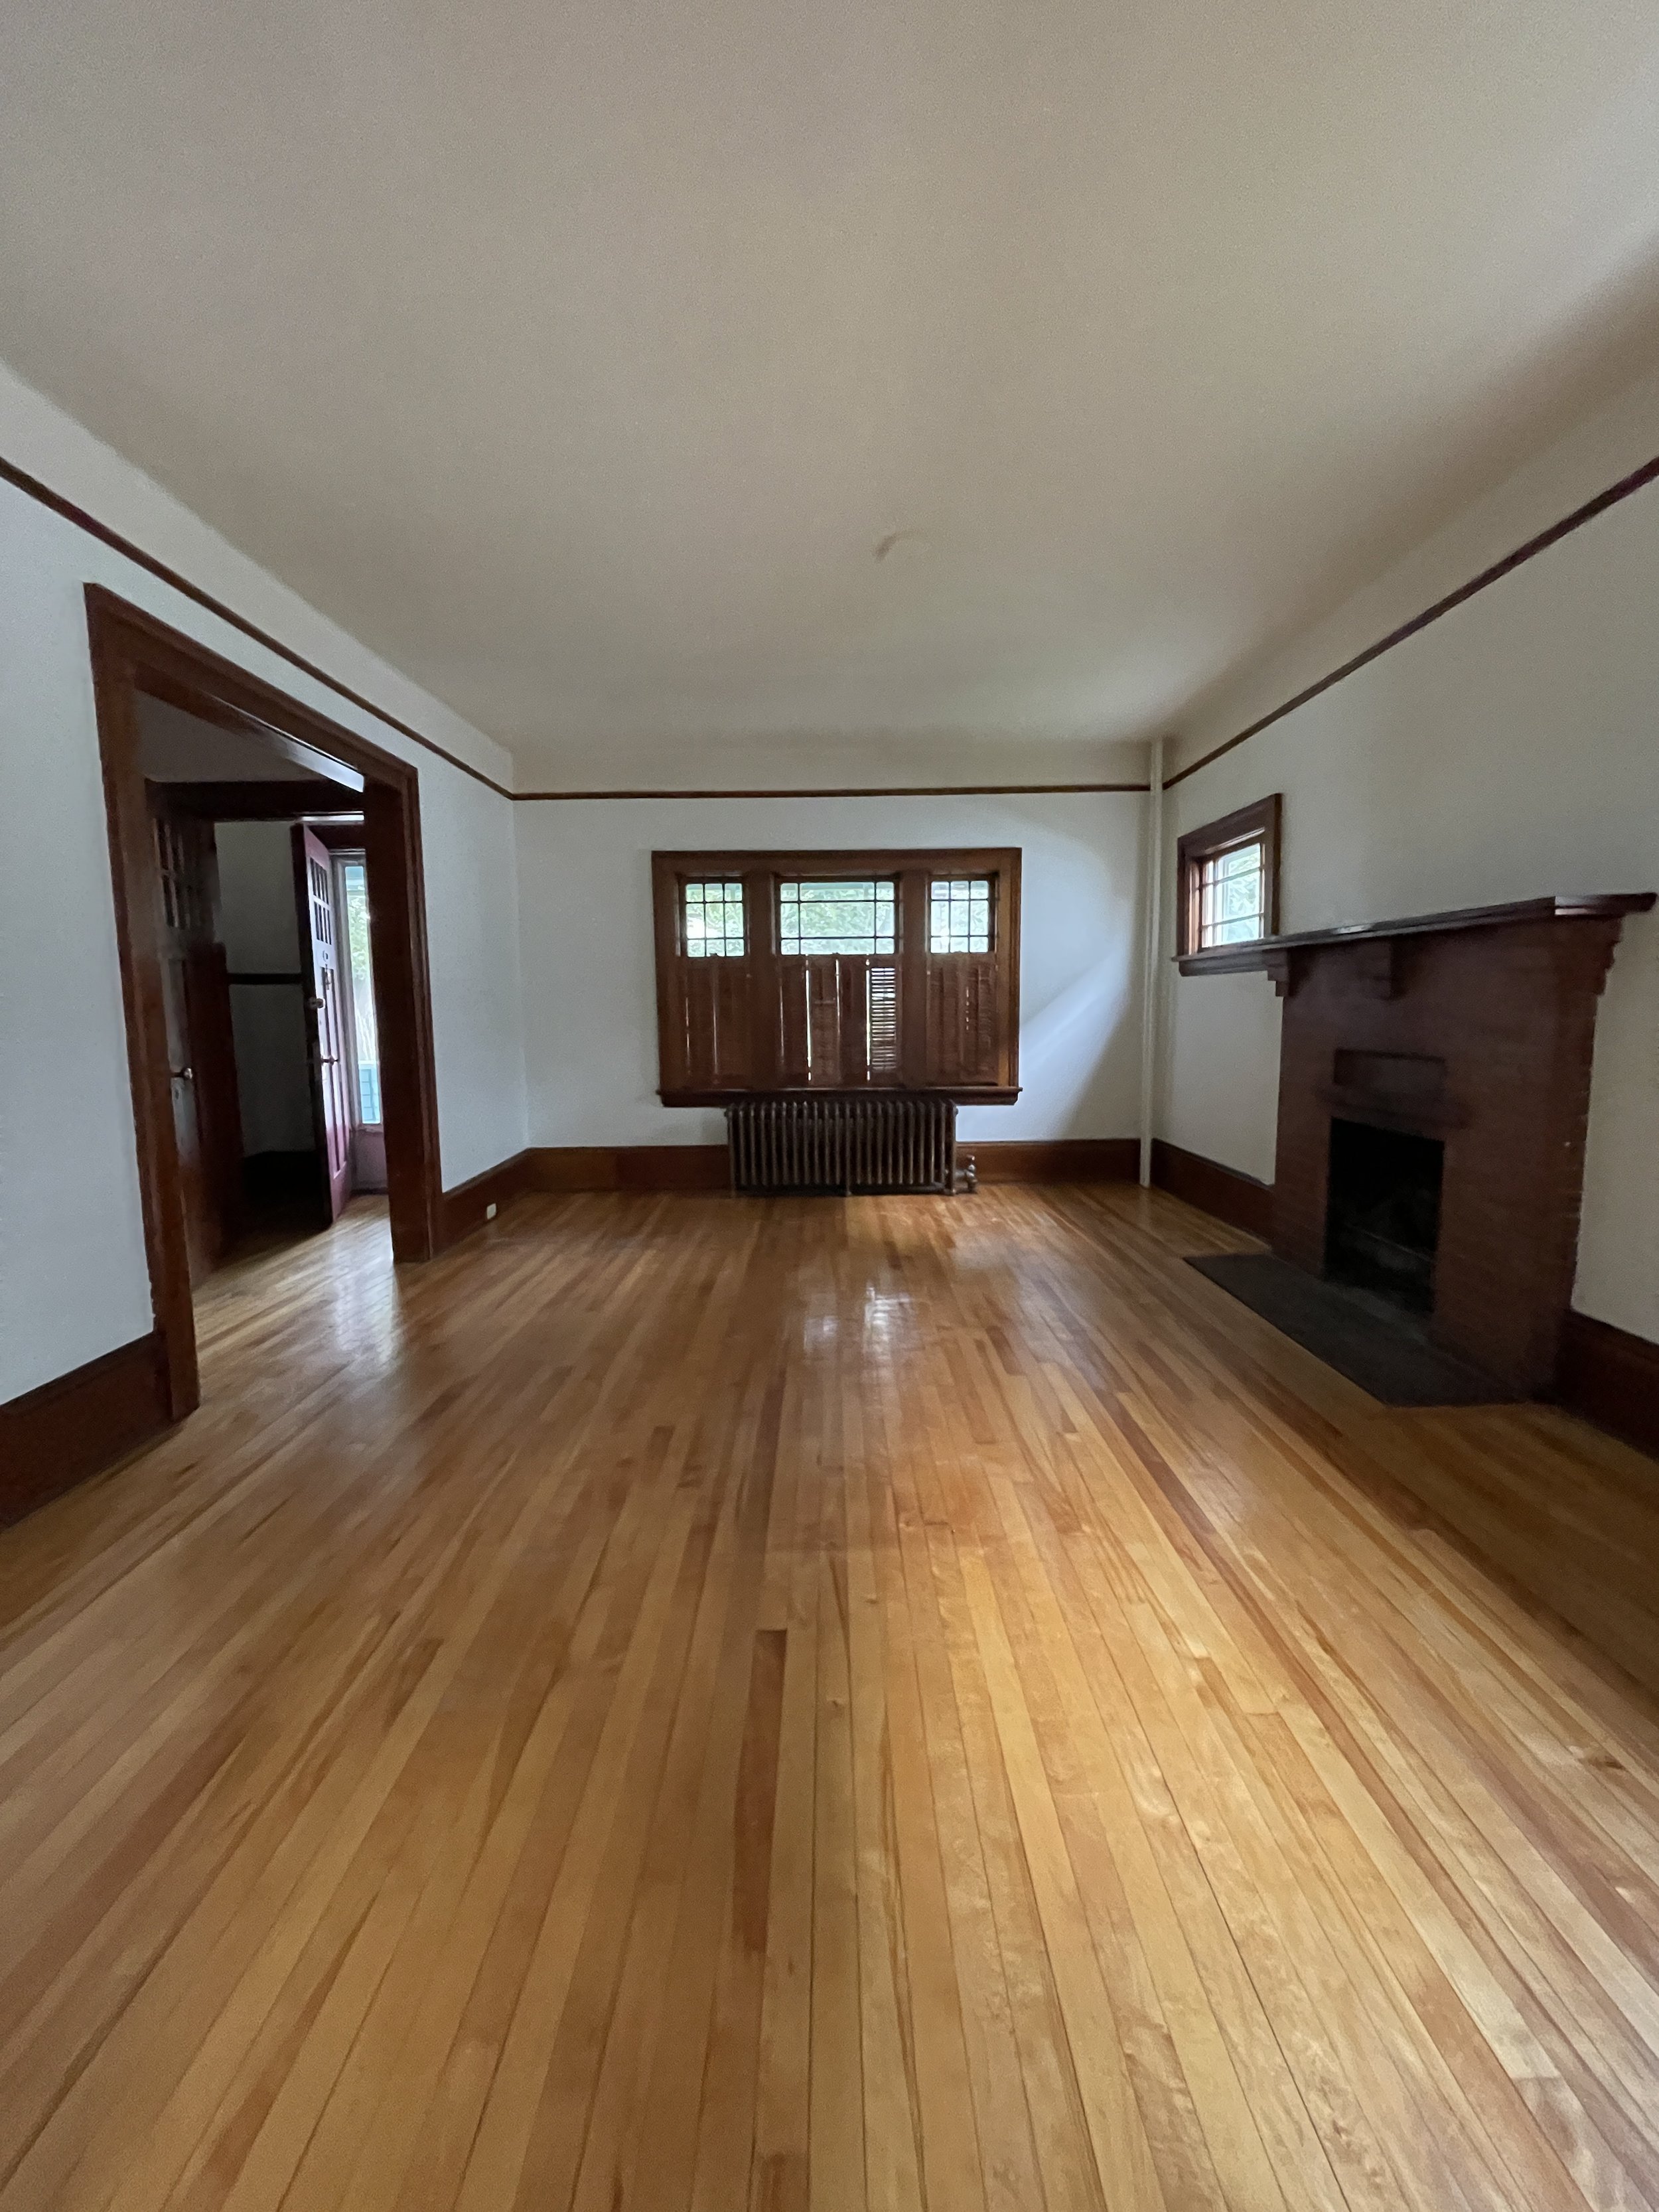
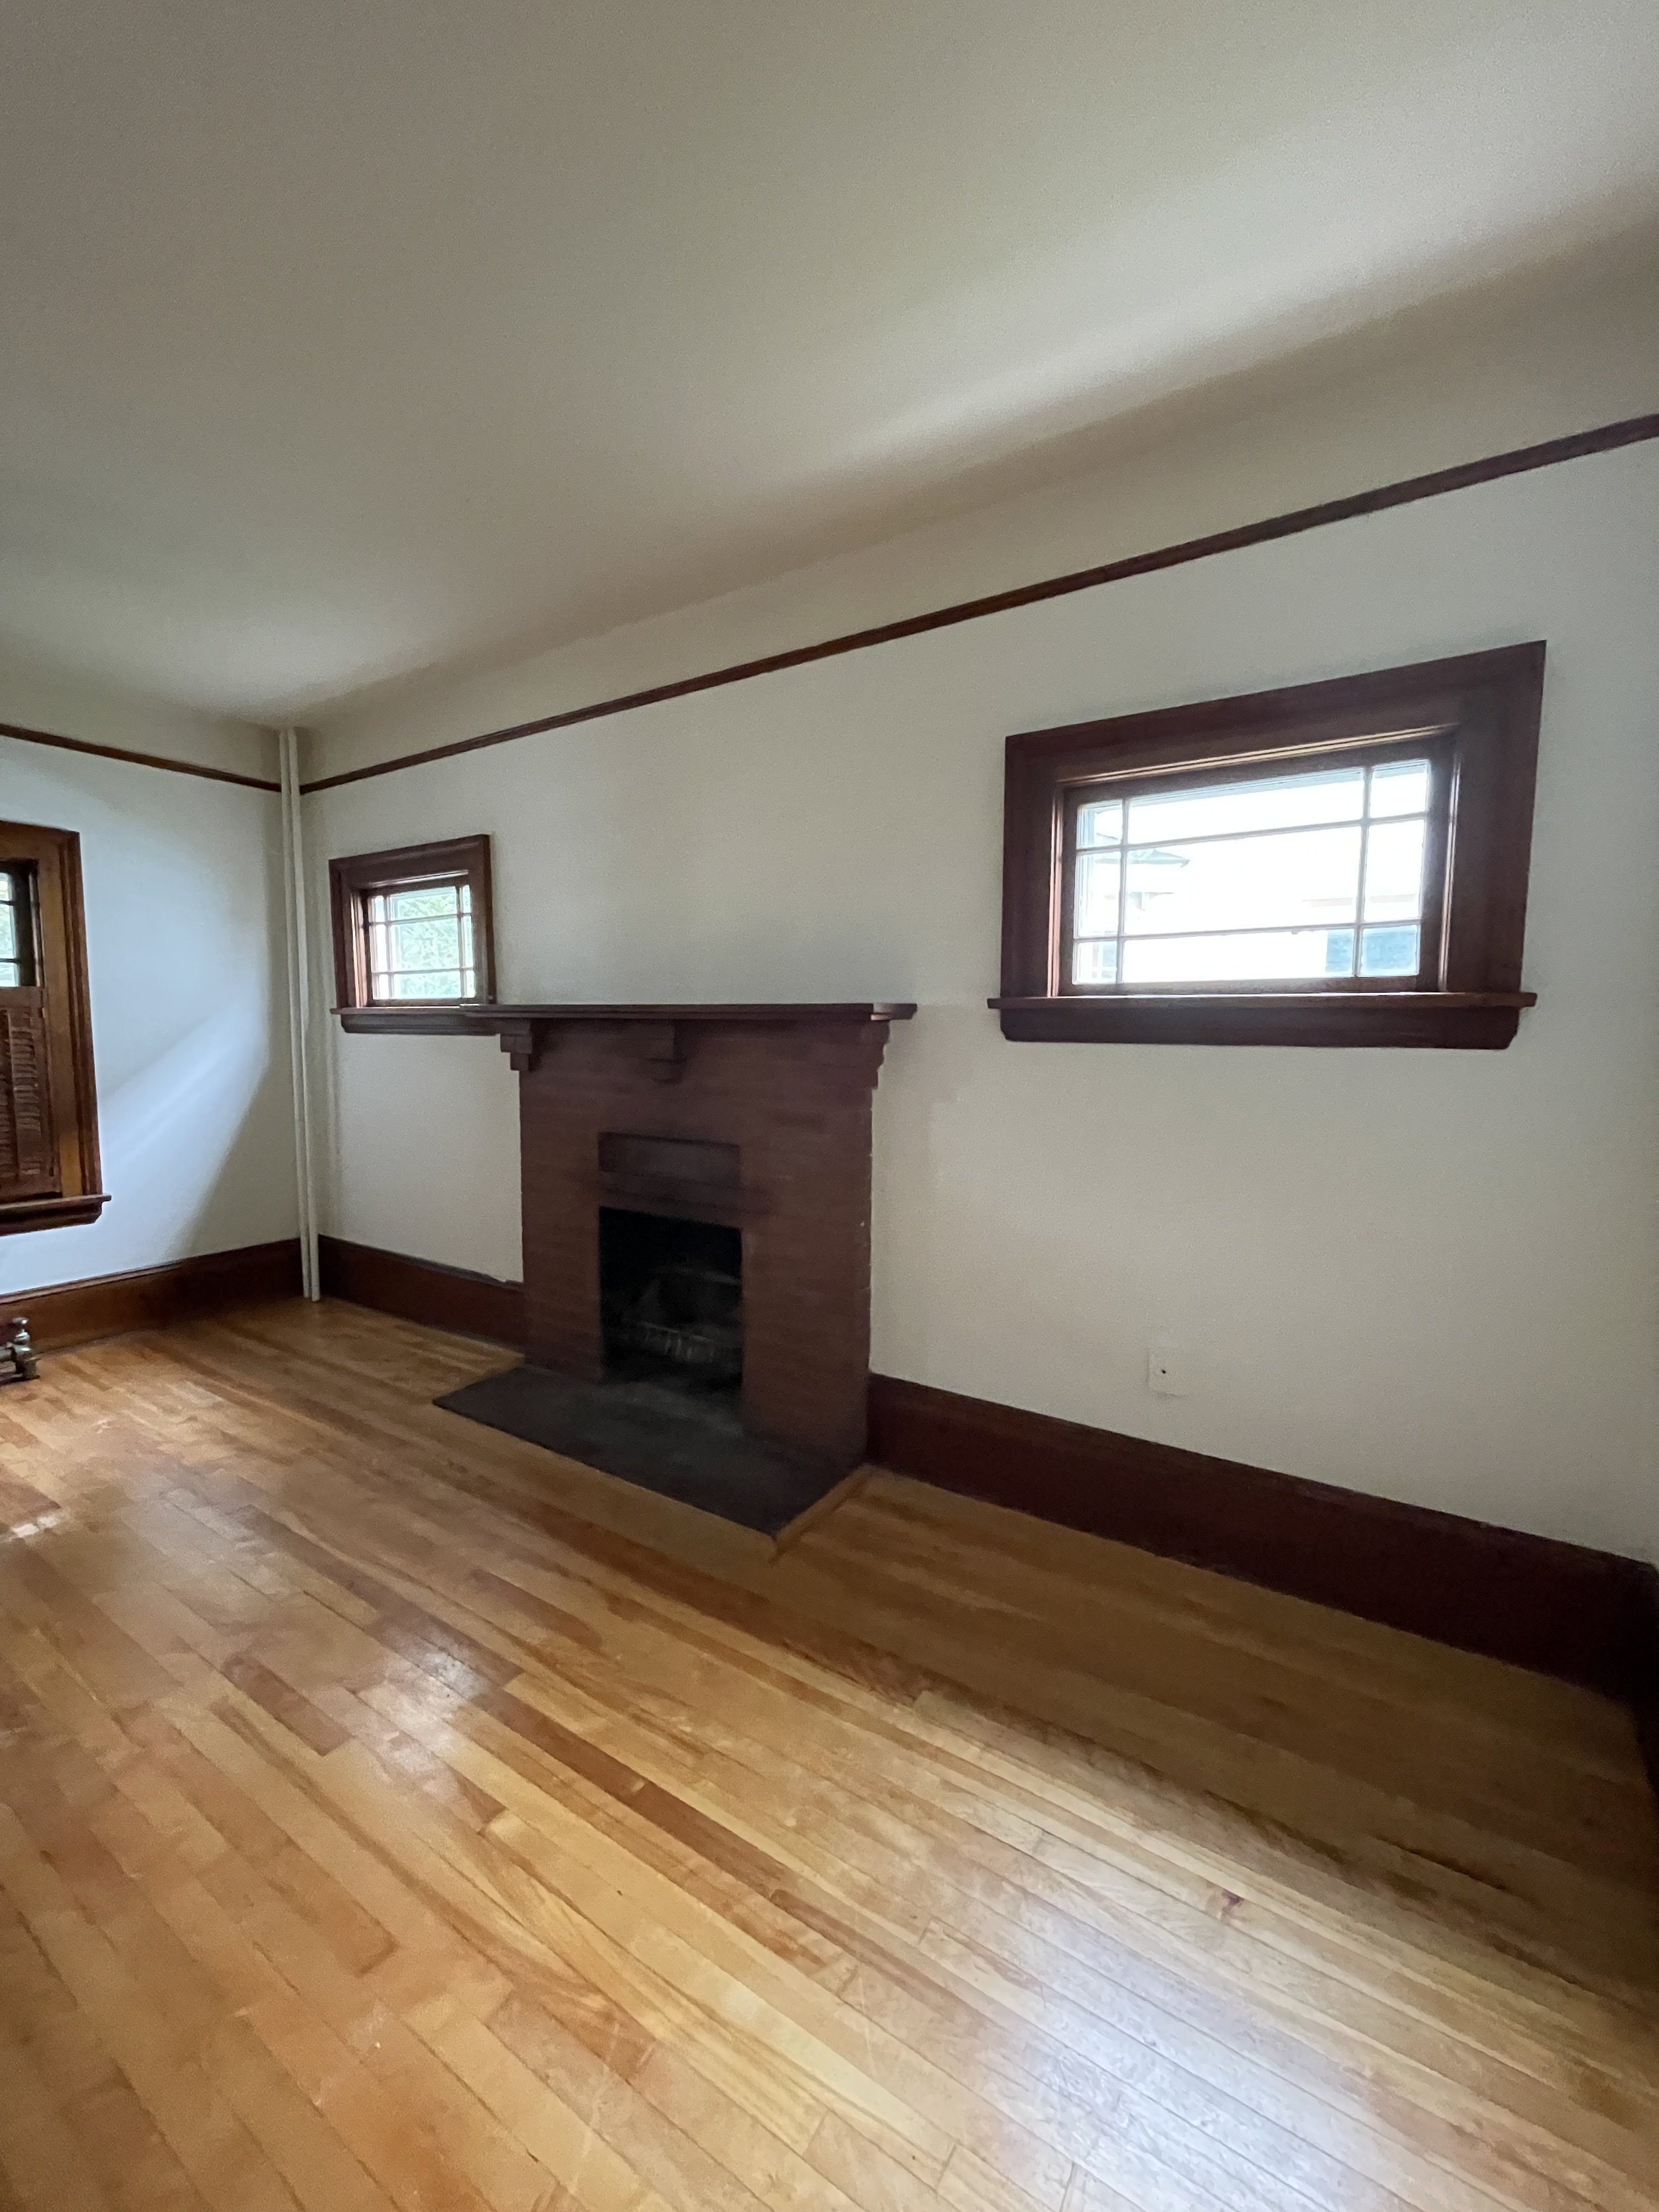
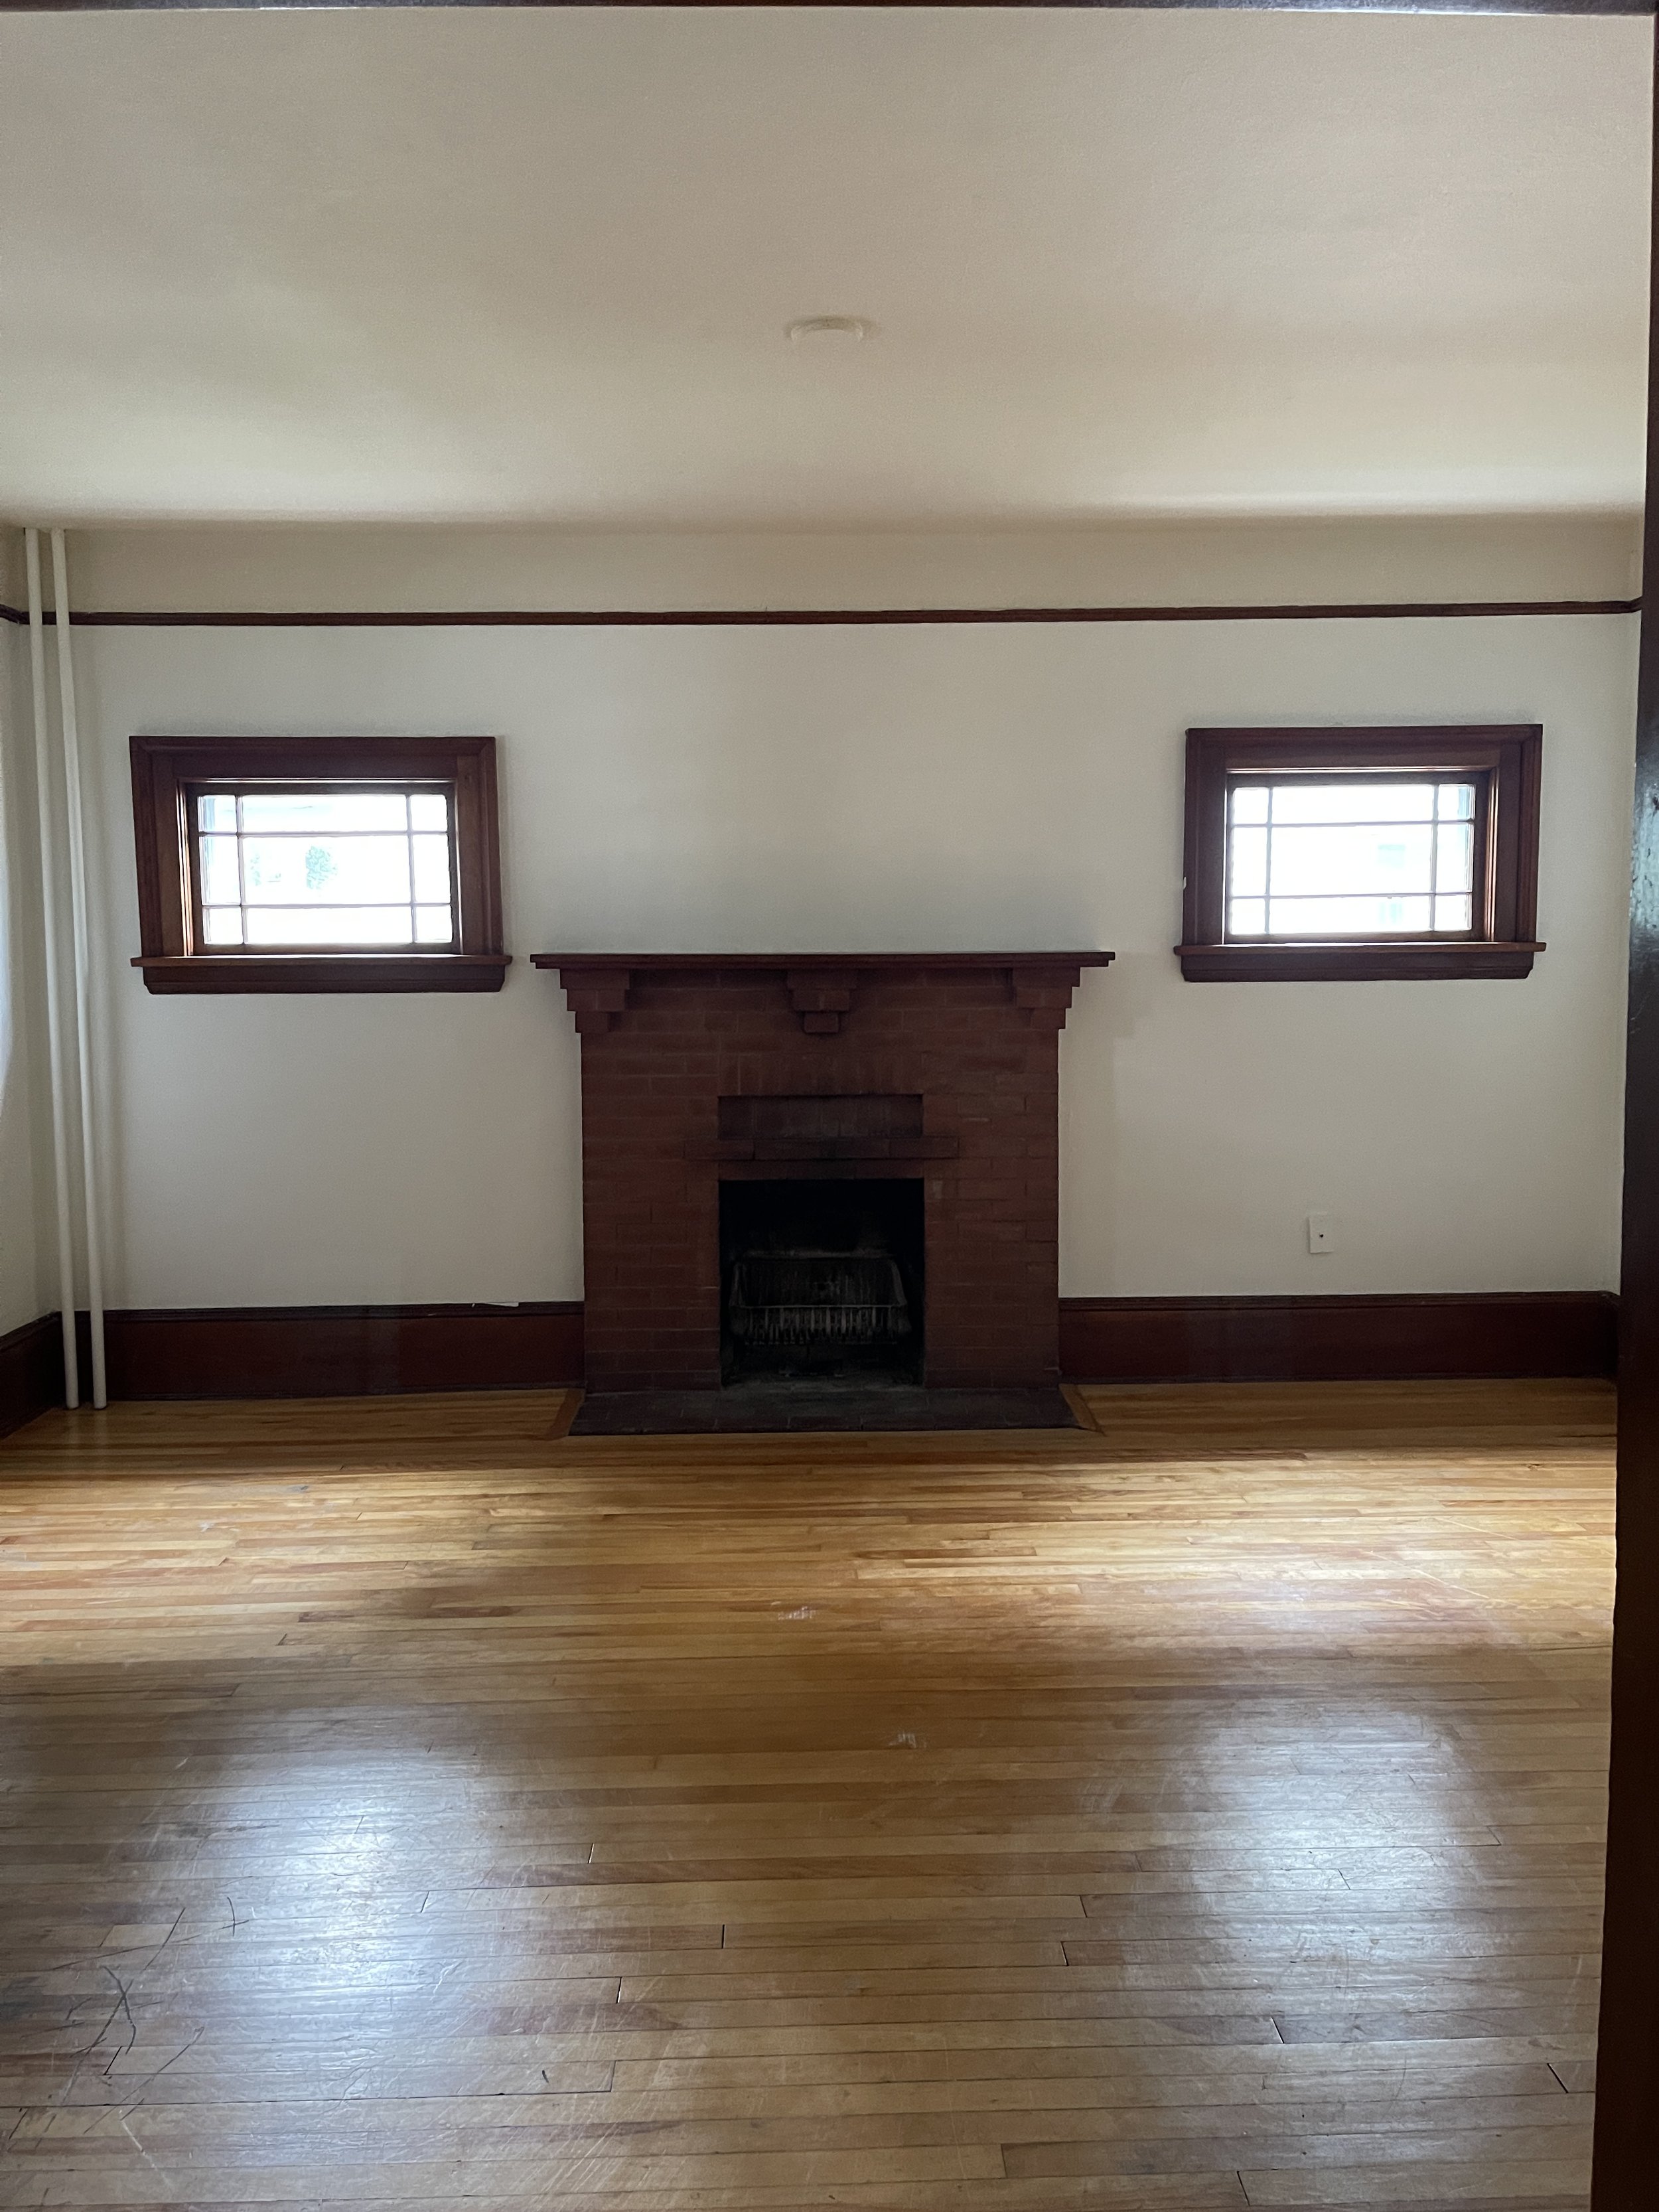
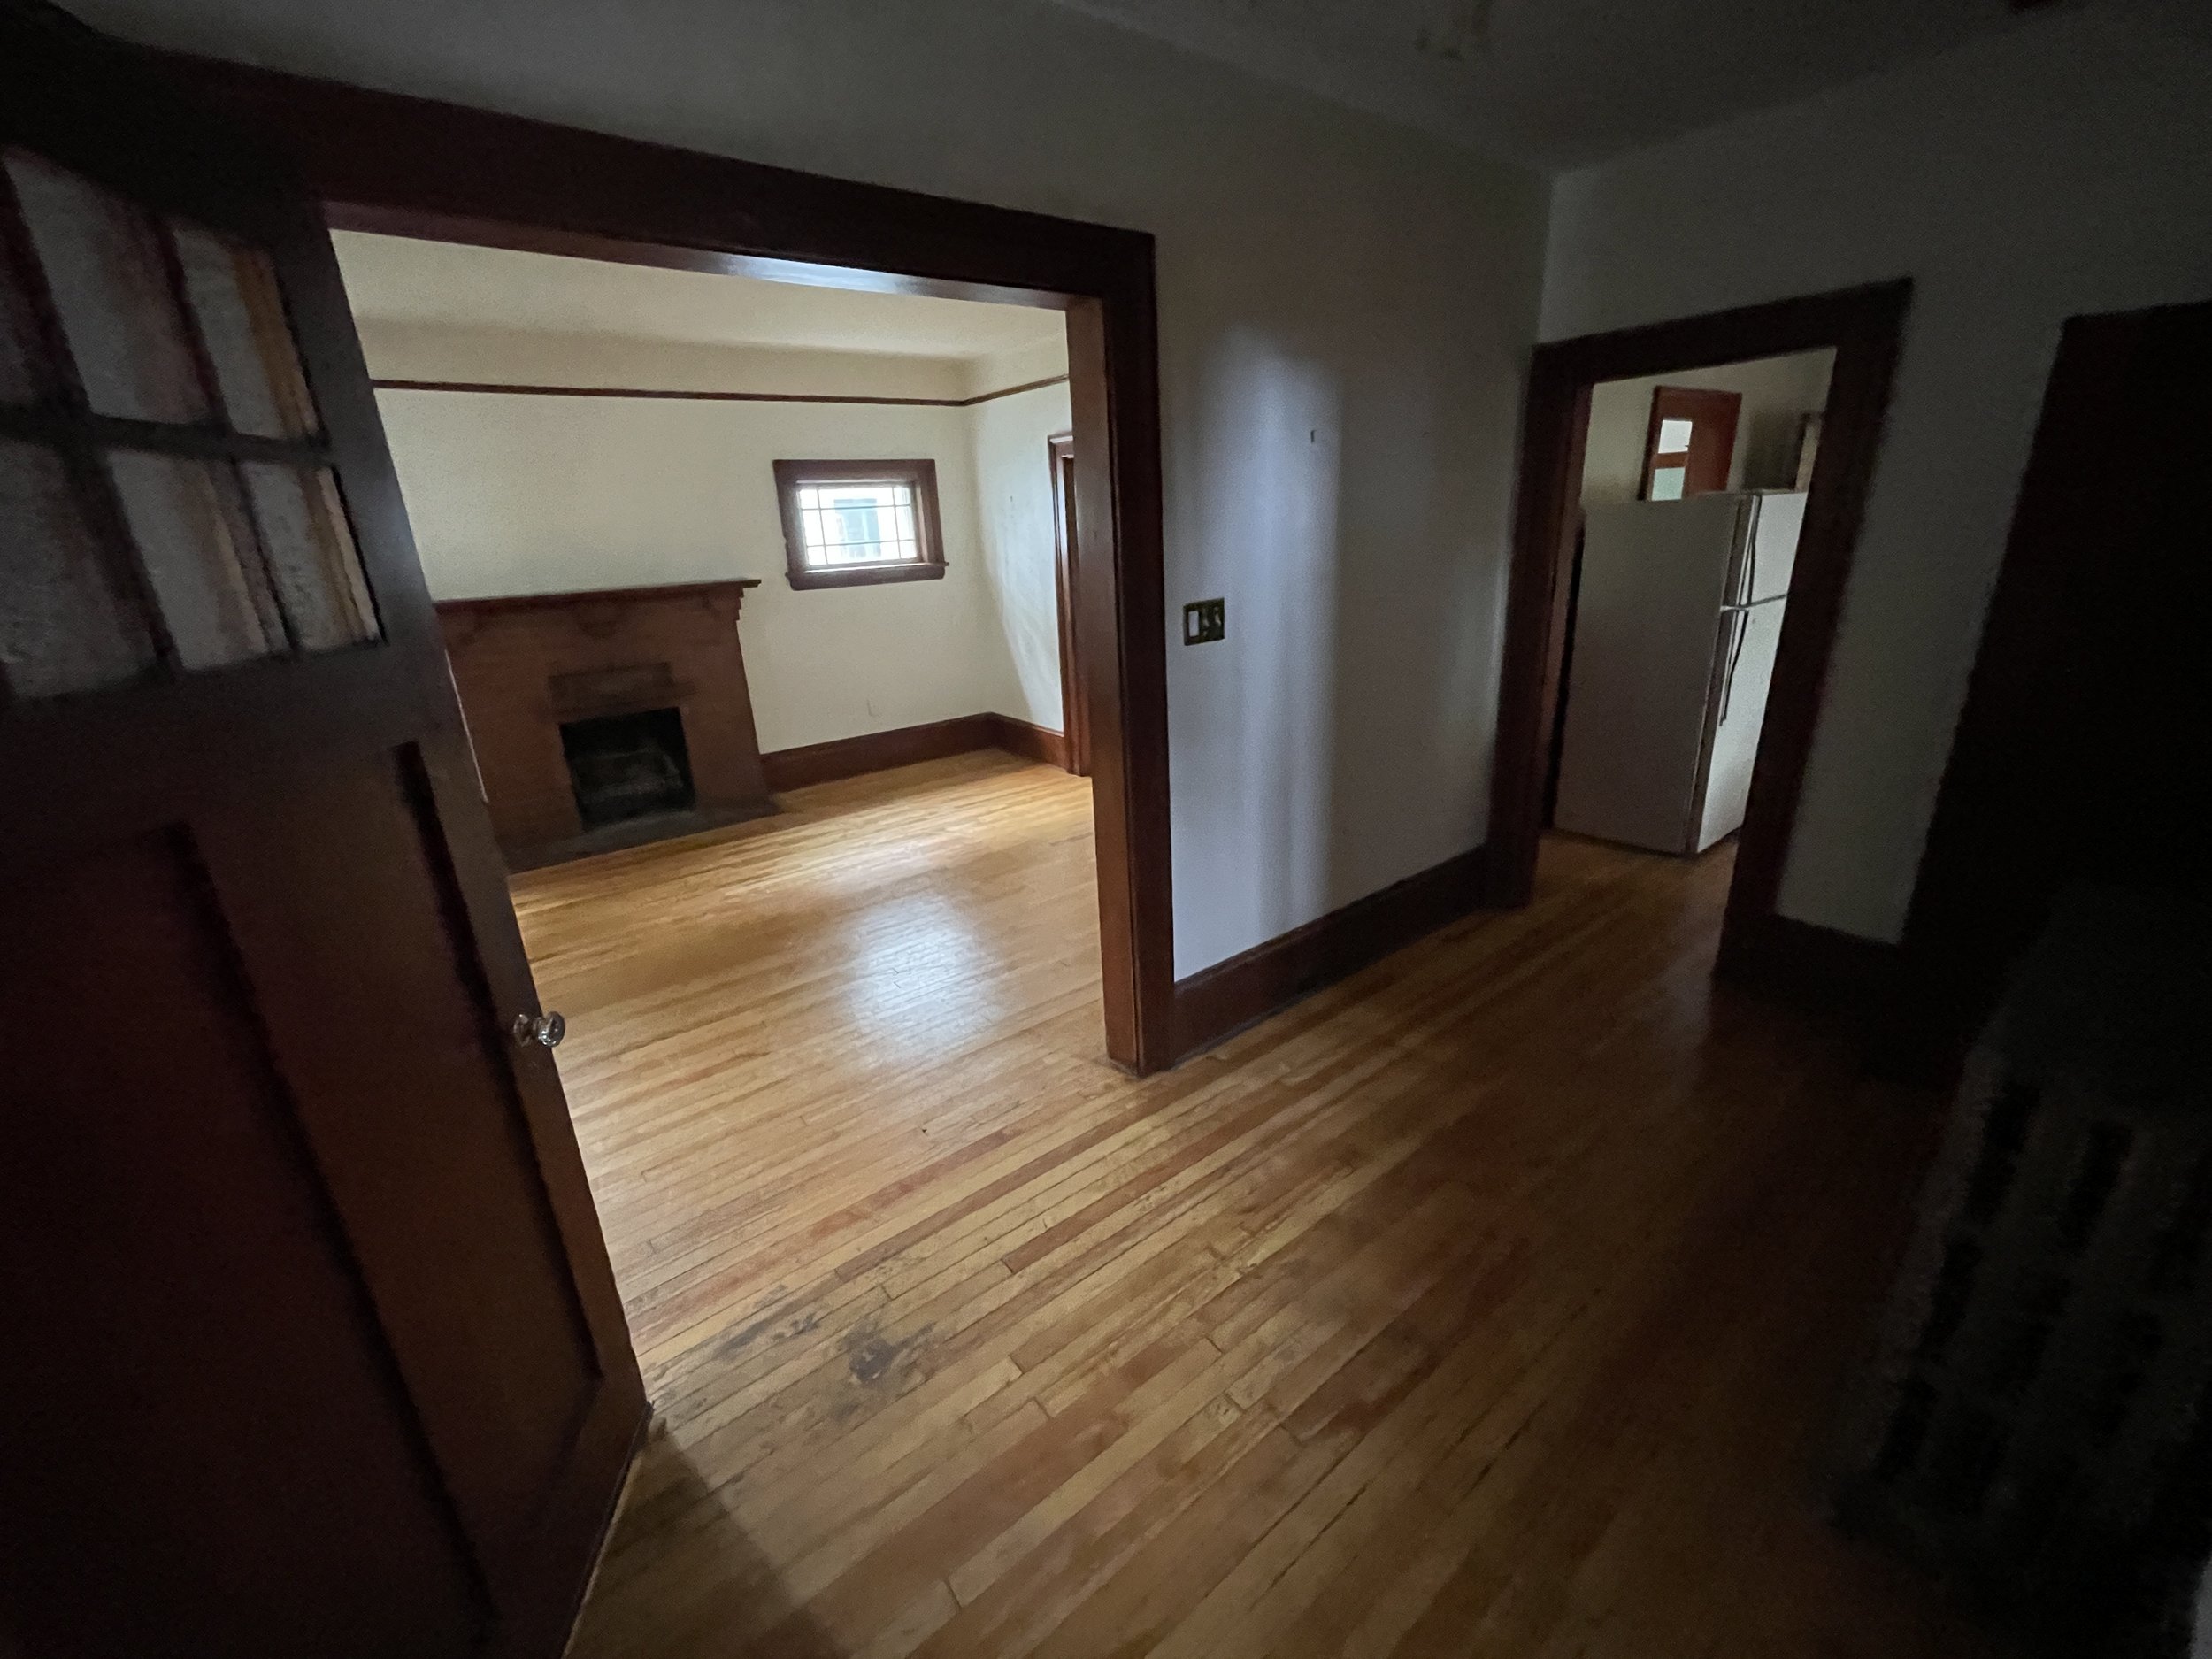
Fireplace Before!
When I started my renovation on this 1922 craftsman style home, It was important to me to work within the look and design of this style of home while adding a layer of freshness and trend.
Before we lifted my home we removed the original exterior chimney to lighten the load. At this point I decided to remove the old fireplace entirely, replacing it with a larger grander Gas one. We were starting fresh with new framing for a new fireplace and that meant I needed to decide on what kind of masonry look I wanted to go with.
CSI - All Things Stone is my go to for all my stone and brick needs. Whether I am using it on my exterior or interior, they have an amazing selection of styles, textures and colors. I used the Echo Ridge Dressed Fieldstone by Cultured Stone on the exterior of this home, and while this product also works for interior spaces, I wanted to brighten up the main floor of my living space with something lighter.
The individual stones give you a warm hand made appearance with added texture and depth.
What’s unique about this product is it’s a faux thin brick that looks and feels just like natural brick. It can be installed virtually anywhere as it doesn't require additional foundation support. I find most people can be intimidated when working with individual stones, however having the ability to install one brick at a time allowed me to maintain the charm and character of real brick and achieve the overall look and feel that I wanted for my fireplace.
Handmade Brick by Cultured Stone in Canvas.
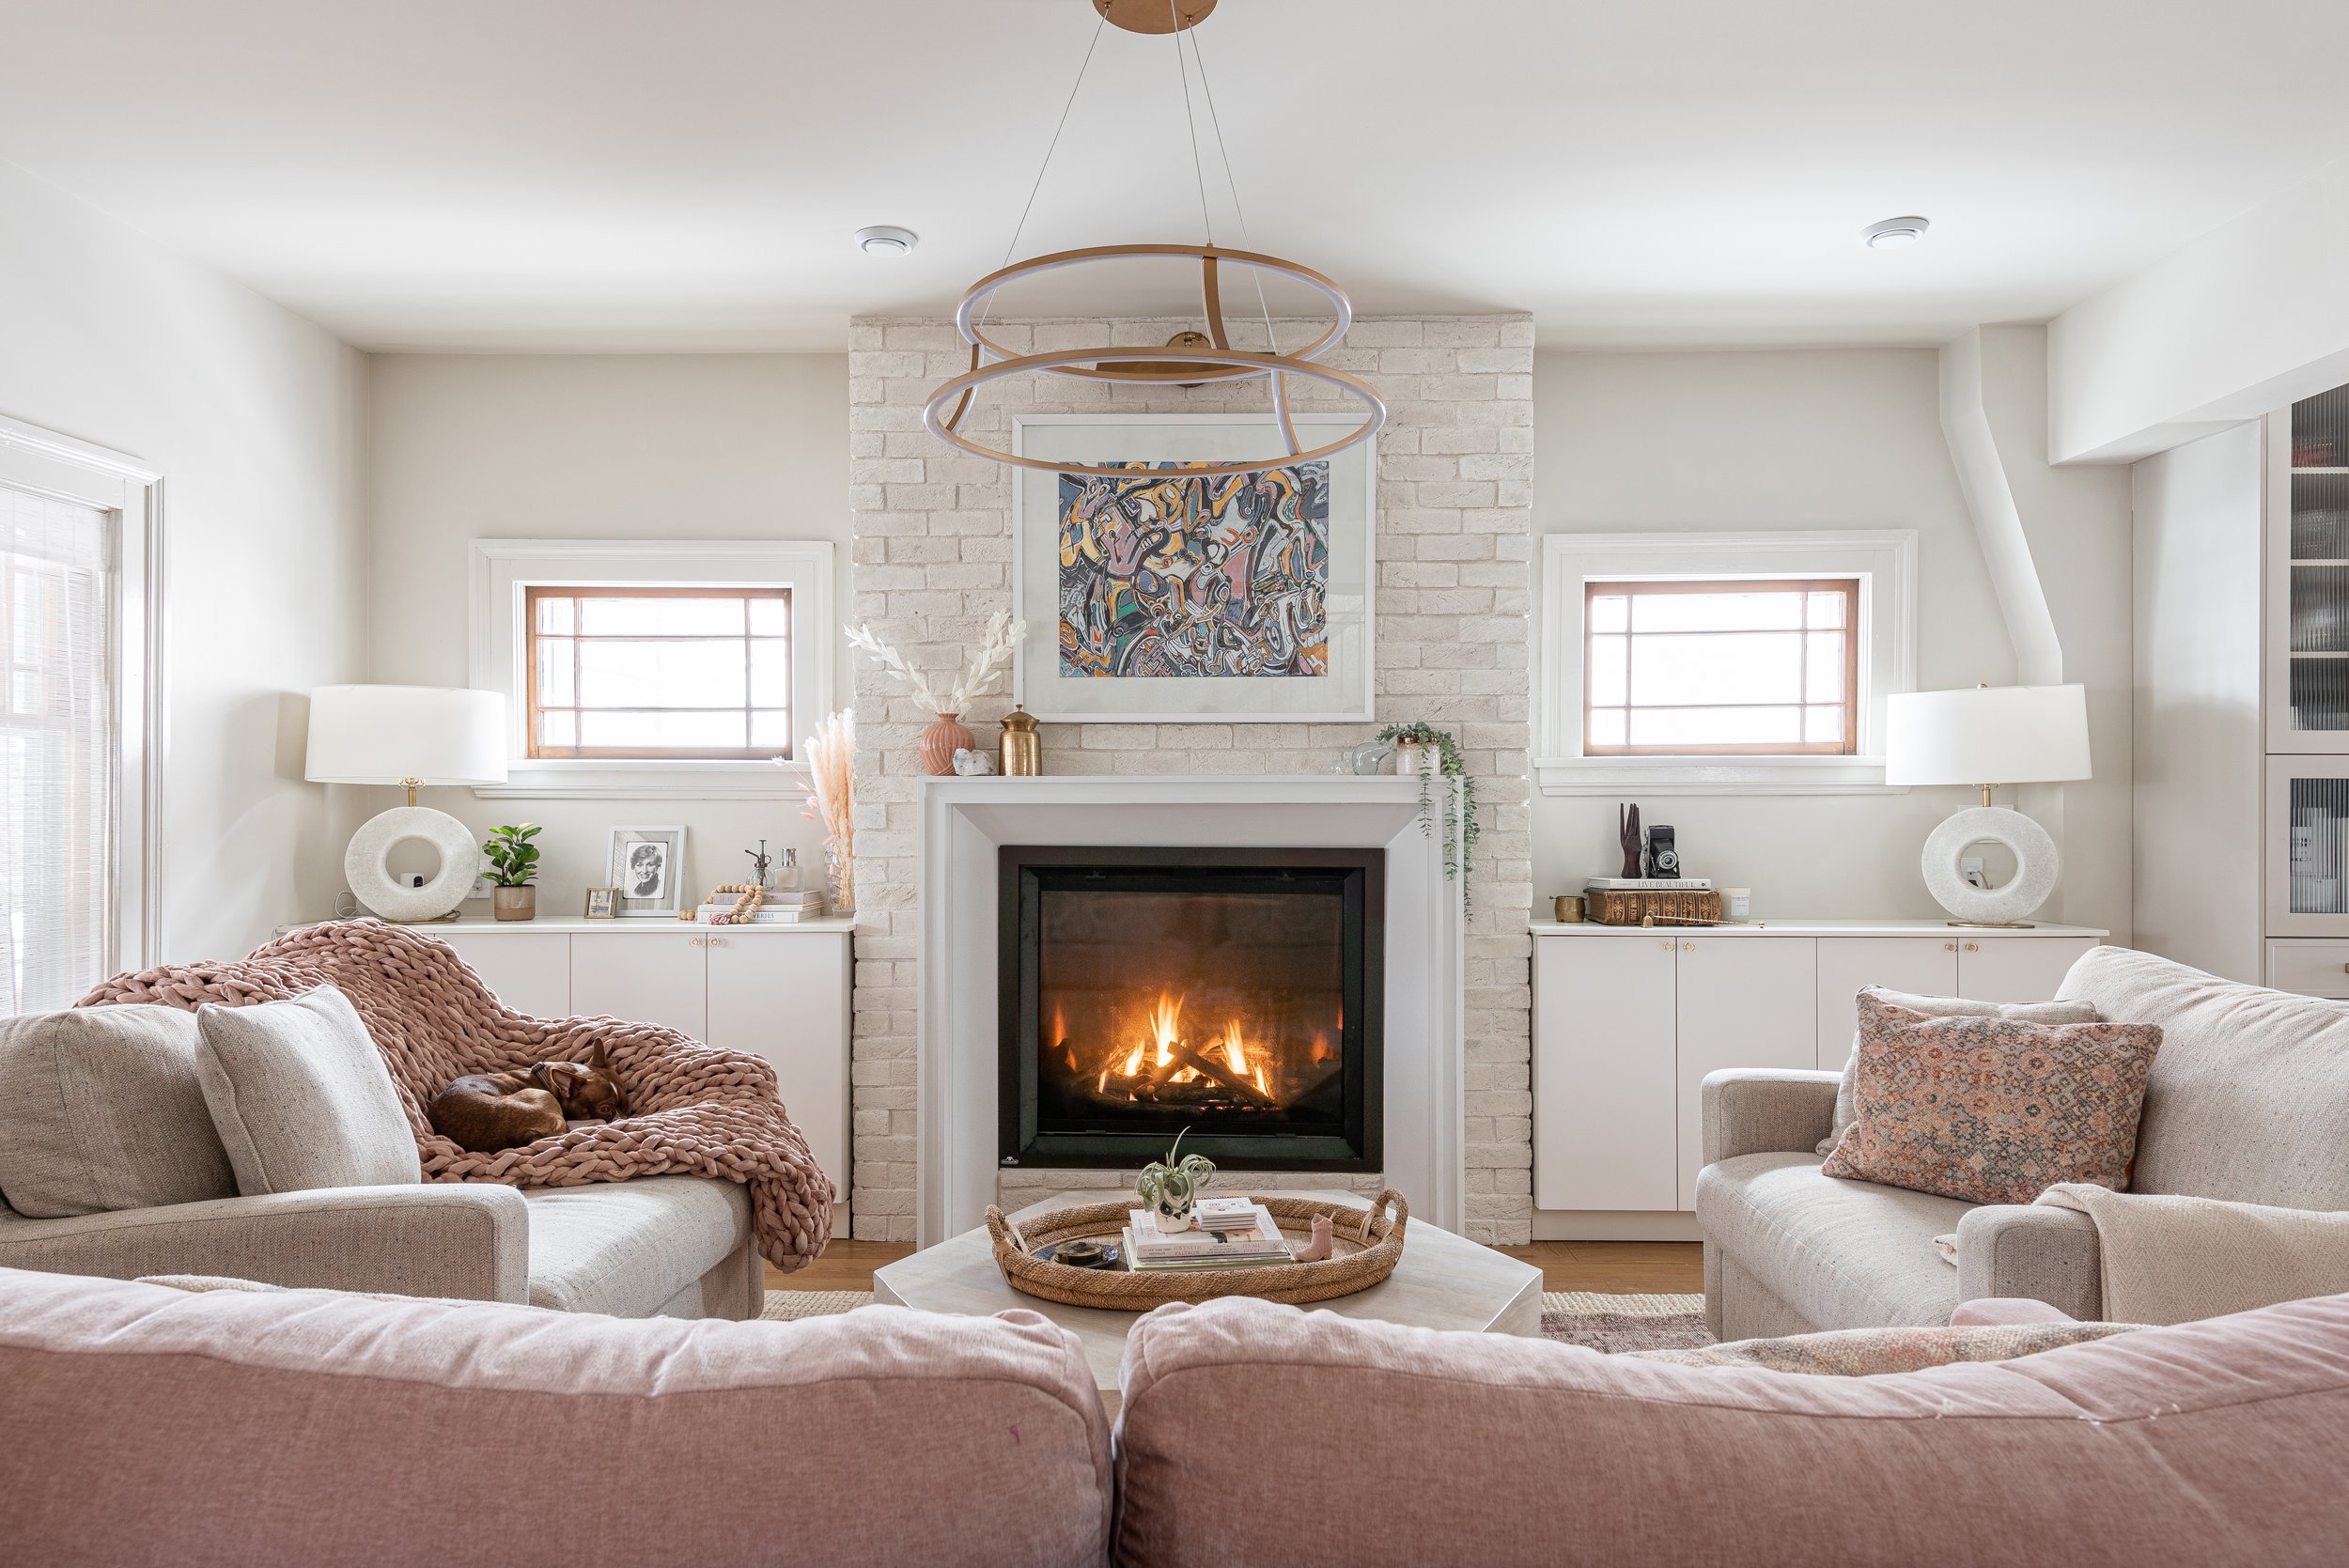
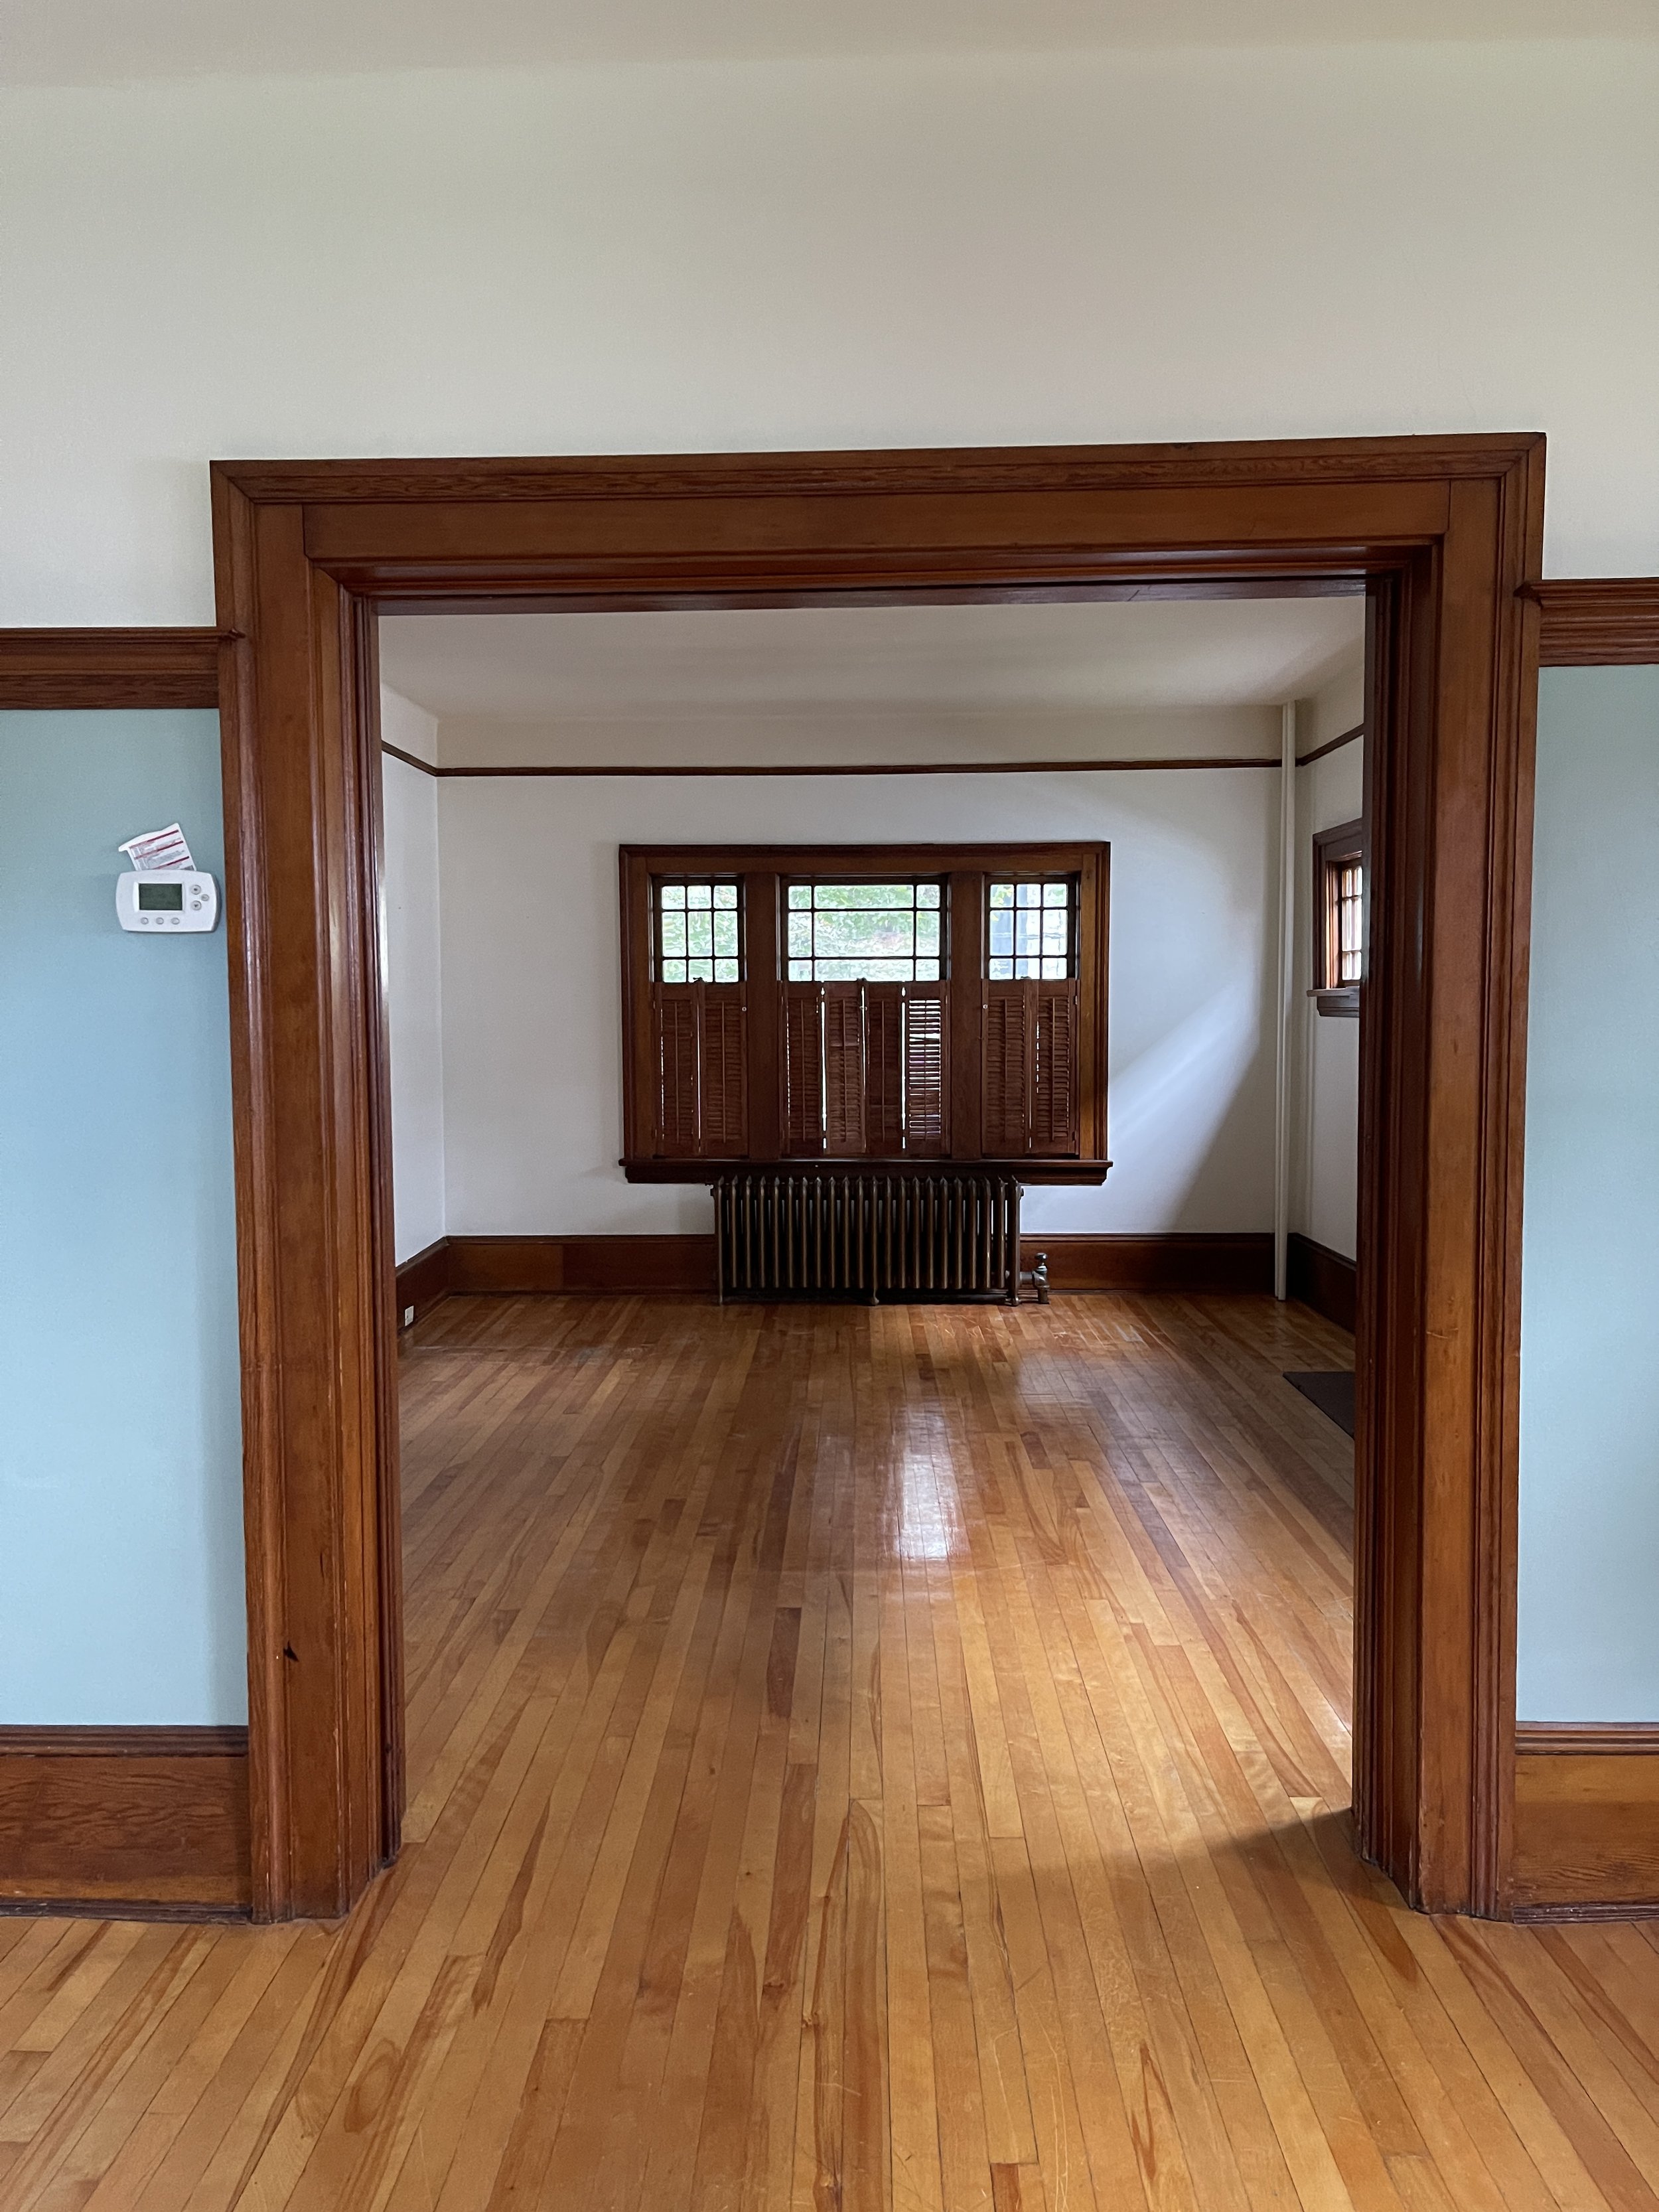
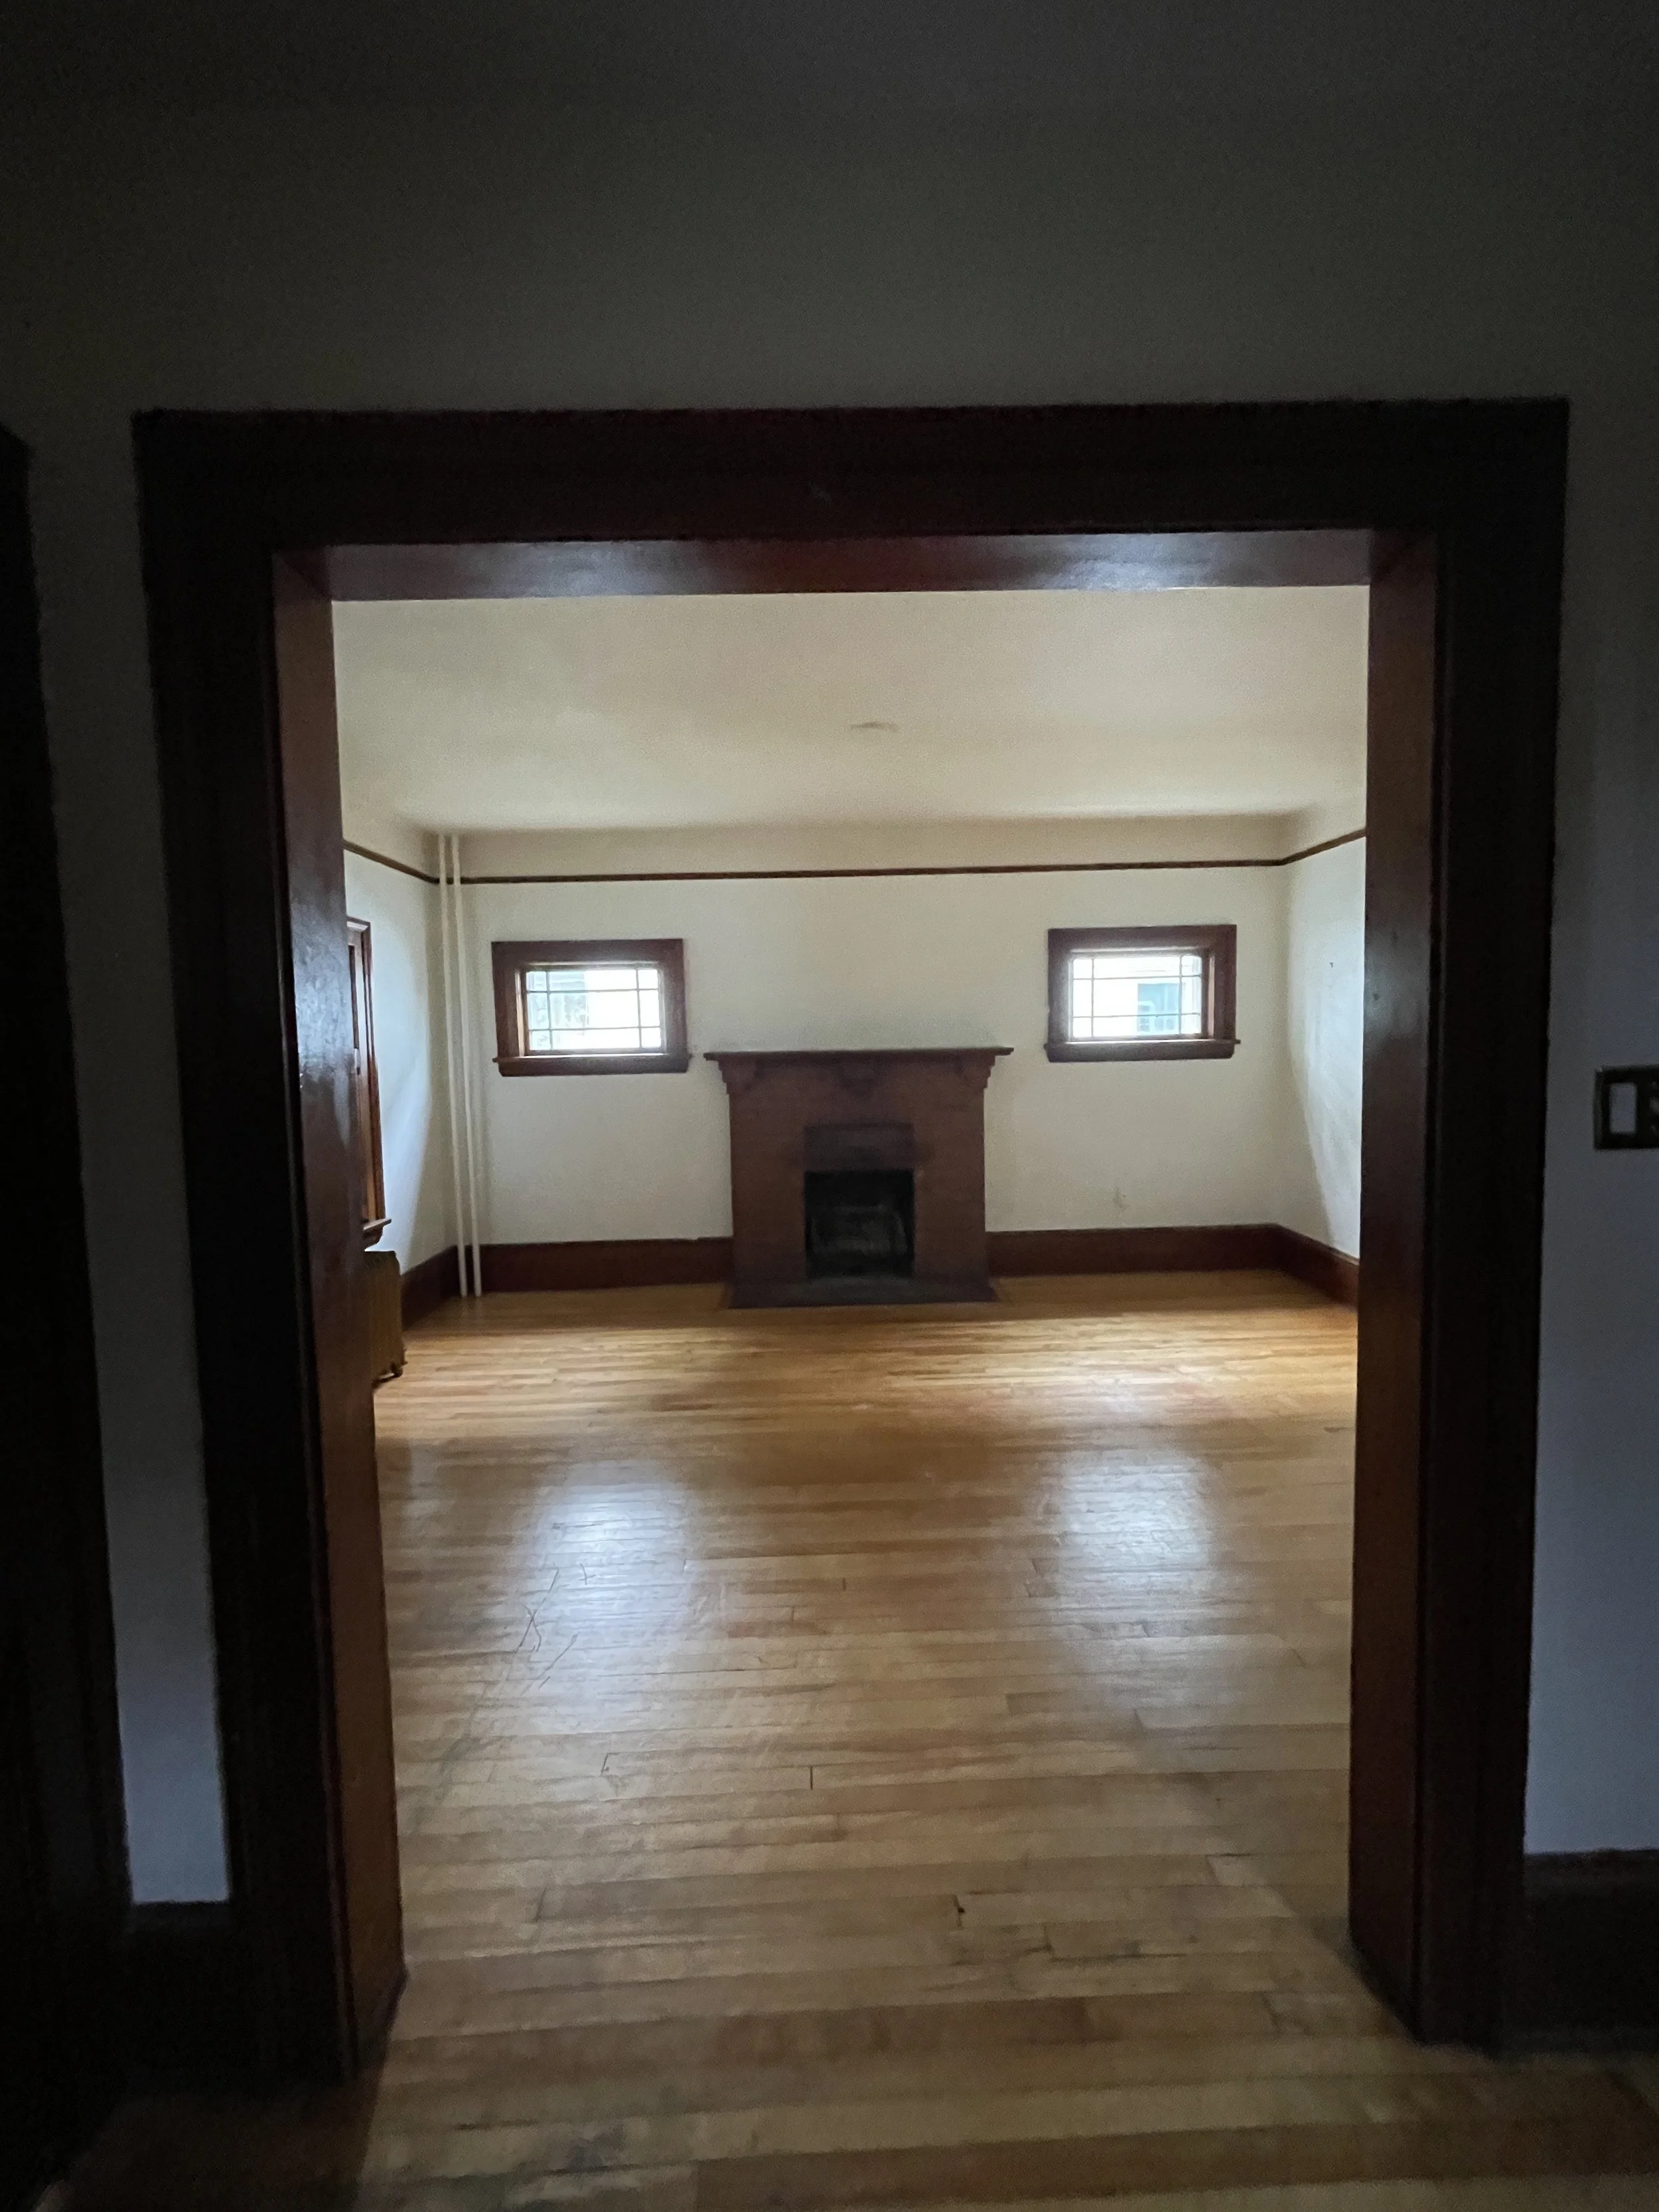
We were working with uneven walls, two permanently placed piano windows, an oversized gas fireplace and a transitional mantle surround. The questions was just how high we wanted to take the brick. I decided to install the brick to the ceiling, and was so pleased with the end result. This created a sense of height and grandiose in my main living area. This space truly is such a treat to walk into at the end of a long day!
My honest review? I would 100% recommend CSI- All Things Stone on your next project. I can’t wait to work with more of their products and I’m excited to recommend it to all my future clients.
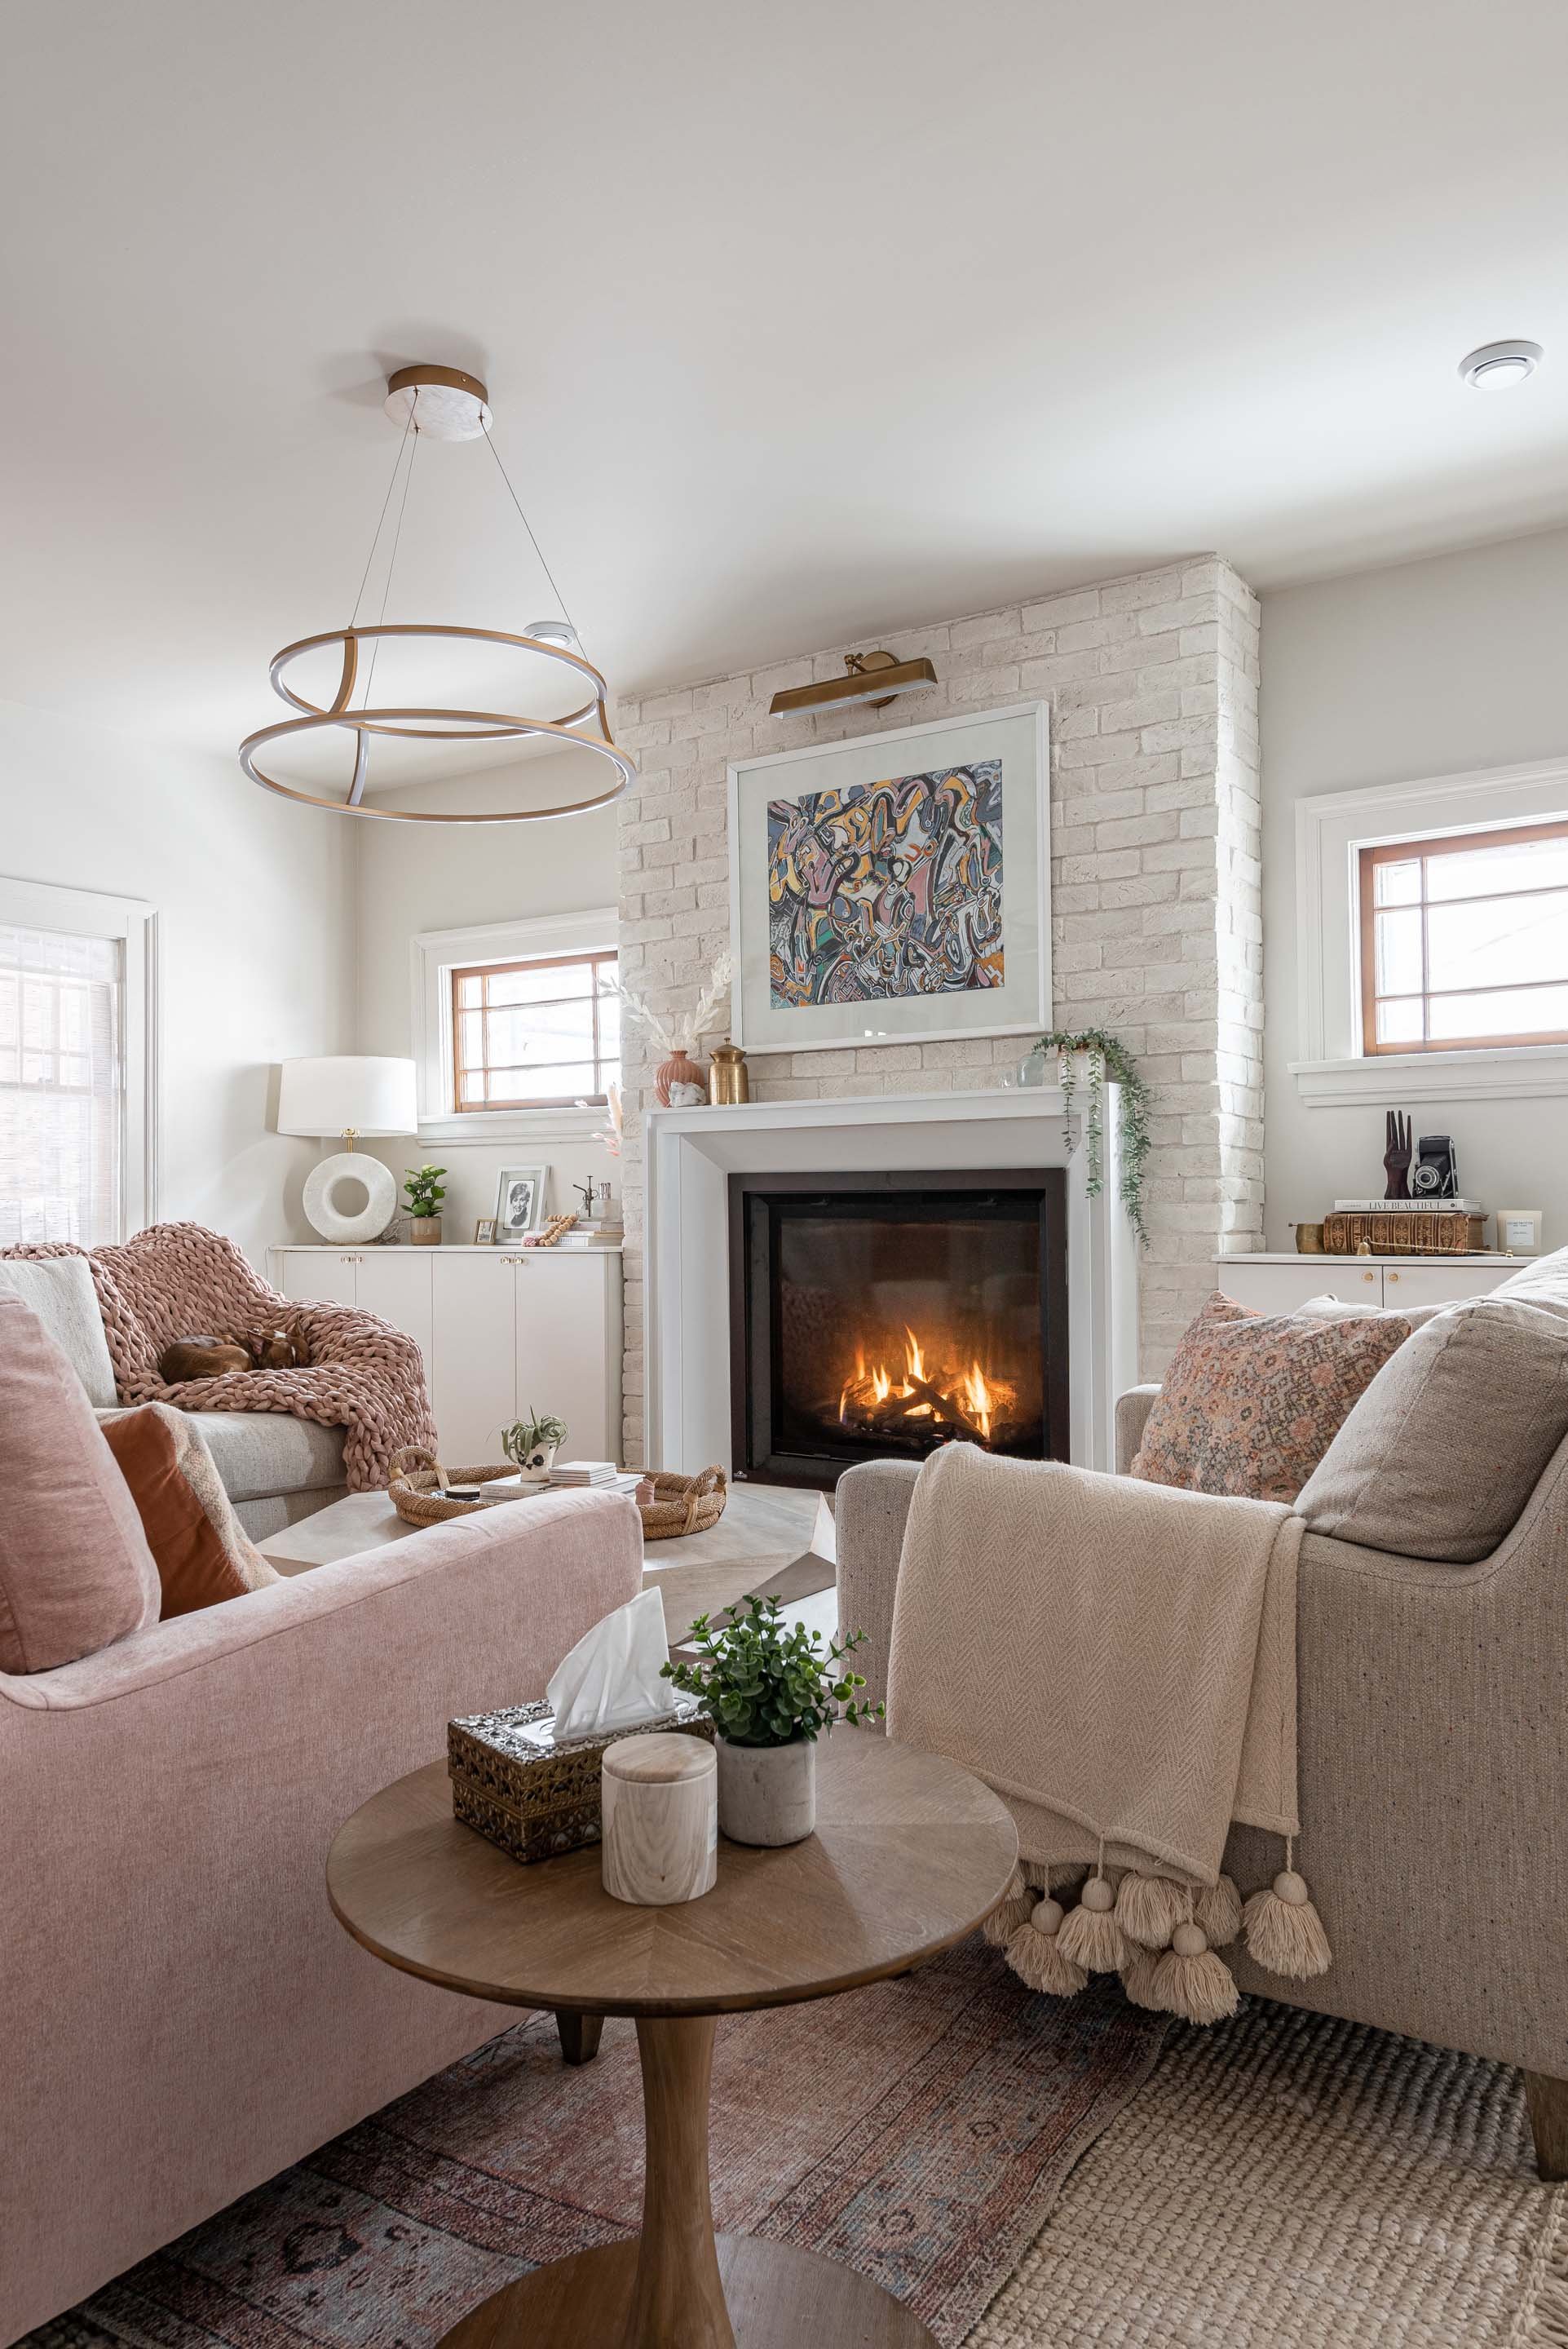
The living feel so light and bright now, and has a beautiful statement fireplace!
Now that you see the final results of my living room space, what do you think of my stone selection?
Drop me a comment below with your thoughts, and feel free to pin and share this blog if you love it!
xox
Rebekah
Check out the full before and after video on my youtube channel!
Everyone always wants to know how much a bathroom renovation will cost…
Well the answer is not as simple or clear as one would hope for.
A bathroom renovation costs anywhere from 10 to 100 thousand dollars, much of which depends on the finishes you select. It’s also why it’s so important to build a footprint for each project so you know exactly where your money is going. Take flooring for example, if you prefer large stone marble walls and floors in lue of ceramic ones, you best get ready to pay more!
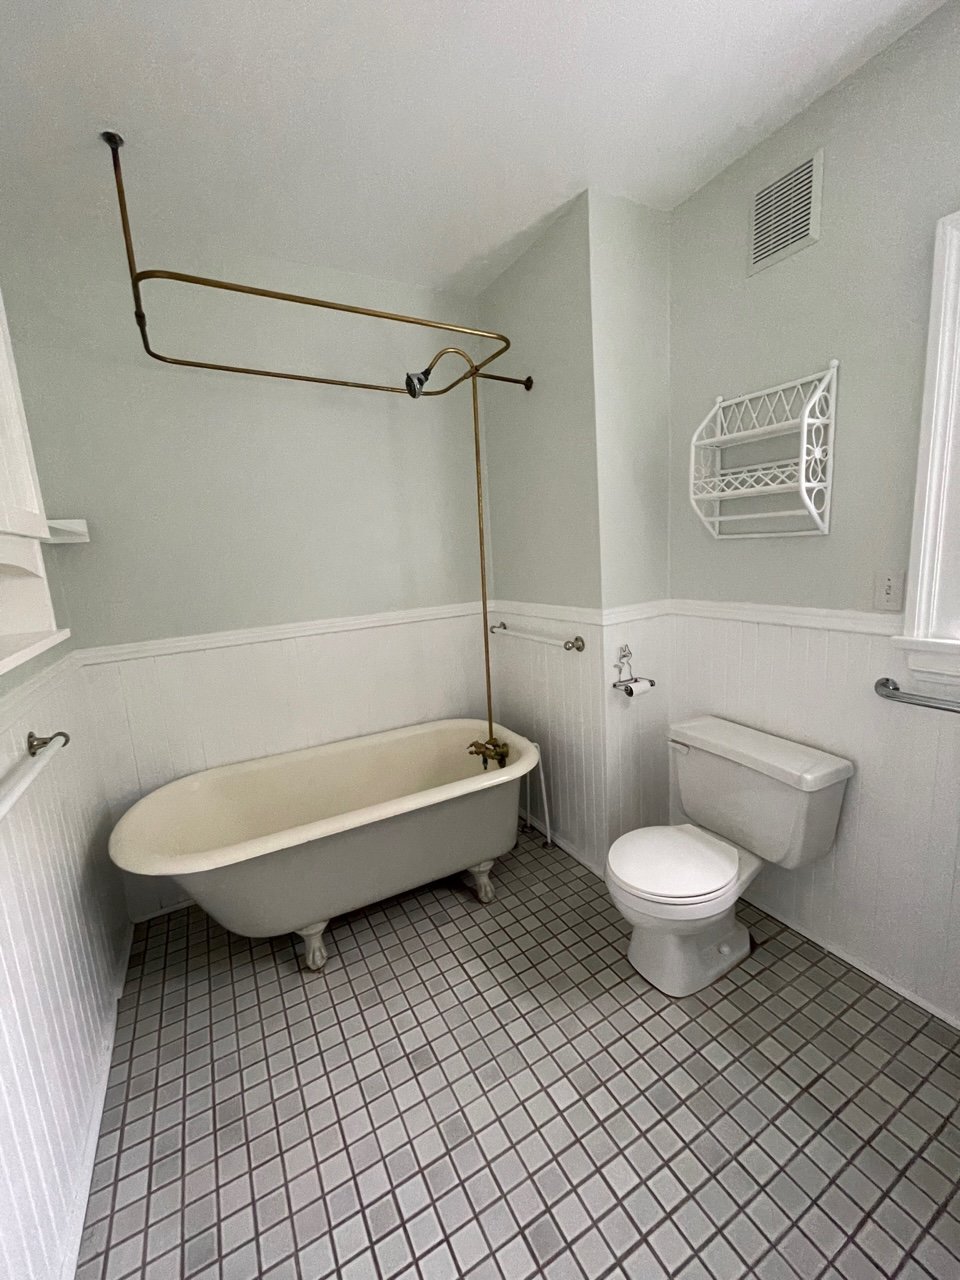
Clawfoot Tub Before
Lucky for me, my bathroom ensuite was part of a larger renovation, that included an extension on our old craftsman style home, so I was able to start fresh. The space was an empty canvas ready for me to paint on the plumbing and layout.
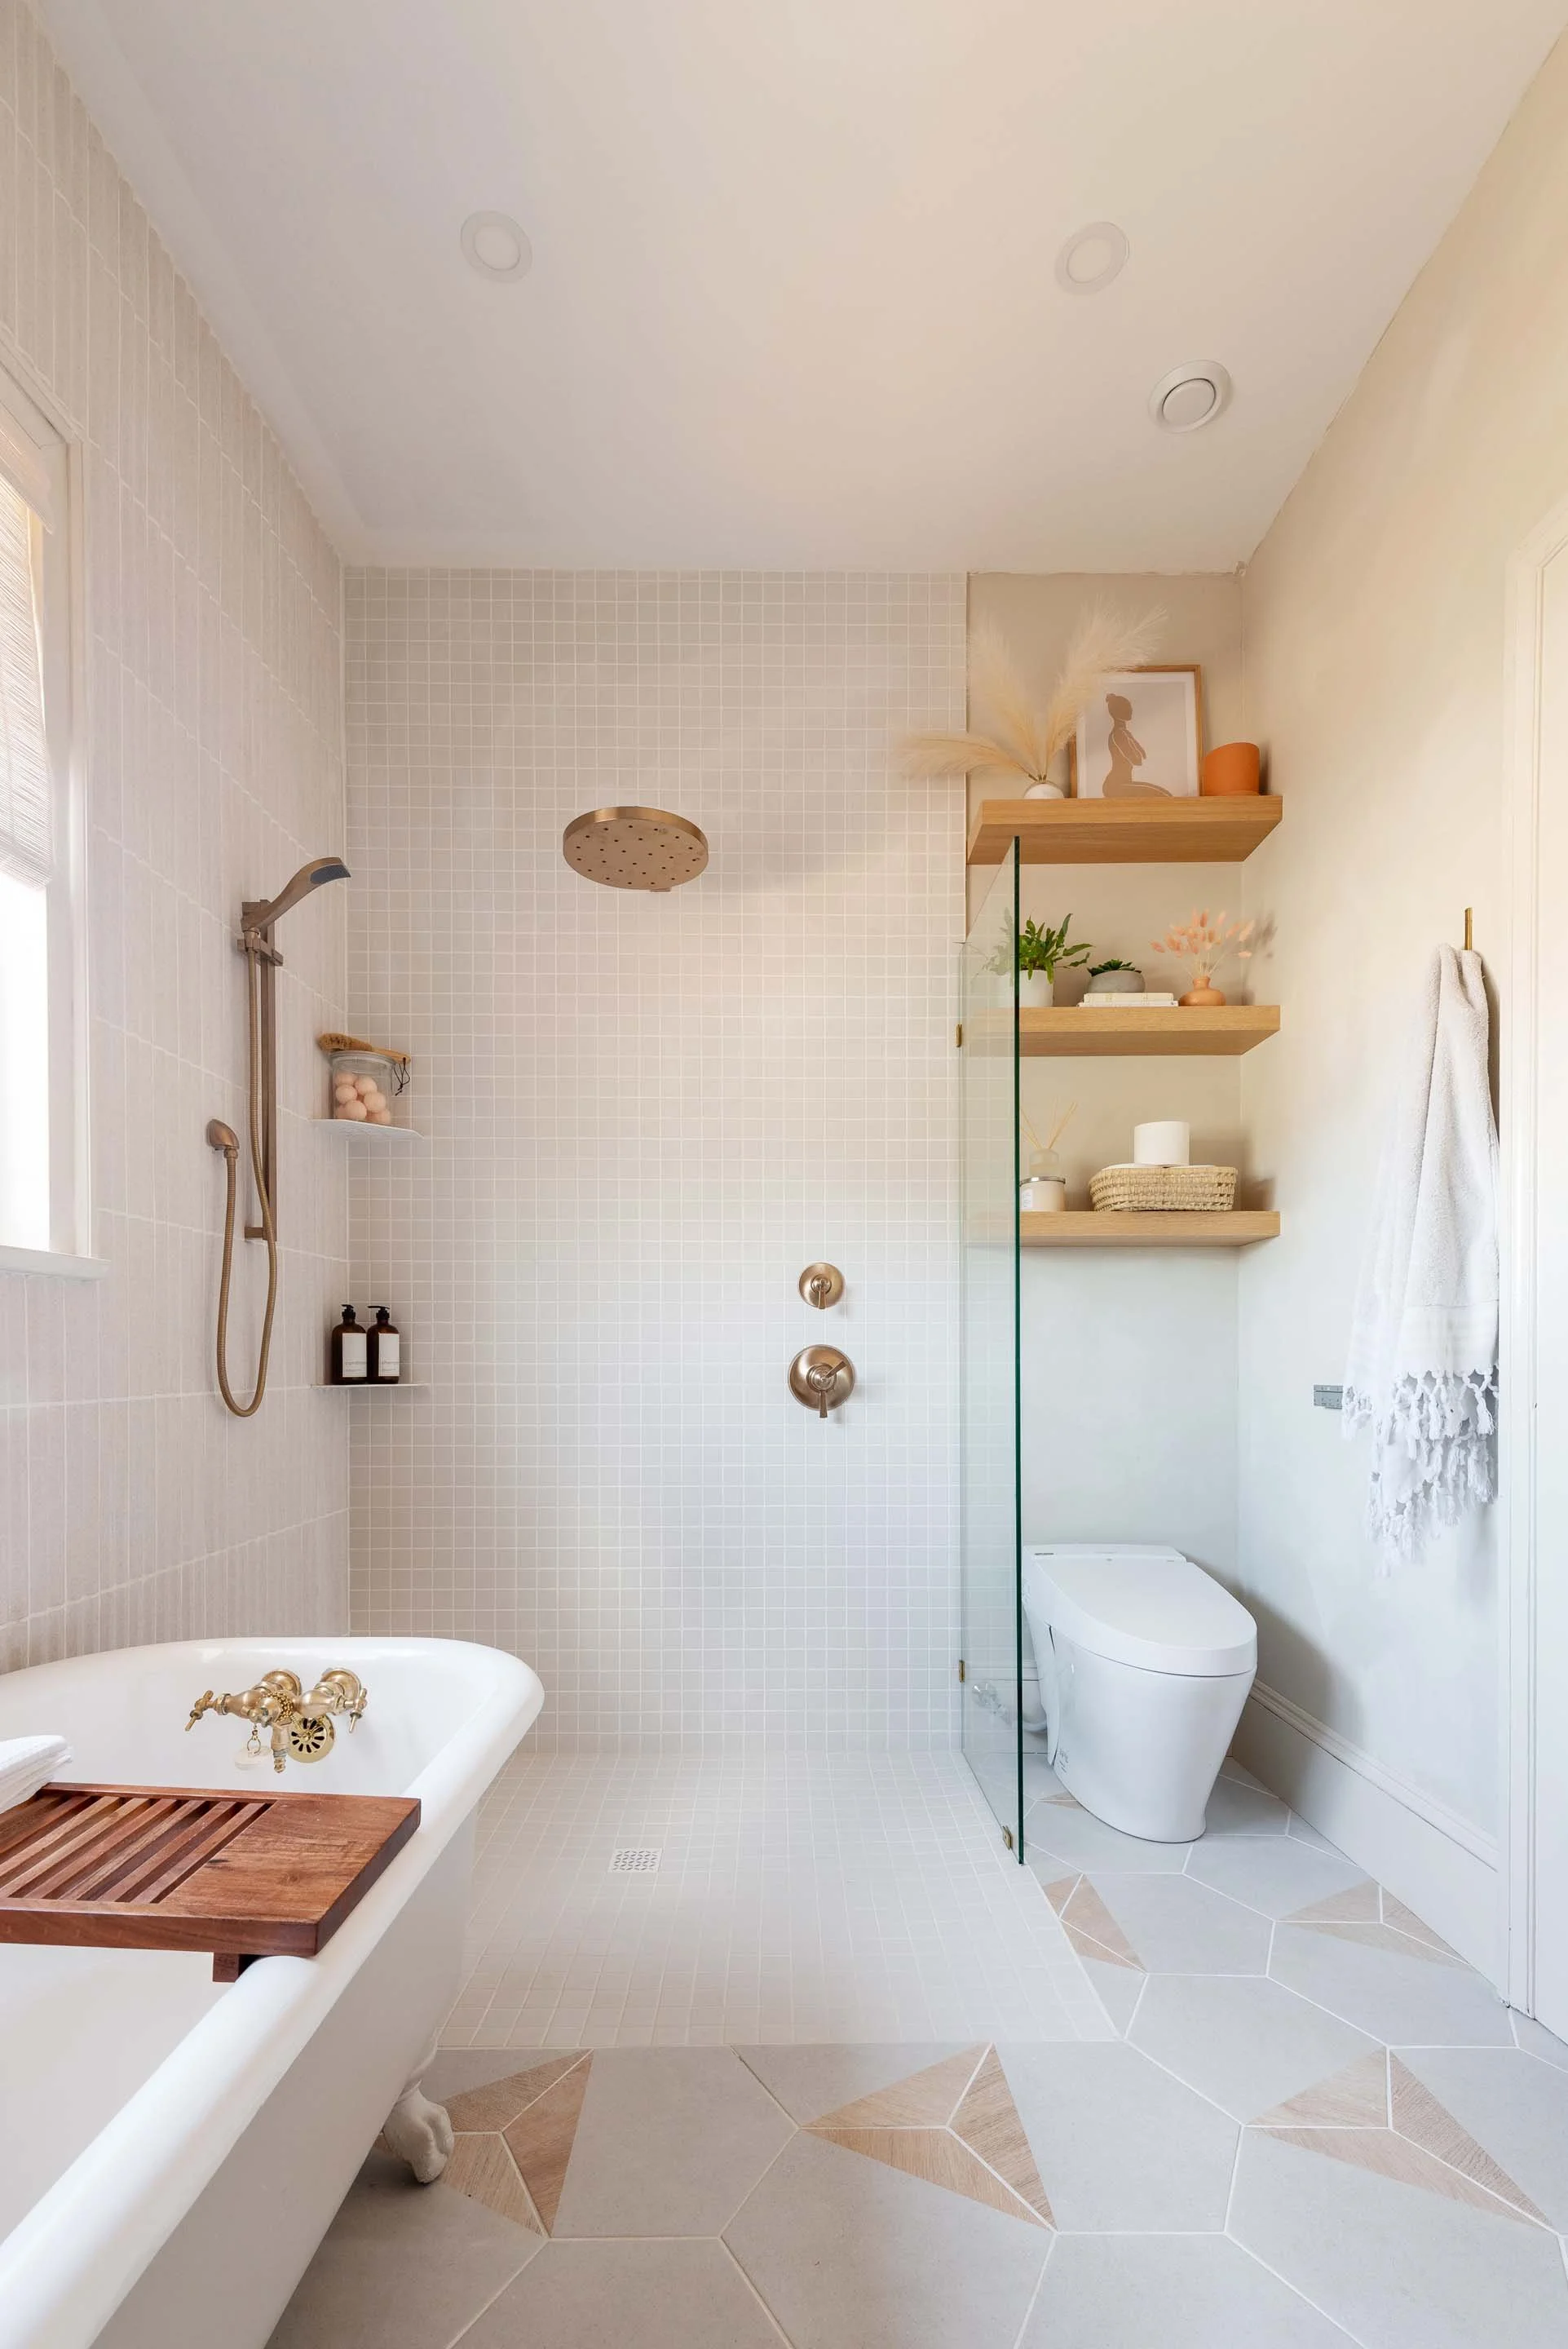
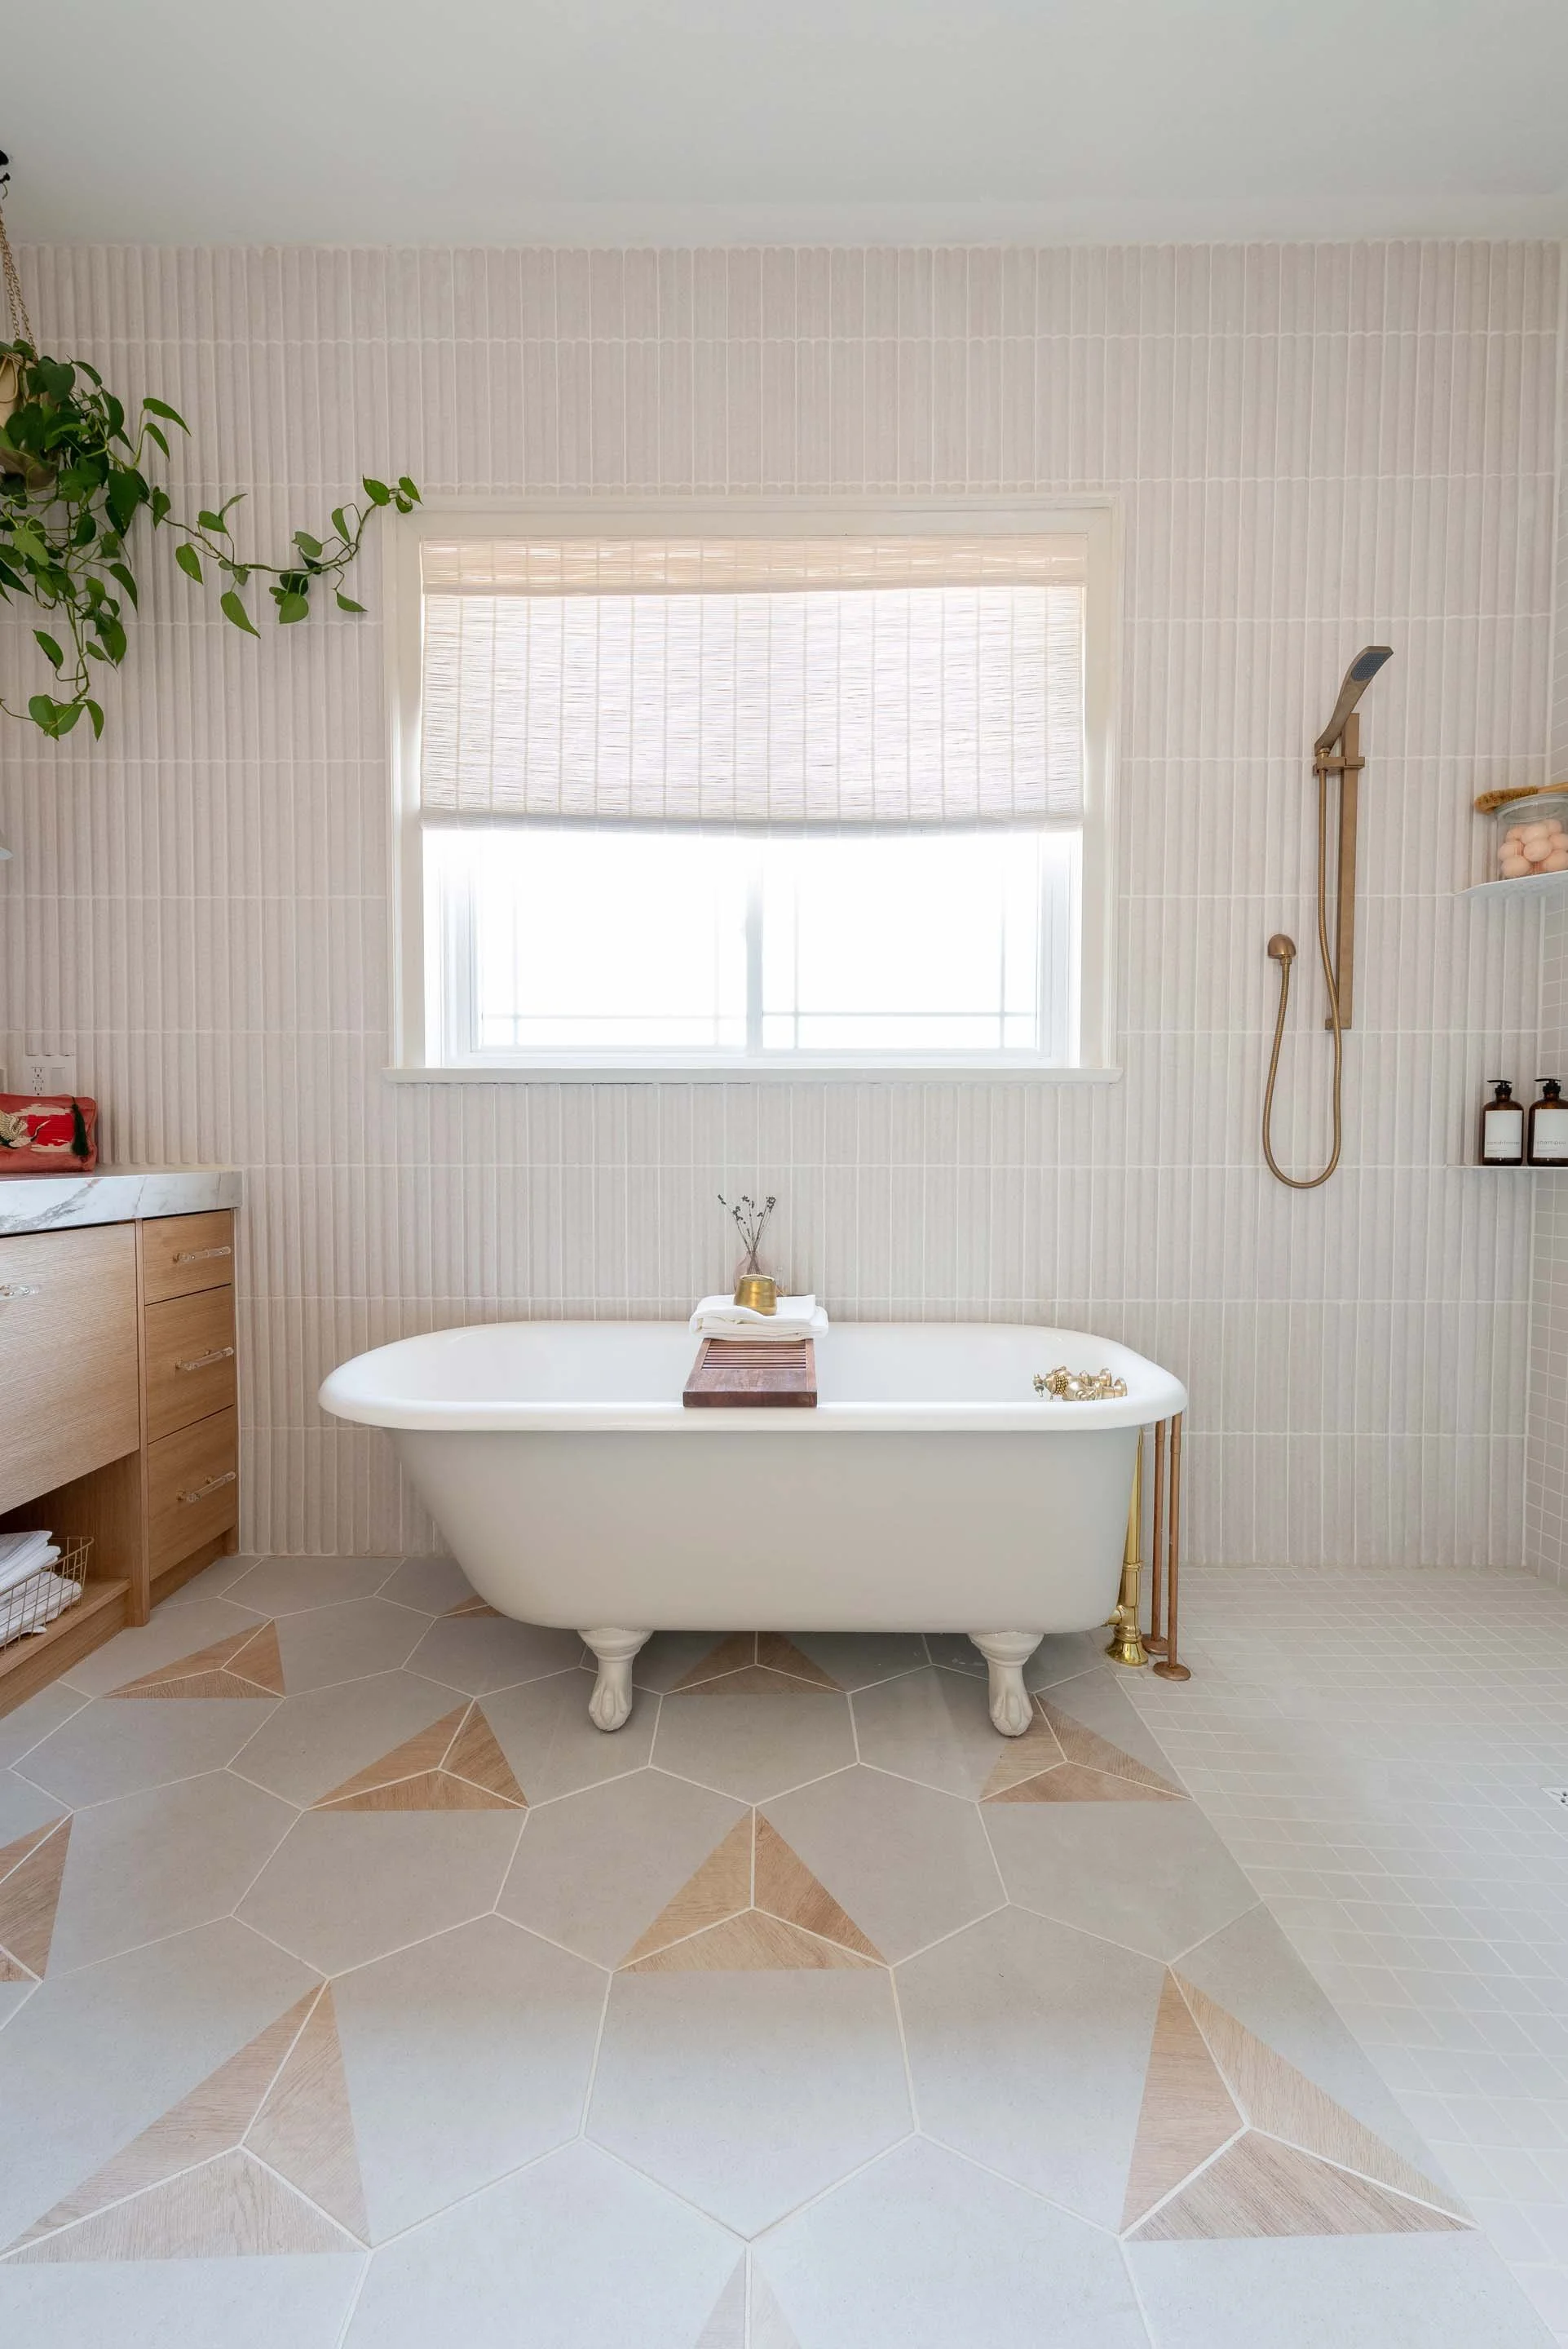
During the initial demo we removed the original 1920 clawfoot tub. I’d heard stories of how cozy these tubs were and thought including it in my design was a wonderful way of acknowledging the era of the home.
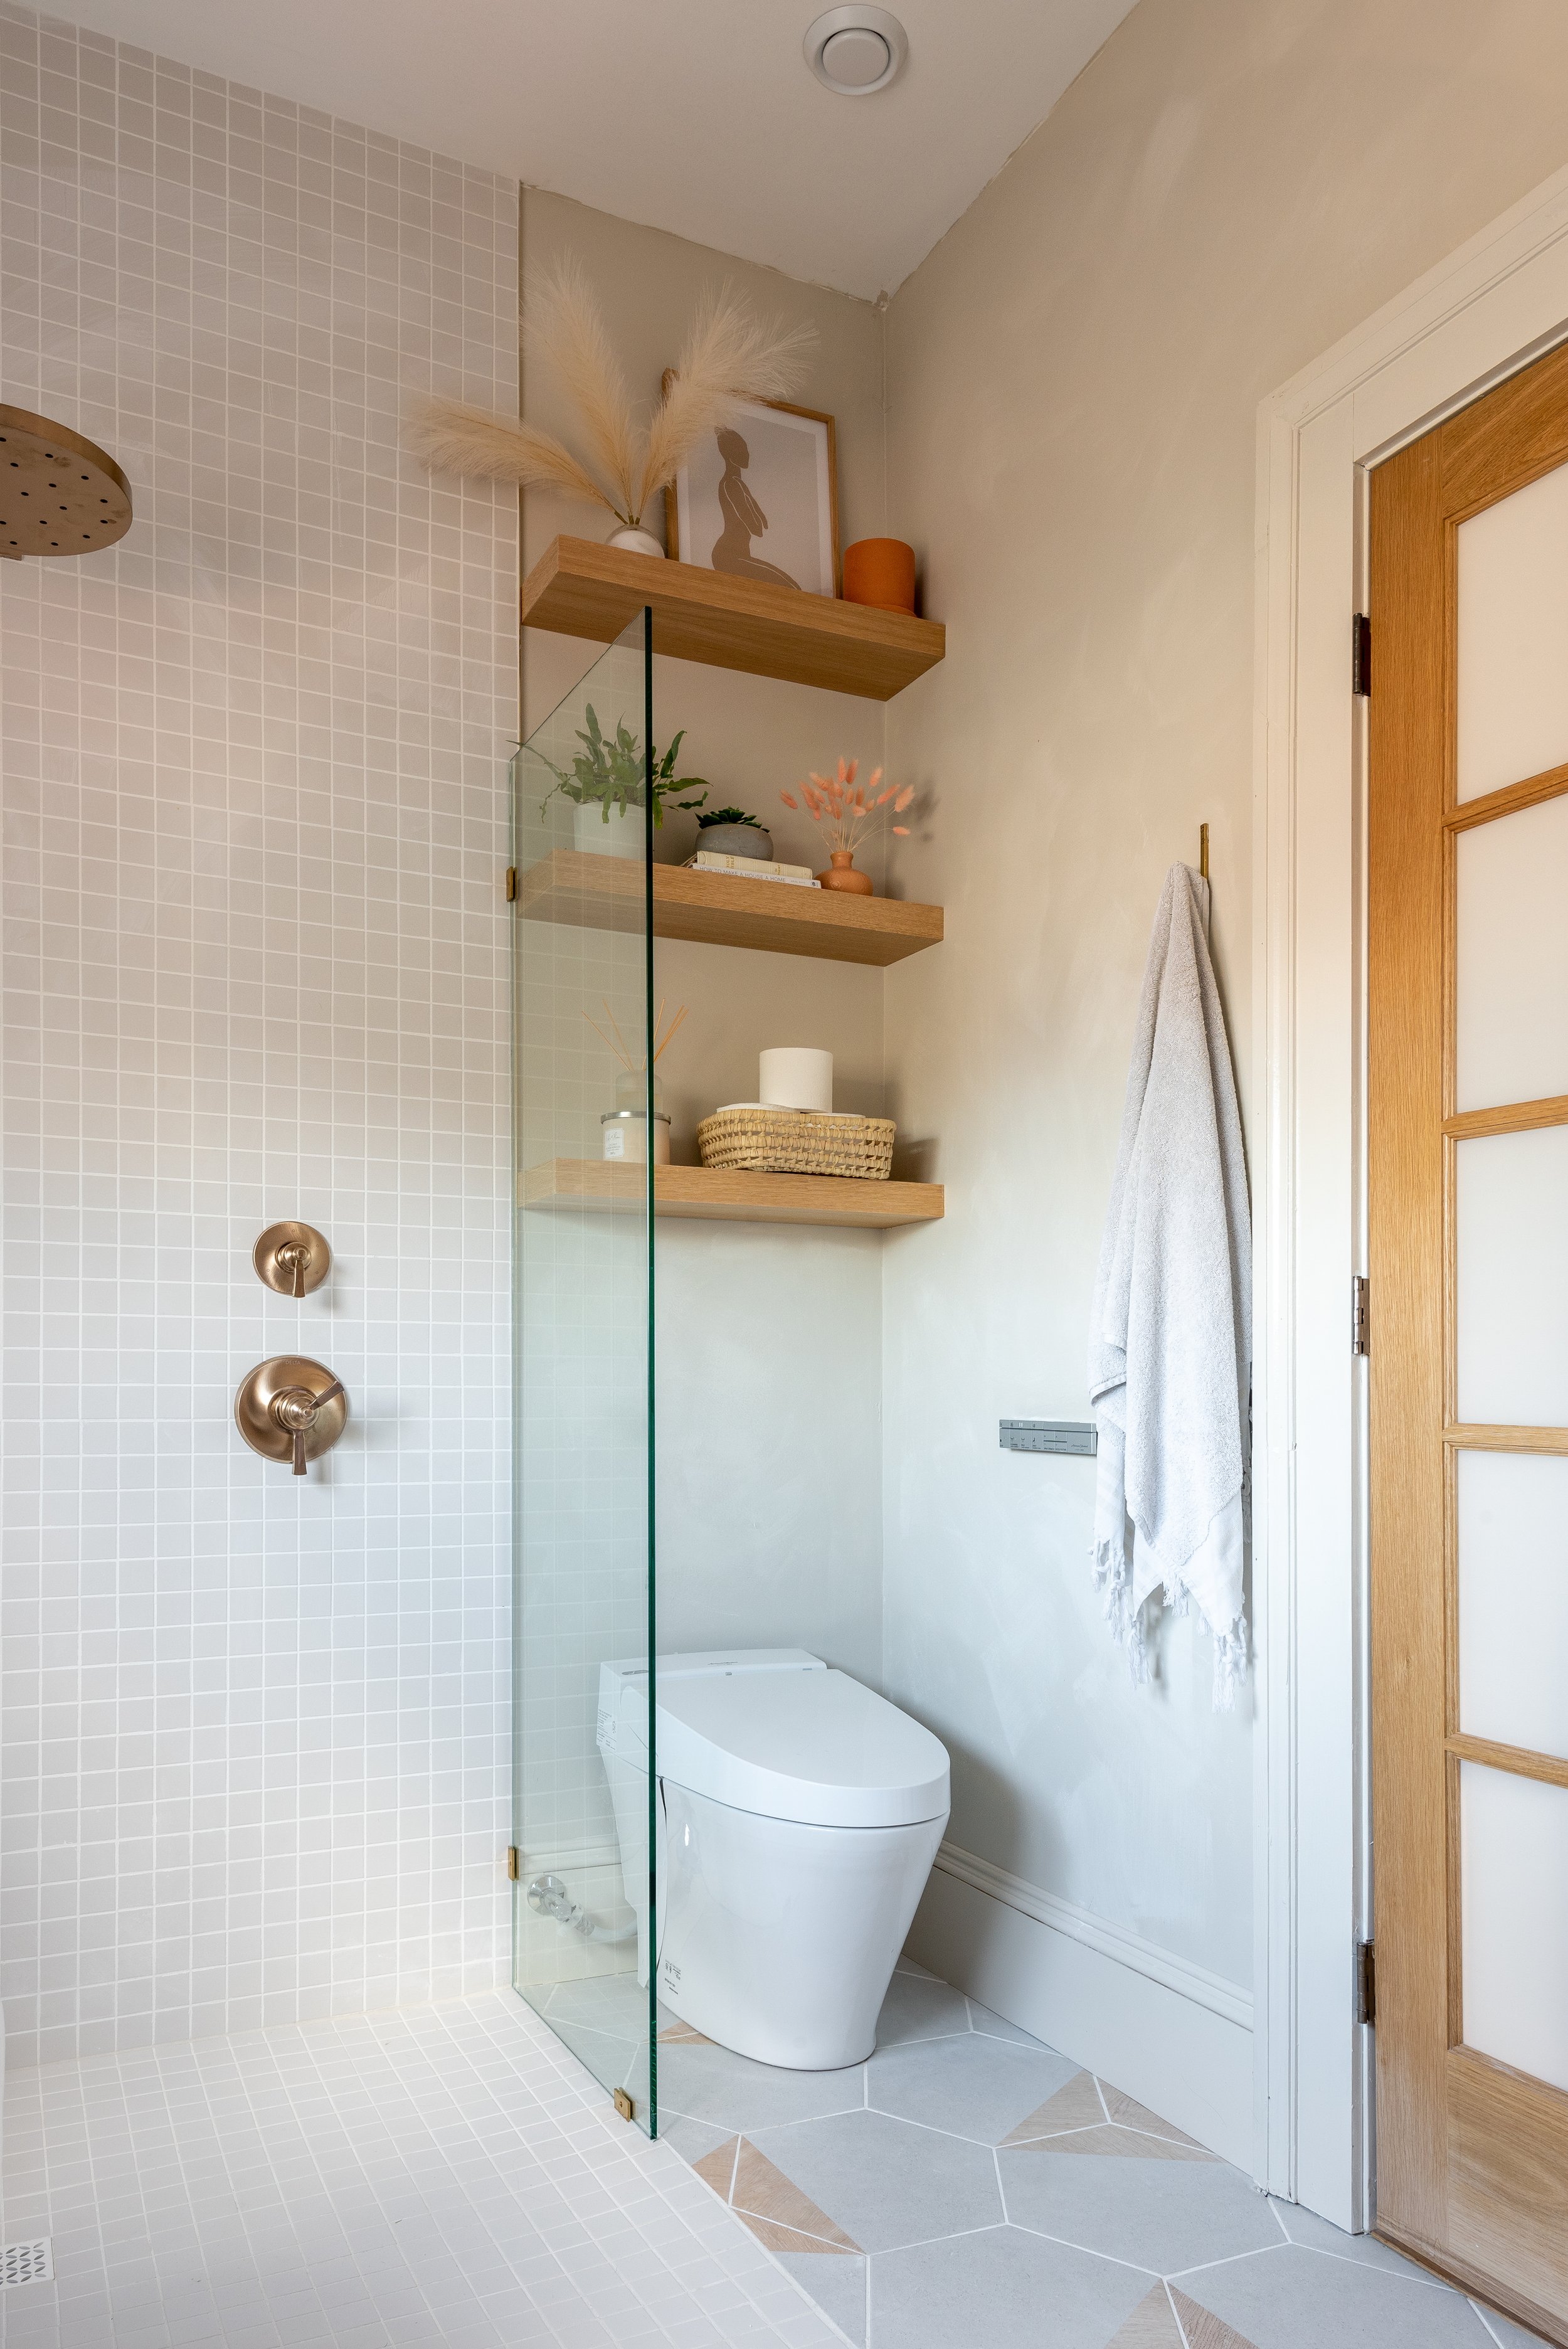
Other elements I envisioned for my new ensuite bathroom was a double sink vanity, a curb-less shower and a canopy shower head with an extendable hand tap (to make cleaning the claw foot tub easier). I’d also always wanted a bidet toilet and lucked out finding a deluxe model from American Standard, the Advance Clean SpaLet 100 Bidet, which included a heated seat, dryer and multi functioning water levels.
I fell in love the with idea of french doors opening up into the bathroom and sourced two beautiful solid white oak doors from Metrie that fit the space perfectly. In my mind it was clear, the double french doors would open to reveal the old clawfoot tub under a large window centred in the room. What a statement!
American Standard Advance Clean Spa Let Toilet is a dream come true!
A simple glass partition separates the toilet from the curb-less shower.
Oak french doors from Metrie swing open to reveal the ensuite.
With my wish list, and the floor plan parameters in place, I started designing a mood board and selecting my tiles. Finding a floor tile was more challenging than I thought, so I ended up taking the lime hex tiles provided by Elegant Flooring, originally intended for my basement bathroom, and moved them upstairs to the ensuite. Next, I fell in love with a textured tile called “Stripes” from Wow tile, and wanted them to be a feature in the room from floor to ceiling and behind the vanity. These tiles were special order, and would take months to arrive so I ordered them early into my renovation journey.
Once I had the physical tiles in hand I quickly realized their texture created concern, perhaps the plumbing finishes wouldn’t fit around them, a less experienced tiler took one look at them and said… I don’t think so.
Champagne bronze rain shower head from Delta Faucet.
In order to skirt around the issue, I decided to pick a wall tile for the shower (artisan white from Centura ) a classic tile I used in my last renovation) . This tile is flat and blends in with nicely enough that I could move forward with the bathroom renovation. Everything was coming together beautifully, all my Delta Faucet fixtures in champagne bronze that I had selected had arrived and the plumbers were well on their way rouging in the shower, toilet and sinks.
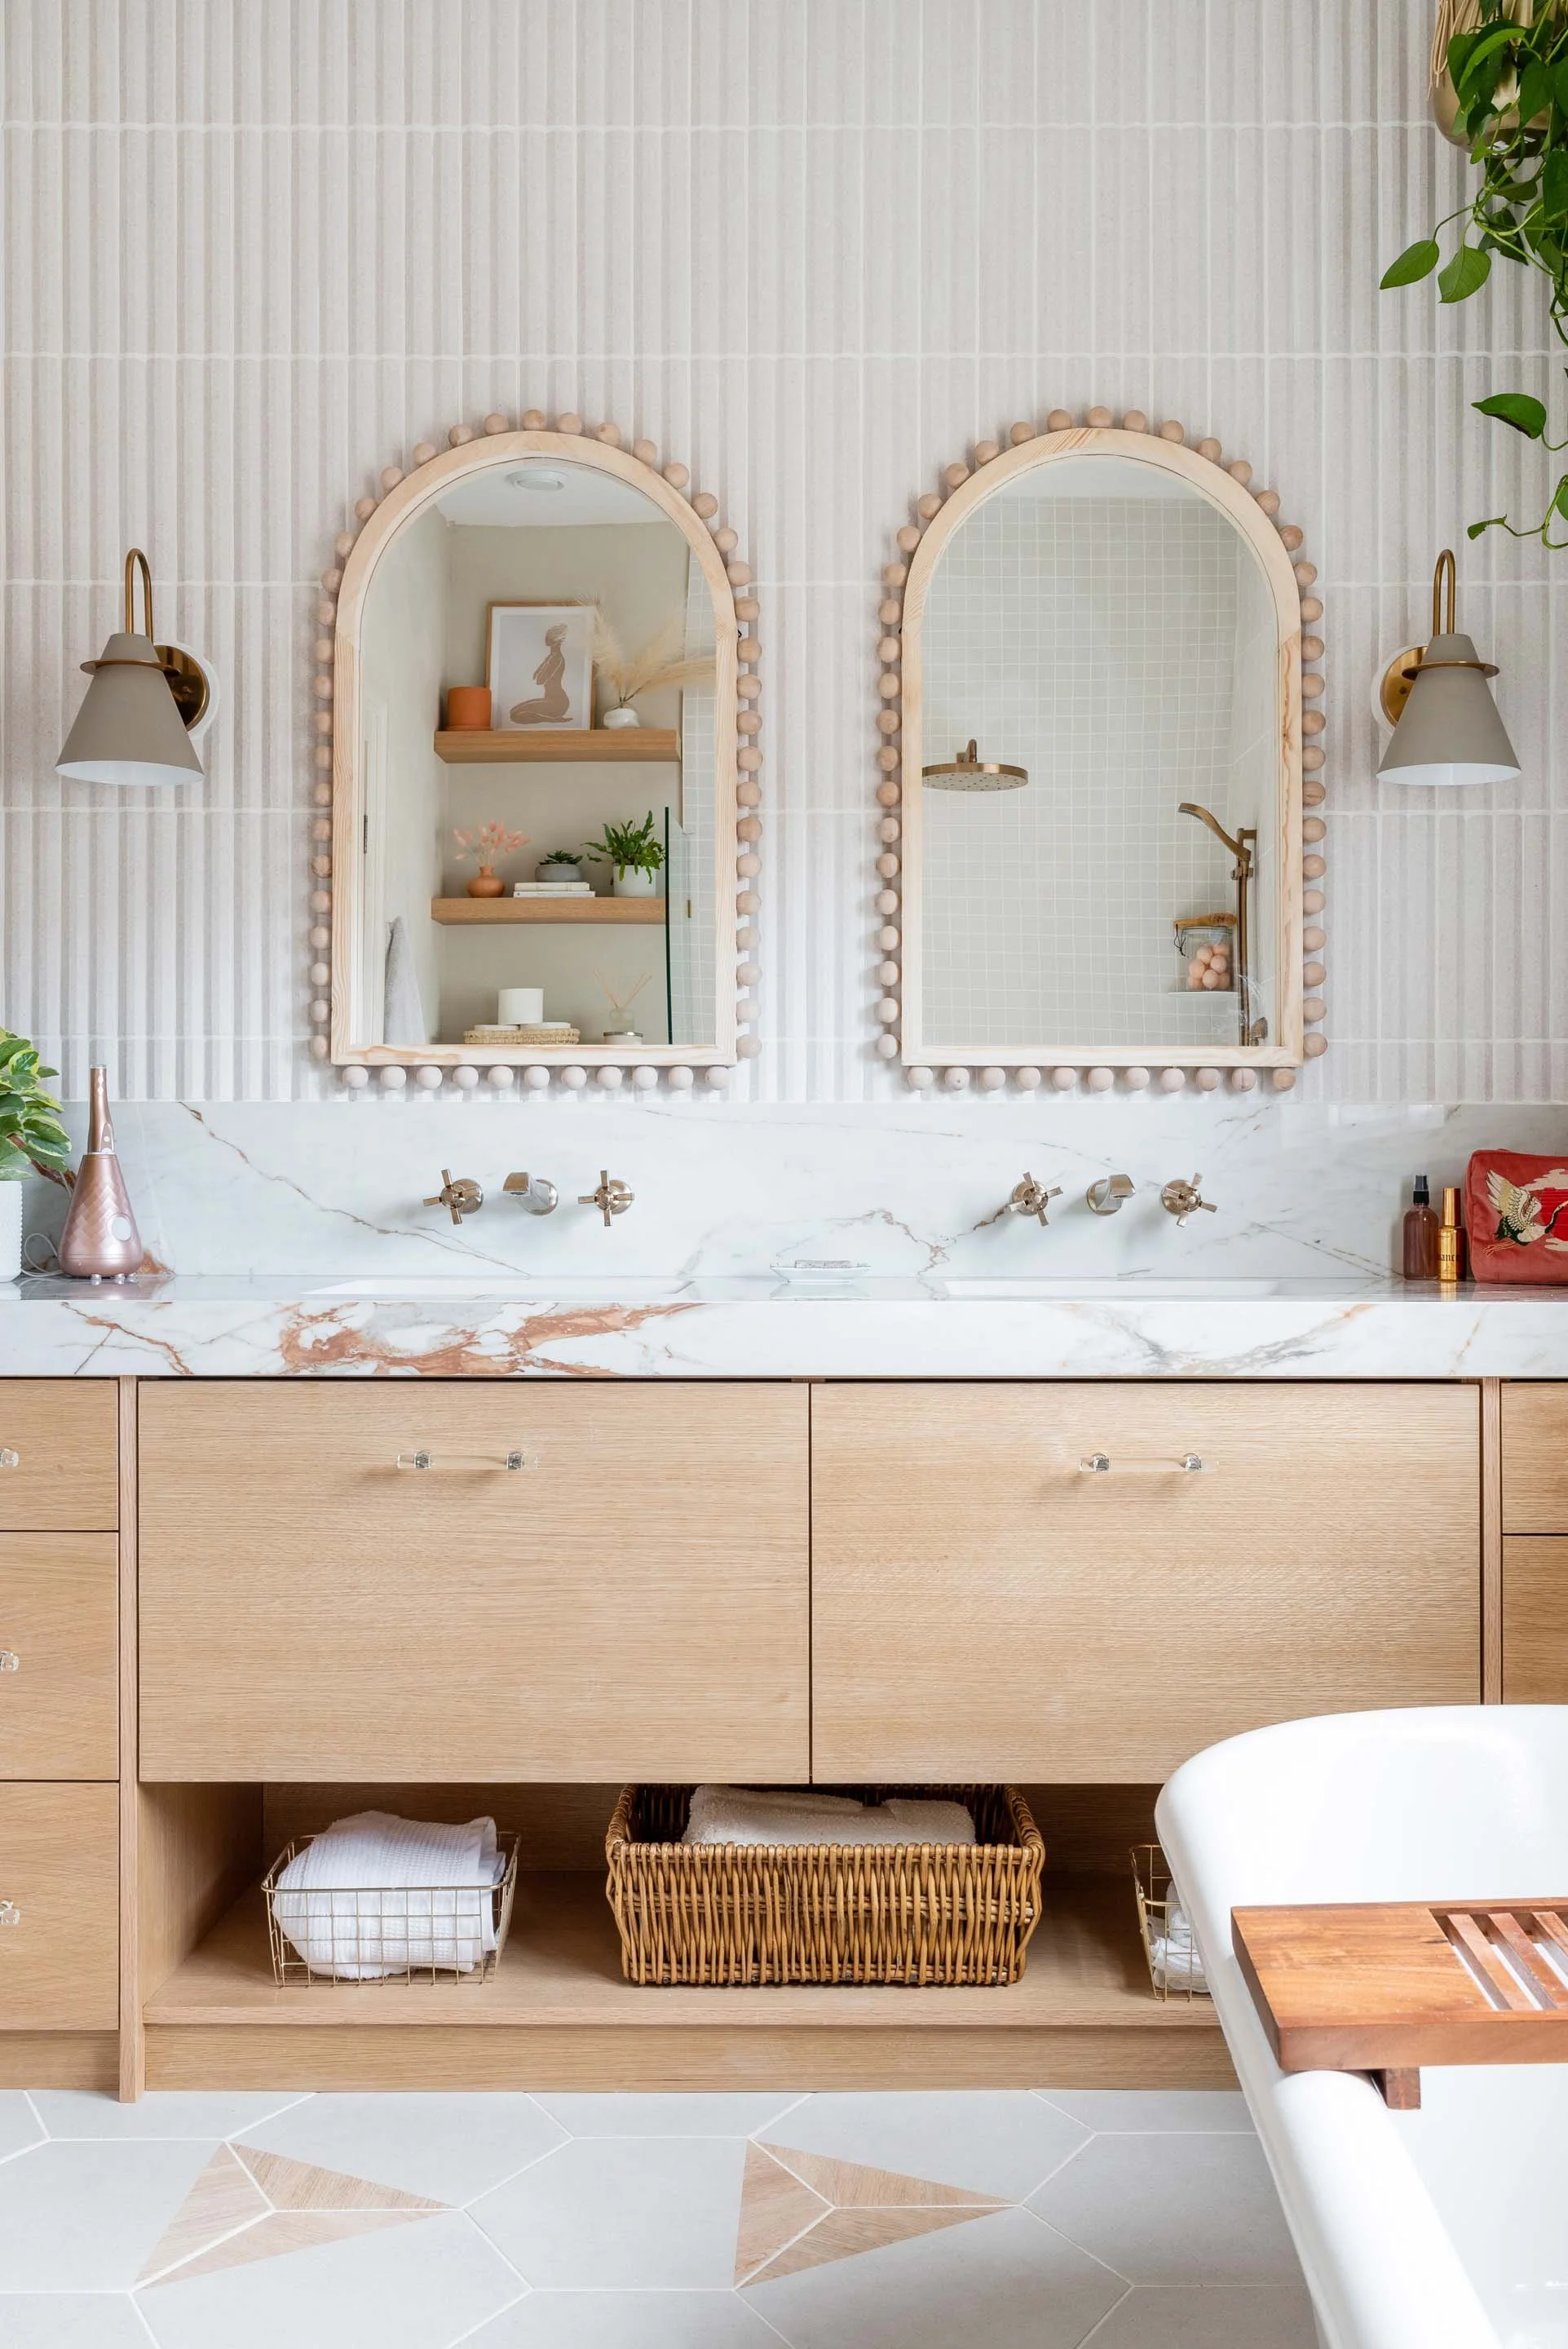
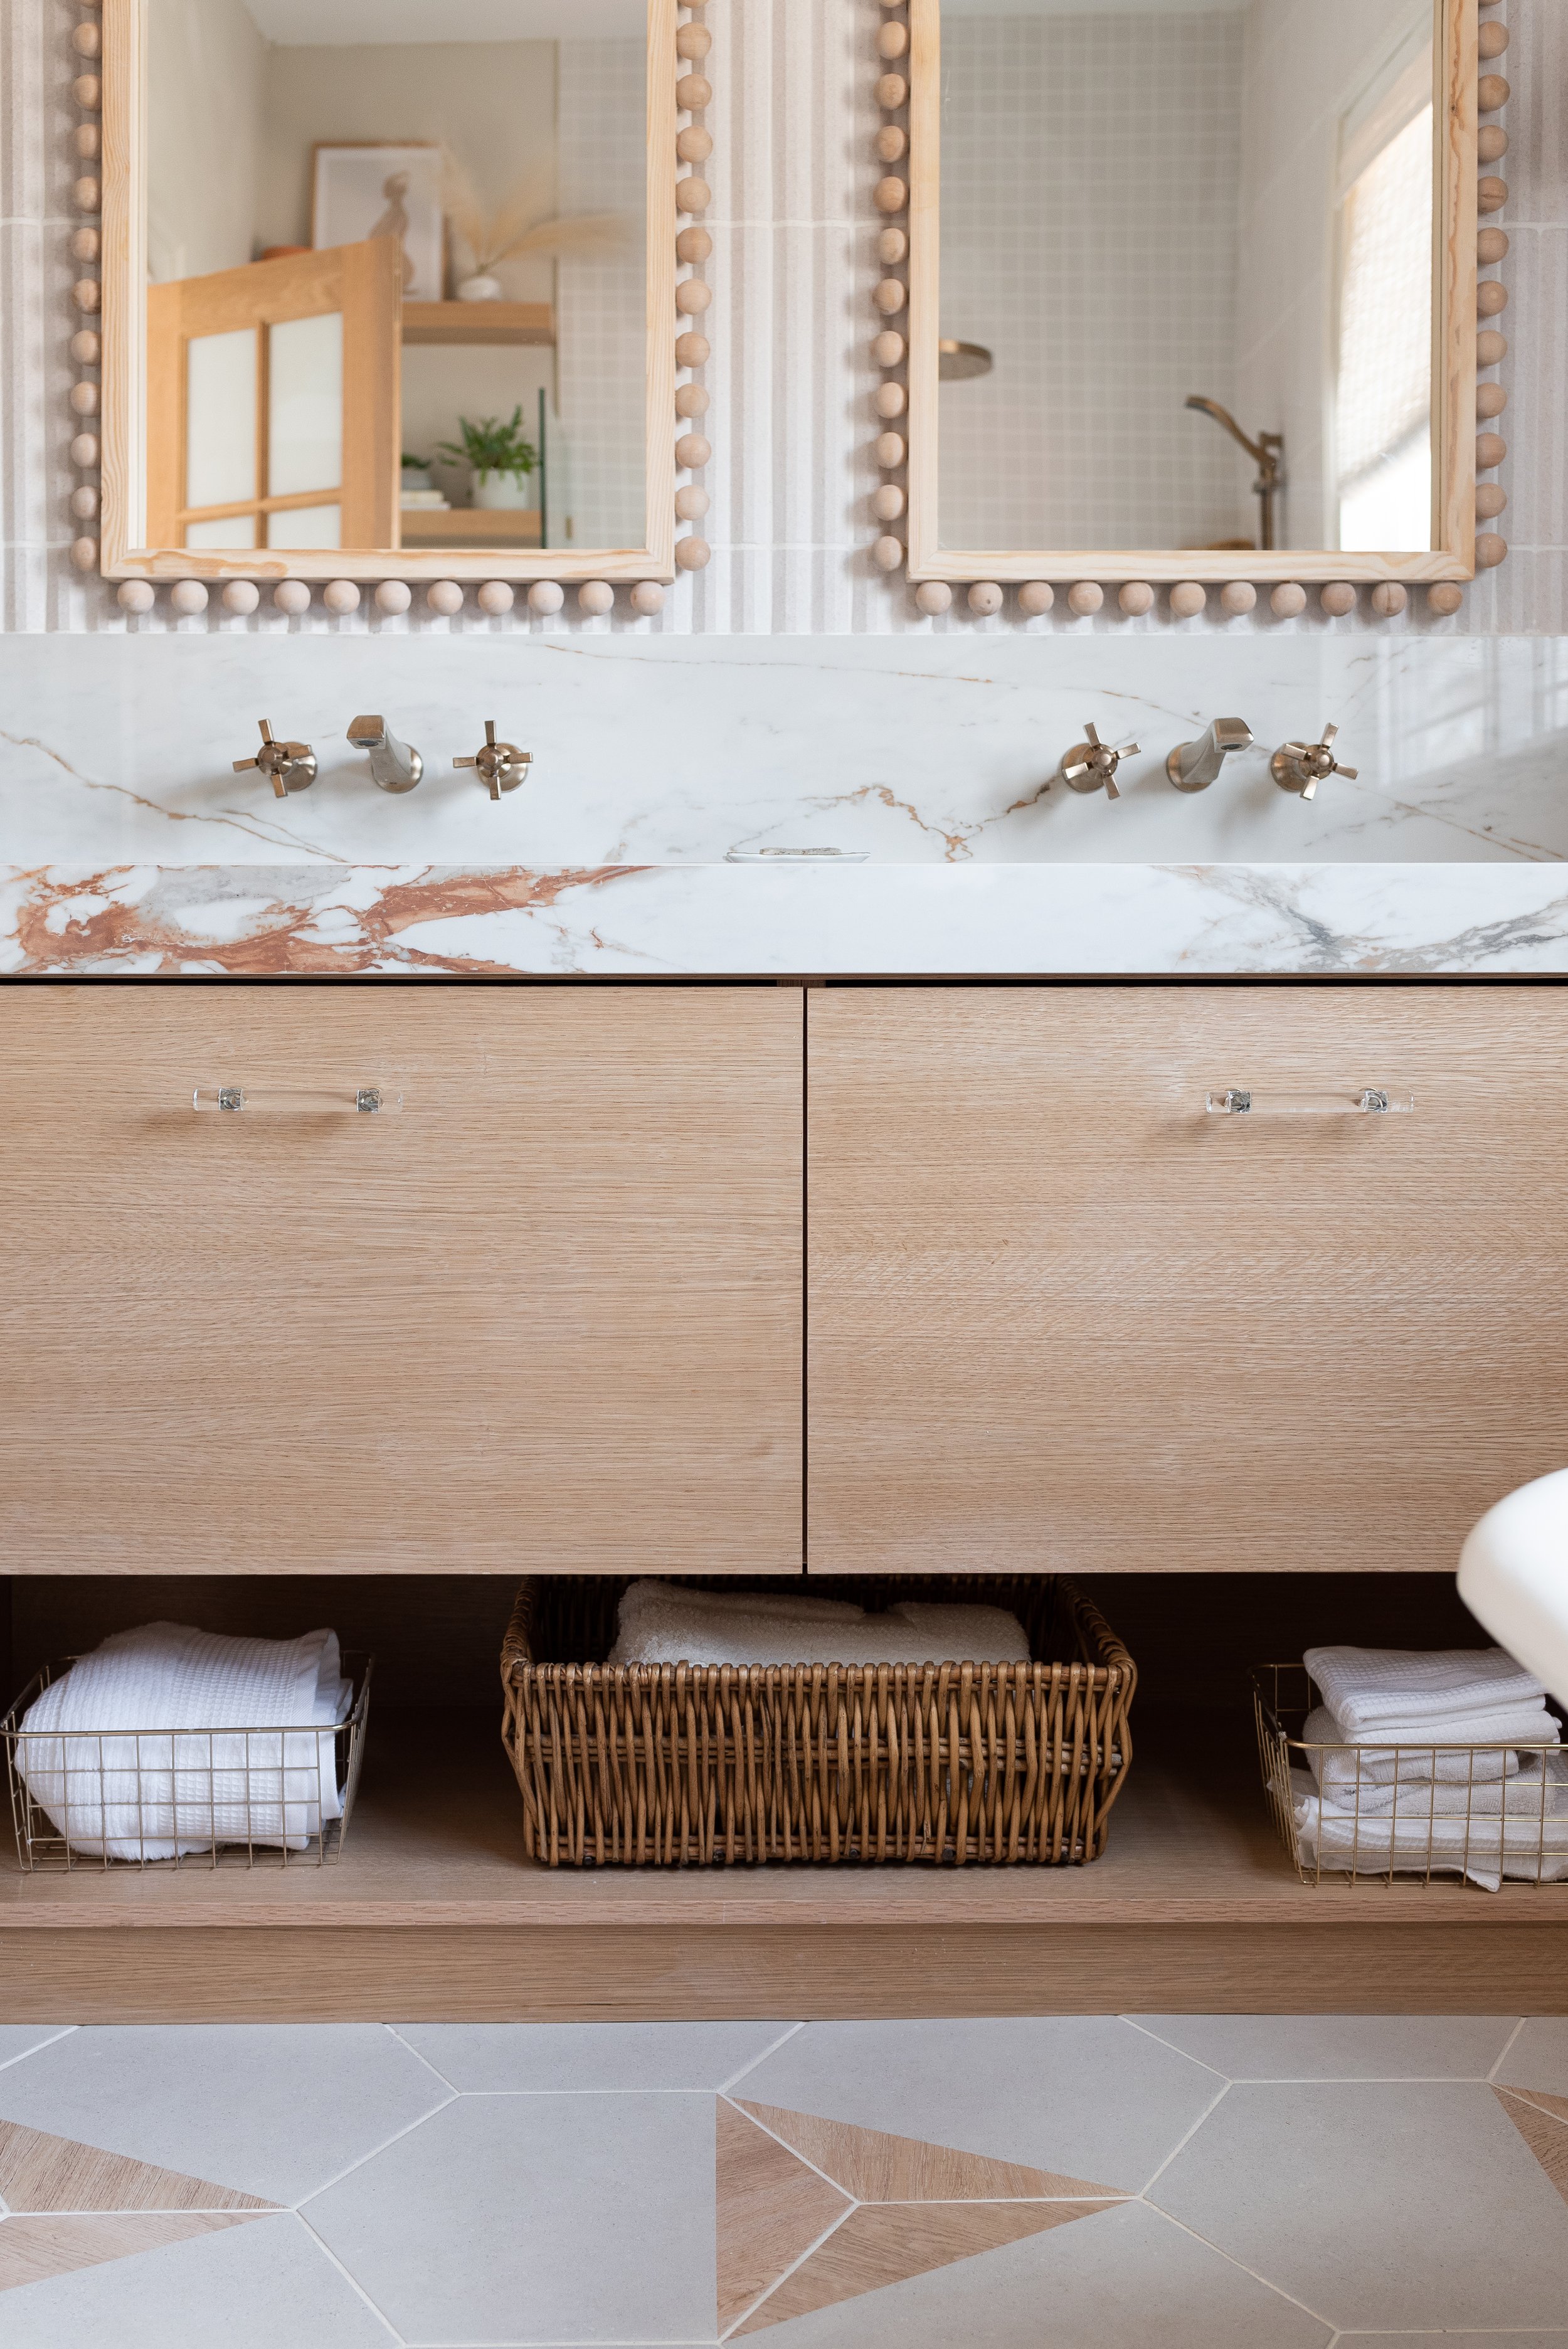
Custom double sink Vanity built with furniture grade oak plywood.
The interior of the clawfoot tub was in rough shape!
Then our next issue arose…. where to get the clawfoot tub refinished. I called around, asked my social media audience for leads, but kept striking out. Refinishing this tub was starting to be a real pain. With the tub interior and enamel in such rough shape, I started to look for alternative options. A new tub? A plastic insert? I decided to put a pin in it while I dealt with larger issues surrounding my renovation.
More issues popped up - of course they did! My new experienced tiler, said he could work with the texture of the stripes tile but was concerned about the large scale of hex tiles sloping to the drain of the curb-less shower. Too many cuts and raw edges would make it difficult and unsafe. He asked if I could pick a different tile for the shower floor…
Oh boy, this was really throwing a wrench in my design plans. Another tile? I was going for cohesion and throwing another tile into the mix wasn’t sitting well. Off to Wacky’s flooring I went, to take a look at their selection for floor and wall tile. If I could keep my tile selections to 3 instead of 4 I just might be able to pull off the look I wanted.
I settled on a simple square matte white tile for the shower wall and floor and hoped that running it from the floor to the ceiling might make it look intentional. My tiler was relieved when I brought back a 2x2 square tile for him to work with. So the artisan white tiles were on the cutting room floor and we were back on track with my bathroom renovation.
Small square tiles used on the shower floor flow up the wall right to the ceiling.
With the floor under control, my attention turned to the vanity. I started looking for off the rack options that might work in the space. I loved the solid wood vanities in my previous home, but my plumbing was set with the sinks specifically placed 29 inches from each other in the middle, so drawer banks could be on either side. There was nothing that would work with the perimeters that were set, so the only option was custom. I drew out my vision for the vanity and worked with my carpenter on the build details.
Completing the space a simple vanity cabinet designed by me and built custom by my carpenter.
We were able to pick up the furniture grade plywood I needed from Robert Bury, and Handy Harry started making the cuts and building the vanity. To finish off the cabinet we stained it with Nano defence (keeping the natural Oak look) and I selected the modern glass pull from Emtek.
While the vanity was being built, I selected my counter top. Wanting something unique with dramatic veining, I discovered the new Awake Stone from Dekton and wondered if it would be right for the room. With so much going on with the tile, floor, and vanity, was I overdoing it with the big bold stone pattern?
I decided to go with my gut instinct and just do it! I asked the manufacturer Living Stone to produce a chunky edge counter and a backsplash high enough to cover the plumbing and simplify the tile job. It worked! I loved the look! I think the Awake Stone was the exact amount of bold that I needed to really make this vanity pop!
After the vanity was complete and the countertops installed, the tilers came back to finish off the wall behind the mirrors with the textured Stripes Tile.
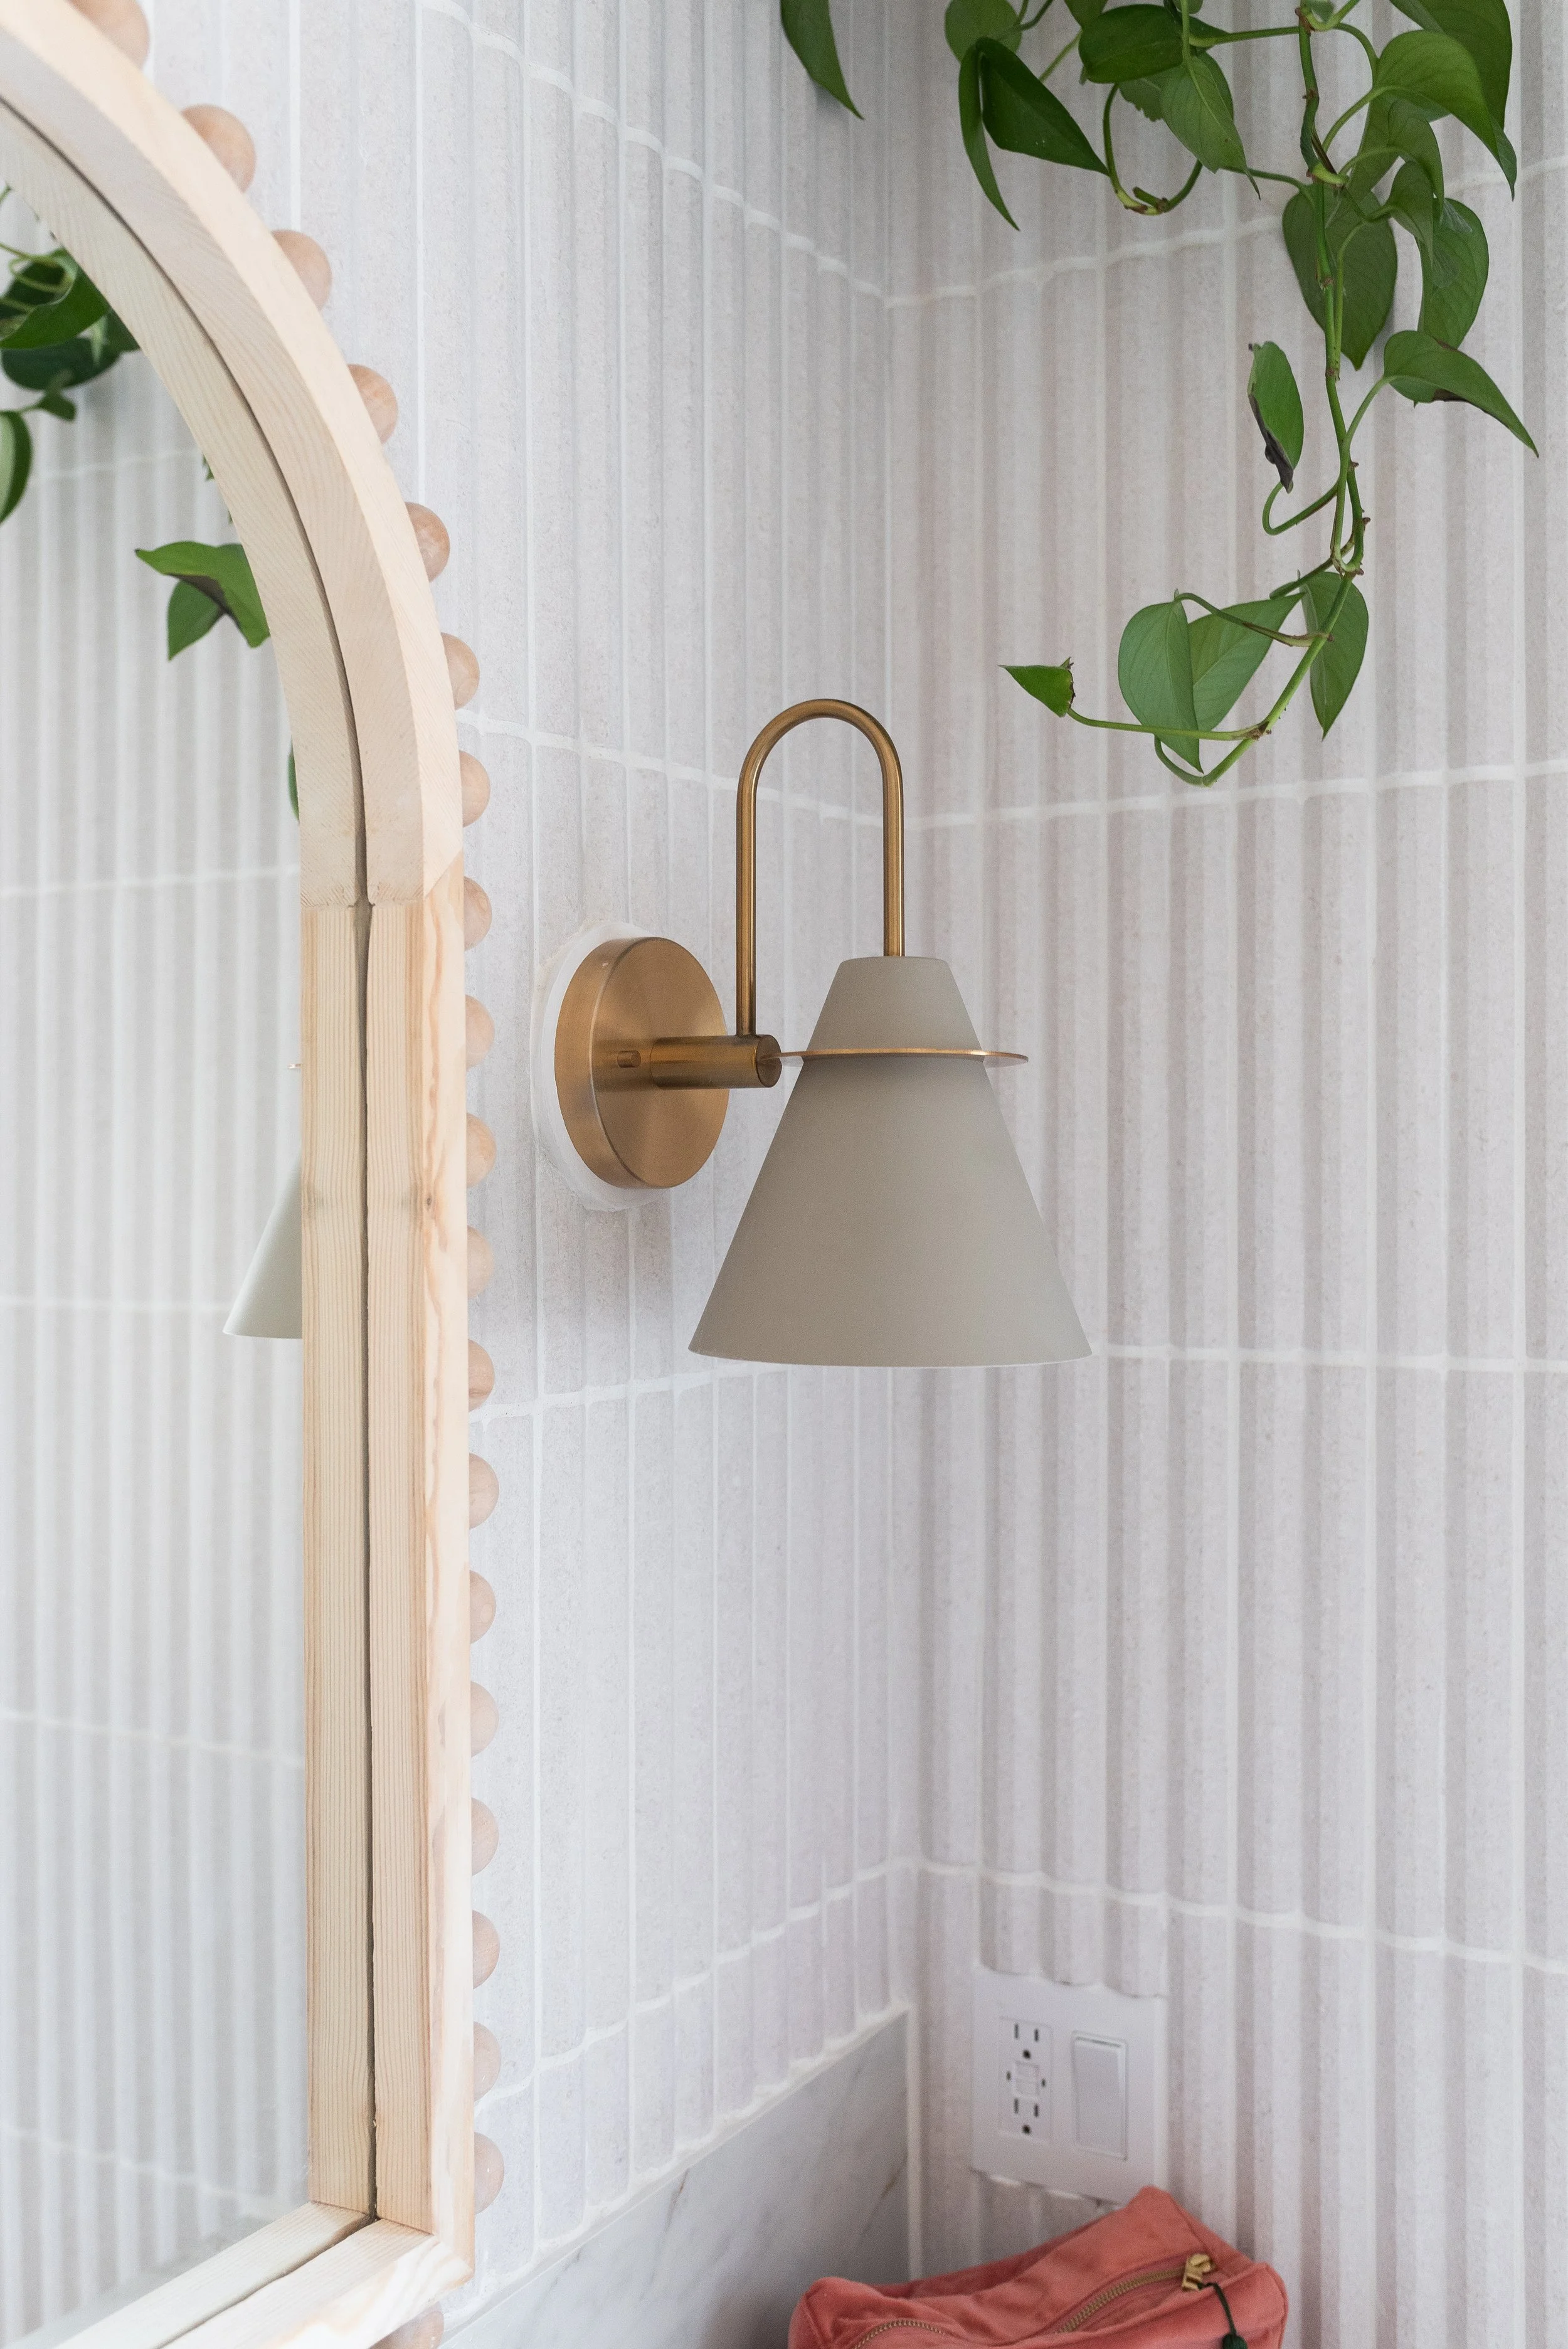
I hung the wood arched mirrors from Mercana that Lazy Boy in Halifax had ordered me, and all that was left before the big photo shoot was to find some sconces to go next to my mirrors and the right blind for the big window above the clawfoot tub.
The Talia Sconce from Kent was the perfect tone for the room.
I popped over to Kent to see what they might have in stock. I felt like I had a horse shoe around my neck when I found the Talia Sconce (only $109) hanging on the wall. It was just the right neutral colour palette with a touch of gold, perfect! But, ugh, they were out of stock and I needed them TODAY. The sales rep checked and another store had them in stock so I rushed over to snag two of the last ones - hooray!
While at Kent, I took a peek at the blinds available in store. There was a bamboo roll up shade of particular interest to me that came in 4 colour ways. I thought the white would make a lovely soft natural fibre for the bathroom window but the 60 Inch blind that was on the shelf was slightly large to be mounted to the the interior of the window. On the bright side, they were quite inexpensive (only $71.99) and after being quoted thousands of dollars for wooden shades like the windows on my main floor, I thought perhaps I could figure out a way to cut them to fit…they were wood after all.
As luck would have it, I did figure out a way to cut them. I used a pair of scissors to cut down the width, then used the chop saw to trim the wood binder at the top. I shortened them and secured the bottom ropes with a hot glue gun. After that, I glued a piece of sheer fabric liner onto the back. When it was time to install them, I ditched the hooks and staple gunned them right to the window trim. And there you have it, for under $100 coupled with a little elbow grease (and my DIY mom experience), I had the custom wooden blind look I wanted from the start.
The final look of my 1920 Clawfoot Tub under the large window with the wooden bamboo blind.
Last but not least I finally found a local business to refinish my Clawfoot Tub! Beautiful Baths came to my home, sanded down the interior and reglazed my tub for $1400. So worth it! If you ask me, they are true miracle workers!
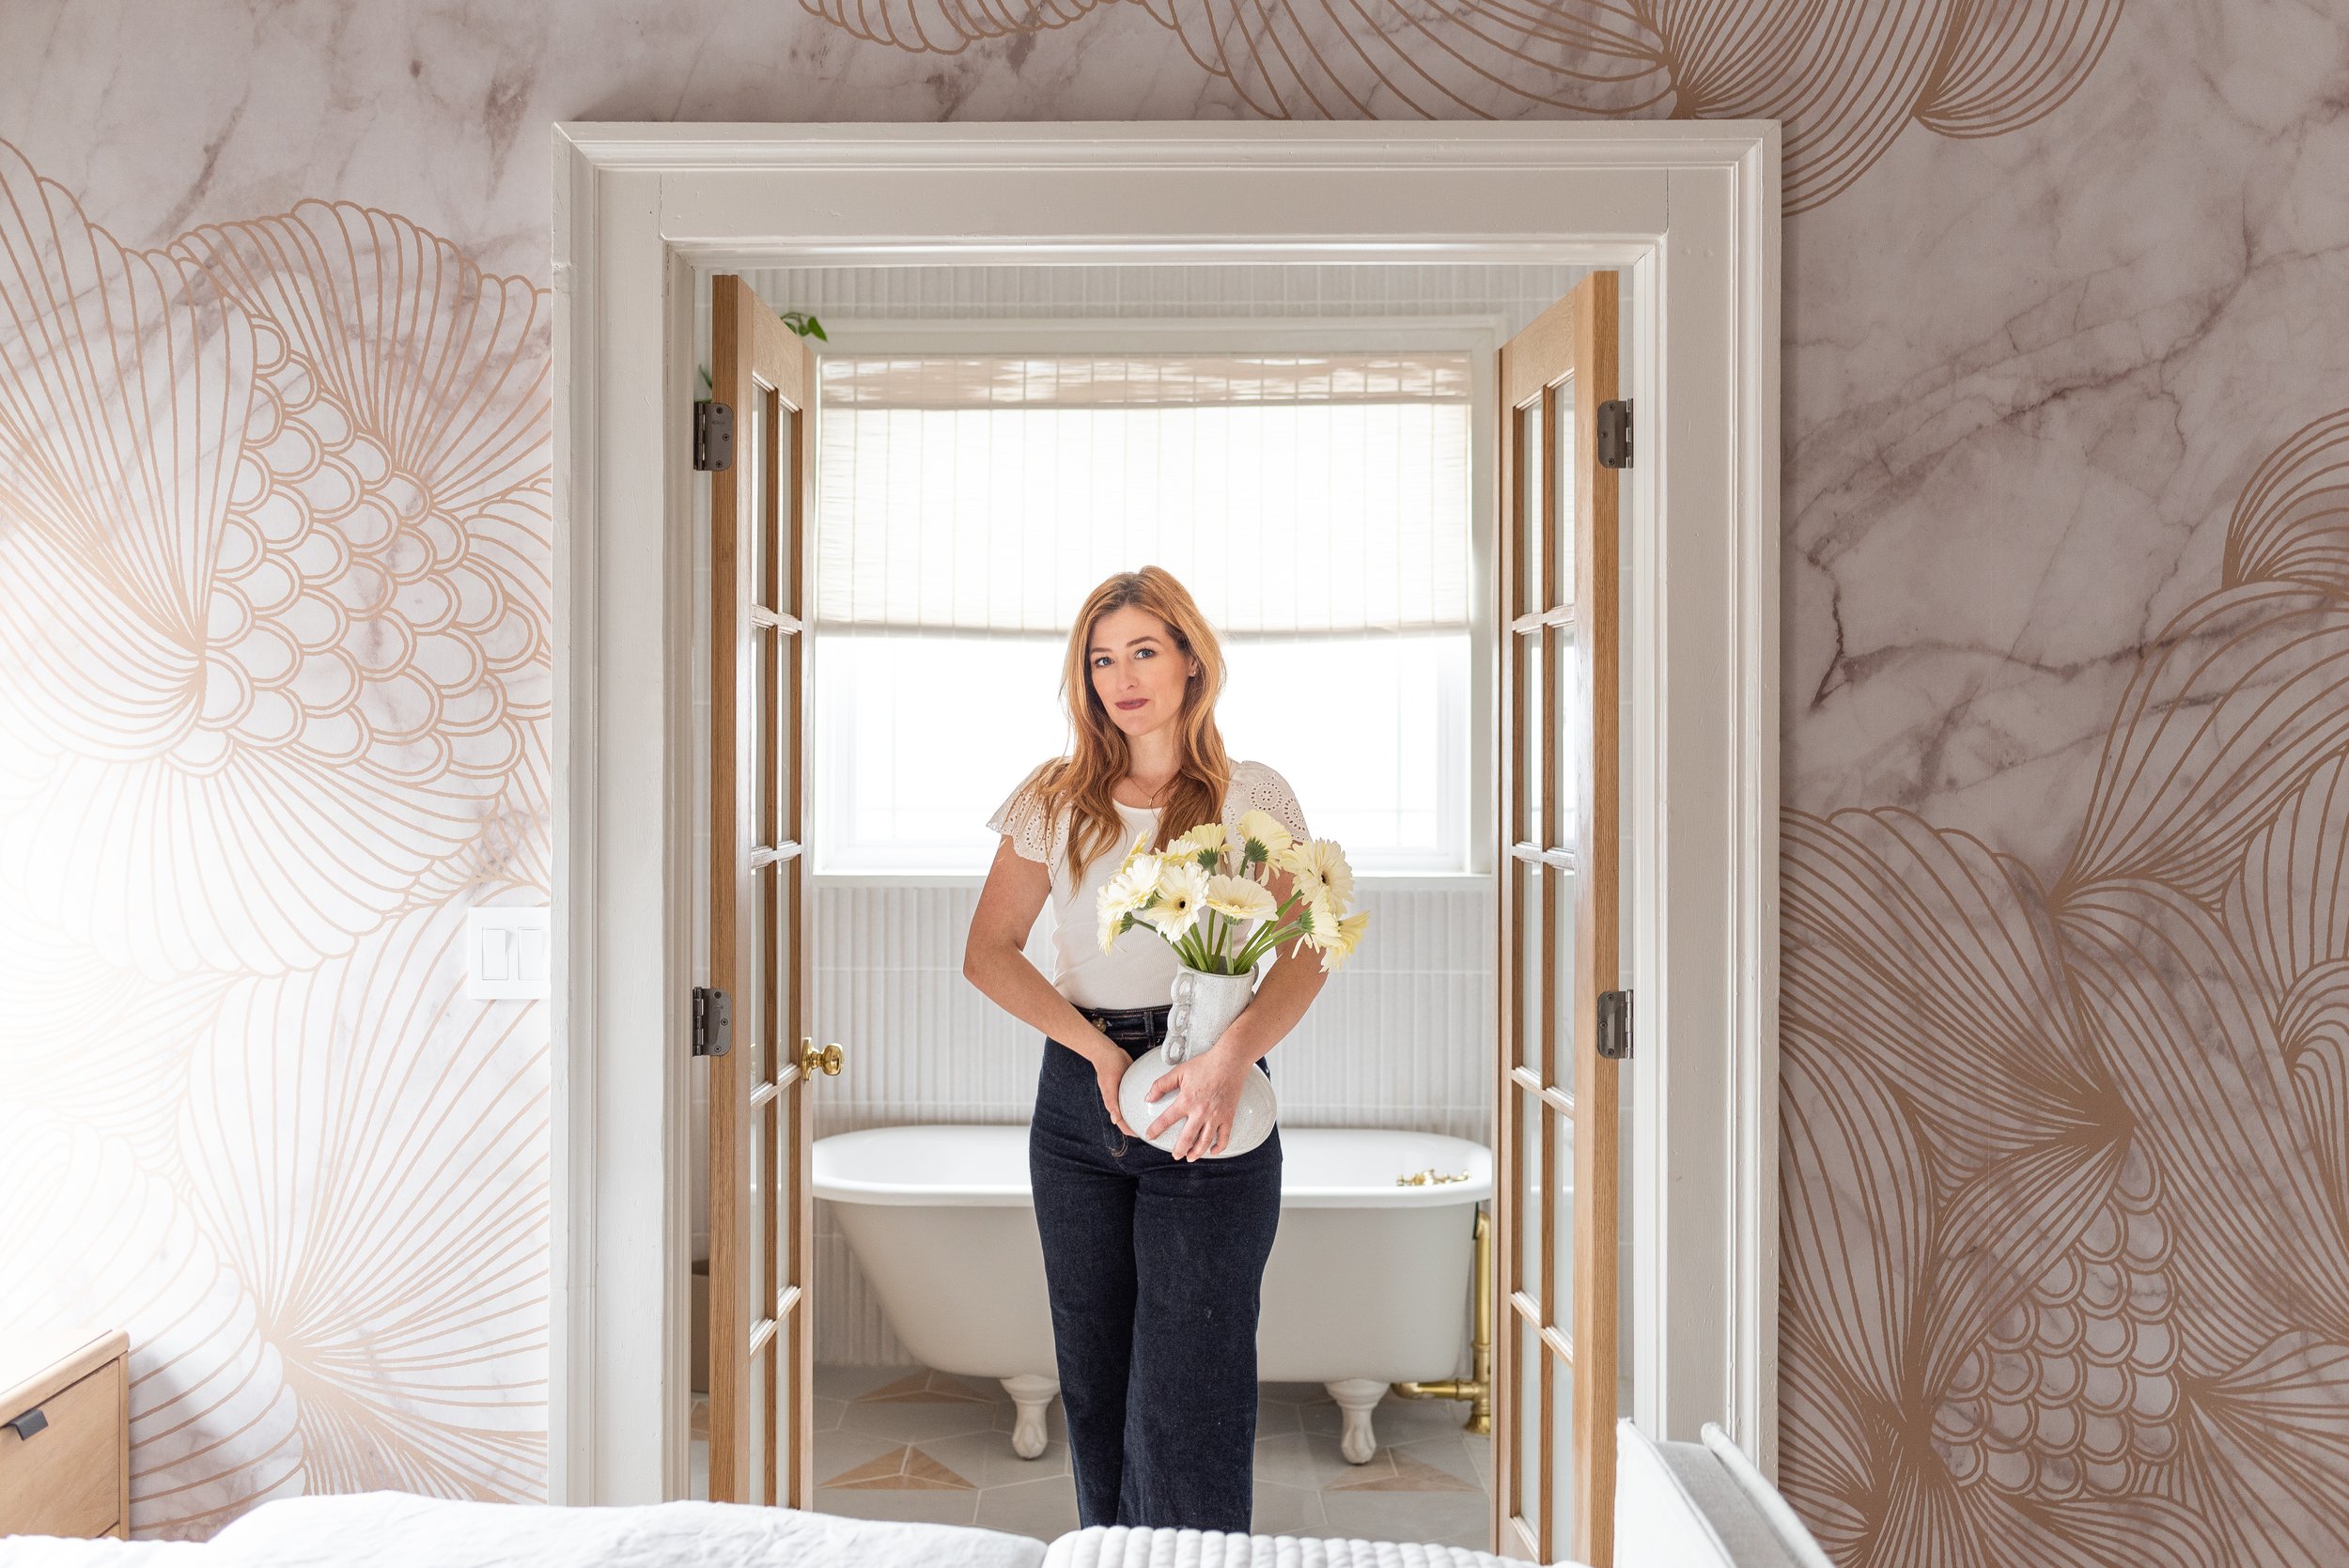
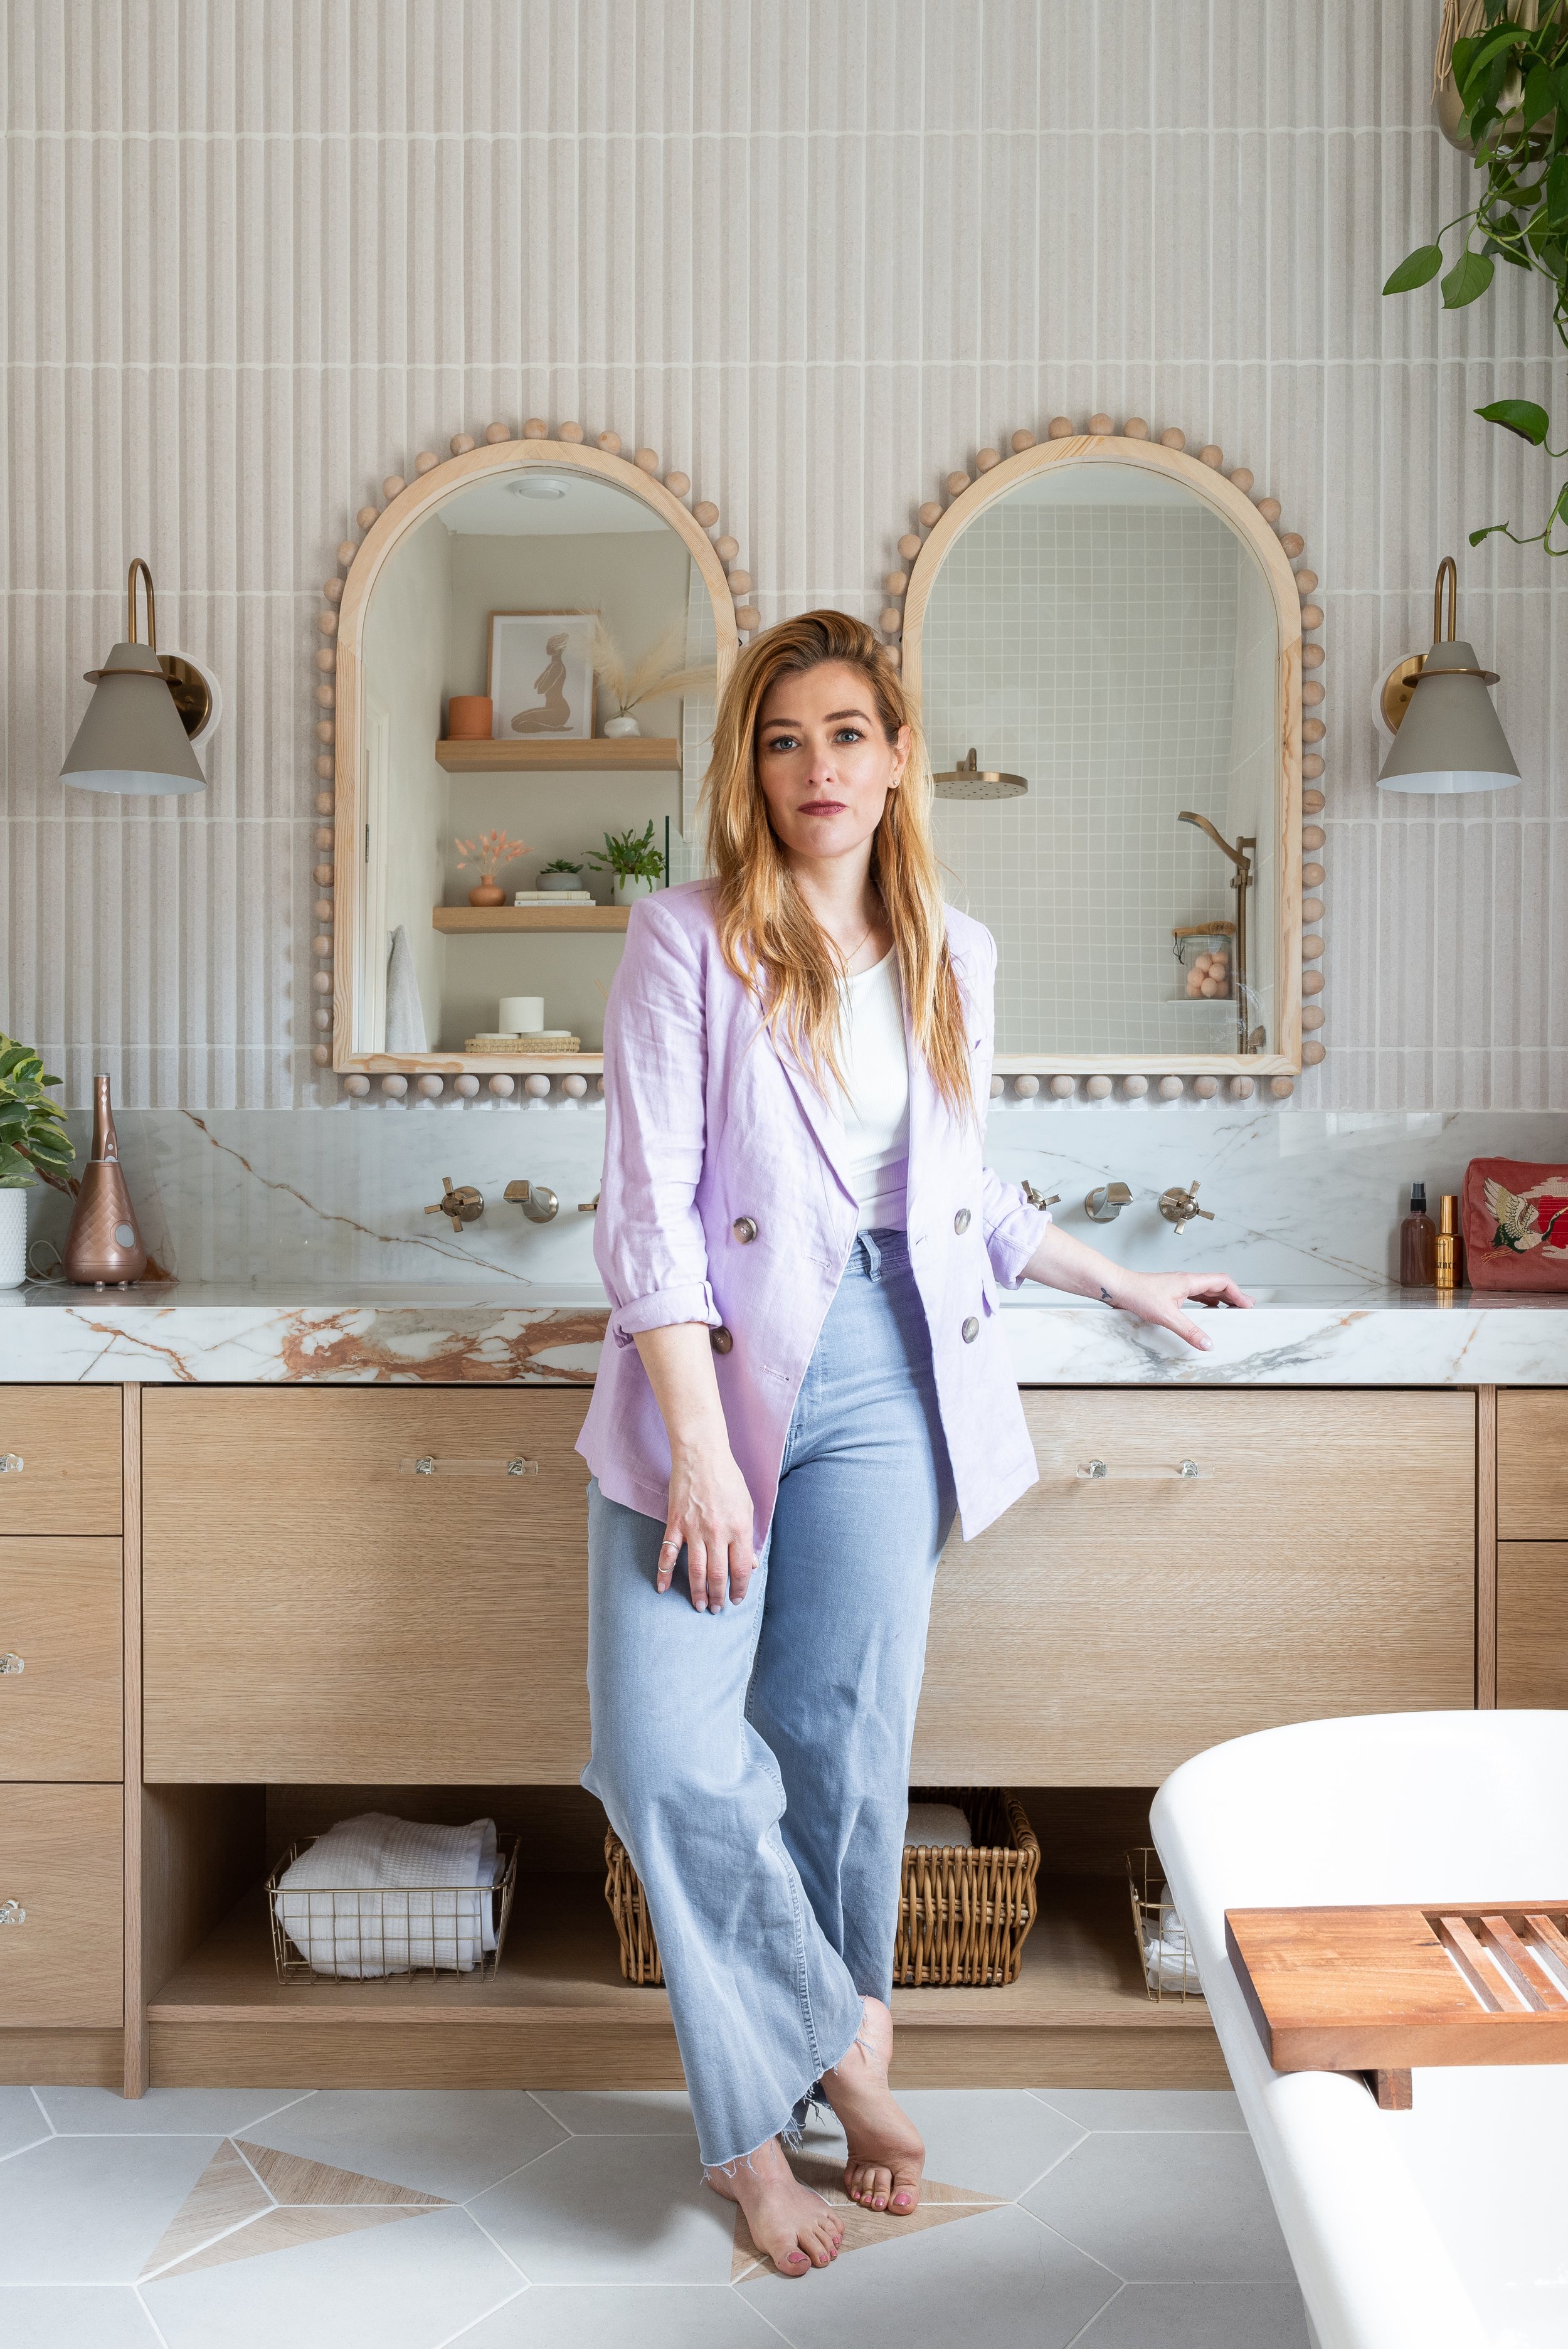
DIY MOM and designer Rebekah Higgs stands barefoot in her completed bathroom space.
So my bathroom is complete, a neutral haven away from the choas of the day. Let me know what you think of my design choices in the comments below! Feel free to share and pin my photos and content if you love it!
On the top of my renovation requirements: Having a cozy and comfortable living room space, to both host in and veg out on the couch.
La-Z-Boy Coronado couch product number 610-685 colour B166302
Chair and a half 655-685 colour C161332
When a guest walks into my home, I want them to feel totally at ease, welcome and able to relax. When I set out on a new design journey I always prioritize this. This old home needed a major facelift and a renovation like this is not for the faint of heart. I made the decision to open up my main floor and create a large open concept living area. This would brighten up the home allowing the light to travel more freely and create a great space for hosting events, gatherings and dinner parties, which I love to do!
However open concept spaces do come with some challenges, and I needed to create various spaces within the open layout for cozy corners, nesting and intimate conversations. A new home with a new foot print also meant that I needed new living room furniture that would work with the new square footage.
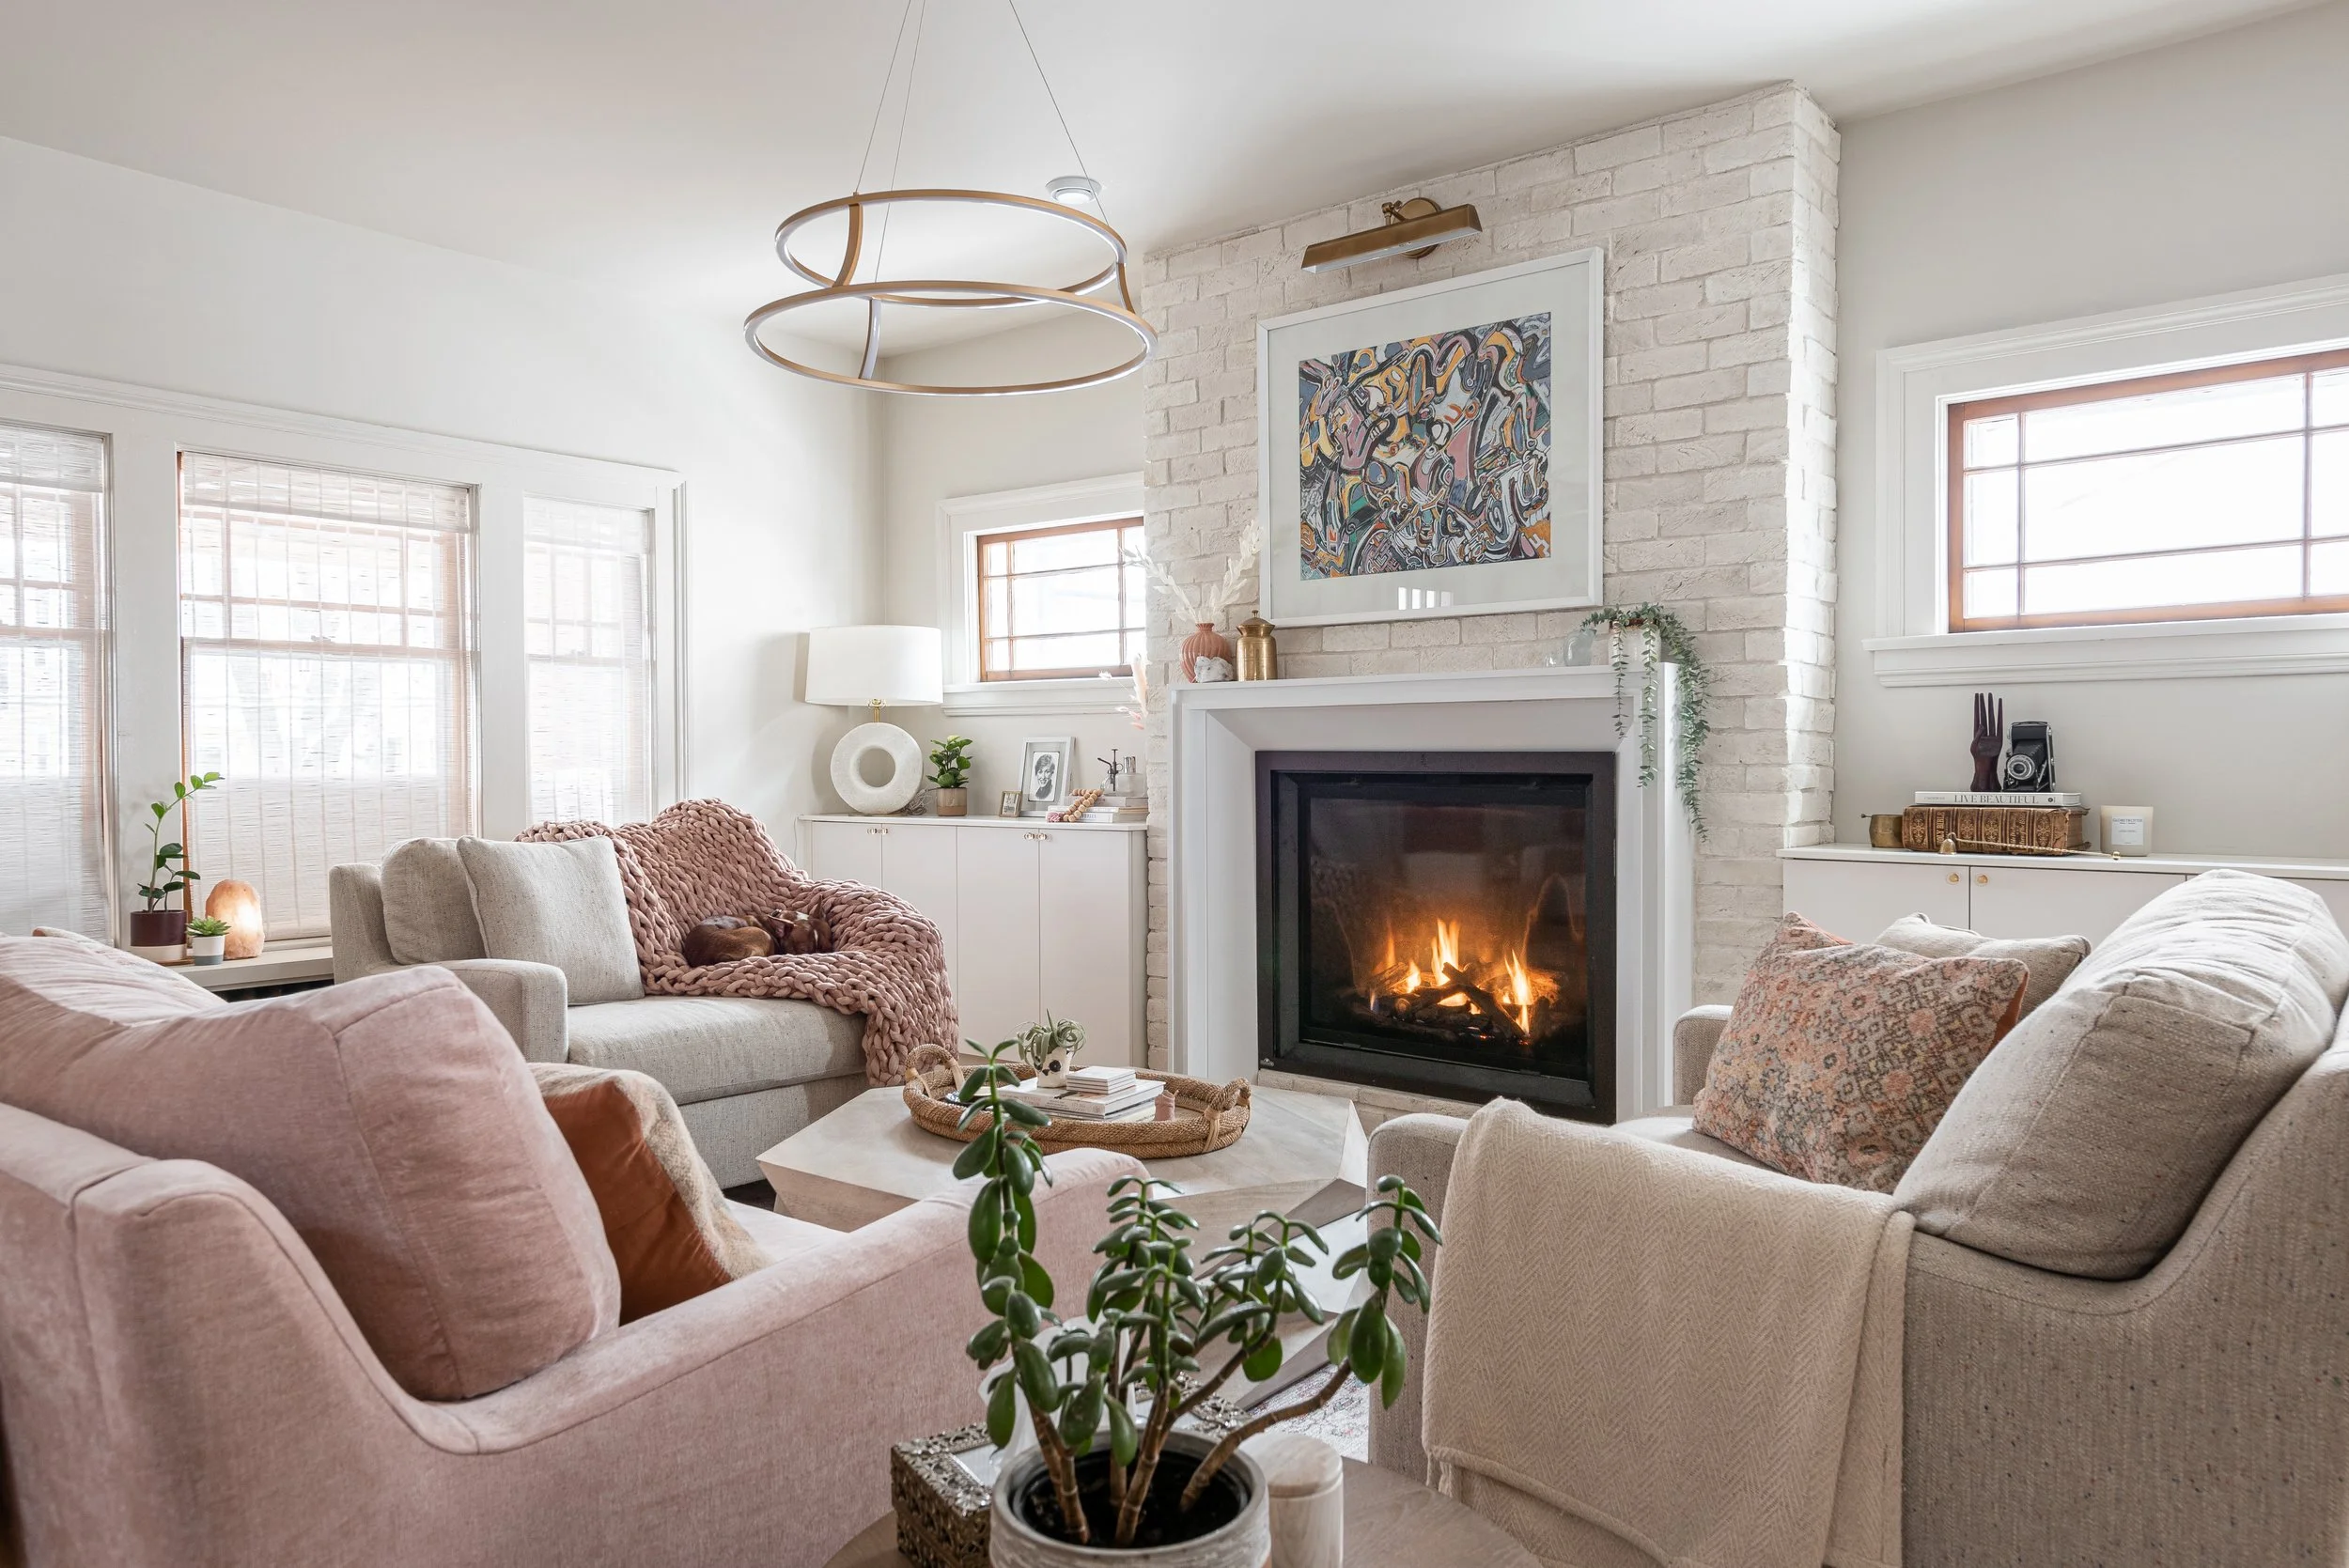
I had limited space within the allotted living room area to work with. My home is 27 feet wide and the visual centre of the space would be a large gas fireplace, with hand pressed canvas bricks and a classic mantle. All in all I was allowing for the living room furniture to take up approximately 11x14 feet of the main floor area.
I’ve always had the best luck finding living room furniture I love at La-Z-Boy. La-Z-Boy is not just your grandfather’s recliner. They have a huge selection of all varieties of furniture, and you can’t beat the longevity and quality of these pieces.
My initial thought, when designing the room was a 3 seater couch with two chairs on either side of the coffee table facing toward the fireplace. But no matter how hard I tried this design was not working… it was feeling forced and tight. I was thrilled when the design team at La-Z-Boy recommended I go with two of the Coronado chair & a half on either side of my coffee table, rather then being stuck with my initial vision of two and two.
The design team at La-Z-Boy Halifax was also able to show me a 3D rendering of what my space would look like with the Coronado Chairs and Sofa. This was extremely helpful and put my mind at ease. When I was able to look at a visual rendering of the room how it would flow, and the walking space for entering and exciting the living room, I knew going in this direction was the right decision.
So my decision was made, I would go with a 3 seater couch and two chair & a half from the Coronado line.
Next up, it was time to select my fabrics. All La-Z-Boy furniture is customized and made to order. As someone who loves pink and has many blush pink home accents, I loved the idea of using the pink velour fabric (B166302) on one of the pieces. I also found a lovely neutral fabric with small colour speckles (C161332) in it that suited the space, my decor style and was dog friendly! As you can see from the photos it’s impossible to keep my pup off these super cozy seats. With the big fireplace and the armchairs, this room is by far her favourite place to hang out!
I was able to play around in the software with the La-Z-Boy designer with various fabric selections until I made my final decision, opting for the couch to be pink and the two chair & a half in the natural tones. Their design services are free, you can get the room of your dreams and have fun doing it! Book a virtual, home or in store consult today through this link!
Soft pastel tones and neutrals sit beautifully in this home. Keep scrolling to the bottom of this blog to see all the before pictures. You won’t believe how much brighter it feels in our home!
Coronado Sofa and Chairs from LAZBOY Halifax
Because La-Z-Boy also has tons of home decor items to shop from, I was also able to order my beautiful layered Surya rugs (AML2326, JS2) , side tables (68523) and this gorgeous hexagon coffee table (69542) from Mercana. If you want to get the look, call and book an appointment or head over to La-Z-Boy Halifax and get them to show you what DIY MOM has!
The room is a perfect combination of high design and comfort. The whole family loves this room, and we love our LAZBOY furniture. The quality, comfort, customizability and endless options are a designers dream come true. I love how timeless and classic this room feels.
Check out the before pictures to get a scope of how I brought this home back to life.
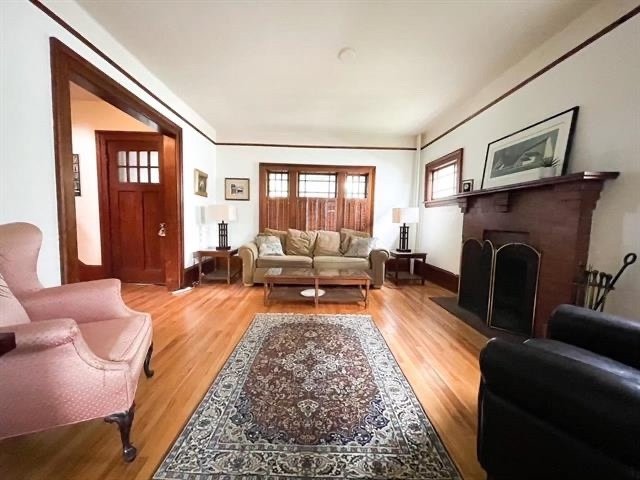
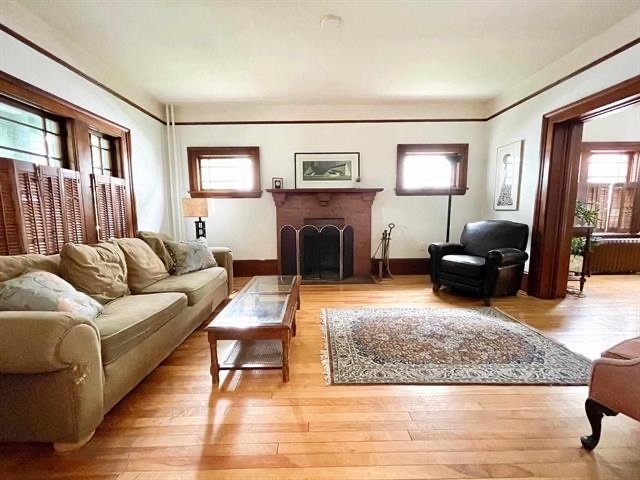
The previous space did not have that cozy welcoming feeling. The furniture and layout makes a huge difference in how the room feels.
Now it’s your turn to let me know what you think! Drop a comment in below with your thoughts on my living room transformation!
What’s one thing a bedroom needs? A bed, definitely. Forever the centrepiece of these self-titled rooms, beds act as a comfortable place to rest while doubling as great decorative pieces. Often, beds set the standards for the rest of the rooms decor. However finding an affordable piece of art to lounge over your mattress can be quite challenging. Purchasing even a simple duvet cover from a retailer could cost a fortune, regardless of the quality and material. Well I’m here to tell you to cut out the middle man, and DIY. Duvet It Yourself.
During my recent Attic renovation, I decided to design and create my own pillows and bedding for the cubby beds in the space. (The above photo is the final look). On my last blog I shared about how I made round pillows with pom pom’s. Today I am sharing the process of making hand painted lumbar pillows with an invisible zipper. Once you know how to insert an invisible zipper, you can sew all kinds of pillows and blankets.
This DIY Piñata Is A Fun and Creative Way to Help “Beat” The Coronavirus
The times are in fact, a-changin’. I must admit that the Covid pandemic has proven difficult to navigate. Being a self-employed, single mother naturally comes with it’s own set of challenges. Throw a quarantine into the mix and then suddenly I need to be a teacher and full-time entertainer on top of it all! I have always had a profound respect and admiration for our school teachers and child care providers, however over the past few weeks, that appreciation has grown leaps and bounds. Finding innovative ways to educate Lennon while maintaining her interest (especially while being surrounded by the temptation of her toys…) was quite the conundrum. Upon some reflection, I decided to teach Lennon the best way that I knew how: DIY Crafts!
Learning doesn’t always have to be sit down, do your work, study and memorize. Sometimes learning can be a little more tactile and hands-on. For example: This Coronavirus Piñata that Lennon and I made for her (quarantine) birthday. Let’s call it Chemistry, Science and Art class all mixed into one dynamic lesson! So let’s gather our materials and get ready to get a little messy with this Piñata DIY.
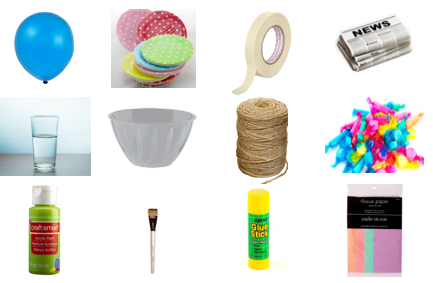
SUPPLIES
Most of these supplies you will likely already have around your house!!
BALLOON
PAPER PLATES
MASKING TAPE
NEWSPAPER
WATER
BOWL (large enough to hold piñata)
TWINE/STRING
CANDY
GREEN PAINT AND BRUSH
GLUE STICK
TISSUE PAPER
DIRECTIONS
STEP 1.
Blow up your balloon and tie a knot at the base.
STEP 2.
Cut a paper plate into quarters (pizza shaped pieces).
Step 3.
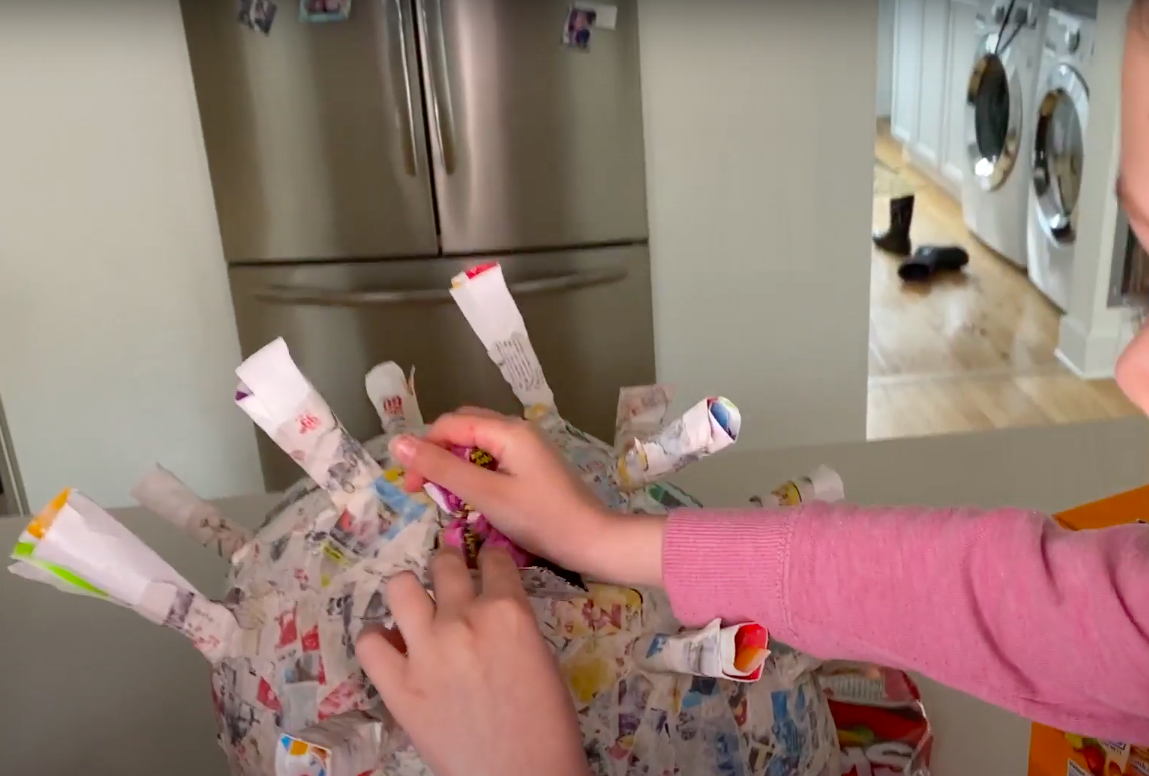
Roll the paper plate pieces into cones, tape them so they remain in this shape, and cut one-inch strips at the bottom of the cone.
Step 4.
Flare out the strips and tape them to the balloon.
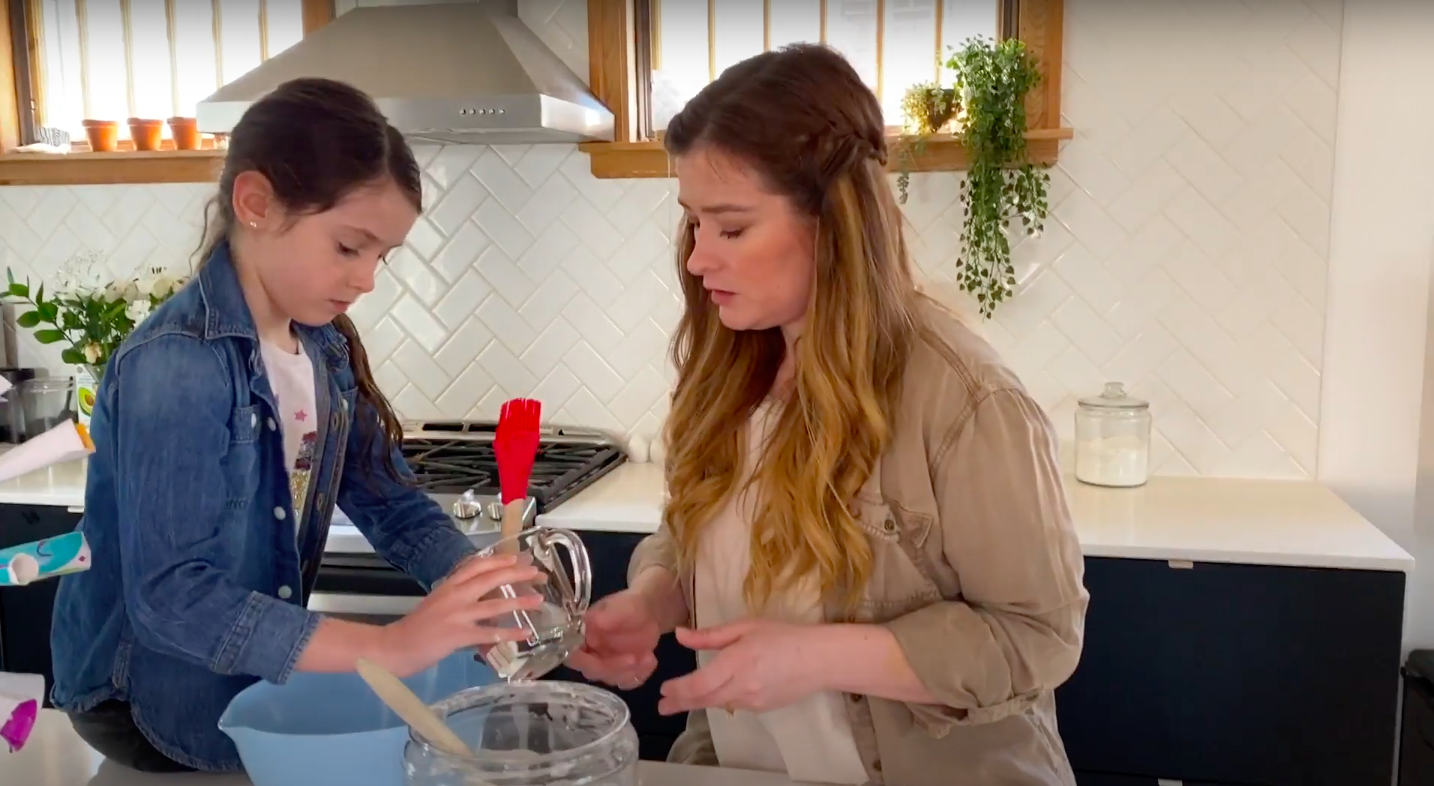
STEP 5.
Make the paper mache with equal parts water and flour, then mix.
STEP 6.
Tear your newspaper into strips and coat them in the paper mache mixture. Layer them onto your balloon in different directions smoothing out any bubbles.
STEP 7.
Let the paper mache dry overnight. Once dry, cut a small flap in order to put the candy in the pinata.
STEP 8.
Stuff the pinata with candy!
STEP 9.
Using the twine, tie a knot around the balloon leaving some excess to allow the pinata to hang.
STEP 10.
Paper mache over the twine to keep it in place.
STEP 11.
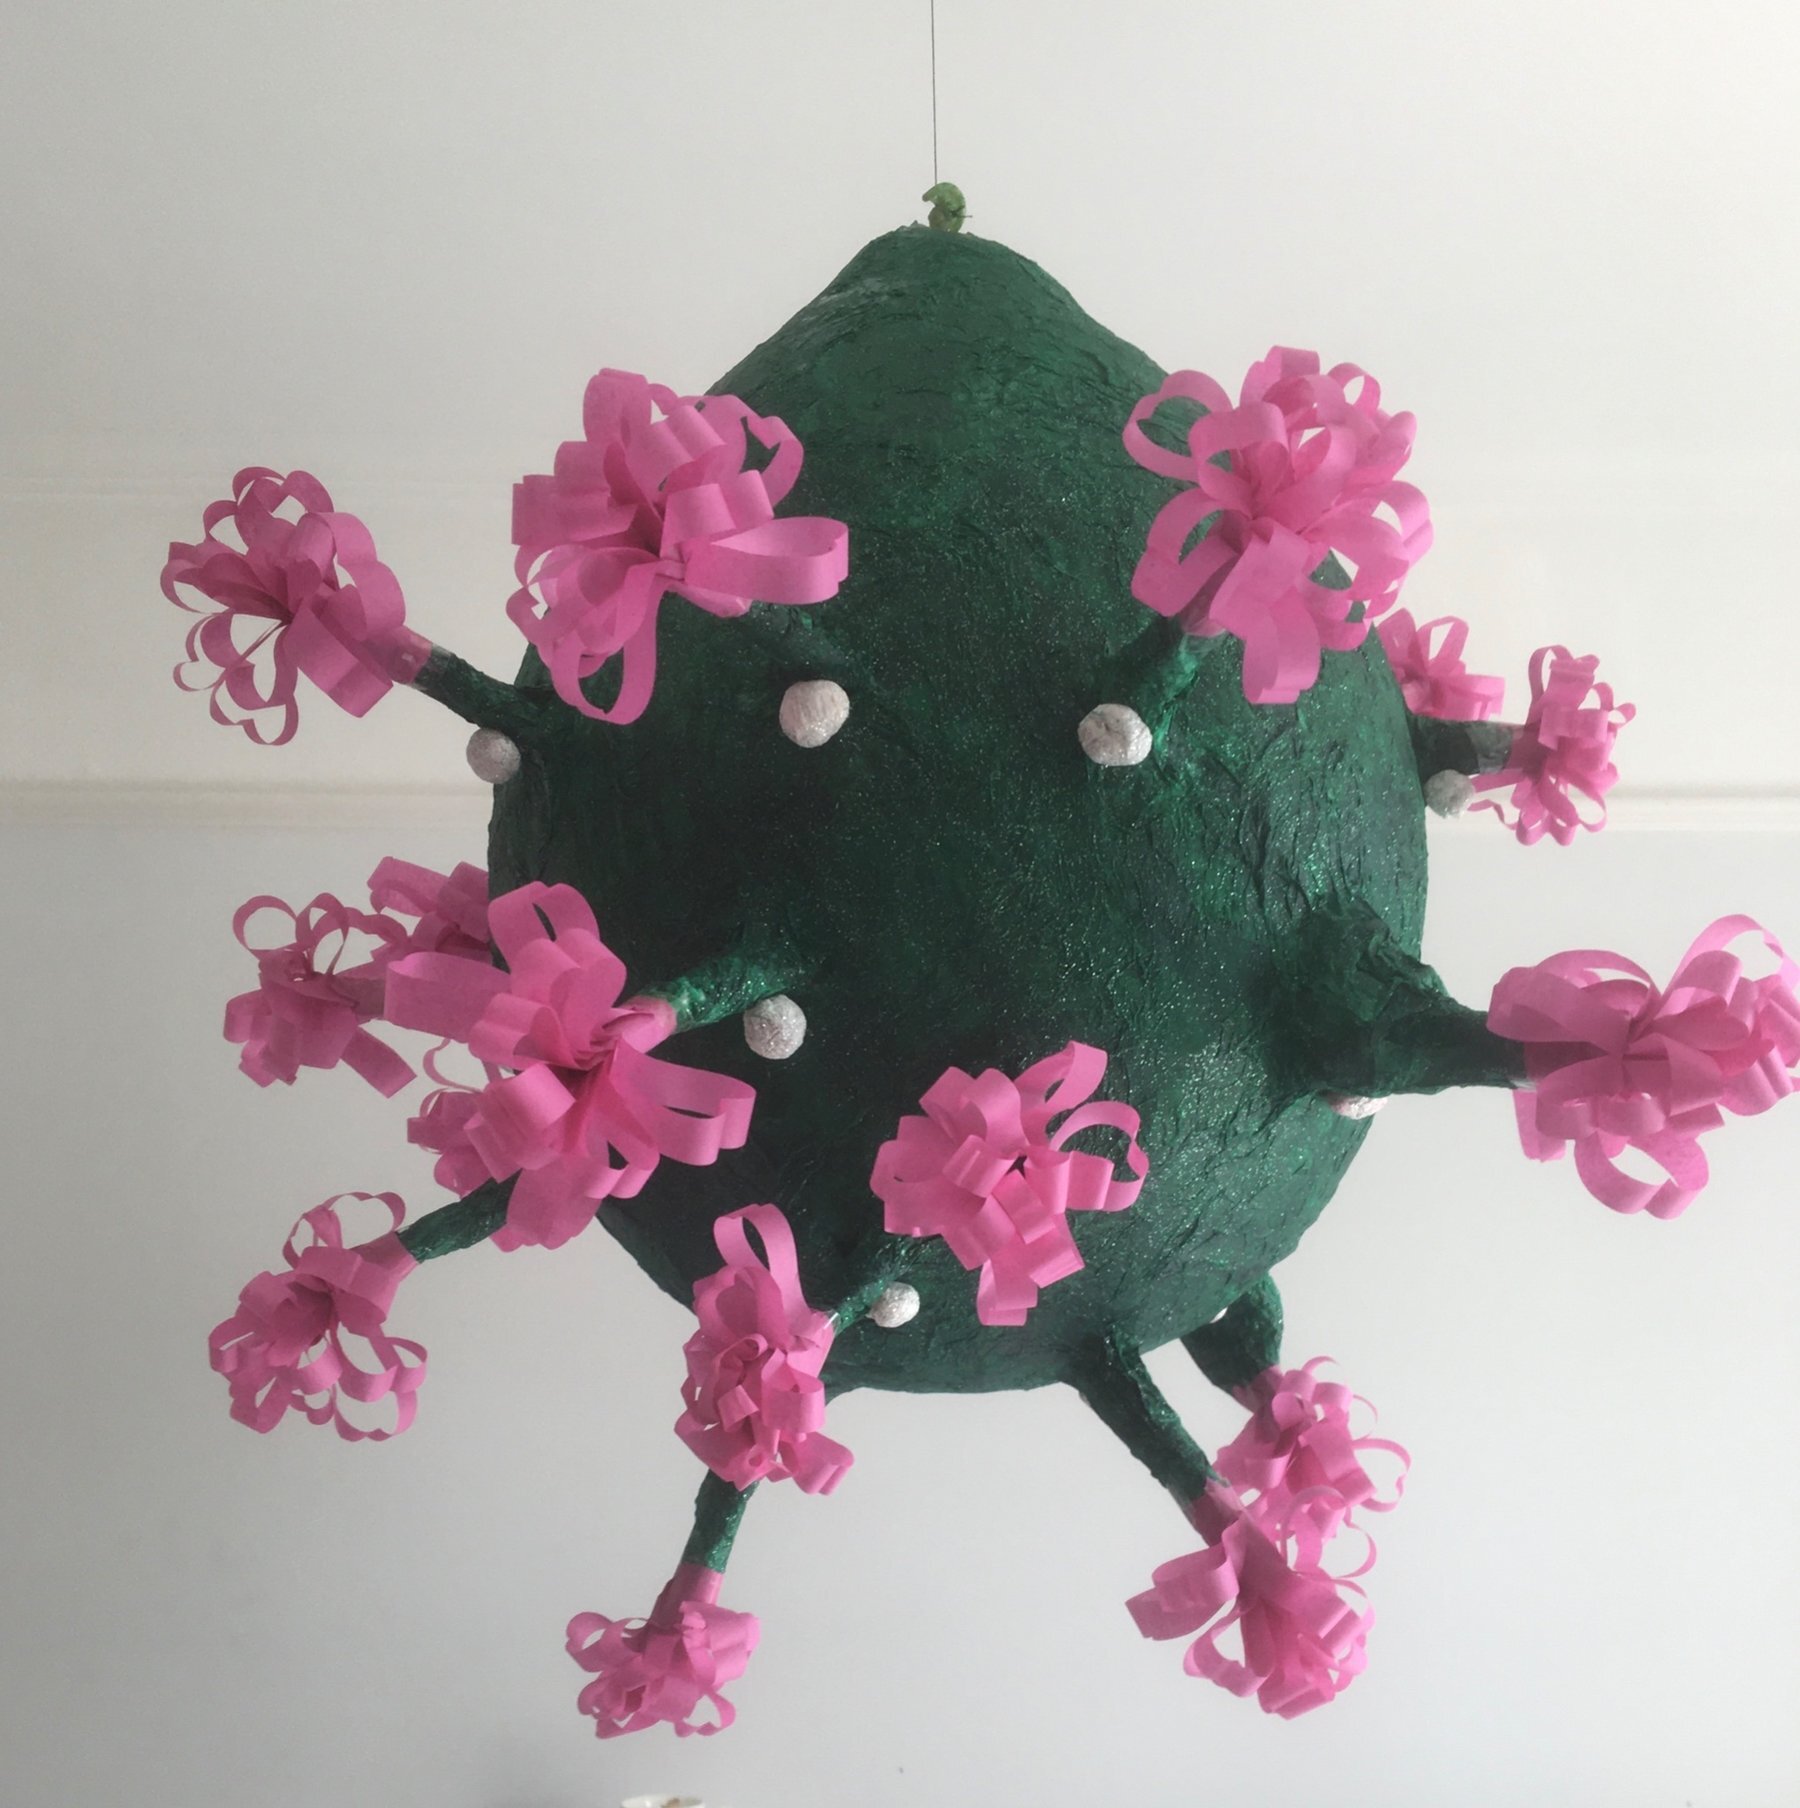
Paint the pinata using your green paint.
STEP 13.
Roll your tissue paper and stick them into the spikes. Using the end of a paintbrush helps!
STEP 12.
Cut your tissue paper into small squares and glue them onto the pinata.
Step 14.
It’s time to finally get the upper-hand! Here’s Lennon showing the villainous virus what she’s made of! Smash away and retrieve all of the goodies as your reward. Hopefully being a little “batter” will make you feel a little better, about these pandemic vibes.
That’s it! It’s that simple.
I would love to see if any of you attempt a coronavirus piñata! Share with me in the comment section below your projects and how they turned out.
Thanks for following my blog and I can’t wait to connect with you on my next project!
Stay tuned for more do it yourself projects coming soon as well as a sneak preview of Season 3.
xox
DIY MOM
Finding Inspiration…
Inspiration can come from anywhere at anytime. The internet is a great resource for sparking your creative energies and discovering projects that you may enjoy trying! The case could never be truer than for this project here. Being cooped up in the house all day, I did tend to find myself peering on social media sites more often than usual. But upon stumbling onto this New York Times article and doing a bit more research (as well as taking some creative liberties), I decided that this would be the perfect project to elevate Lennon’s Bday and really make it a SMASH!
During my recent Attic renovation, I decided to design and create my own pillows and bedding for the cubby beds in the space. (The above photo is the final look). On my last blog I shared about how I made round pillows with pom pom’s. Today I am sharing the process of making hand painted lumbar pillows with an invisible zipper. Once you know how to insert an invisible zipper, you can sew all kinds of pillows and blankets.
My daughter Lennon really loves unicorns, well really who doesn’t! They are magical, colourful and make everyone smile. When I began my renovation Lennon had an idea. She wanted a large Unicorn Head on the wall. Her idea seemed to come out of left field.
I started looking at buying a unicorn online and quickly thought… hmmm…. I bet I could make one myself. So I looked up how to make Papier-mâché and discovered it was quite simple and that I had everything I needed to make something right here at home!
Now that I have three properties that I am renting on a short-term basis, I find myself offering up a lot of advice and tips to people who are looking to start their own instant hotel.
I thought it would be a great idea to answer some of those frequently asked questions by writing a blog dedicated to my tips and tricks when it comes to attracting short-term renters while protecting your property.
Easy solutions for busy mom’s to cut down on single-Use Plastics
There has been a lot of discussion lately about our overuse of single-use plastics and the harmful effects they are having on our environment. The recent coverage in the news has made me take a closer look at my own single plastic consumption in the home and thinking about practical ways that I can cut down, or cut back on the amount of plastic we throw out. For so long we thought we were recycling all the plastic that goes into the blue bags but as it turns out Canada only recycles about %10 of our plastics and what we are unable to recycle we’ve been shipping off to poorer Asian Countries. Those countries are now taking a stand against the rich world’s plastic waste signalling a change in the global recycling system. There is a growing movement against non- recyclable plastic.
Getting rid of old windows might seem like an obvious step when renovating an old home but there are actually several good reasons to keep old windows and integrate them into your design plans. Before you begin the huge project of replacing old windows, here are a few reasons why you might want to consider keeping them.
When I bought my 1938 Colonial Style home it didn’t take long before we realized that this house needed some major help becoming more efficient!
Making your home more energy efficient home is not only great for the environment, but it’s good for your wallet too!
As a single mom, I didn’t want to get stuck with a big energy bill every month, so I knew I was going to put some effort into getting this place up to snuff. I also wanted to get the most of my renovation dollars, and make sure that this house would be desirable for repurchase when I go to sell! Having a big oil bill every month is not going to look good for my real estate listing.
TD Insurance has some great efficiency tips on their website (linked here) and it inspired me to talk to you guys about some of the steps I take to make my home more efficient (I even learned a thing or two from TDI!)
I learned that a huge part making your home more energy efficient is just a simple matter of proper maintenance. The same way you check up on your health, you should schedule a check up for your home – it can help you prevent small issues from turning into larger issues like leaking pipes, collapsed roof and heating issues.