

Hello friends, and welcome to the before and after blog post about my homes stair case.
I hope you will be inspired by the transformation I have made to this 1938 colonial style home that came into my life over a year and a half ago. This home was on the market for a significant amount of time, because the style and layout was very dated and it required a lot of work to modernize. However this created an amazing opportunity for me, because I could see the beautiful bones of this old home, and the challenge of bringing it into a new era was exciting to me!
The Original Stairs
Originally when you walked into my home, there was a hallway, door to the kitchen and stair case covered in carpet. During demolition we tore down the wall to the living room, and I decided to leave it open. I saved the french doors to use for my bedroom renovation down the road.
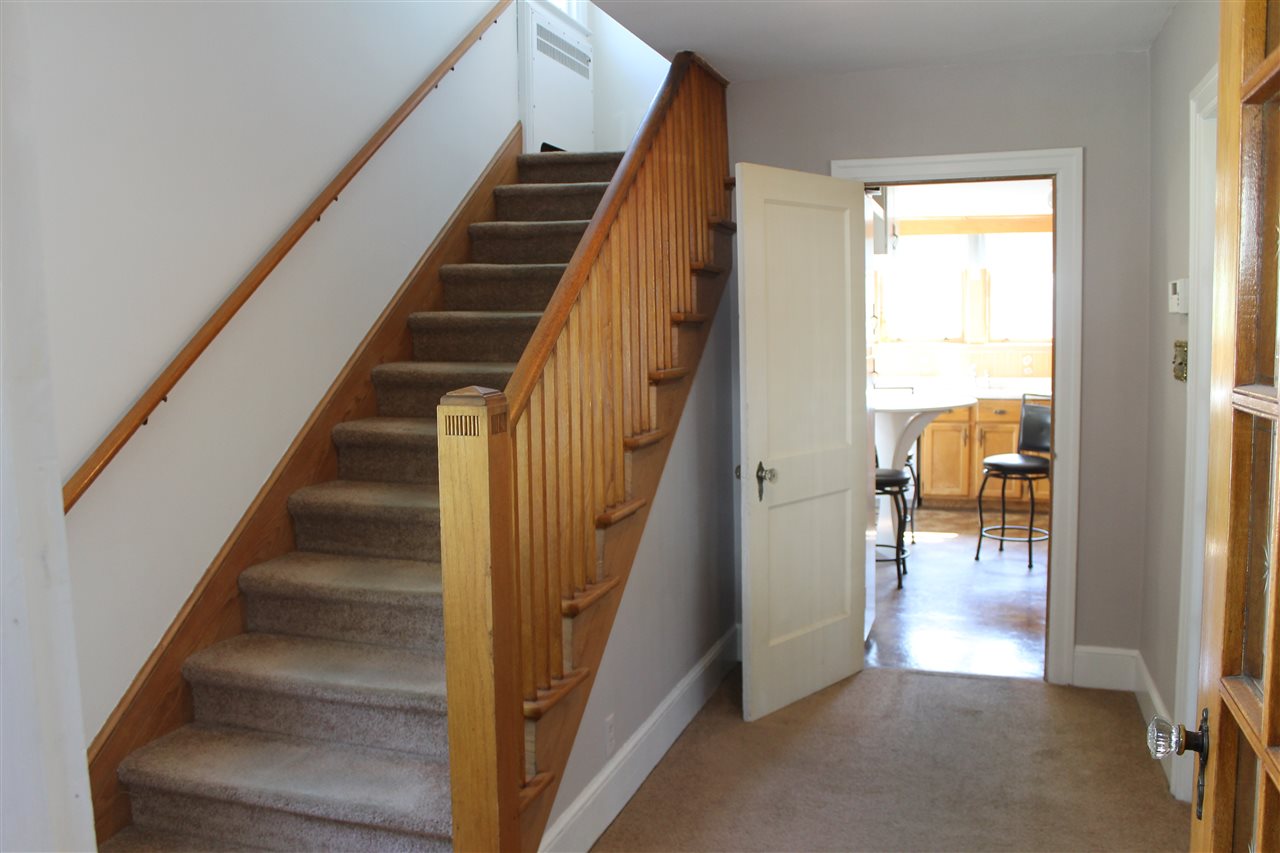
After we took down the wall the hard wood floors needed to be patched and refinished. A local wood source found me the exact type of oak flooring I would need, and a local crew patched, sanded, and stained the floors for me. Instead of ripping out all the old floor where it wasn't possible to weave in the new flooring. I chose to put a wood seam down the middle where the transition was. This saved time and money, and no one really notices it anyway.
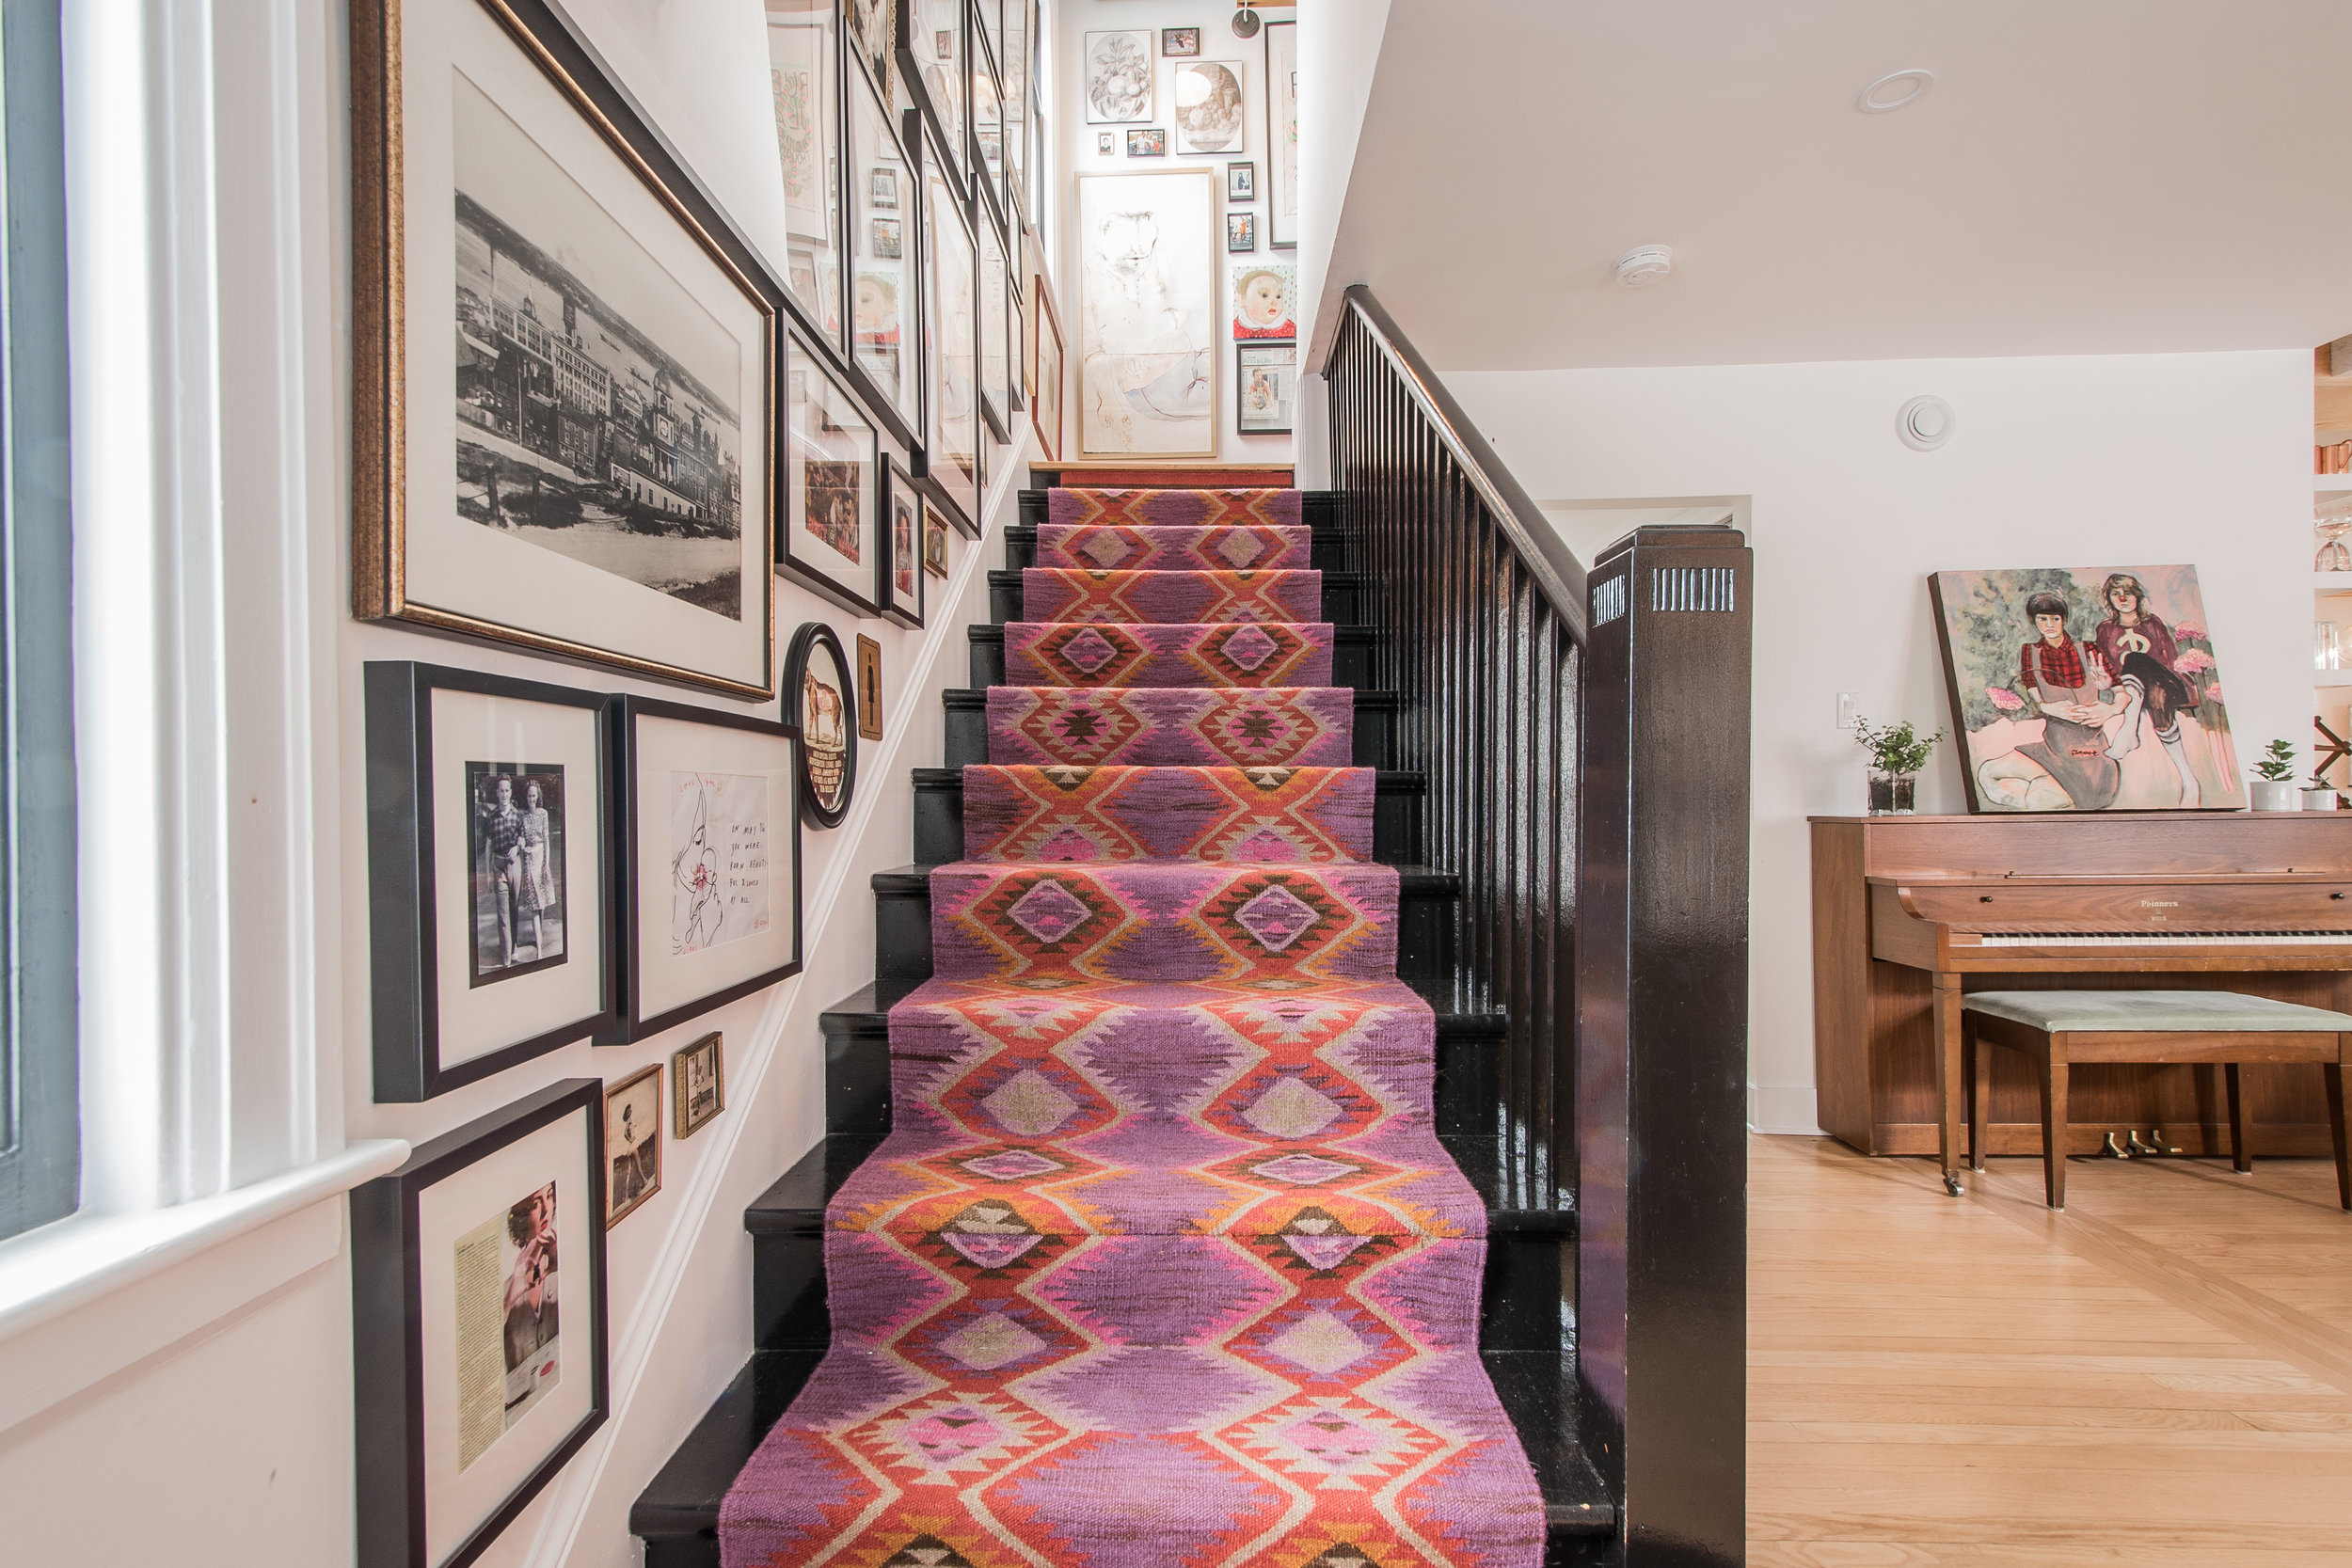
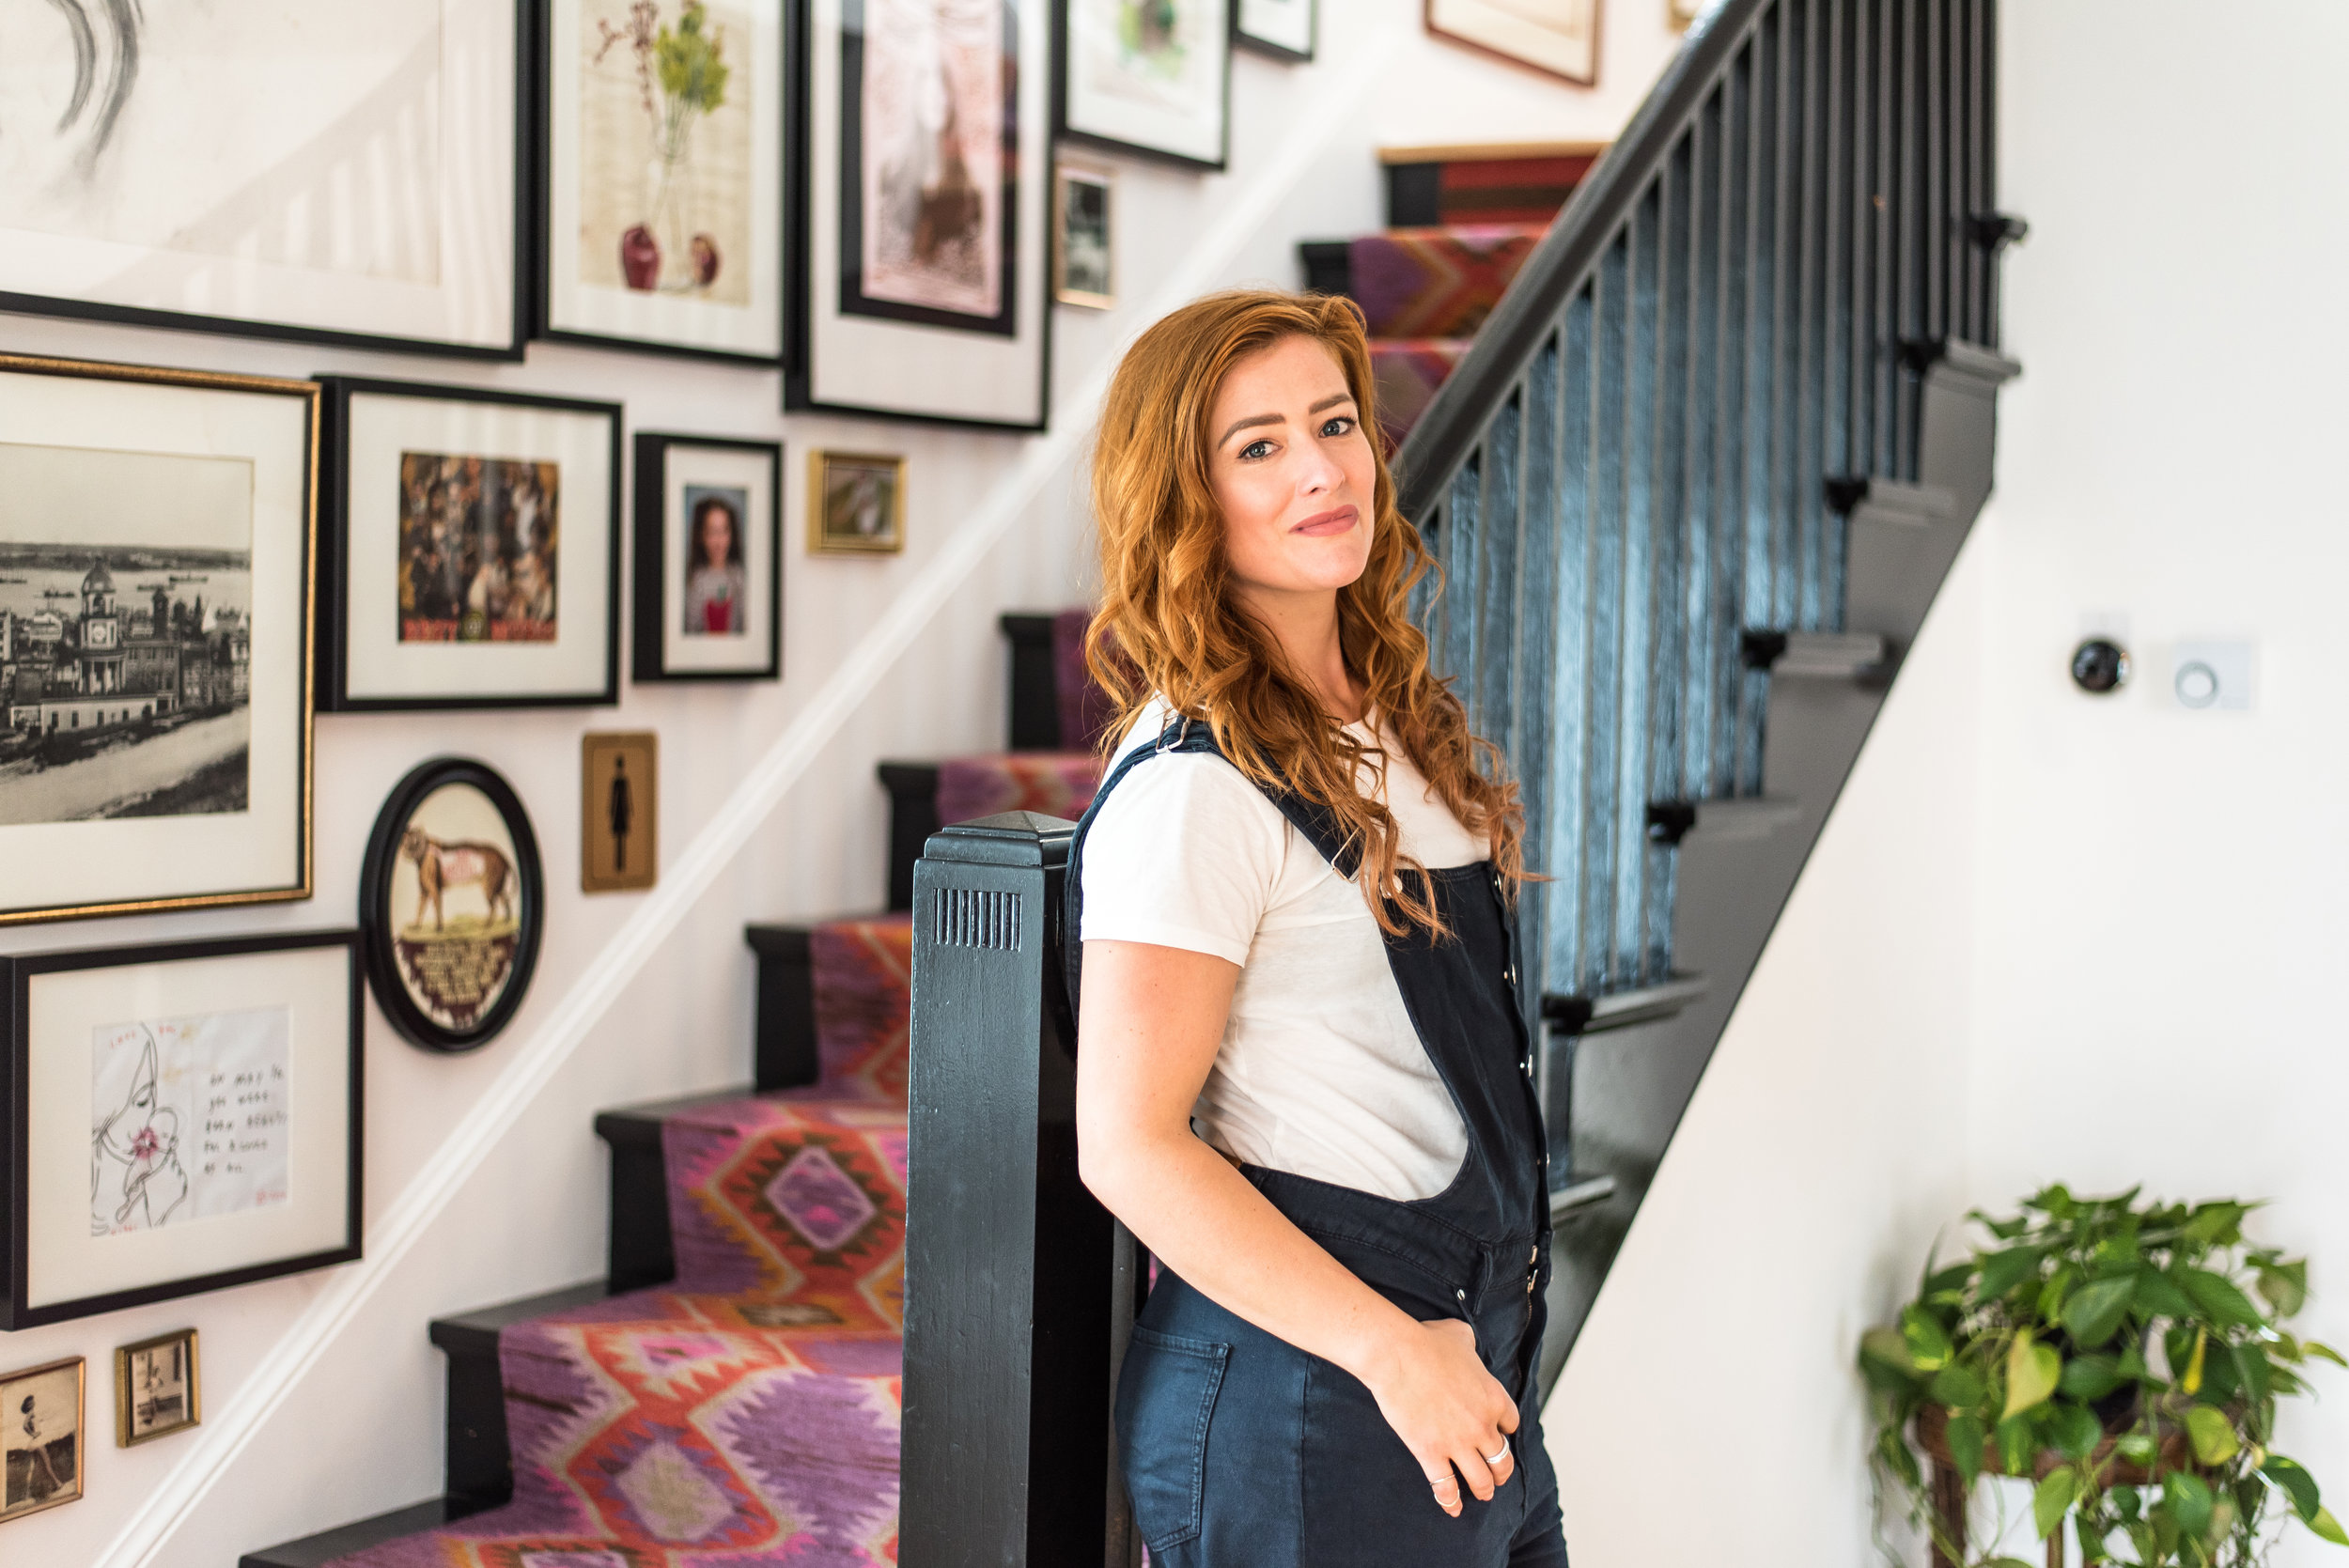
Because the staircase was going to be a lot of work to refinish. I decided to paint it a high gloss black, using Benjamin Moores Enamel Paint. This tied my main floor together well, since I have black features in my living room, kitchen and dinning room. An easy way to maintain my black staircase is that any time I notice a small piece of the paint chipping off, I fill it in with a black sharpie. No one is the wiser!

The Staircase Runner
I decided to go for this beautiful bright staircase runner... A bold choice I know. But when everything else in your home is black or white, i think you can get bold with a few details. Well this staircase runner is a big detail, but the response has been terrific. This is a flat woven wool runner that I installed myself. It is very easy to install and you can follow my steps on my youtube tutorial.
The Stair case Runner was purchased locally in Halifax at Bellissimo! It is by Dash & Albert
The Gallery Wall
The next part of my amazing staircase transformation was creating this Gallery wall. It was so much fun to go through my belongings and pick out the most precious memorabilia to include on my wall.
I've collected a lot of magazine articles and show posters from my time as a musician that I wanted to include in my wall. I also have a lot of old family photo's art work from my amazing artist friends, and charcoal drawings that I carried around with me unframed from home to home. It was time they got the framing the deserved. Watch my step by step tutorial for some easy tips and tricks to getting your gallery wall right the first time!
I bought my frames from Ikea
I ordered 3 of each size, to get variety and textured, and mixed in some vintage frames, value village finds, or frames I already had.

Thank you
for reading. In my next post I will talk about moving my kitchen from the corner of the house to the middle of the house!
I hope you have had a chance to watch my TV series DIY on Youtube.com/diymom.