Excerpt – My “Make It Happen” Mantra Through heartbreak, self-doubt, and late nights spent sanding drywall or editing content, one mantra has carried me: Make it happen.
It’s not just a catchphrase—it’s a mindset. It’s what I told myself when I was a single mom with a baby on my hip and a drill in my hand. It’s what I whispered when I didn’t know how to tile a floor, but did it anyway. It’s the voice I still hear every time I take on a new renovation, pitch a brand, or speak on stage.
“Make it happen” reminds me that momentum matters more than perfection—and that I am capable, even when things feel messy, uncertain, or hard.
Feeling overwhelmed by parent burnout? 💕 Discover my top self-care tips, creative home design inspiration (hello, Barbie Dream Home!), and how I balance work, parenting, and personal well-being. Click to read and find your balance! 🏡✨ #SelfCare #ParentingTips #DIYMom
It’s no secret that pink, makes my heart sing. I’ve incorporated it in some capacity in every home I’ve ever owned. I suppose on some level, it’s the colour that most resonates with my overall disposition and outlook on life–rosy, harmonious, in perpetual search for inner peac
When I started my renovation on this 1922 craftsman style home, It was important to me to work within the look and design of this style of home while adding a layer of freshness and trend.
Before we lifted my home we removed the original exterior chimney to lighten the load. At this point I decided to remove the old fireplace entirely, replacing it with a larger grander Gas one. We were starting fresh with new framing for a new fireplace and that meant I needed to decide on what kind of masonry look I wanted to go with.
Everyone always wants to know how much a bathroom renovation will cost…
Well the answer is not as simple or clear as one would hope for.
A bathroom renovation costs anywhere from 10 to 100 thousand dollars, much of which depends on the finishes you select. It’s also why it’s so important to build a footprint for each project so you know exactly where your money is going. Take flooring for example, if you prefer large stone marble walls and floors in lue of ceramic ones, you best get ready to pay more!
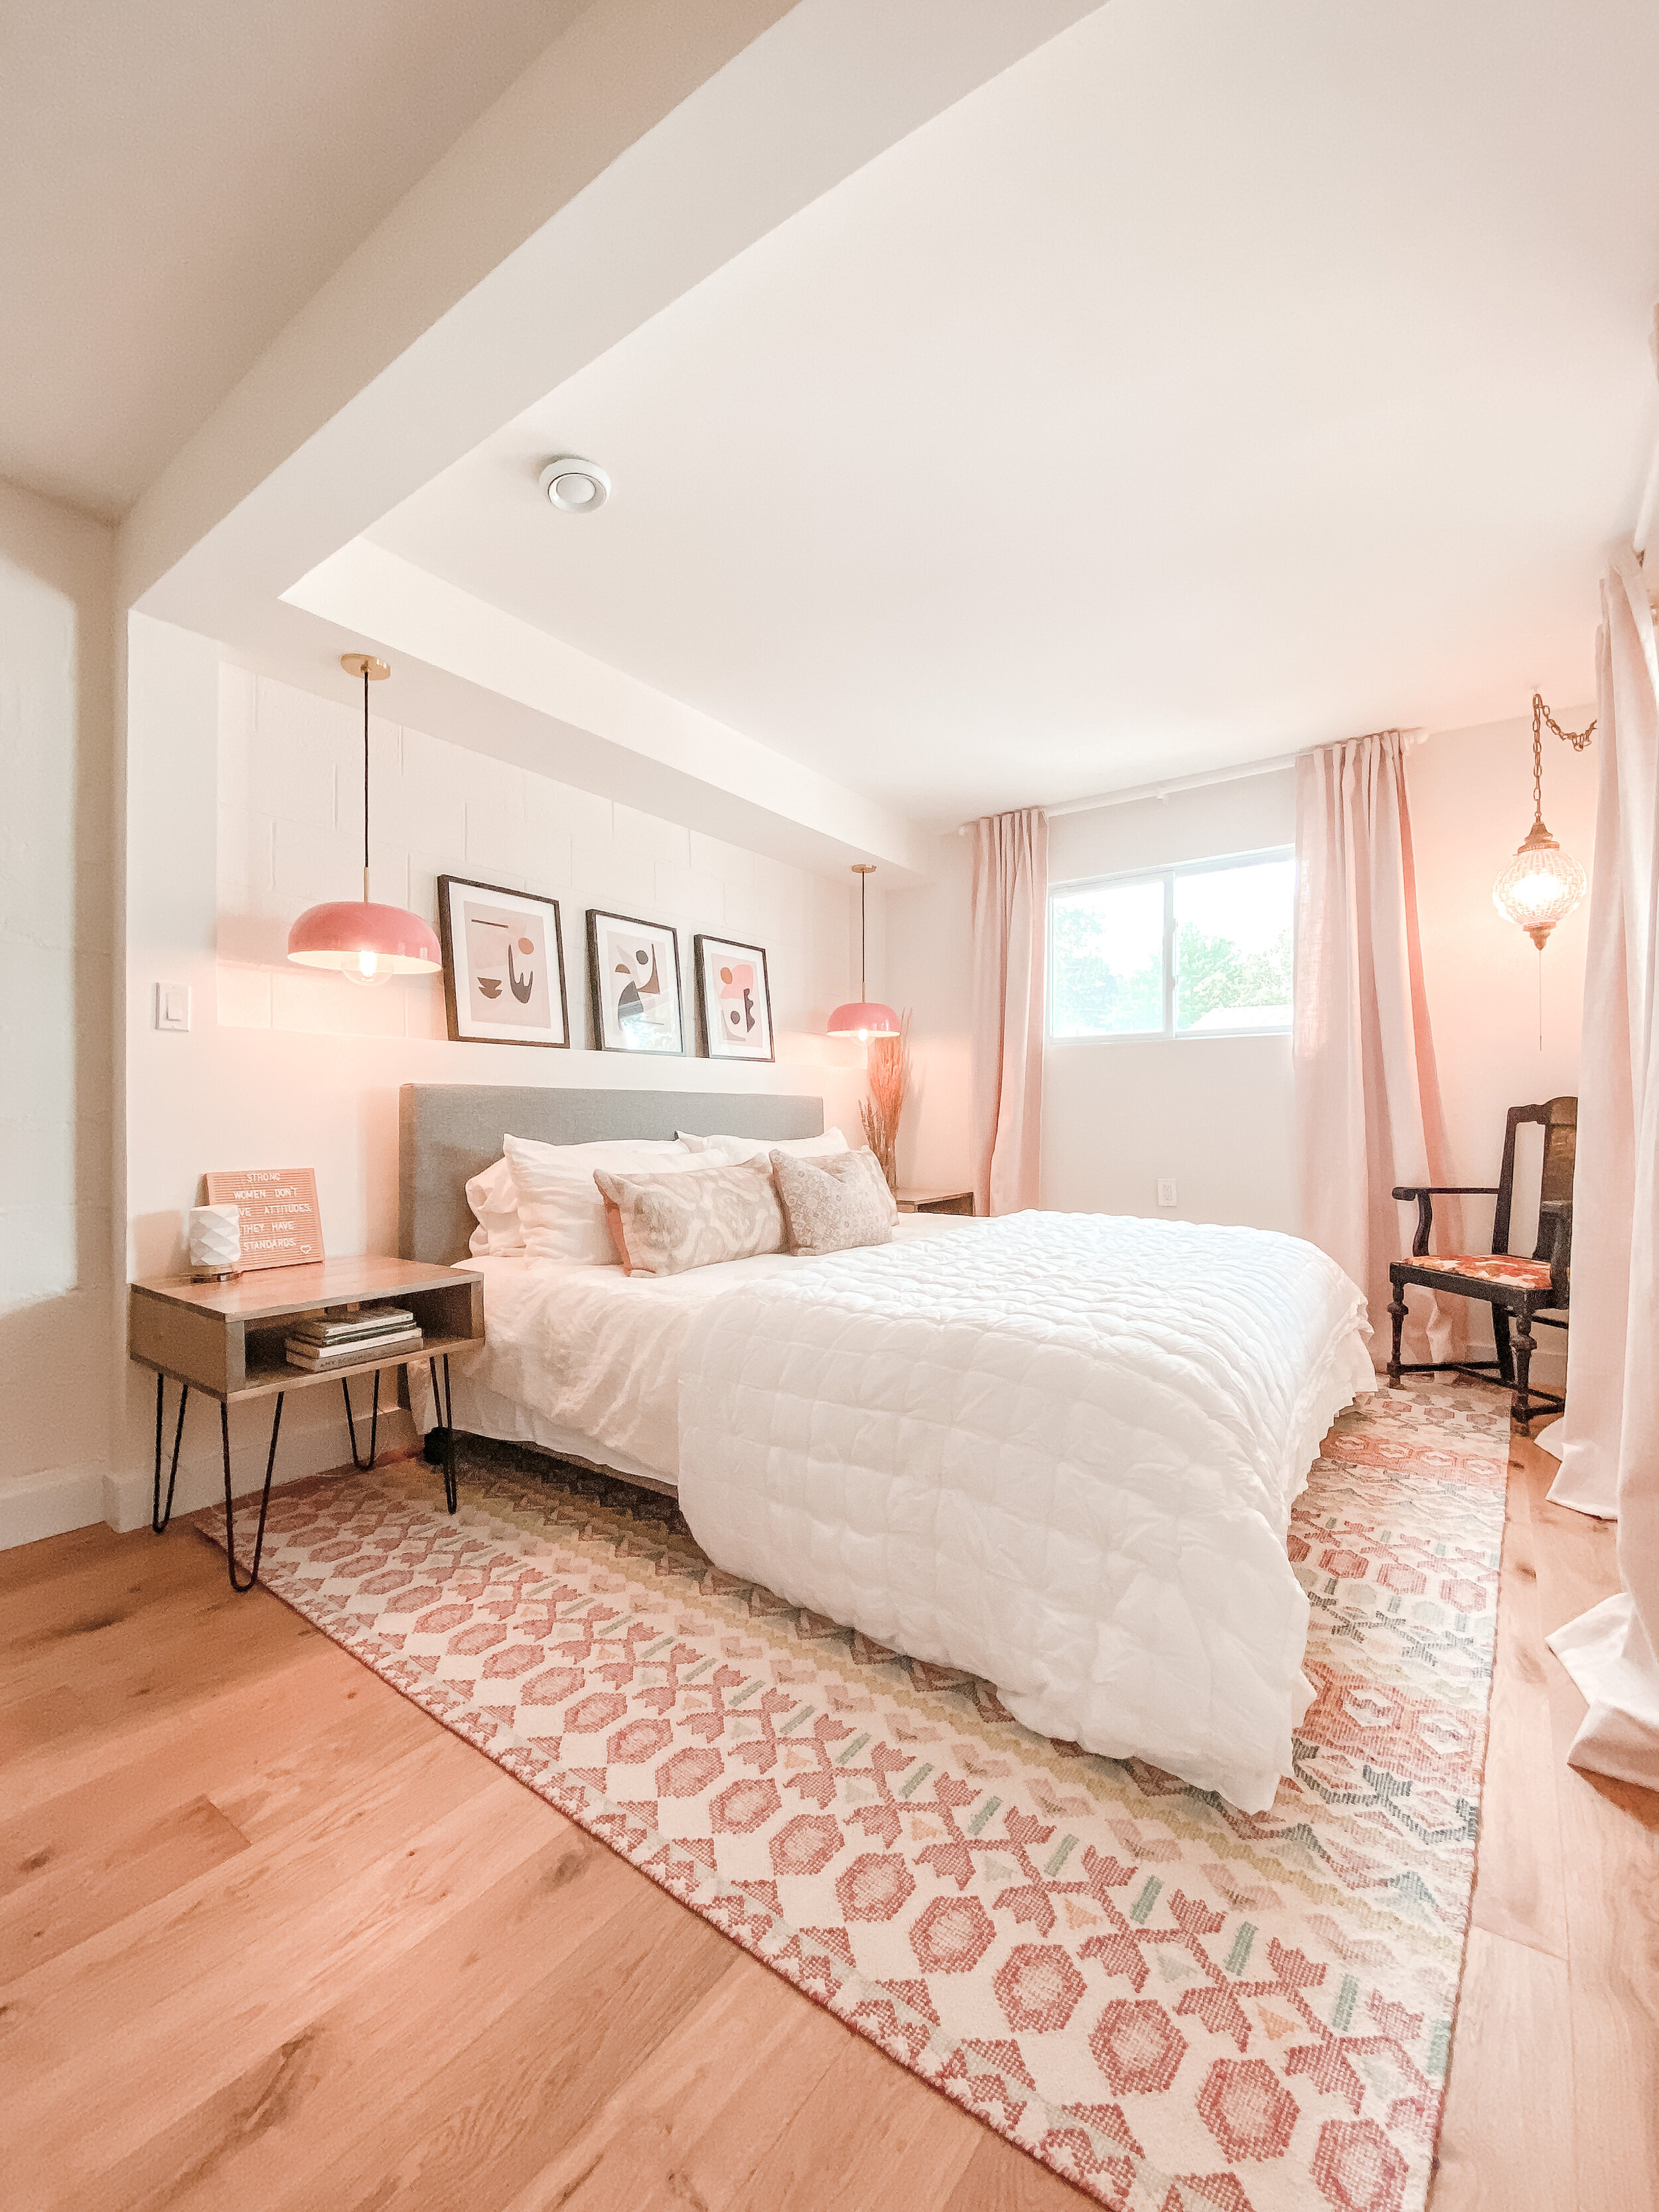
Now on my third major personal home renovation, I have gotten to know what I love and prefer when it comes to my principle bedroom. I wanted this space in my craftsman style home, built in 1922, to feel like a glamorous hotel room. A quiet and tranquil space to get away from the busyness of life and renovations. Anyone who has an active imagination will empathize with me when I say how challenging it can be to turn off my mind truly experience the rest and relaxation my brain needs at night.
When a guest walks into my home, I want them to feel instantly welcome and at ease. That was the driving force behind renovating my main floor into a bright, open-concept space perfect for entertaining.
But open layouts come with their own design challenges—especially when it comes to creating cozy zones and choosing the right furniture to fit. With limited square footage and a bold fireplace feature, I turned to La-Z-Boy Halifax for guidance. Their design team helped me reimagine the space, providing a 3D rendering that brought my vision to life—and introduced me to the Coronado Chair & a Half, which turned out to be the perfect fit.
This post is all about how I made it work, and how you can too.
In today’s blog I am excited to break down my design and furniture selection for my kitchen and dining room space.
When I started the renovation of this century old home in downtown Halifax my mind was set on opening up the walls and having one grand room on the main floor, (Kitchen, Dining, Living room). But I also wanted each space to be defined as their own. This took some careful planning, and meant I had to make design decisions that would impact the space, early on in my renovation.
In order to have my kitchen and dining room feel cohesive and well thought through, I started incorporating my furniture selection into the grand scheme of my design plans right from the get go. Creating a mood board for my design and renovation projects is a big part of my process.
As someone who is late to the camping game - my family didn’t camp together when we were kids, I’m not much of the roughing it type! On our first journey out with the camper my daughter said to me… “I don’t know about this camping thing mom, I’m more of an indoor girl.” I had to chuckle at the comment from my then 8 year old daughter. But as many of us turned to camping as covid kept us close to home, this 1973 Boler camper came into our life and transformed the way we felt about the great outdoors.
So as a reformed non camper, I’ve discovered how bringing a little luxury along to the campground can make an outdoor excursion much more pleasant. Keep Reading for my 5 Camping Tips for Non Campers!
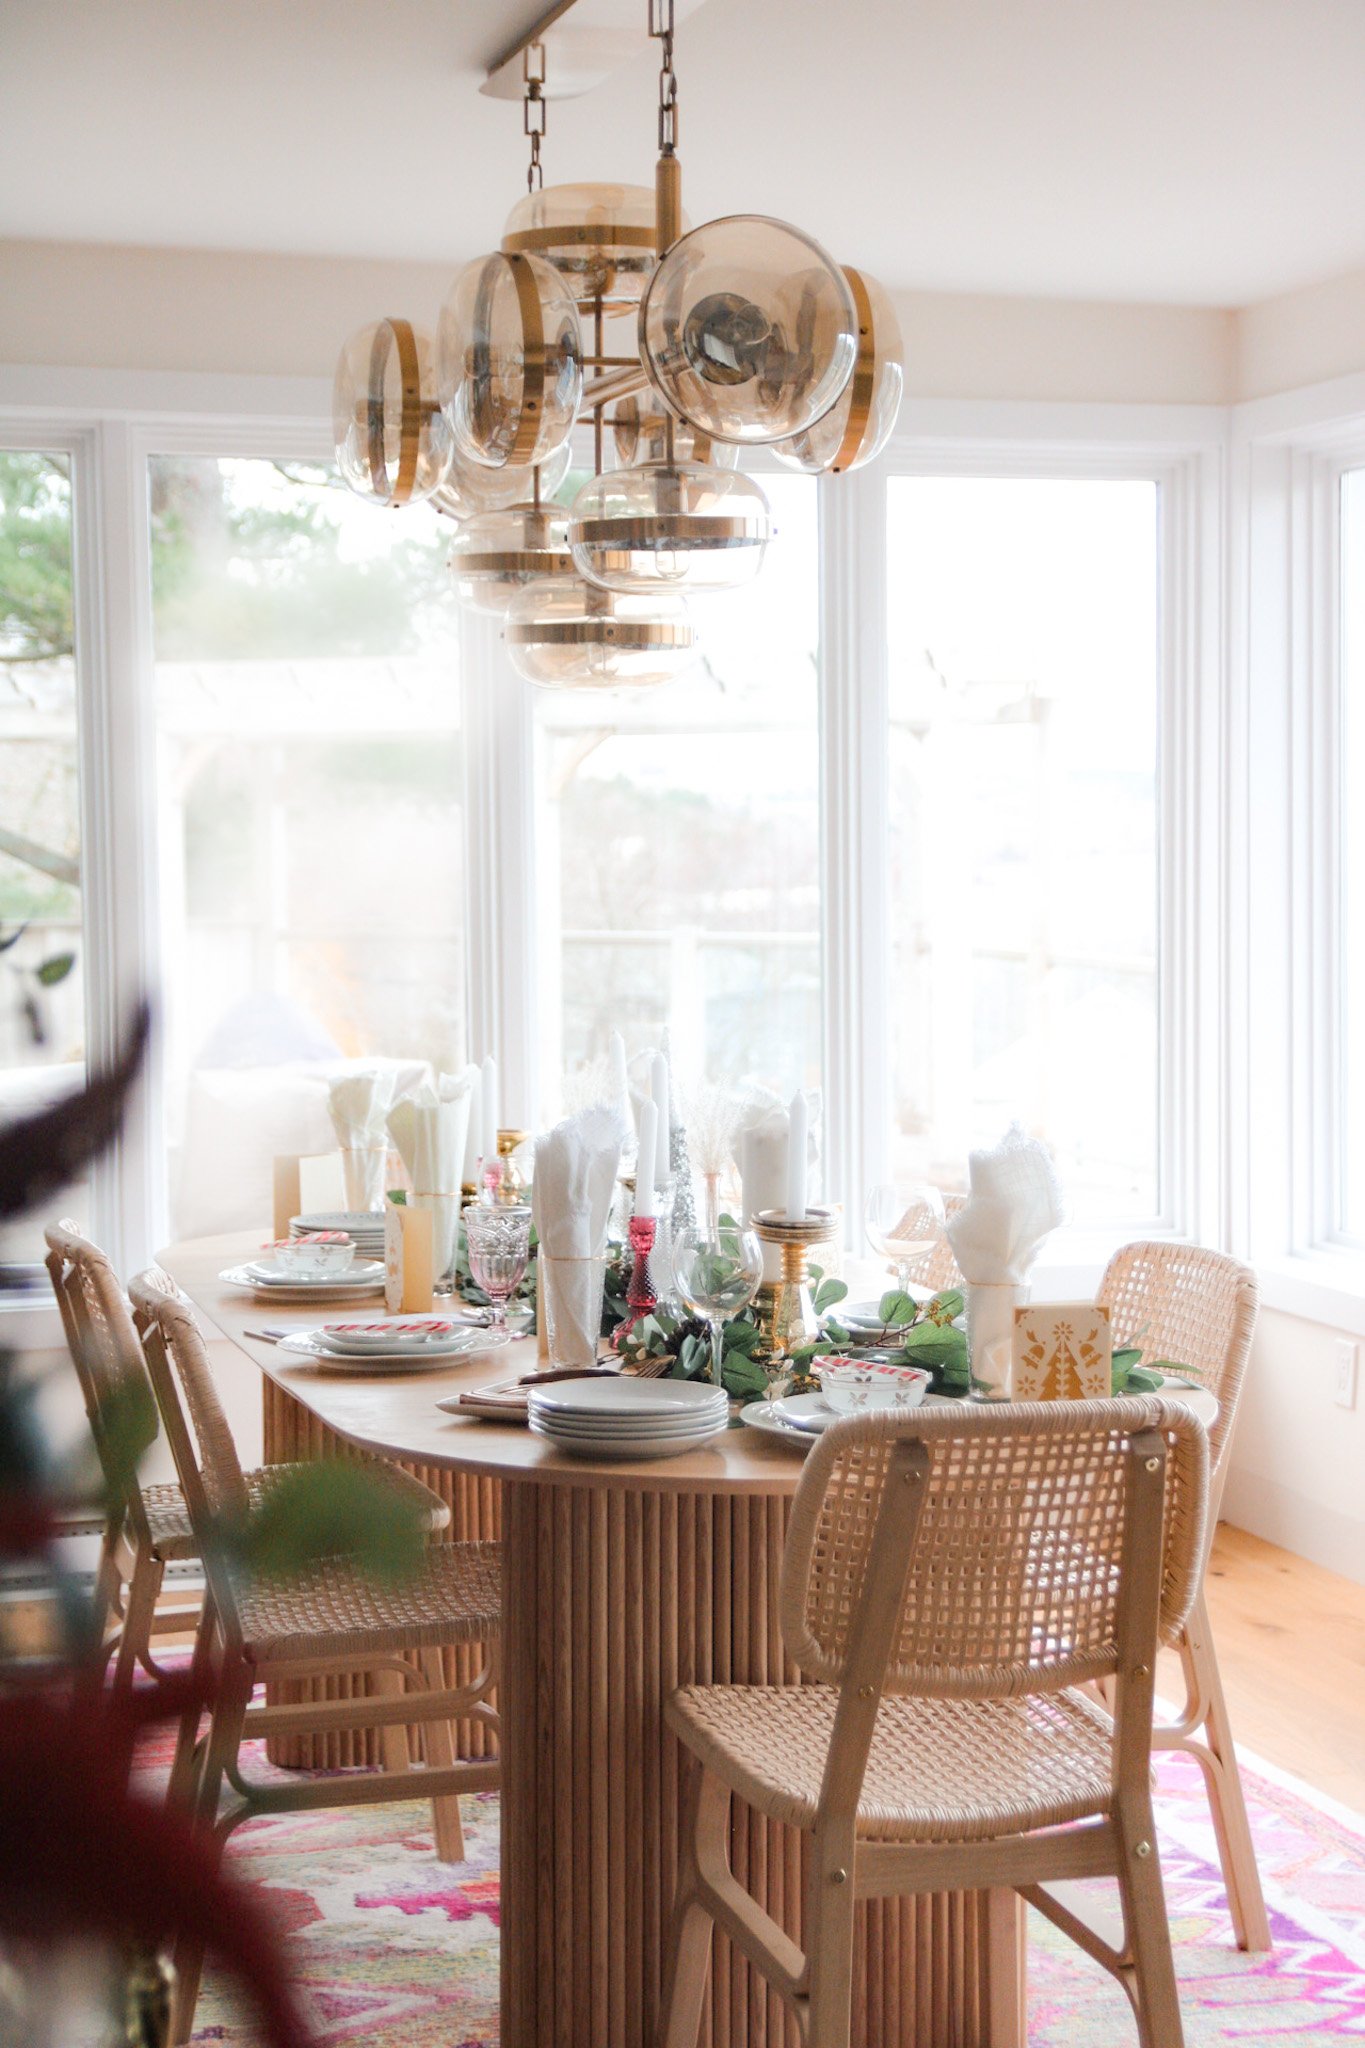
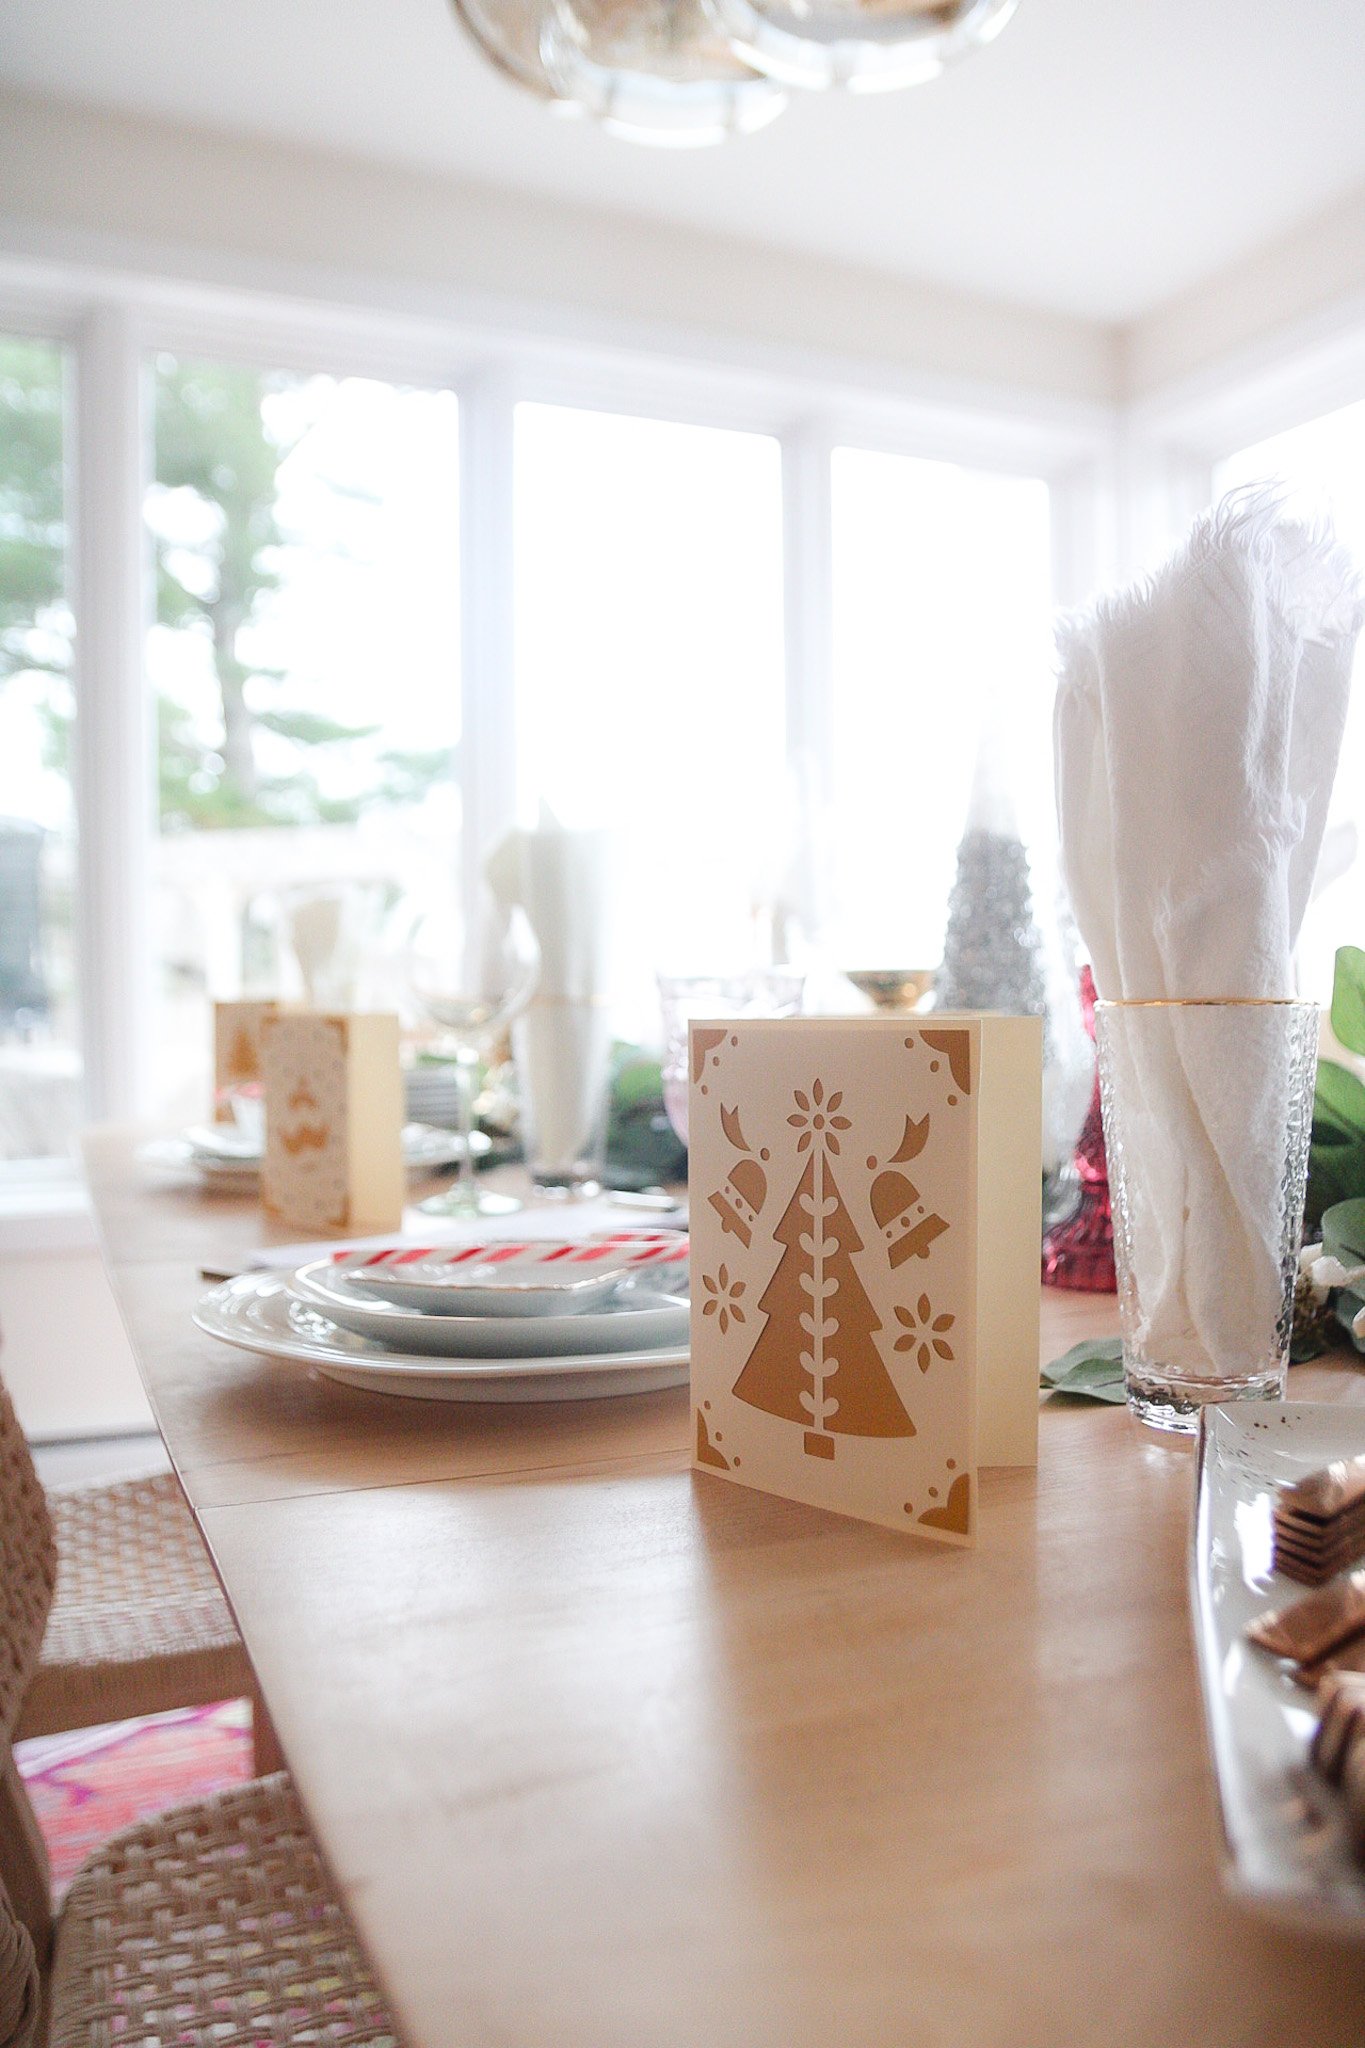
I love Christmas, and so does Lennon. But mostly I live for a holiday table display!
With holiday parties quickly approaching, let’s go over some tips and display options that will help you set your table to holiday imperfect perfection. By adding hits of sparkle and personal touches, your dinner parties will never look so festive!
This year is especially exciting to welcome guests from near and far, as the world is getting bak to “normal” we can host our little hearts out and enjoy the company of loved ones around the table.
Holiday Table Set Up
Not sure where to start? Let me help you with that! Though this is the greatest time of year, the holidays can be stressful, there is SO much to do. You want to give your guests the best experience, make sure you thought of everything, make sure your decorations are perfect et etc etc.. Well, the first tip I’ll give you is let’s remove the PERFECT. Being perfectly Imperfect is the way to go. This tip comes in handy with so much in life but especially when doing a gorgeous table display.
First: You will want to clear your table off. Having an empty, squeaky clean surface is the best place to start when doing any display.
Second: You’ll want to gather anything you will want to incorporate. Such as greenery, candles, dinnerware, napkins down to the bulbs and glittery pinecones you might want to use. Grouping these things by item together on the table makes it easier to place and allows you to see how each item will work together. It sort of gives you the overall vision before you set it.
Third: If you know what your centrepiece will consist of, such as garland, candles etc, place that FIRST. If you aren’t sure what your centrepiece will be just yet, start with each place setting. If you start with your centrepiece which is what I did for this display - Heres how to do it!
Place the centrepiece of your choice, (garland for me) fluff the leaves, add ornaments, glittery pinecones, candle sticks and candles, as well as any other items you may want to incorporate. Placing items where the garland has a natural bend looks the most natural. I try to space each item out so one style of candlestick aren’t all on one end of the table, but I don’t put too much thought into where each item land. When things are too thought out, it takes away the inviting feeling. I don’t want my guests to be scared to even look at the table display let alone enjoy a meal by it!
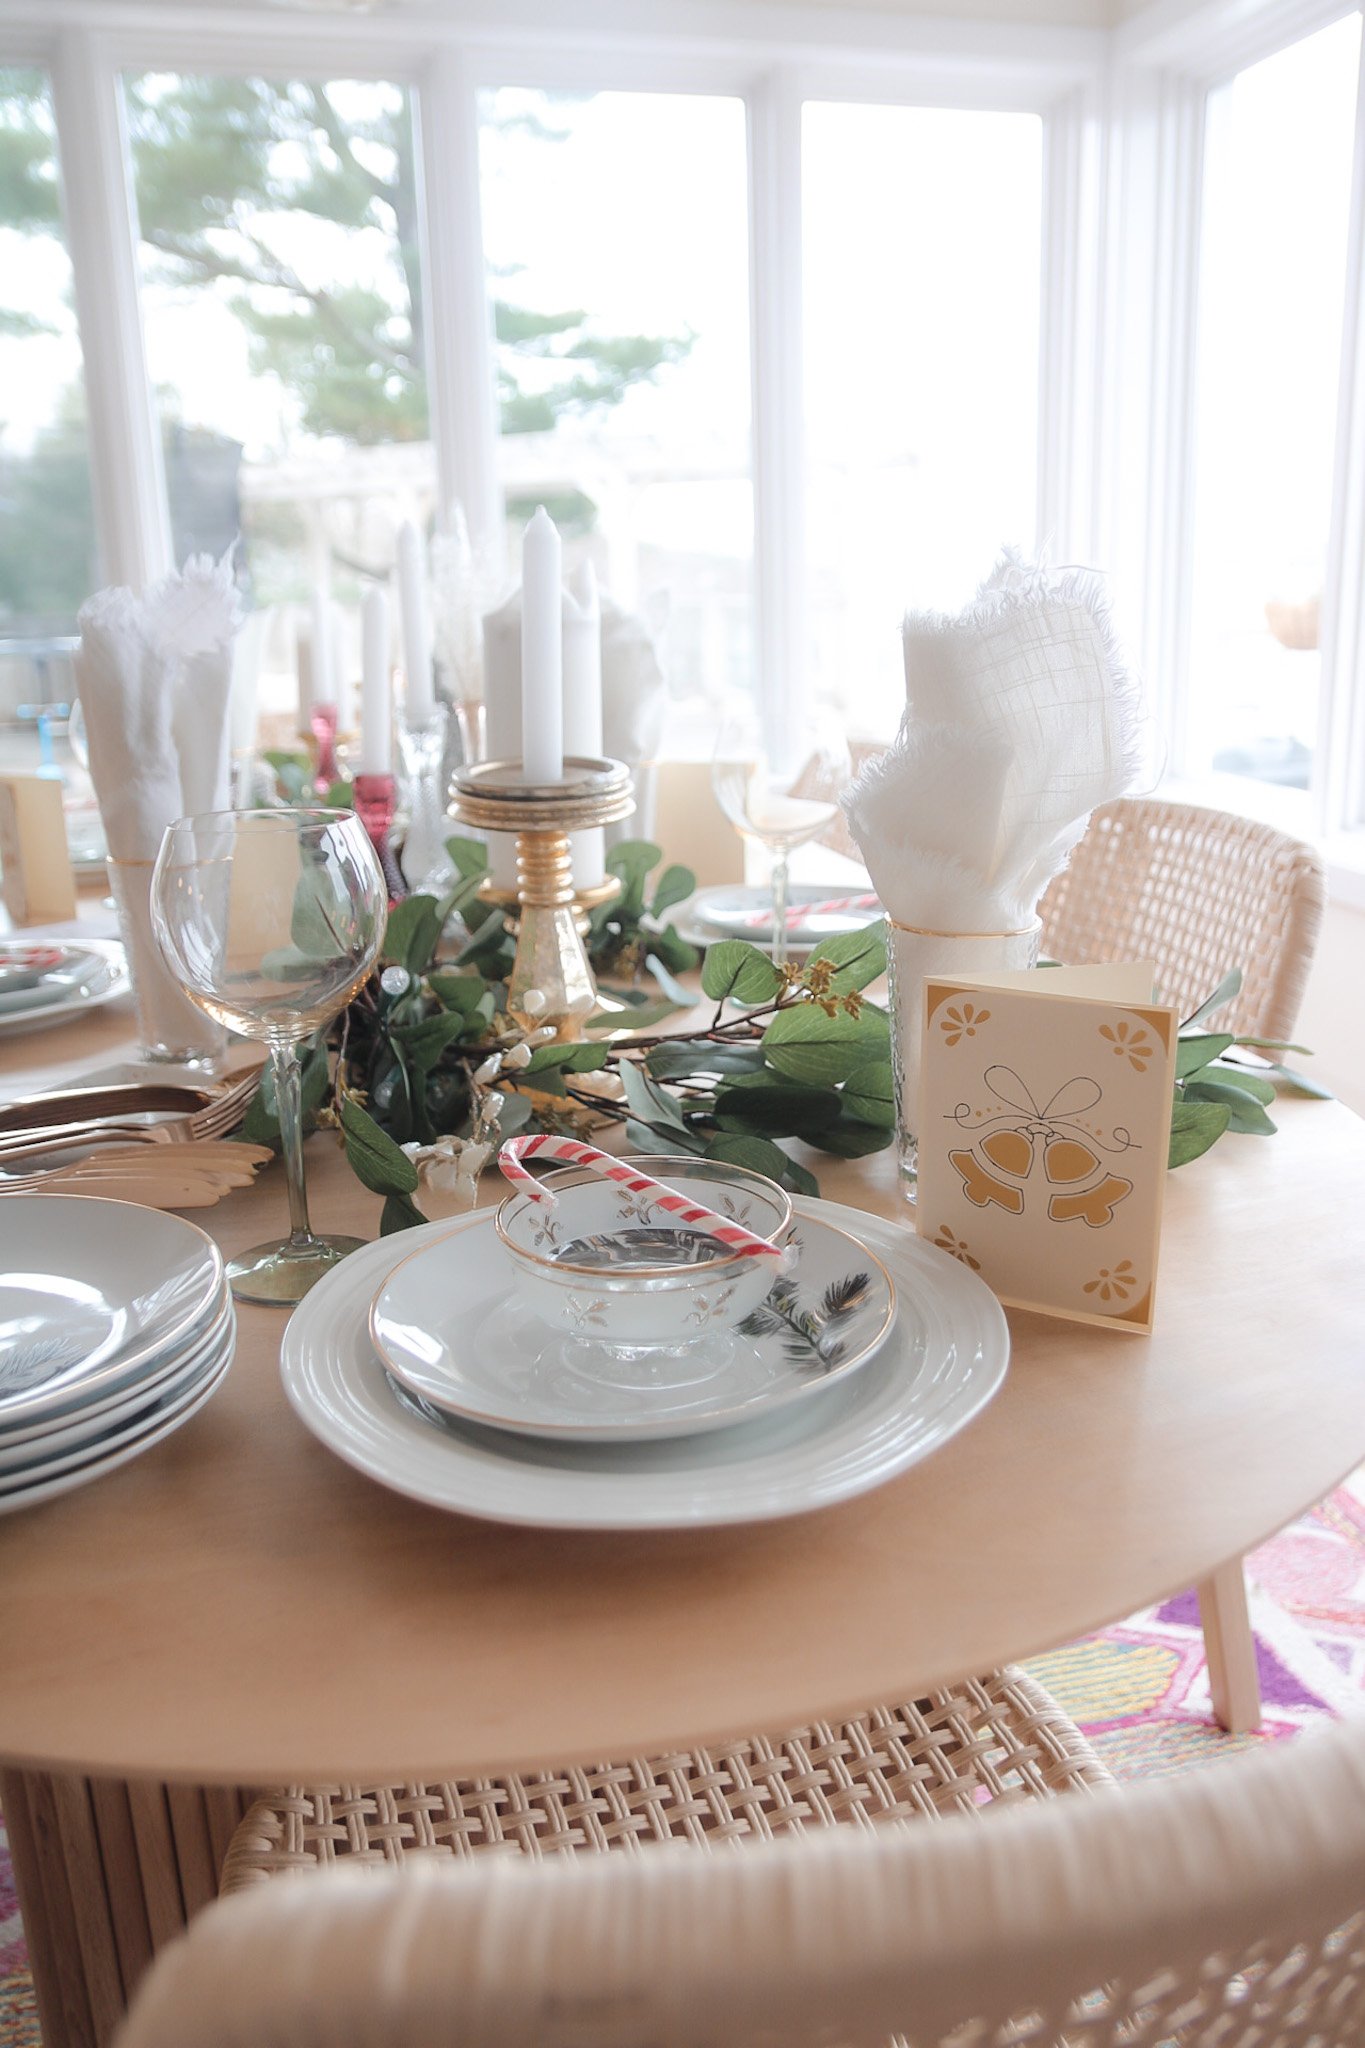
If you’re starting with place settings, I like to choose a variety of plates, sizes, shapes, patterns etc to mix and match, it makes each guest feel like it was done just for them. Layering dishes really adds to the overall look and feel of the display.
Whats next you ask? Keep reading to find out!
Adding Details And Personal Touches!
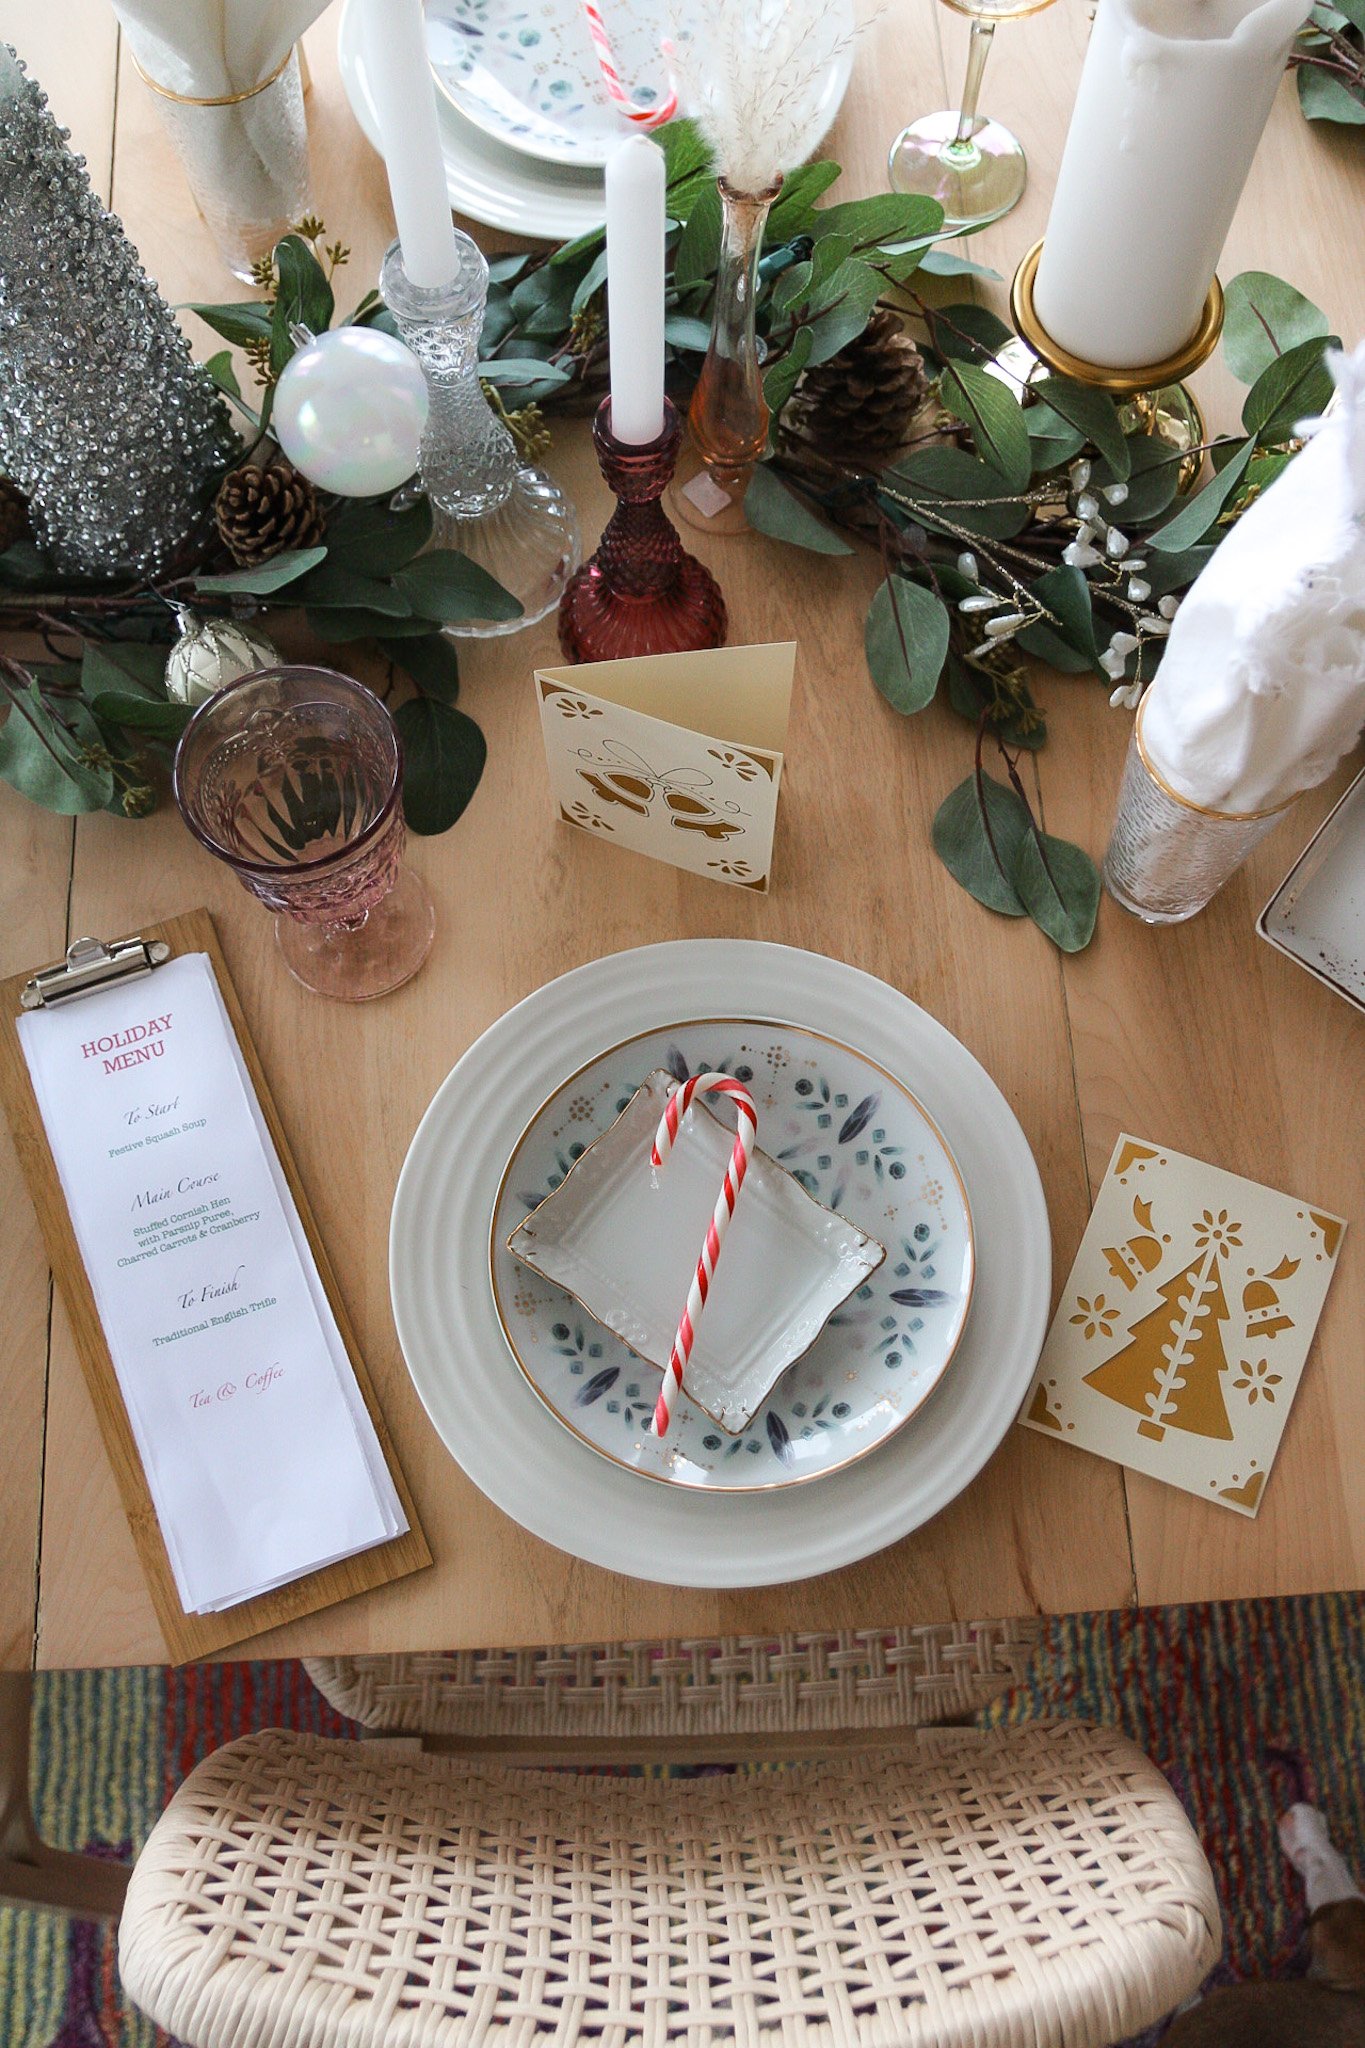
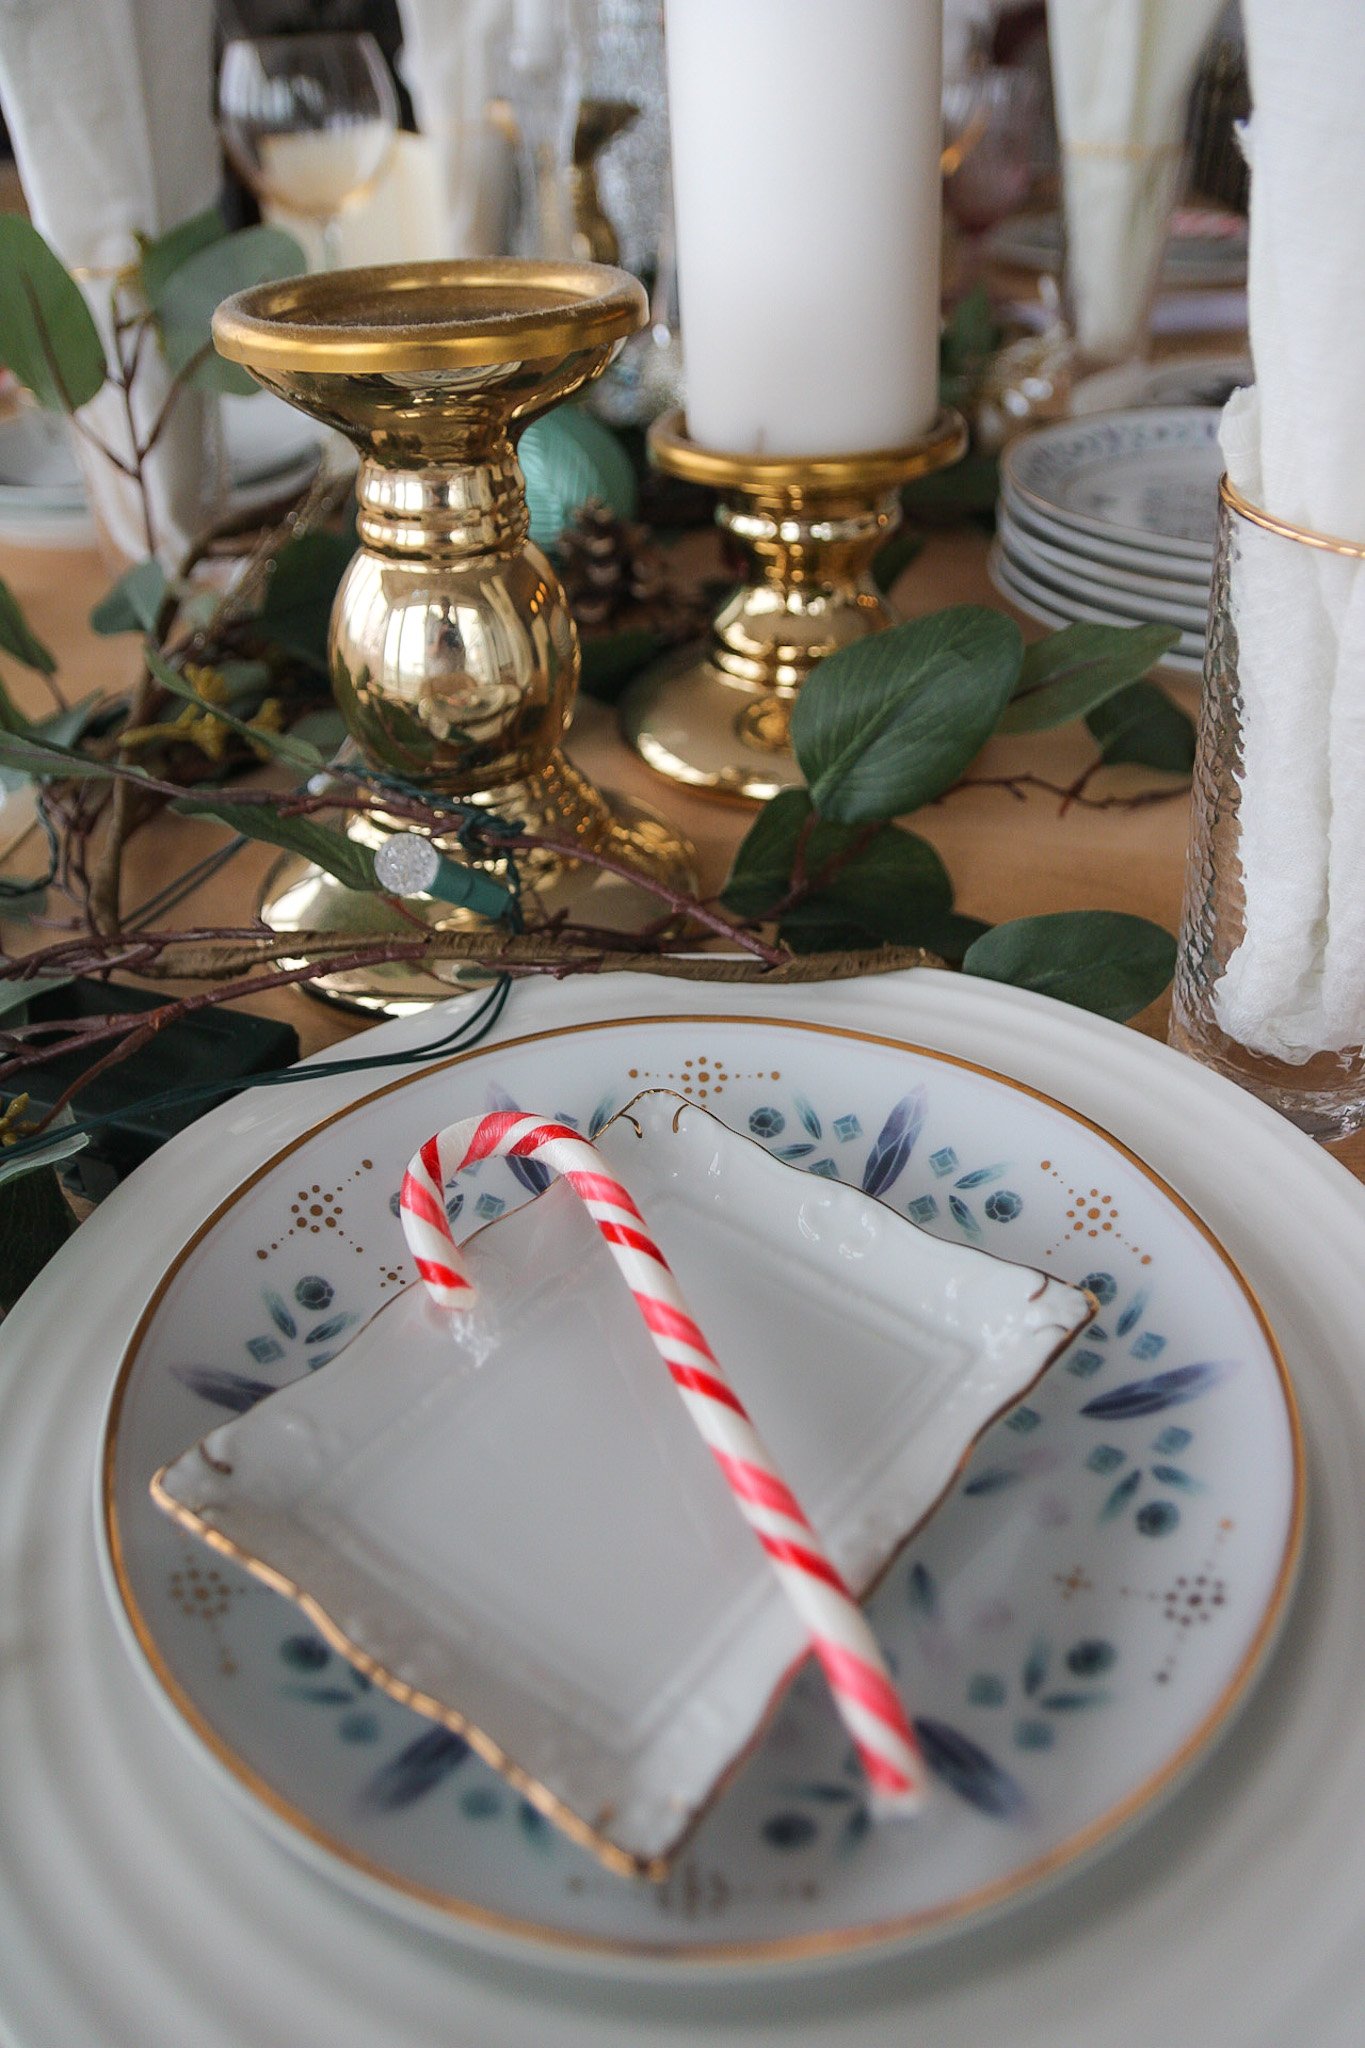
Okay so we have the place settings and centrepiece completed. Now its step four! Adding the little details that add so much to the overall presentation of your table. As you can see in the photos below, adding things like candy canes as a little welcome treat for your guests is festive and an added touch they’ll appreciate.
Here are a few more personal touches can you do to make your holiday table special for your guests:
Giving your loved ones cards is something I love doing. I took it a step further this year, and made my own cards to put at each place setting for my guests. So they not only have a candy cane to enjoy, but they can ready what I love about them too. I used my Cricut Joy to create these unique holiday cards!
Notice the wooden menu boards? I decided to make my own menu and print it for the table! You could also do a menu board for each guest, or pass one around the table. It’s a simple thing to do but adds just one more layer to your dinner. These ones are from the home and restaurant supply store Big Erics.
Holiday Menu!
Candy Cane Welcome!
Shopping Your Home!
The holidays are full of giving. Don’t let the thought of spending too much on a table display like this steer you away. You can make a beautiful table display without breaking the bank! Heres how:
Shop your home!
What do you have around your house that you can pull to make your display beautiful? I took candles from my bedroom that have already been burned! You don’t need to go out to the store and buy brand new candles, pop some in you love using!
Christmas tree or table display?
If your Christmas tree is up, you’ve got yourself some decorations for that garland on your table. I grabbed a handful of ornaments that were maybe one too many from my tree and scattered them on the garland. It added a hit of Christmas cheer and elegance without having to make a trip to the store, and when I’m done with them, they’ll go right back on the tree!
Go outside and shop your yard, neighbourhood or a local park!
There are so many things to be gathered like sticks, branches, pinecones, you name it, to help with your table display. I gathered a handful of pinecones and love the element of texture they bring to the table. (Pun intended!)
Time to use grammas china! Have any dinnerware that have been passed down over generations, or were given to you as gifts over the years? Time to dig them out and let them be appreciated for their meaning! Adding something that has a story behind it is a conversation piece and brings all your guests closer.
Remember, using items from around your home makes any display not only more meaningful but cost effective as well. Mixing items that might be new or passed down for generations adds topics for conversation. Placing items without trying to be “perfect” will allow you and your guests to really take in the beautiful table display in front of them without being too worried to ruin it! Tis’ the season for being around loved ones, not worrying about the fray in your napkin or the stain on your table.
Enjoy this special time around the table with those that are the most special to you this holiday season!
Happy Haul-idays! This blog is sponsored by 1-800-GOT-JUNK?
My decluttering journey started a number of years ago. I was gifted the Marie Kondo Book “The Life Changing Magic of Tidying Up” over the holidays and the book truly resonated with me in a big way. I started the process of simplifying my home, donating access items and creating more space for friends and family in my home.
This holiday season, I invite you to join me on this ongoing journey - get your junk hauled away and create more room for holiday cheer this season. Here are a few tips I incorporated into my home that I think will make a huge difference in your spirit levels this Christmas.
If It Doesn’t Spark Joy To The World- Let It Go Go Go
When I applied this principle to my closet, I was able to gift, donate or toss the access away without any pain. I just held the item in my hand and if it sparked joy I held on to it. No joy - it went in the donate bag. Who doesn’t take advantage of those amazing deals during the holidays? Making room in your closet this time of year can help for when you bring home all those pieces you stood in line for during those save the tax events! By using the “Spark Joy” tip, I now have so much more room in my closet for those holiday parties and dinners!
Holly Jolly Decluttering! All Similar Things Go Together
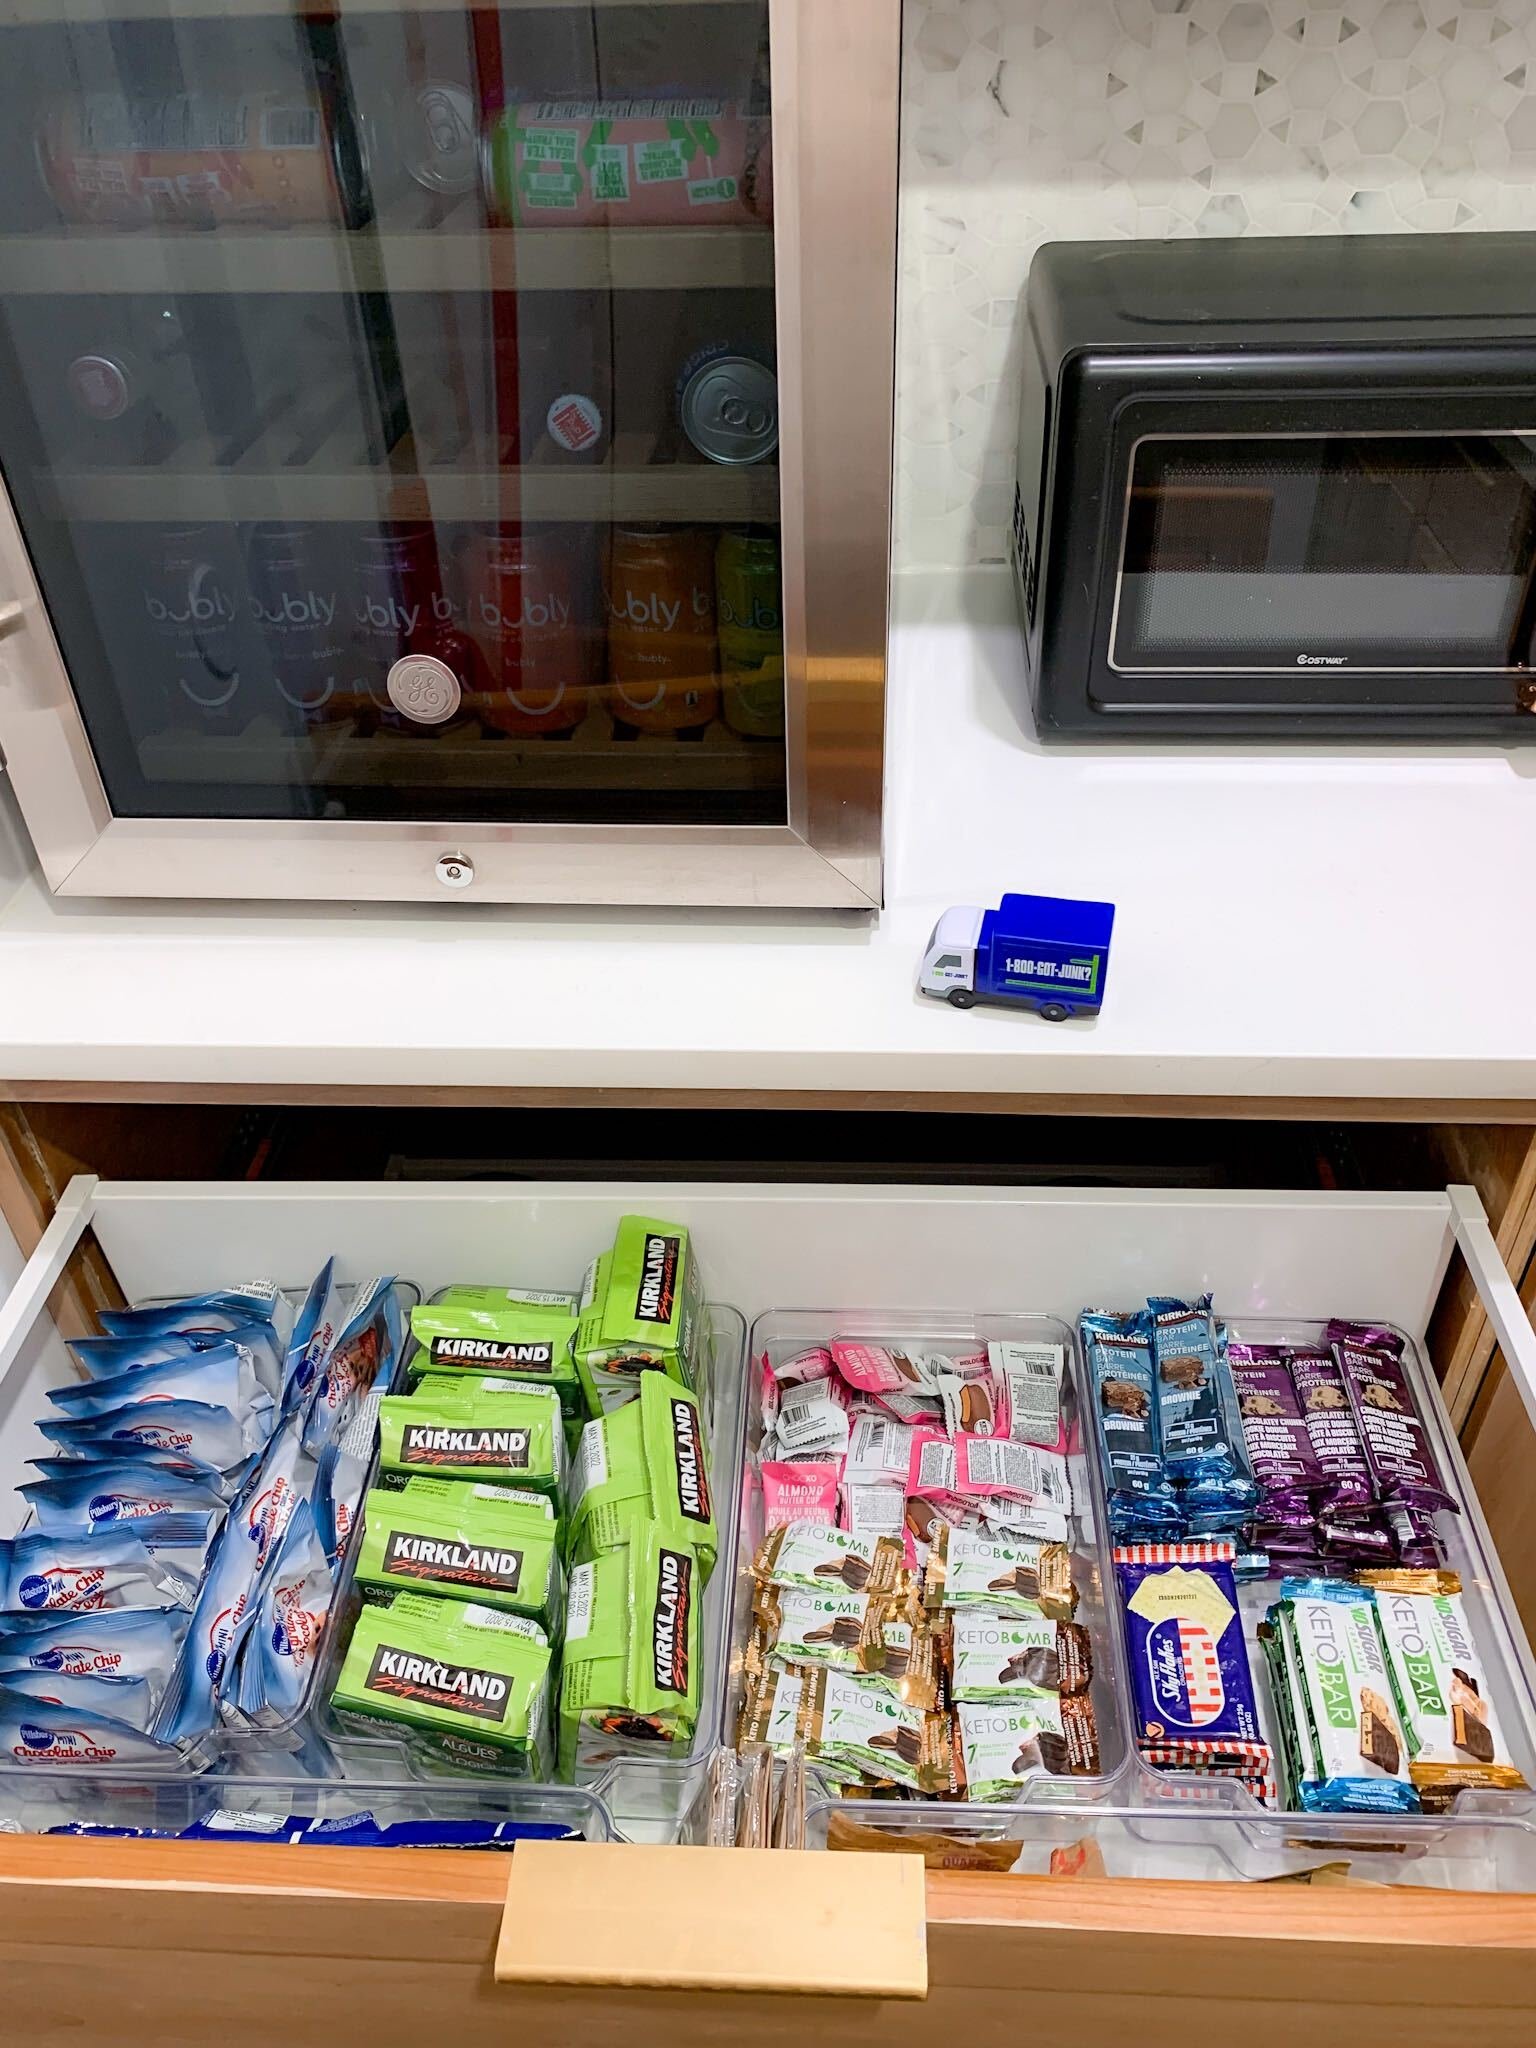
Not only does decluttering give my brain more space to live whole heartedly but my life has become so much easier when I am not panicked and looking for my car keys all the time. This is a very easy principle to start your decluttering journey. It’s simple really. All the Tupperware are in a single drawer in the kitchen and all the snacks in another. Bags go inside of bags, purses inside of purses. Once you get all the same things together, you can see how much you have and can get rid of the access! Doing this also creates a sense of ease for your guests, so they can find everything easily!
Happy Places, Happy Faces!
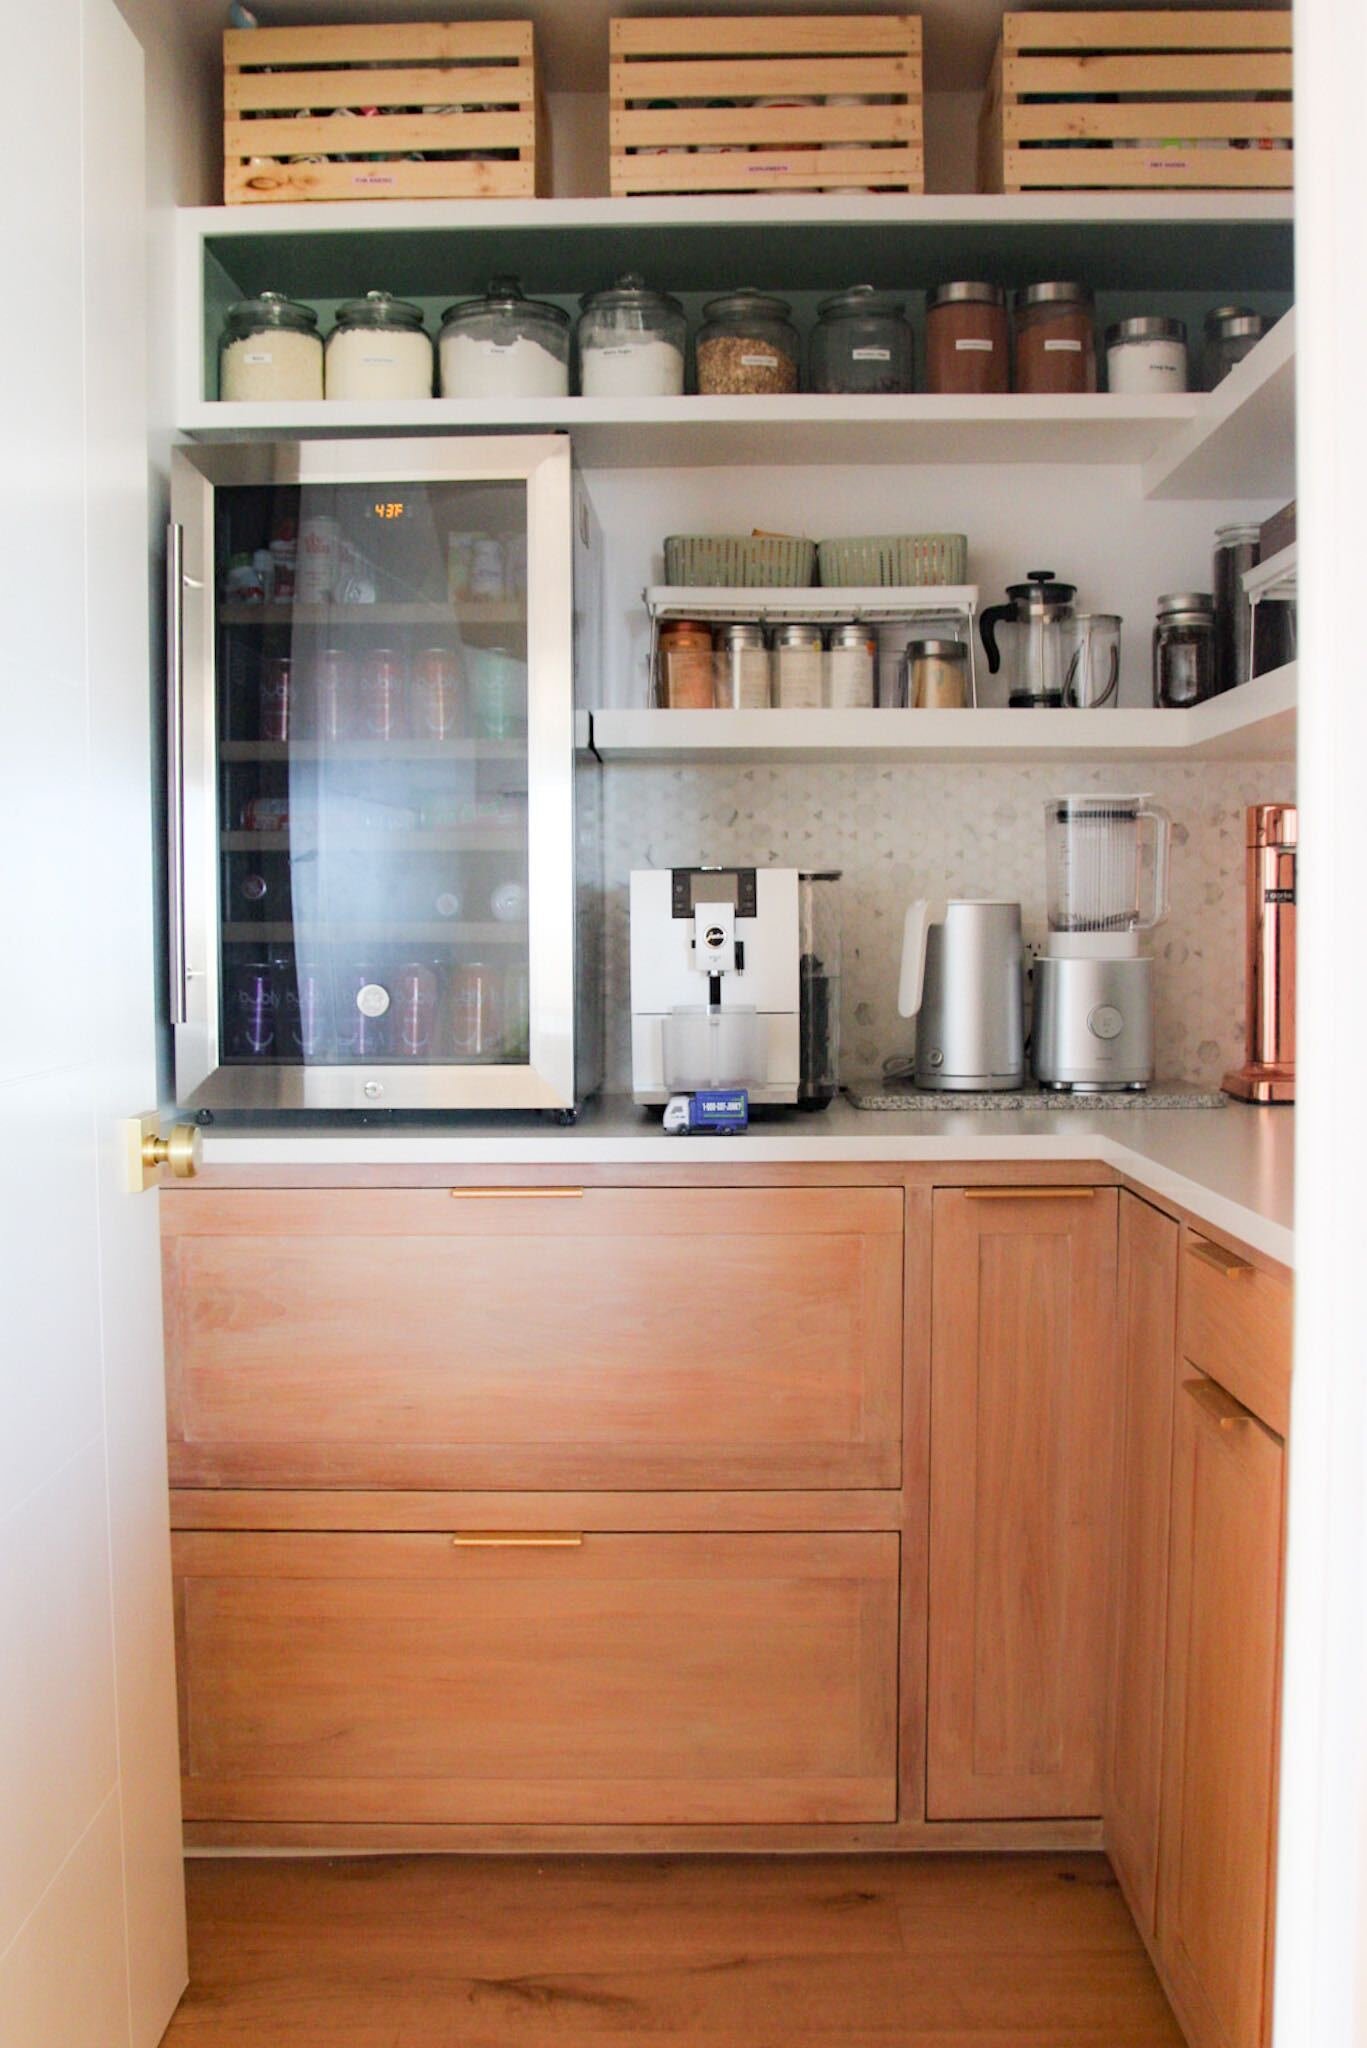
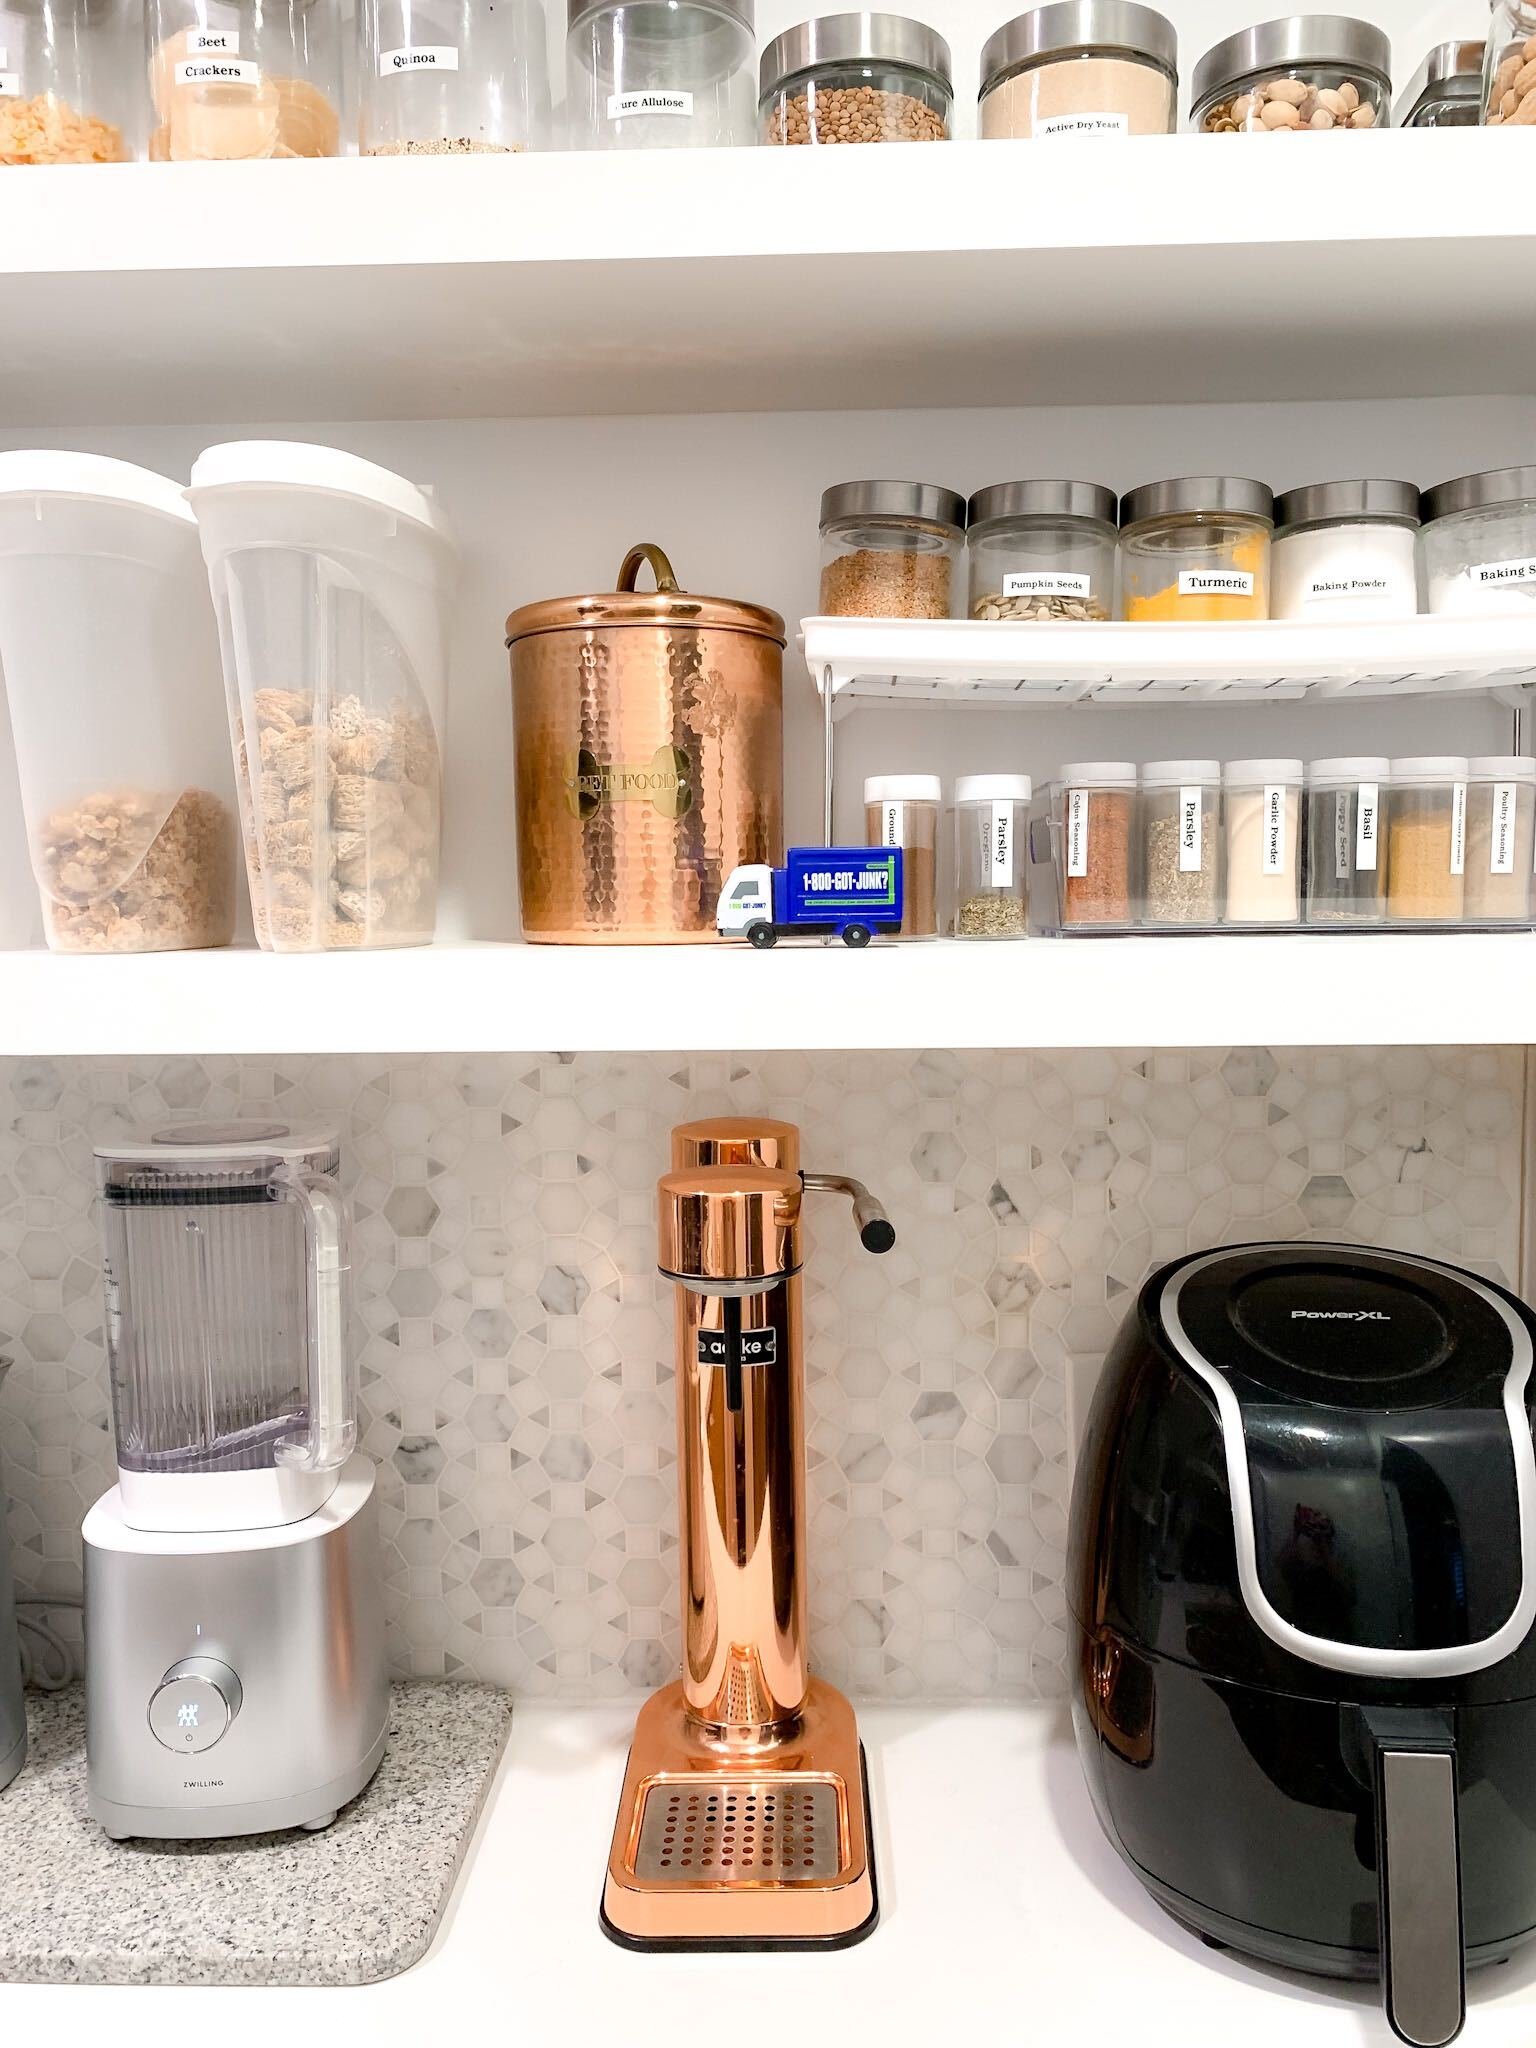
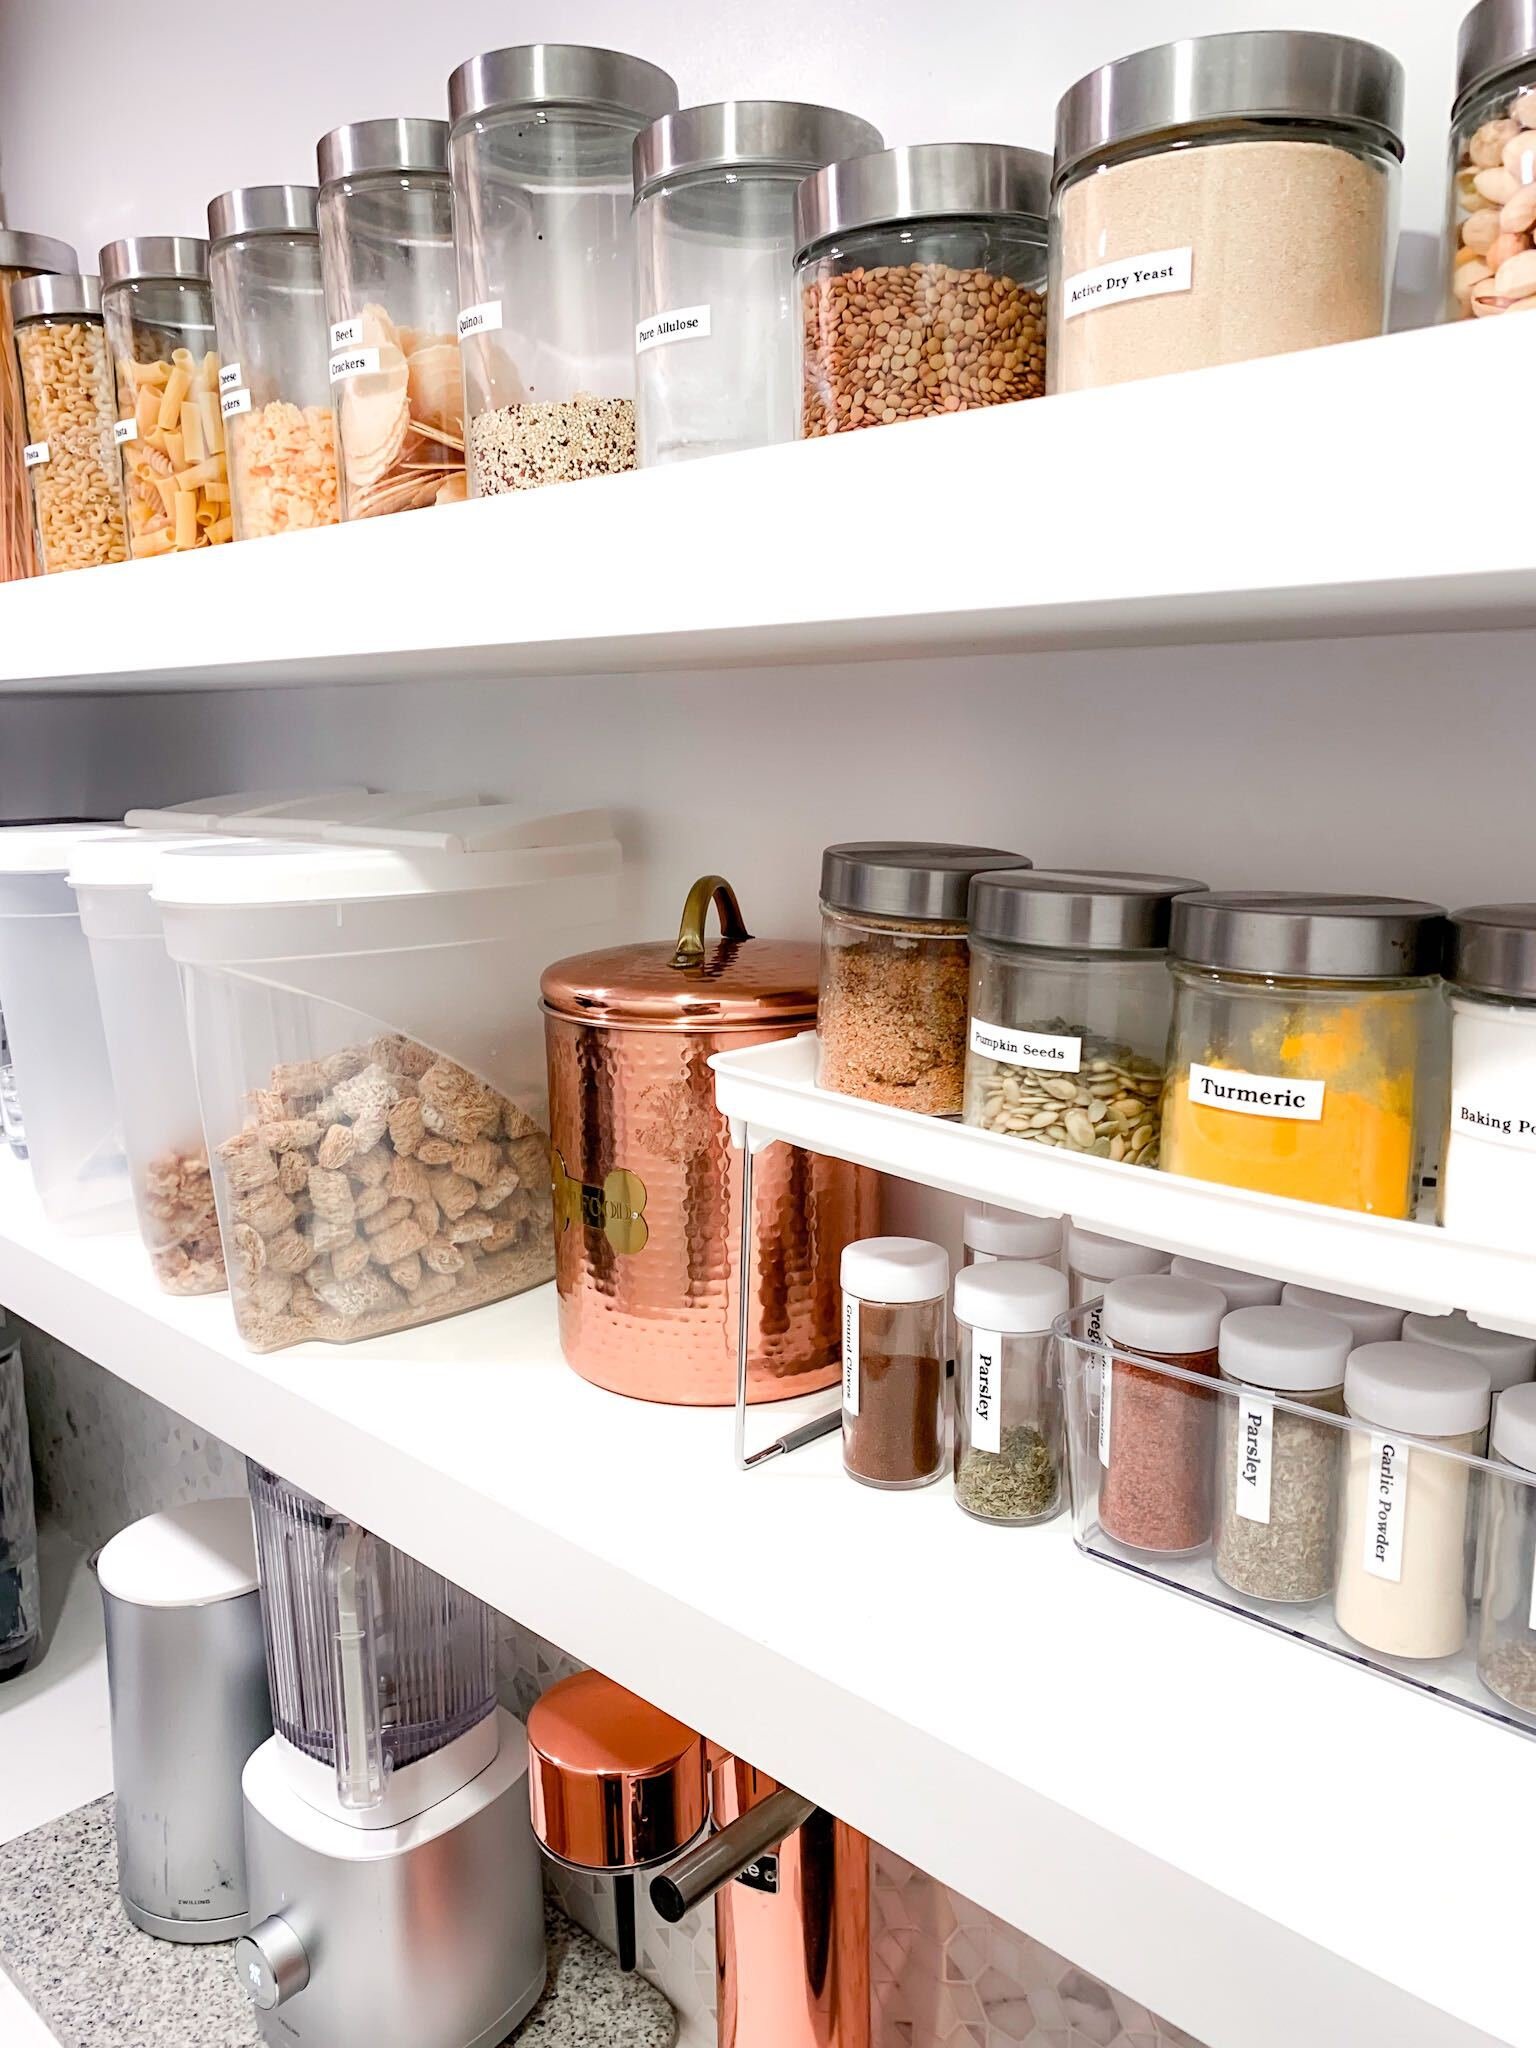
With so many different cooks in the kitchen during this time of year, making sure everything is easy to find, accessible and organized is incredibly helpful. Doing things like putting ingredients into clear containers, so you can see what you have. Putting all like items such as spices, baking items, tea, coffee, etc in their own little baskets or clear containers helps to keep things together. Last but certainly not least, labelling is life changing. When you label what things are, it makes life so much easier, not only for you, but for your guests too!
Now for a few personal tips that I have garnered along the way.
Tis’ The Season For Giving - Declutter & Donate When Your Kids Aren’t Home!
Lennon has outgrown so many clothing items or no longer plays with certain toys. Now is the perfect time of year to donate her once loved items to other children. How many times have you gone through yours kids old clothing and toys, put them into bags, only to have them tear back through them and pull out various items? Lennon’s classic line is “I want to save that for my kids!” Really? There are a few sentimental items I don’t mind holding on to in a small box or chest for her, but trust me, those sneakers you wore the rubber out on, are not going to be worn by my grandchildren.
This pattern of me bagging all the clutter up and her unloading it back onto the floor has happened one too many times, so now I know. I declutter when she is out of the house, and make sure it is hauled away before she gets back! Out of site, out of mind. Just the other day her closet got a major face lift when she was at school and she has not mentioned a single thing she thinks is missing.
Lennon’s Closet AFTER
Lennon’s Closet BEFORE
GIVE THE GIFT OF SPACE!
It’s a great time of year to clean out the closet, get rid of the clutter and open up your space and your home to guests. My entry way and mud room are usually filled with so many coats and shoes, bags and every day items, but as the seasons start to change, I know I need to make room for family and friends. Having open coat hooks, spots in the closet and places to put shoes make guests feel at home and like they aren’t taking up any of your personal space.
If you need help making your clutter disappear, it’s easy with 1-800-GOT-JUNK? All you have to do is point and junk disappears! Not only is 1-800-GOT-JUNK? happy to help, they’ve been a trusted junk removal since 1989!
Here are just a few reasons why I love donating my junk to 1-800-GOT-JUNK? :
They work on your schedule - They come when it's convenient for you.
They do all the heavy lifting - just point and the junk disappears.
The World’s Largest Junk Removal Service
Whenever possible, they donate the donatables, and recycle the recyclables!
When Got Junk has finished helping you declutter, your home will sing a happy song!
Are you planning on doing a renovation? Make sure you take the time to build in energy efficiency and get the most out of your reno. Keep reading to hear all about my personal tips and recommendations for cashing in on Efficiency Nova Scotia’s rebate programs when you are renovating a house!
You might think planning the design of a home is the most intimidating portion of renovations. Surprisingly, it’s actually much more intimidating to figure out how to run the house efficiently. There are so many options for heat sources out there - it’s hard to know where to start!
For my mid-century modern home, my top priorities were efficiency and saving a bit of money. Fortunately, Dave at Acumen Home Assessment was so helpful. He pointed me in a direction that would help me with both. Here are some great ways that I am able to see important savings, both environmentally and financially!
Reimagining Spaces
Space is precious, and as I love to host friends and family, I knew I needed a space for them. As you might have seen in Season 4, I decided to transform my furnace room into a guest bedroom.
I made my home so much more energy efficient by taking out the oil furnace, adding insulation into the attic and installing two mini split heat pumps. Doing this not only saved me energy costs but allowed me to utilise the space so much better.
Making changes like this to your home not only adds visual appeal and utilises the space better, but also helps the environment.
Big Statement, Big Savings
Front Door After
This pink door is not only a statement piece, but due to the materials used during insulation, it also keeps the heat in and the cold out. That might not shock you, but what might is that it came with amazing rebates!
This is what my front door looked like before!
Front Door Before
NEED HELP? If you need a little extra help making your home more efficient, my big tip is to book a Home Energy Assessment for someone like Dave to assess your home before doing a home renovation project. Doing this can steer you in a direction you might not have considered before. Energy Advisors know how to help you save on emissions, costs, and your households environmental footprint! It was well worth it to have Dave come by early in the process, and together we came up with a plan to maximize rebates and make my home more energy efficient.
Once I finished the renovation of my property, Dave came back to give me a final home energy assessment. My rebate cheque is in the mail and I am continuing to look for new innovative ways to be eco-conscious in my own home and all other home renovation projects I have on the go.
Instant in-store product rebates
Efficiency Nova Scotia also offers year round in store rebates. Save up to $400 at the checkout and long-term on your energy bill.
Examples of this are:
Washer and Dryers- $75 off per appliance
Dimmer switches- $3 off per unit
Smart Thermostats- up to $100 off
For the full list of in store instant rebates click here:
I hope you are inspired to look for ways to make your home more energy efficient while renovating. Feel free to email me with your questions or watch my Youtube Video below to see the before and after of my efficiency makeover!
We can all do our part to help our planet by being more energy efficient. No effort is too big or too small, so why not start with booking your energy assessment with Efficiency Nova Scotia today!
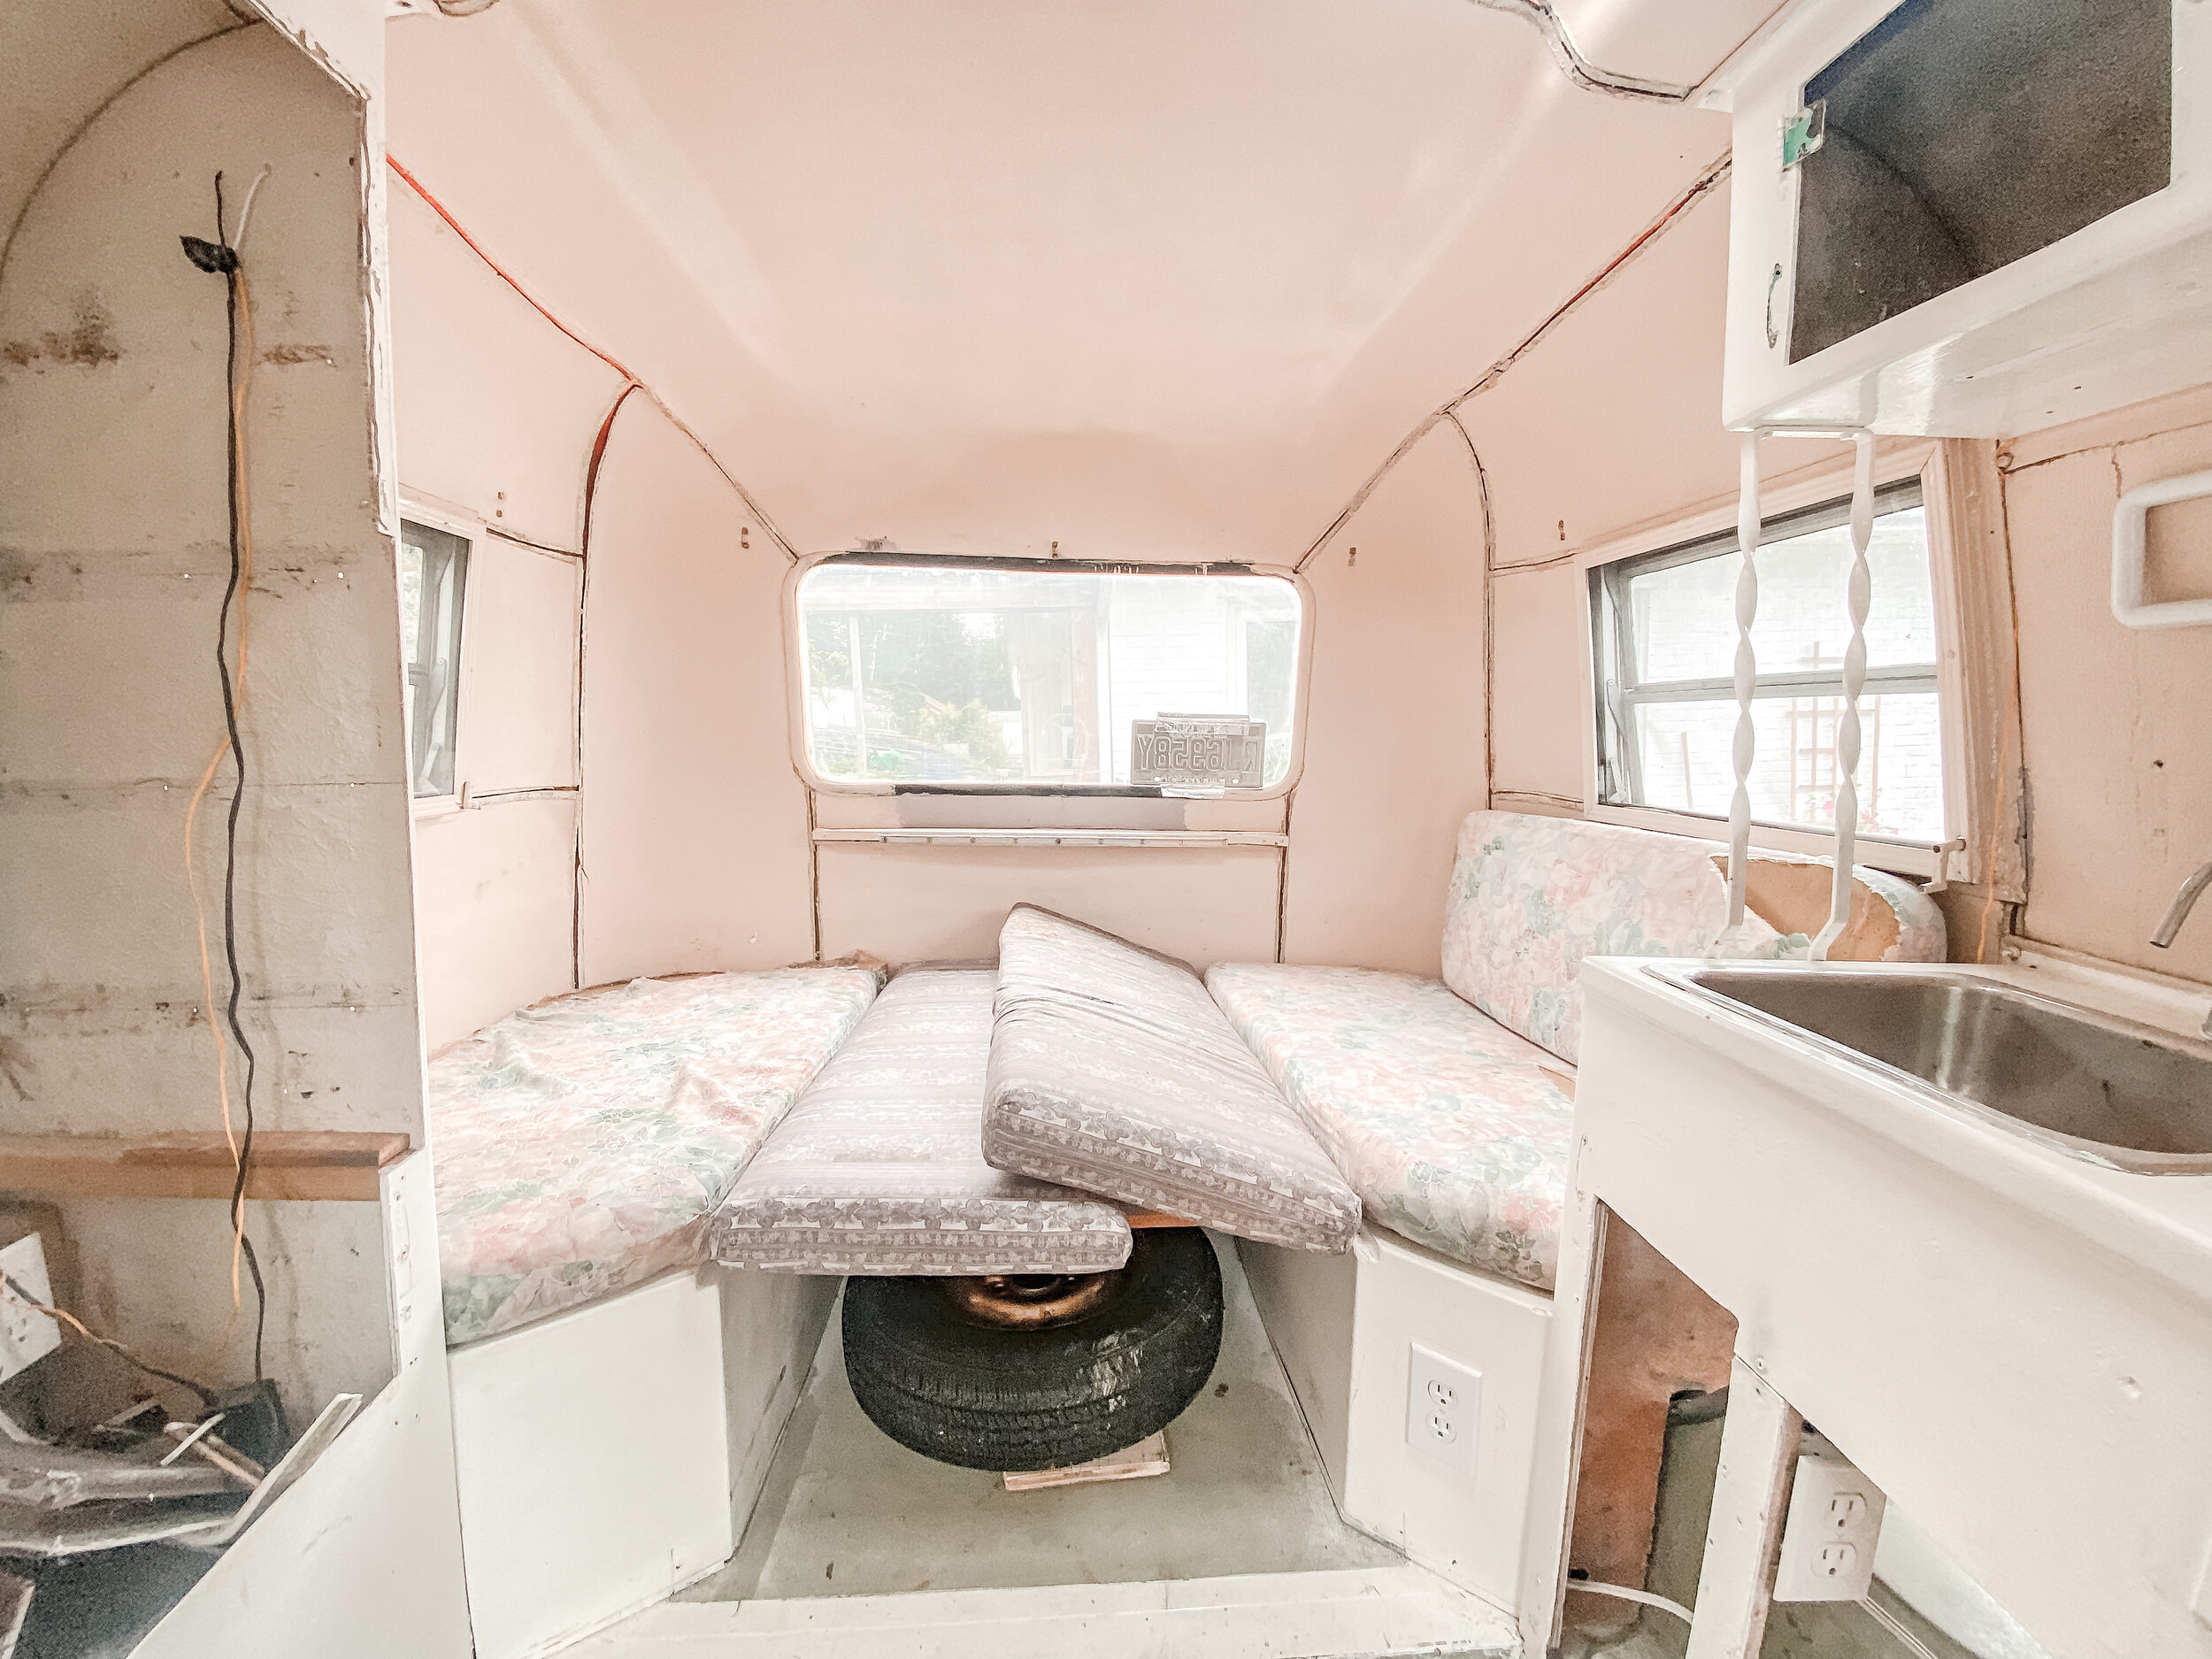
This summer has been full of surprises. A good portion of my summer has been dedicated to renovating the front lawn and backyard of my home, but as with most things, Covid delays have slowed down the process. In the meantime, I have taken on a trailer reno!
The original thought was to restore and remodel an Airstream trailer, but I figured I would be better off starting with something a little smaller. So I’ve settled on a 13-foot Boler trailer.
If you’ve never seen them before, Boler trailers were made from 1968 to 1988 in Winnepeg Manitoba. Only 10,000 were manufactured and they estimate about 8000 are still in circulation. The Boler became the famous iconic “Egg On Wheels” and is often the graphic used to symbolize a camper. They are now becoming popular restoration projects across the country! I am learning that though my trailer is only 13 feet long, there have been many new things to learn as I go. But nothing I can’t tackle!
Bolers are made with fiber glass. The company started as a septic tank company, but ironically the Boler has no bathroom in it. The Fibre glass makes the trailer extremely light and easy to tow. I can move it by hand, and pivot it on the camp site. Pretty handy for a single parent, I must say!
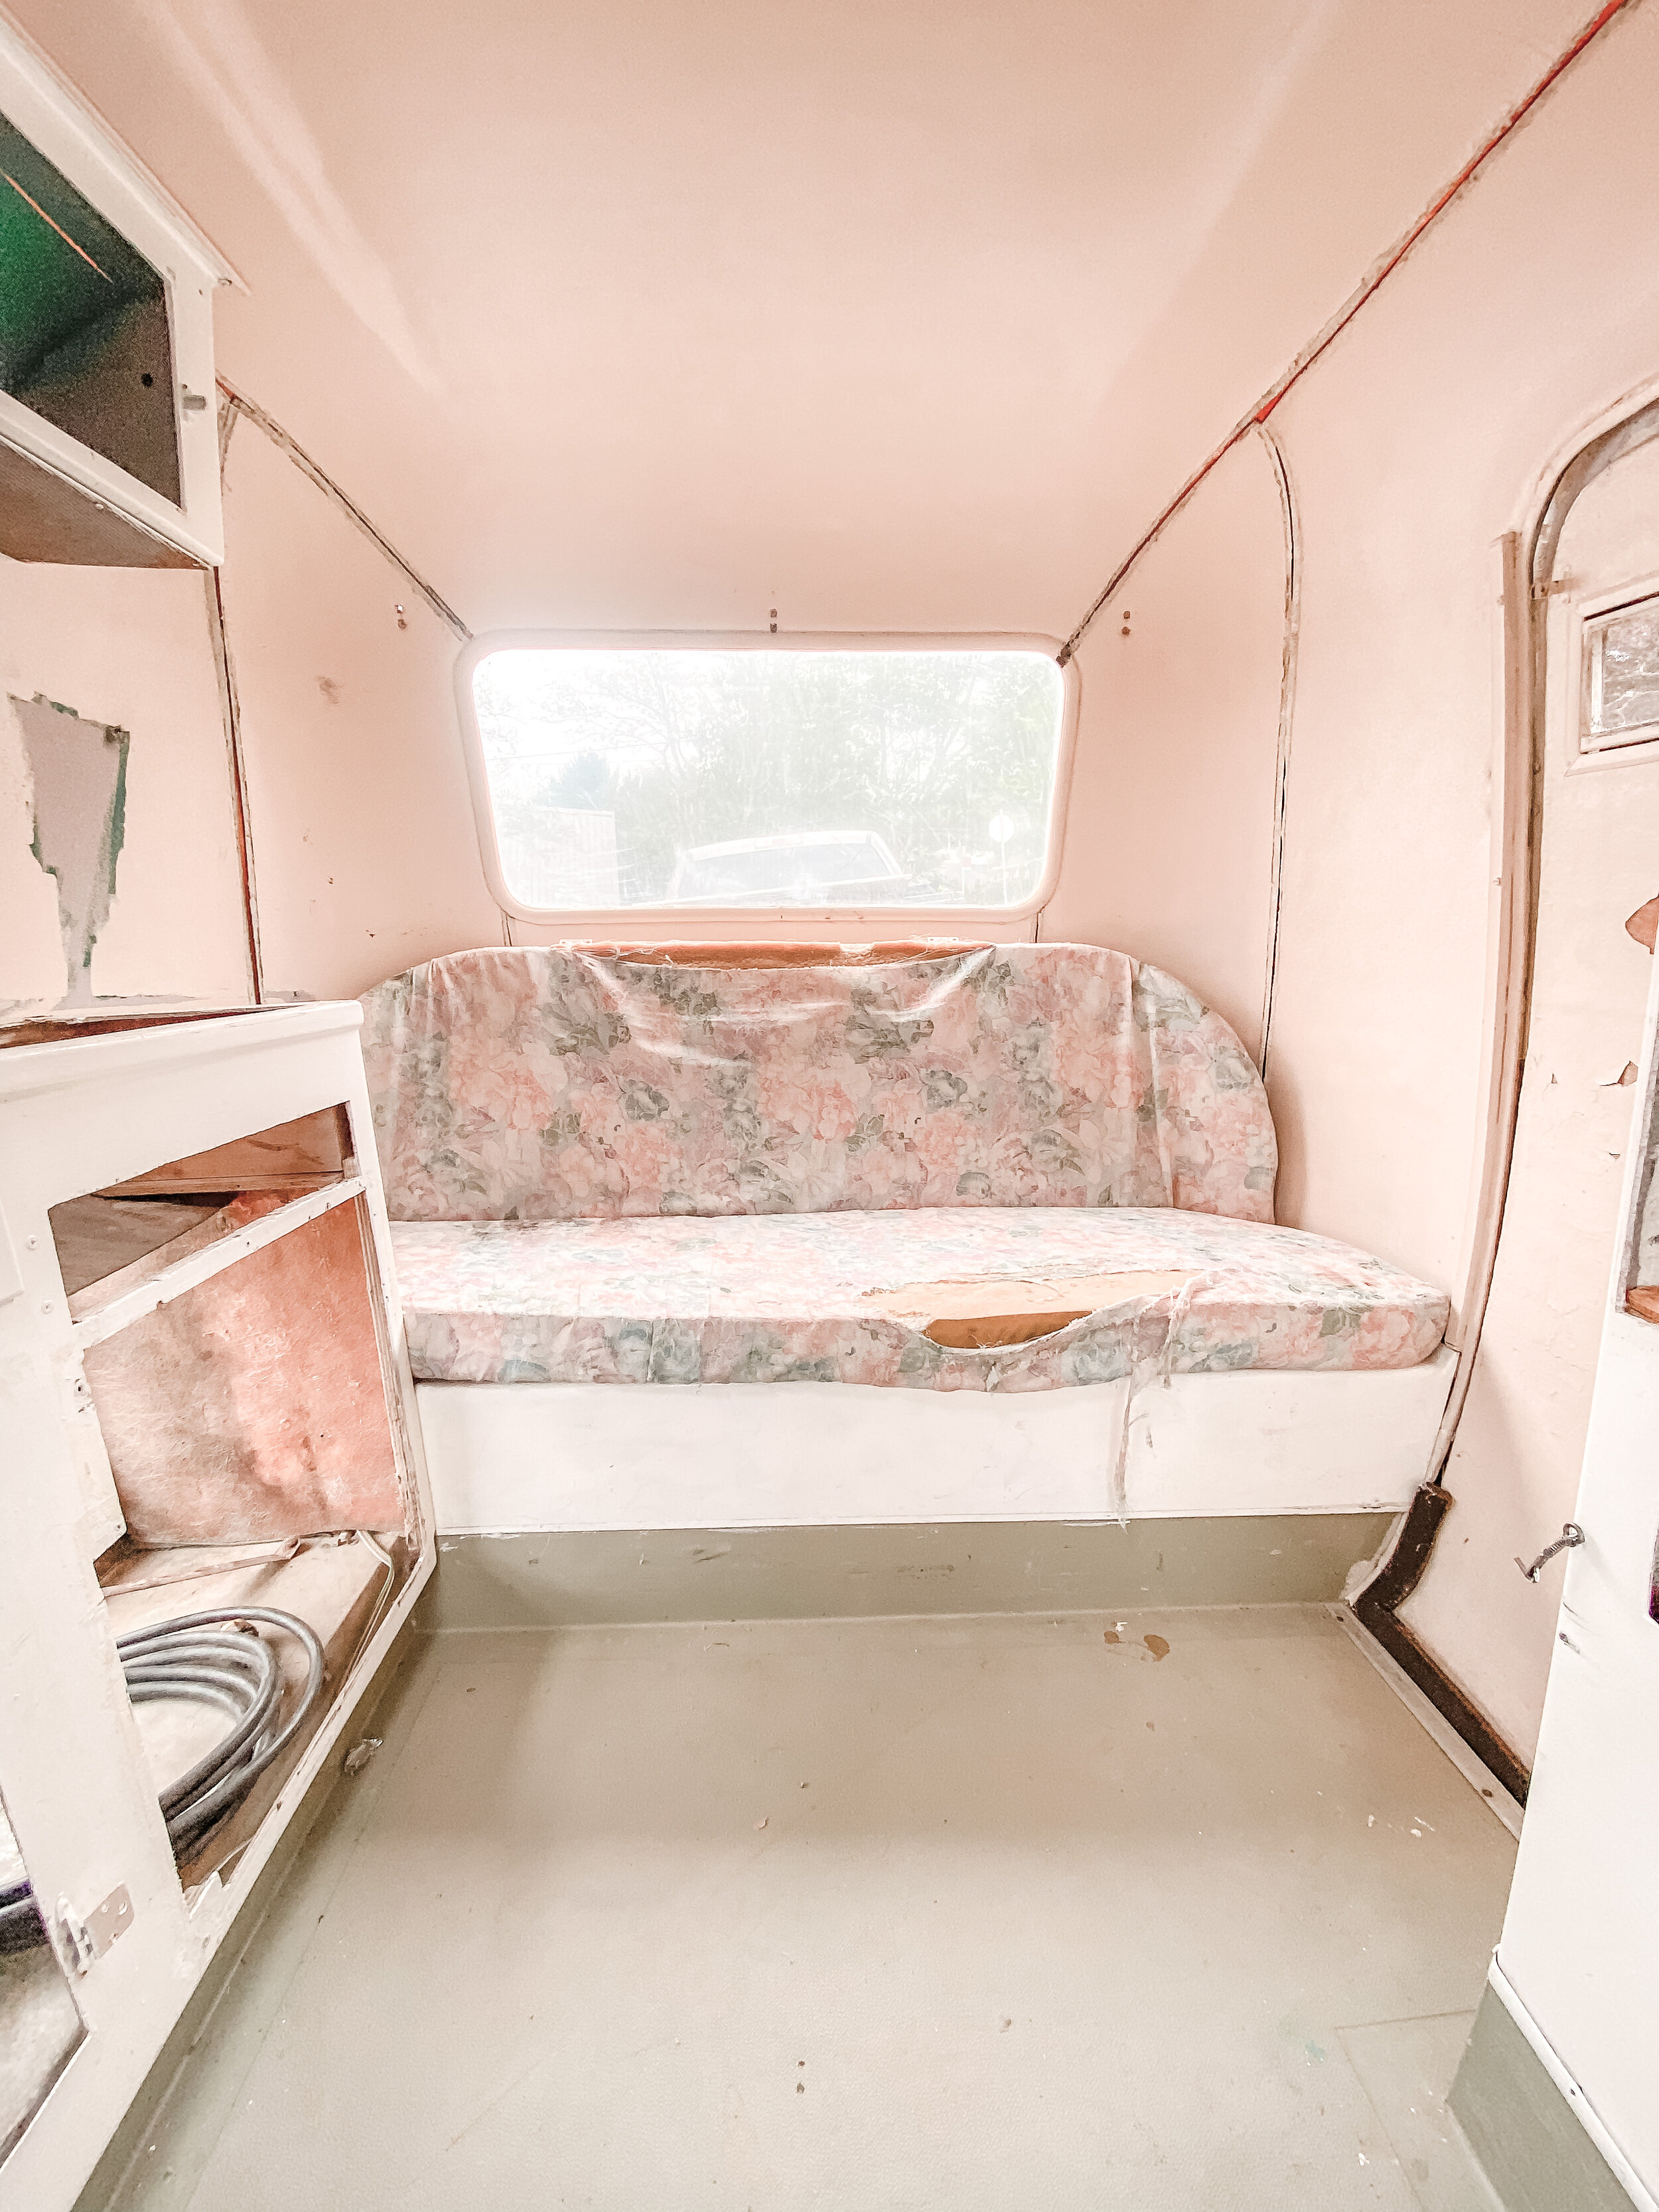
The Boler layout has a sofa on one end, that turns into a bunk bed, a small kitchen enough for a tiny fridge, tiny sink and a bit of storage. A dinning area that turns into a double bed, and a small storage closet. It’s small but adorable, and the perfect starter camper, for me and Lennon.
Let's Start with the Issues:
Original Boler Parts Are Hard to Come By!
I didn’t really look into this before I made the impulse purchase of this camper. But as I started tearing it apart I realized how custom everything is. There is a helpful website boler.ca that has links to purchasing some items you may need. But finding windows and hardware can be a challenge. Sourcing these items can also be expensive. Trailers and Boats are similar, so I did have some luck at the RV parts shop, and a local boat store. Other items I was able to grab at Home Depot!
Bolers can leak:
Just like any trailer, leaking is an issue. Apparently they are known to leak around the middle seam where the top of the fibre glass meets the middle. I discovered after my first vacation that the cushions were a little damp so I will need to do some investigation, but i am going to need to do some serious caulking. For this I am using exterior window and door caulking.
The Fibre Glass Needed to be Repaired:
Fibre glass is not a fun substance to repair, cut or interact with. It can leave you feeling itchy and icky. We discovered a few places on the Boler that need to be repaired before we could repaint it. There were a number of steps involved in refinishing the exterior, but due to the amount of repair that needed to happen, we ended up giving it a full do over.
The Door is Drooping:
I discovered a funny issues with the door, it is about 1 inch lower than what it should be to create a proper seal, this means we will have to remove it and raise it up with some washers or a new ball joint to make sure it is fitted properly and is both leak proof and safe from the outdoor invaders (mosquitos!) This is a task I will tackle in the next faze of the reno, so stay tuned!
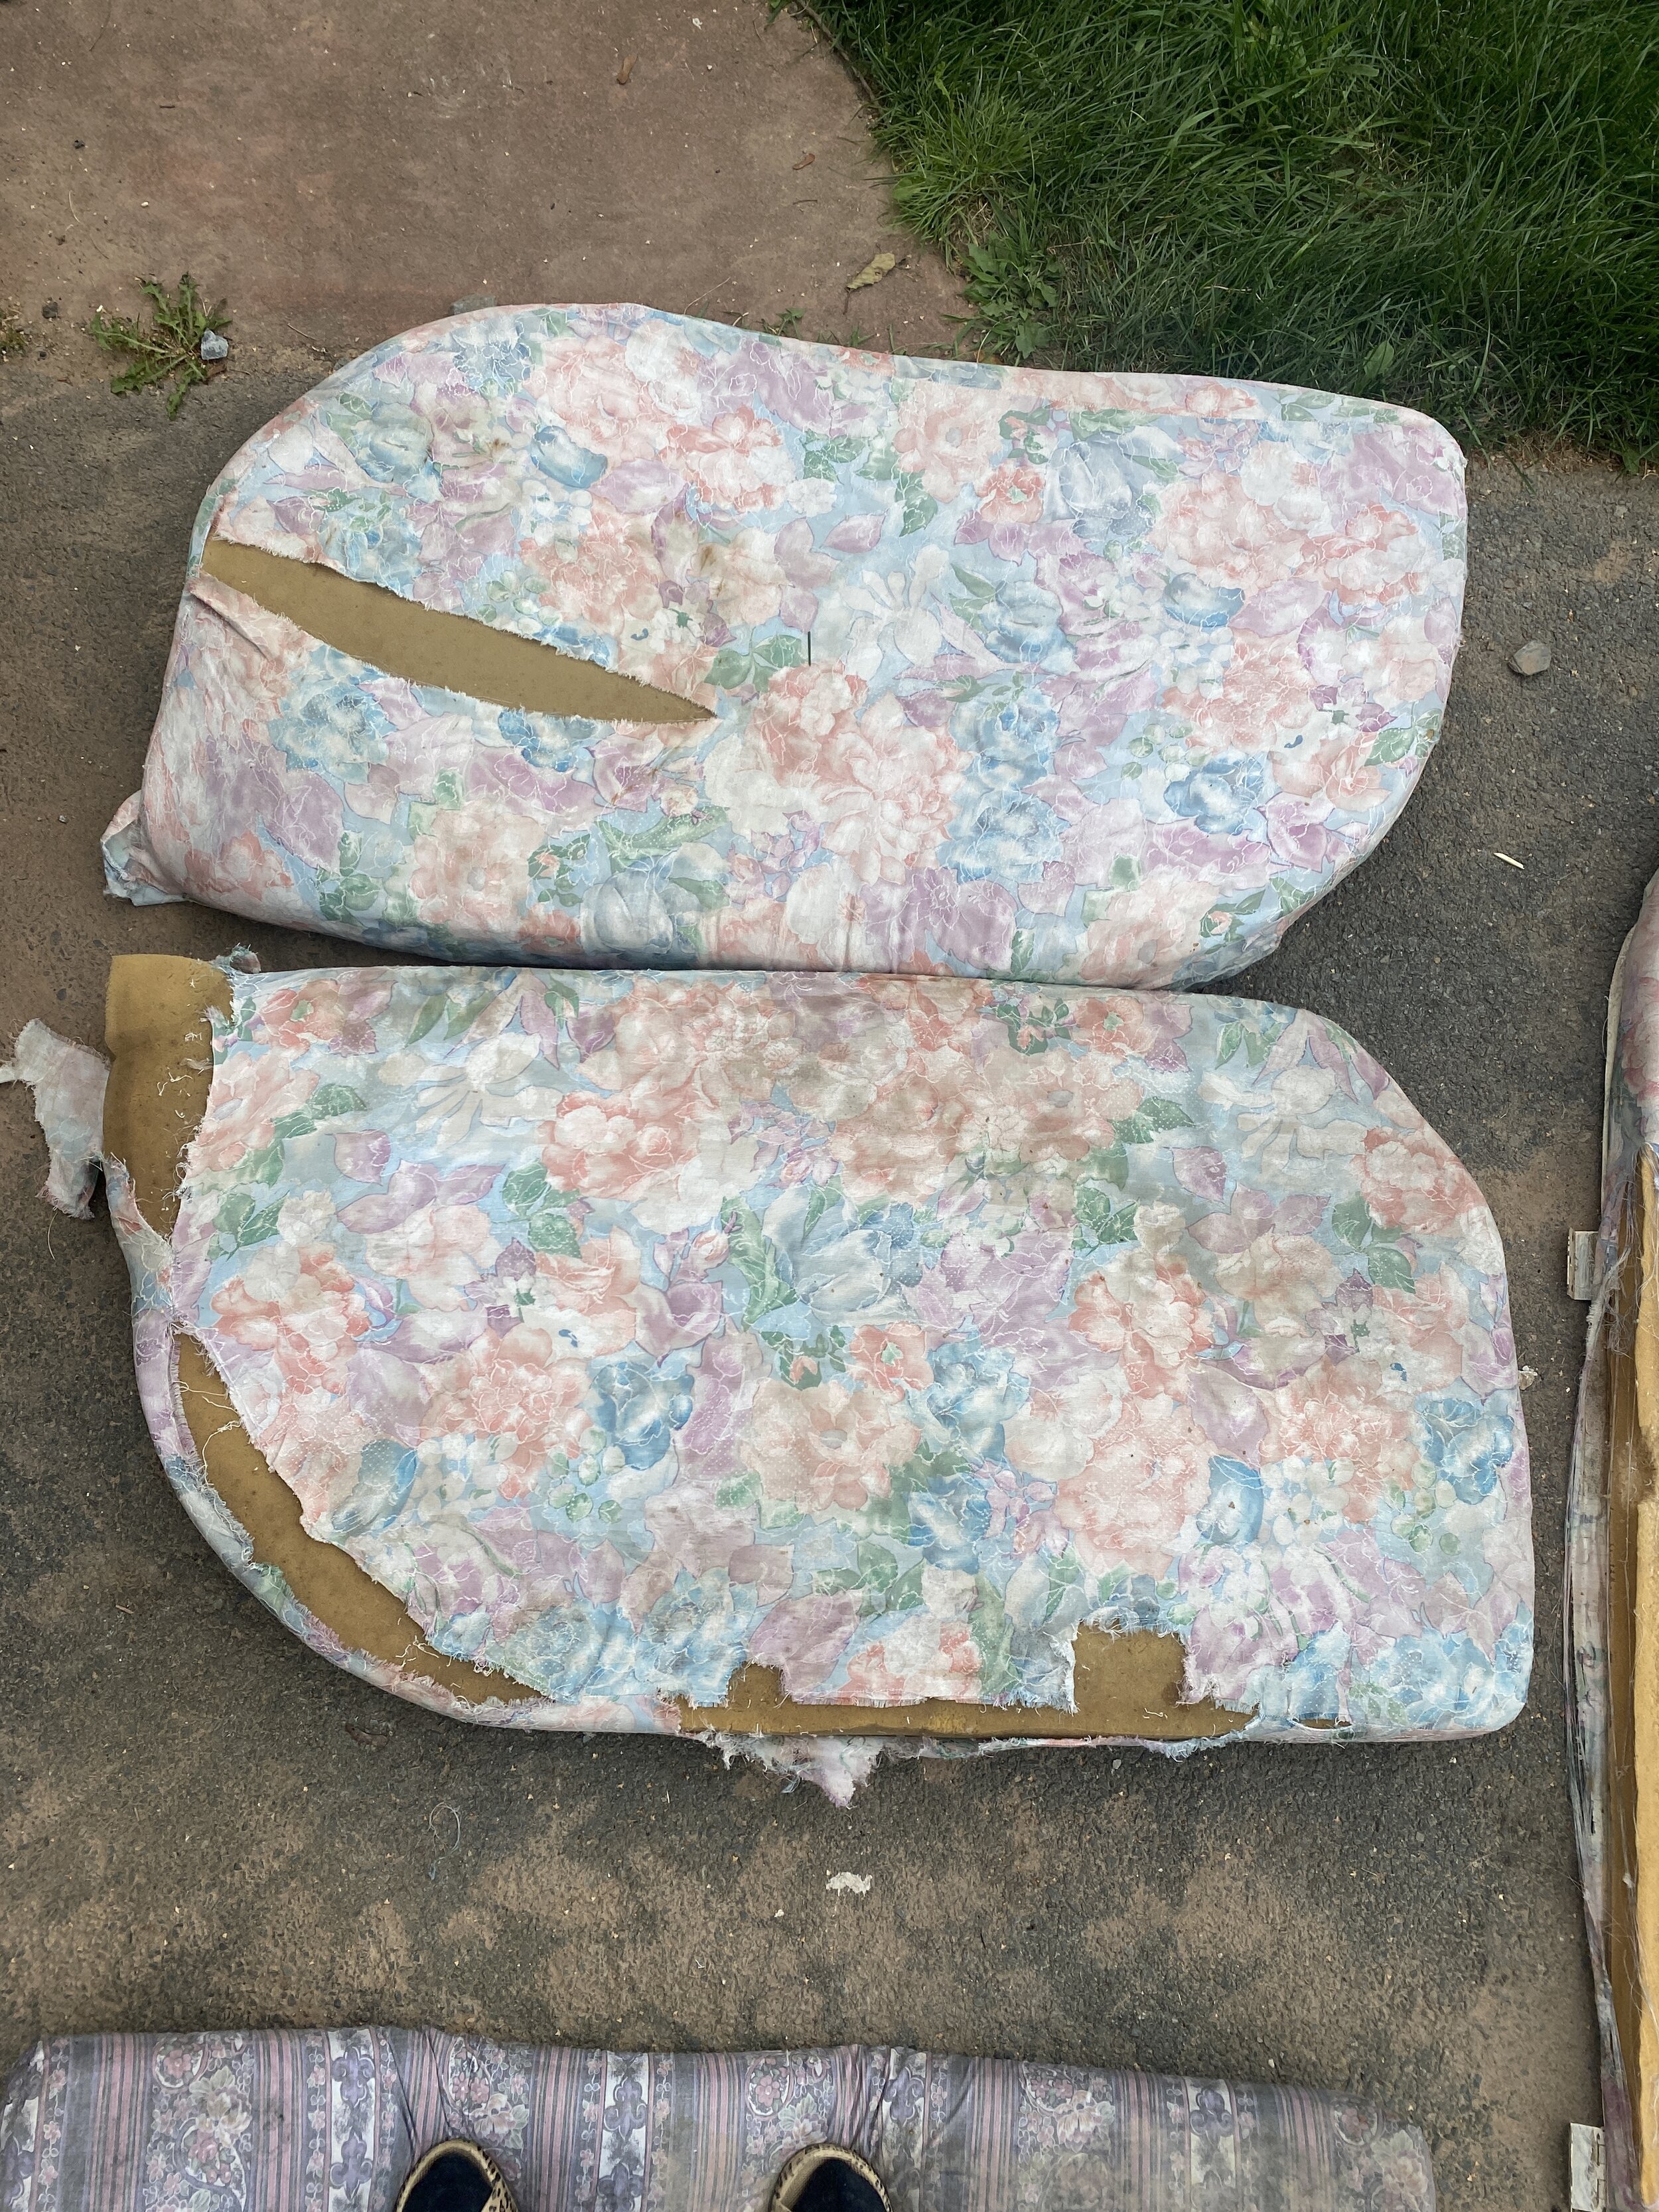
All the Upholstery and Foam needs to be replaced:
This was definitely a no brainer for me, I wasn’t going to be sleeping on mildew and mold. so the old cushions need to be tossed. but before they go, I took them to an upholstery shop and had them recut new foam for the unique dimensions and space inside. This was probably the most costly part of my renovation. It came to around $2000 for 6 new pieces of foam and fabric.
The Windows Don’t Work:
All the window mechanisms were either stripped broken or leaking… so i had to figure out a solution before leaving on our cabot trail road trip. I called a local welder and had him come out and measure the front door window to put a temporary solid pan in, where it was broken.
All The Seams Were Ripped Out:
This was a head scratcher, how was I going to make the inside look seamless and pretty. I couldn’t find flexible T moulding, and wasn't sure how to secure it quickly. So I went for the quick and dirty solutions. DynaFlex Caulking! After filling all the gaps with the caulking I painted everything white. This seems to have solved the problem for now, but I will definitely want to add something before the end of this restoration to draw attention to the beautiful interior lines of the camper.
Moving on to Inspiration
Here are some inspiration shots of what I’ve been inspired by.
I had the Boler sent from rural Quebec. A couple had previously purchased it so they could remodel it, but plans arose so they couldn’t finish the project. The Boler had already been sanded down, which helped with our tight time constraints, and it was just a matter of patching holes and giving the Boler a good paint job to get things refreshed.
Bolers are made of fibreglass, so I couldn’t send the trailer to a normal auto body shop. It took some thinking outside of the box to find someone that knew how to restore the trailer, but it turns out that Bolers are oddly similar to boats! I got in contact with Ashley, a marine repair specialist, who knew how to advise on everything from fibreglass repair to fixing the linings inside the trailer. In no time, we were able to get to work on turning the trailer into a luxurious camping escape. I went with a cream to paint the top half and a pretty pink that matches the front door of my house for the bottom, then buffed and spray painted the hubcaps to give the Boler a much needed glow up.
….And here she is!
So you’ve seen the finished product of the outside of the Boler.. Believe me when I say that’s just the beginning! Who’s ready to see what we achieved with the inside?
Lennon and I just took the Boler out on our first camping adventure. I can’t wait to share the story of how the inside of the Boler turned out! Check back in soon to see all the details, the process, and the big reveal of my trailer!
Have you ever had your heart set on a table you saw online or maybe at a designer shop, but you just couldn’t stomach the price tag? When looking for the perfect dining table to fill my mid-century modern open concept living space, I kept running into this problem.
When taking on a renovation project, budgets can be tight, a lot of your funds often get soaked up by construction costs. This leaves less money for decorating but the pieces you bring in to furnish and style make such an impact on the way you feel and function in a room. It’s key to look for areas you can save. When it came to the dining table, I knew I needed to save some pennies, but I didn’t want to sacrifice design. I had envisioned the table as a statement piece, so I decided to get crafty and create my own. With a bit of elbow grease, a solid vision, and some tools, I was able to achieve the look I wanted at a fraction of the cost. Now I have a beautiful place for our friends and family to gather around for a meal, conversation, or games.
Old doesn’t mean useless, and this is often the case for me. I love searching secondhand places for great finds that I can transform into unique, custom pieces for my home. I started looking for a second-hand wood table to kick off the project. Fortunately, I found just what I needed on Facebook Marketplace. After negotiating a bit and solidifying a pickup time, I was able to secure the base of this project for $90.
TIP: If you see something you like on Facebook Marketplace, act quickly, be direct with pricing, and know that time is of the essence. Pieces go very quickly; I don’t want you to lose out on what you are looking for.
Next, was the elbow grease step. With a few cuts, some sanding and varnish, the top came out exactly how I had envisioned. I couldn’t be happier about how the legs turned out - the dowels make the perfect statement. They hide the outdated look of the previous legs, making it match the rest of my open living space. To see the full tutorial so you can create this look in your home, watch the complete transformation here.
To create this table on your own, you will need the following tools and supplies:
Belt sander
Palm sander
Skill saw
Chop saw
Router
Nail gun
Sandpaper (do you want to suggest grits?)
Wood glue (do you want to say the type?)
Screws
Varnish
Pre-used wood table (we found ours for $90!)
Wood dowels (we chose oak)
Then you can begin construction…
———————————
For the top
1. Remove the braces and legs
2. Sand down old varnish using the belt sander and palm sander
3. Cut the edge with a skill saw
4. Glue the leaf inserts into the table
5. Use a router to create the new desired angle
6. Sand with finishing sand paper
7. Apply the desired varnish
———————————
For the base
1. Create race track structure with leftover wood as cross braces
2. Cut half-round oak dowels to the correct height with a chop saw
3. Secure dowels with a nail gun
4. Toenail top to base with screws
5. Finish with more sanding and varnish
This piece finally got the facelift it needed and is now the center of a beautiful space we use to gather for food, conversation, and games. To complete the look, I paired the table with some cute IKEA chairs. Lennon and I have already created many memories around this table and we can’t wait to create more.
The products in this post were generously gifted in collaboration with Endy.
As a busy mom, I need as much sleep as I can get. When choosing a mattress, I knew I needed something that would give me a great night’s rest. After researching I decided on Endy, a Canadian mattress company that you order online & receive in a box. I know buying mattresses can be daunting and expensive, so I thought I’d share more about my experience with this mattress company!
The boxes showed up on my doorstep, and they were really easy to simply unfold and put in each bed frame. After spending so much time and hard work on the renovations of my home, it was great to have something that could easily be moved in and maneuvered, and I knew I could look forward to spending my first night in my new home because of this Endy mattress.
I will also admit that I love that I didn’t need a box spring with these mattresses, therefore creating a low profile look, which matches the design of my mid-century modern home.
Let’s get down to the nitty-gritty. The mattresses are made of foam instead of using coil, and after extensive testing, they are rated significantly more breathable than other leading brands, so I notice I get a better night’s sleep because I’m not as hot during the night.
I personally like a medium-firm mattress, which happens to be the only firmness Endy offers. If you are someone who wants a more firm or soft mattress, I might suggest taking advantage of Endy’s 100 Night Trial.
I love that on the Endy website, you can find all kinds of bedding needs: everything from mattress covers to couches, and I would say the price point is really reasonable for the quality that you receive. If you are interested in trying one of these mattresses or any of their home décor, I highly encourage you to check out their website!
More reasons why..
Each Endy mattress comes with a zip-off, machine washable cover, so you can wash it easily. I love hacks that make things more convenient!
The technology used in the mattresses not only control temperature through every season, they also control motion! The mattress prevents the transfer of movement in order to keep you and your partner fast asleep!
Endy is certified CertiPUR-US & GREENGUARD Gold, meaning they are safe from VOCs, formaldehyde, and phthalates and guarantee extremely low levels of chemical emissions and harmful pollutants after third-party testing.
And finally.. They are also made in Canada and loved by over 100,000 of us!
Need I say more? It’s time to get your Endy mattress, and a restful night of sleep - from now on!
These Germ Eliminating Fixtures and Hacks are about to change your entire bathroom experience.
This blog was written in partnership with American Standard. All opinions are my own.
There is nothing quite like the feeling of a clean and tidy house! When my home is put together and sparkling from corner to corner, I feel relaxed and ready to tackle whatever comes my way (except spilled milk!). I love getting Lennon involved in chores whenever I can because it’s a great way to teach responsibility and make her feel like she’s an important contributor in caring for our home. It’s me + you kid!
That’s one of the reasons why I love my American Standard sink and accessories. The company produces high-performing fixtures, stylish faucets and sinks, and other wellness products for the bath and kitchen. And, since I’ve been on a cleaning kick lately, their touchless product offerings and clean technology make my life a whole lot easier and my home a whole lot more sanitary! Check out these tried and true cleaning hacks that will save you time, simplify your life, and instantly boost your mood.
• Hack #1•
Clean In Every Corner
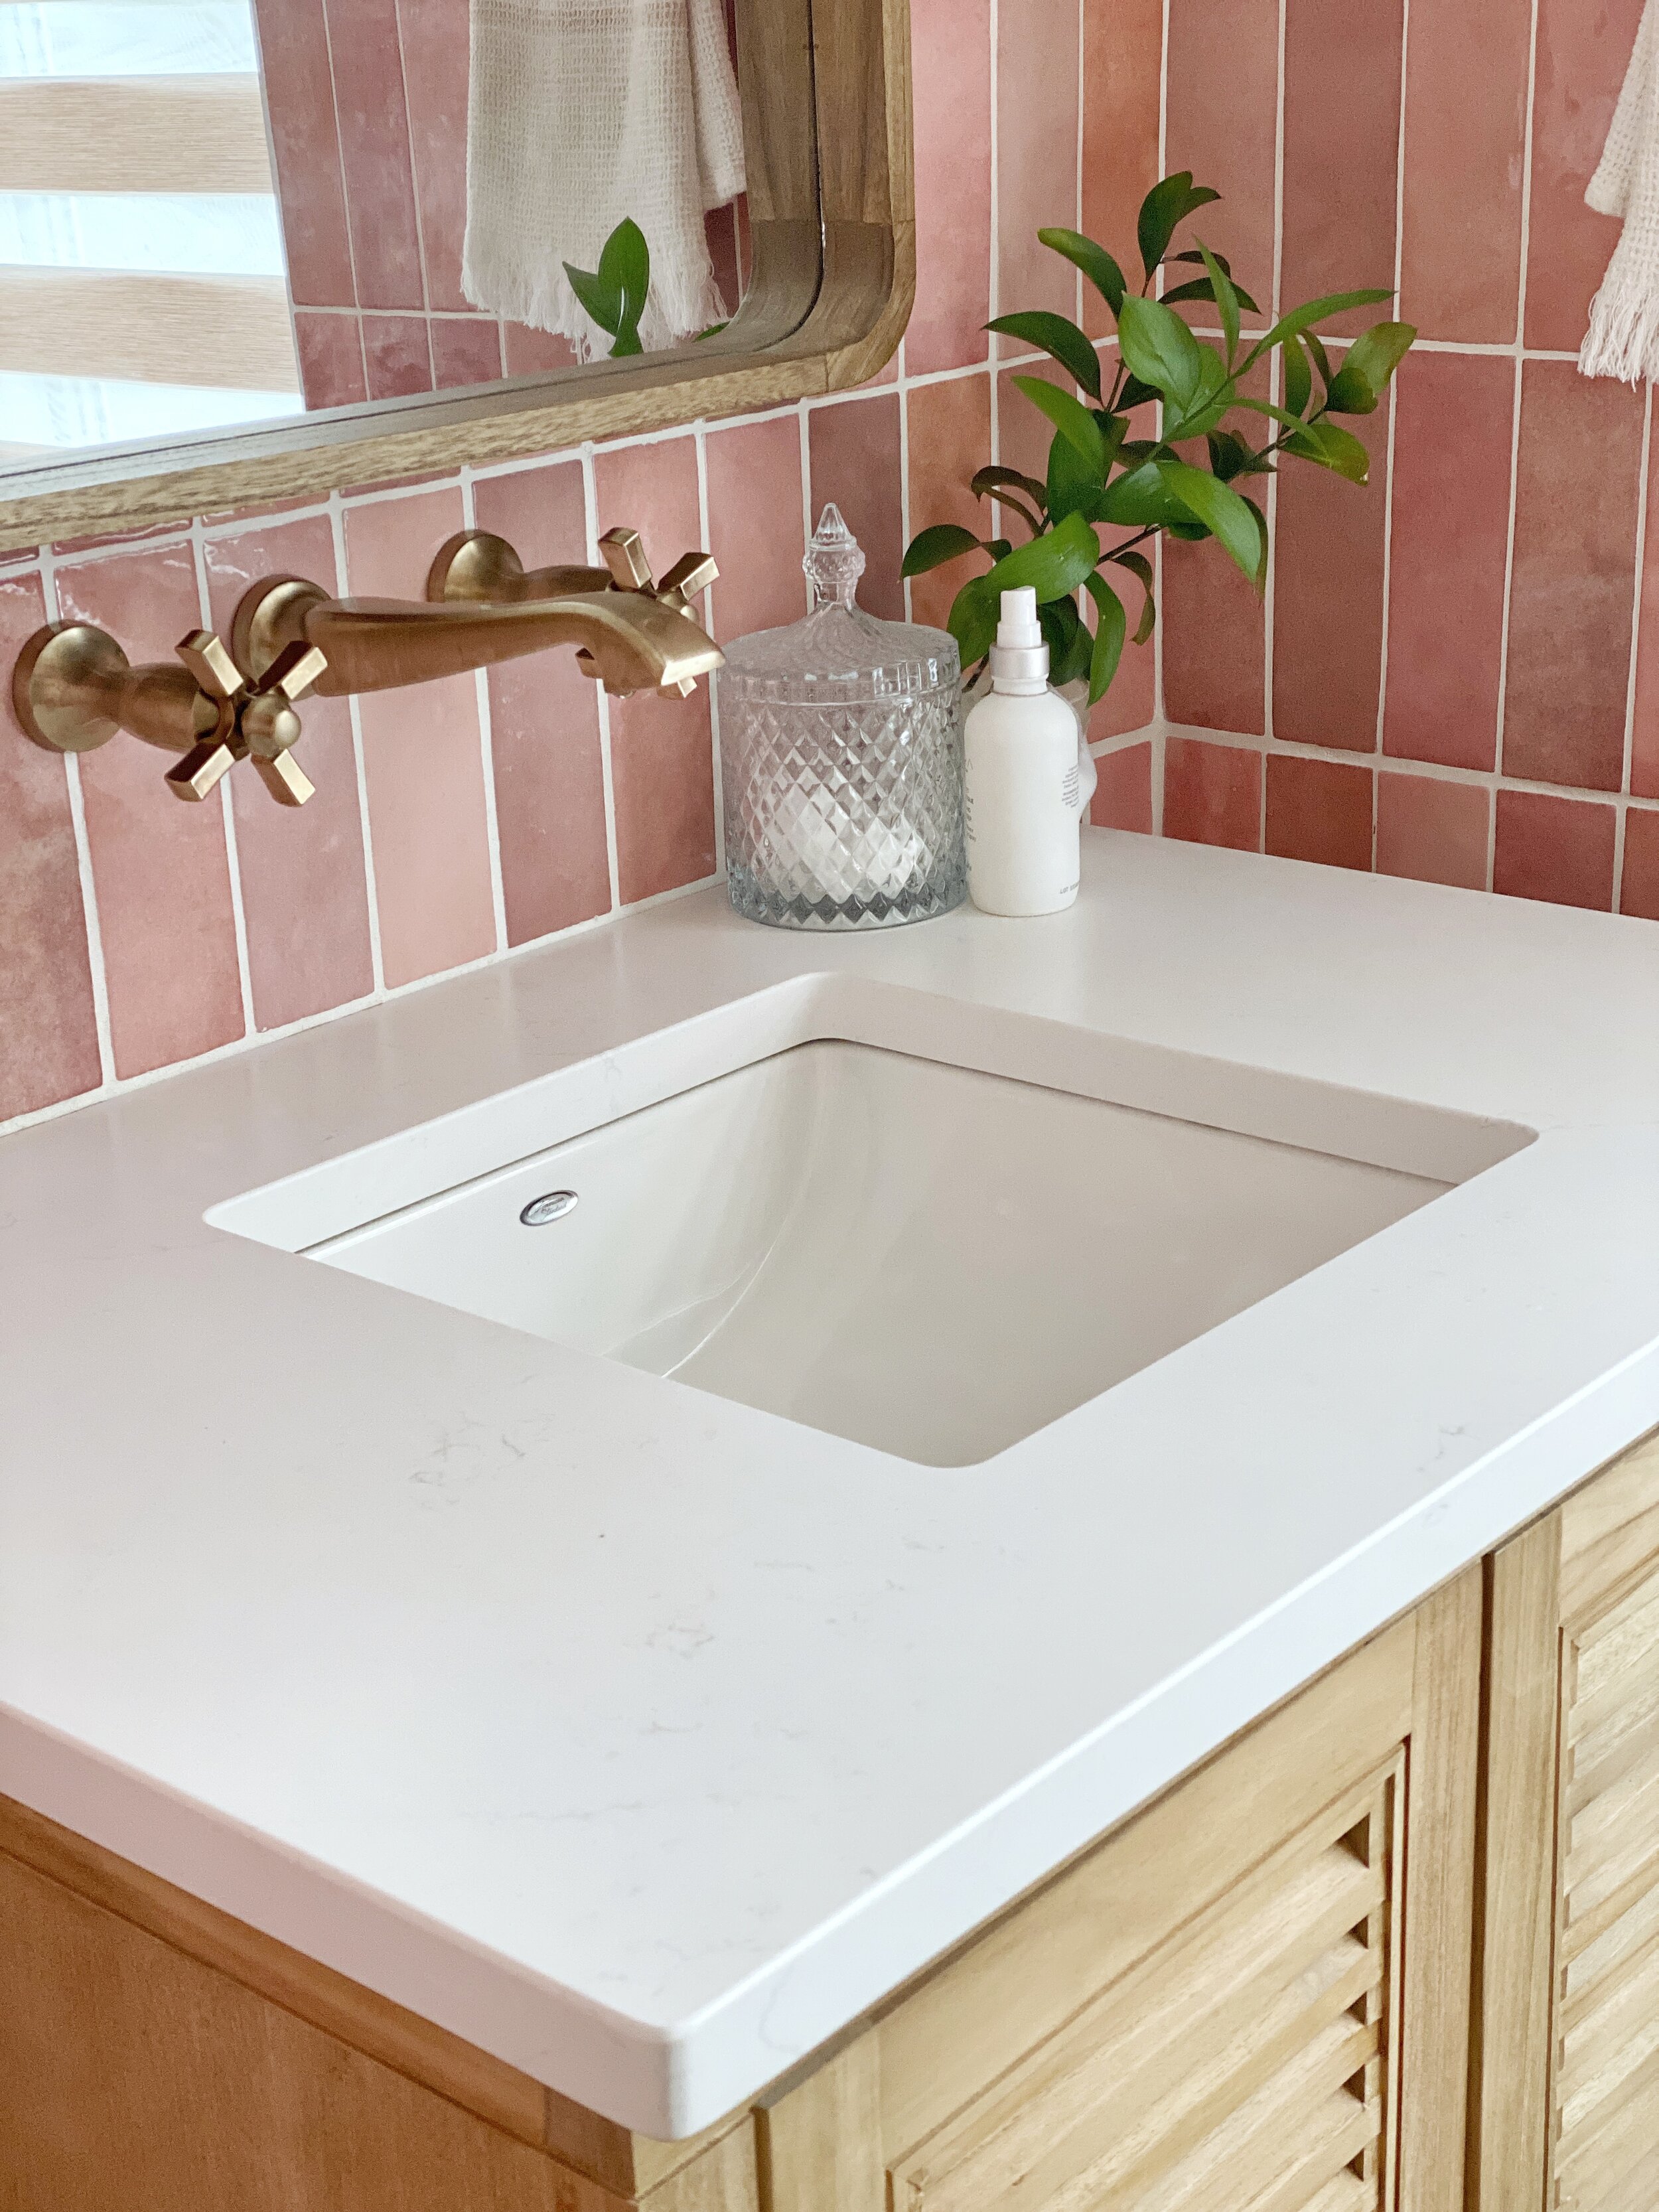
If you struggle with cleaning the nooks and crannies around your bathroom and kitchen, you’re not alone. These hard-to-reach crevices can be incredibly frustrating, especially for die-hard cleaning aficionados like us. I’ve come up with an easy hack that will make those tricky areas sparkle faster than you can say “clean as a whistle!”. Wrap a soft cloth around the end of a butter knife to clean the gunk around faucets, vents and other small fixtures. The knife is small enough to get into those tiny corners, and the cloth prevents scratches. They’re the perfect deep cleaning duo in my humble opinion. American Standard sink and accessories
Studio Carre Undercounter Sink
• Hack #2 •
Pearly White Surfaces
The power of a soft-bristled toothbrush goes beyond healthy gums and teeth. Wet the bristles with a mixture of baking soda and water and gently brush over the shower and wall grout. Leave it on for 10 minutes, rinse and voila! Gleaming tiles every time!
• Hack #3 •
When Life Gives You Lemons….
If you hate water spots on your chrome faucets as much as I do, I’ve got you! Cut a lemon in half, rub it all over your faucet, rinse and buff with a soft cloth. Easy, peasy and done in a flash.
Beale Pull-Down Kitchen Faucet
• Hack #4 •
Let The Fixtures Clean For You
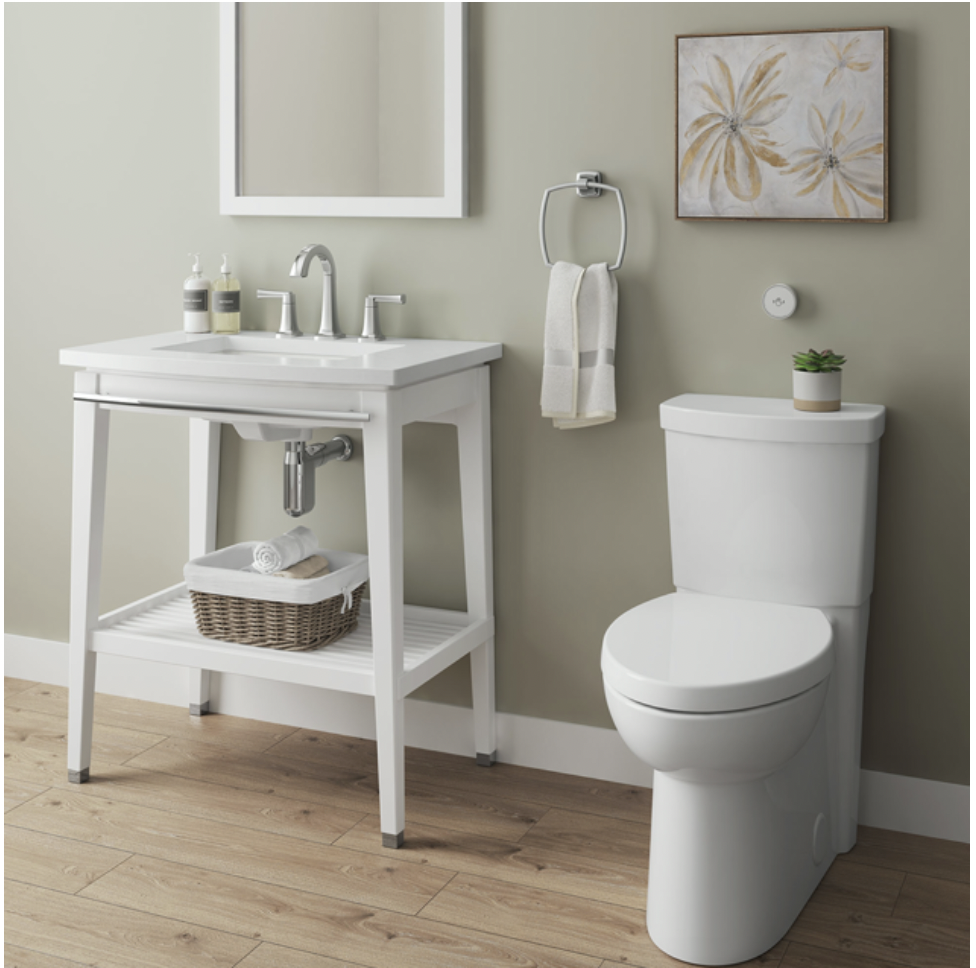
If there’s one job I hate, it’s scrubbing toilets and I know I’m not alone on this one! The American Standard Everclean surface makes cleaning toilets a cinch!The double-coated surface inhibits the growth of stain and odour-causing bacteria, mold and mildew on the surface, and that means less backbreaking work for this mama! It's like a self-cleaning oven for your bathroom!
Studio Touchless Toilet
• Hack #5 •
Keep Your Hands Out Of It!
My American Standard Studio Carré Undercounter Sink was made for me– someone who loves clean, contemporary lines, but not the maintenance as the EverClean Surface and Technology makes it super easy to keep clean! American Standard understands that dirt and build-up happen, which is why they’ve created the double-coated surface to inhibit the growth of stain and odour-causing bacteria, mold and mildew on the surface. The smooth, mirror-like surface stays cleaner longer, even after years of use, making my life a whole lot easier. I use some vinegar, warm water and buff it with a soft cloth to make it sparkle and that’s as much work that’s required from me. Heaven.
Beale Pull-Down Kitchen Faucet
I’ve also become obsessed with American Standard’s Beale Pull-Down Touchless Kitchen Faucet, which features a Selectronic hands-free technology sensor so you can stop and start the water with a simple wave of the hand. The pull-down faucet spray head will also help you reach all regions of your sink with ease, while the sleek and contemporary design is sure to complement any home design perfectly.
• Hack #6 •
Even Your Mirrors Love a Clean Shave
If you have a can of shaving cream lying around, you can kiss foggy, dirty mirrors goodbye- for a couple of weeks anyway! Simply pump some foamy shaving cream onto a soft cloth or paper towel to stop your mirrors from fogging up when you’re in the shower. Who doesn't love a clean reflection?
Designer Rebekah Higgs loves to repurpose and redesign.
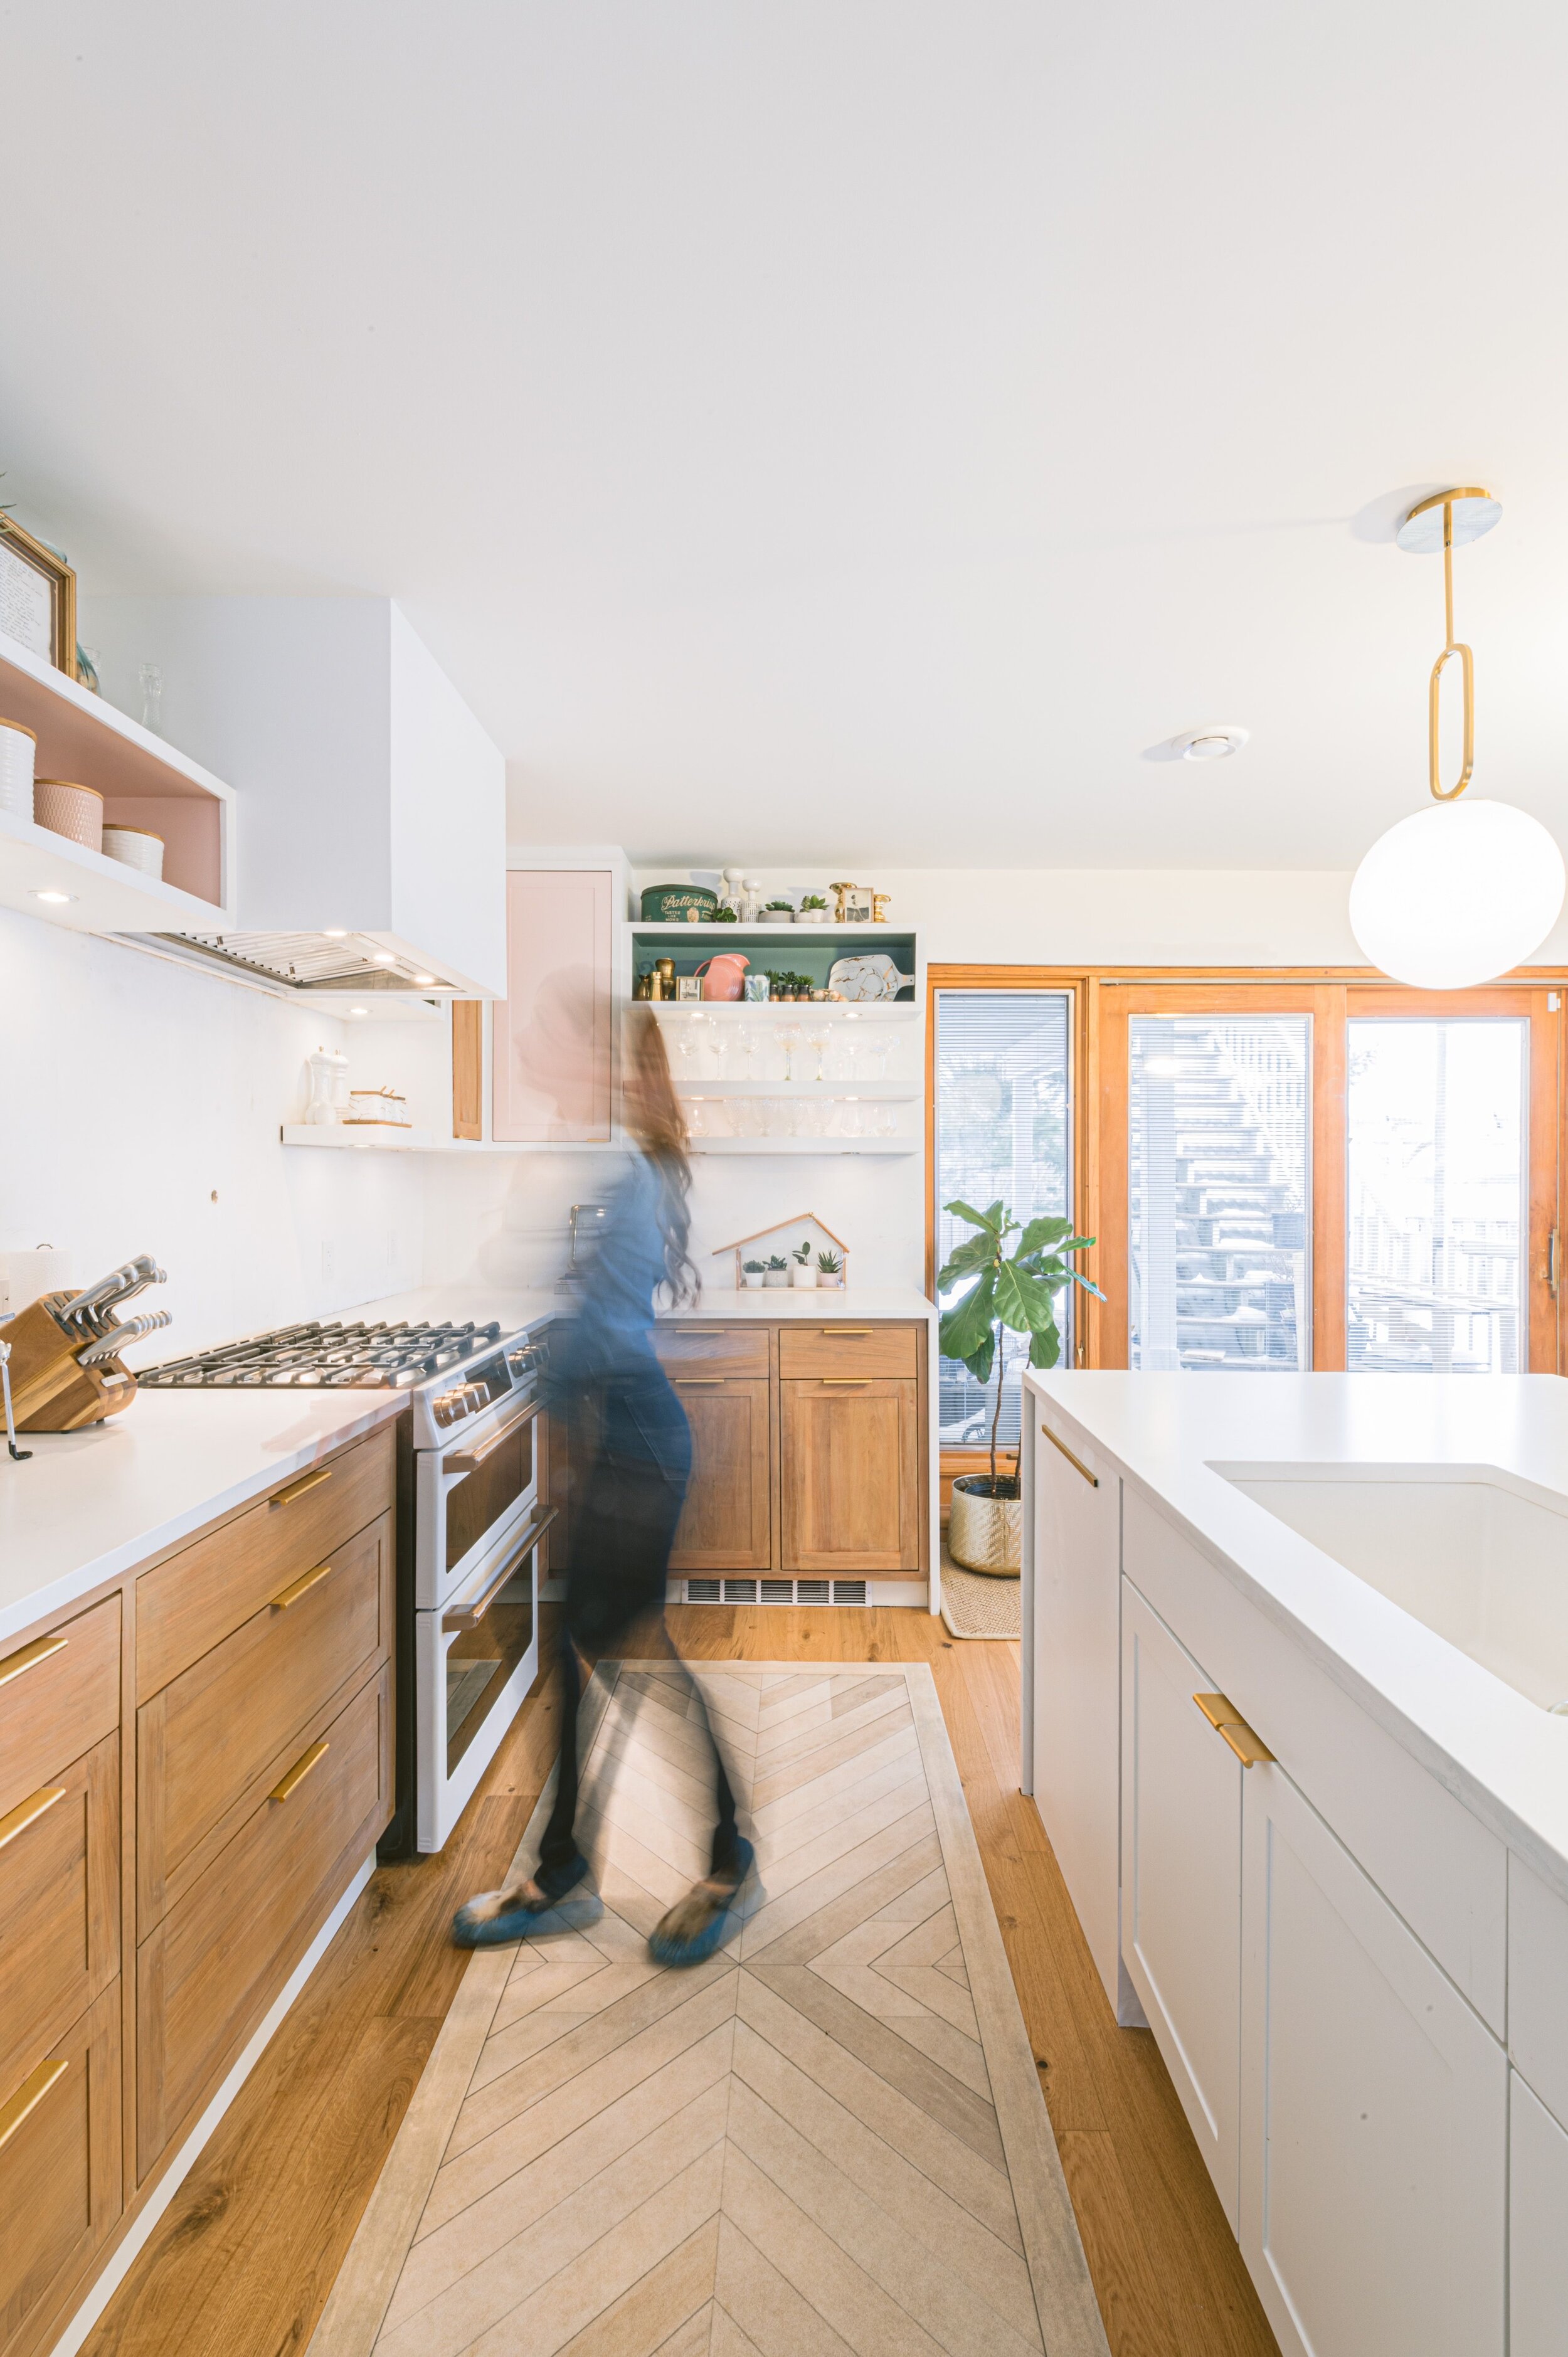
If someone told me 2 decades ago that the kitchen would be my favorite room in the house, I would have said, “As if!”, (while watching my favorite movie, Clueless). Back then, hanging out in my bedroom with my girlfriends in tow, talking about our boy troubles while listening to sad tunes, or rummaging through my closet for try-on sessions was how I spent the majority of my time.
Fast forward to being a single mom with a busy 7-year-old daughter, the producer of a TV show featuring our latest renovation and a never-ending list of DIY projects and I can sincerely declare that the kitchen has my heart. Where else can I simultaneously make a grilled cheese sandwich, help Lennon with her homework, and jot down notes on my latest design plan? Did I mention the kitchen/dining room in our new home has the most expansive and breathtaking view of the Bedford Basin? When I say I love my kitchen, I mean….I LOVE my kitchen.
My vision from the very beginning was to design an inviting space that was both functional and stylish. This is the center of our home and that means it needs to work for every member, including @ziggymygirl who has created her very own special nook near the back door. While it’s hard to narrow down my favorite features, there are some that have stood out as fan faves from the very beginning. Interested to know what they are? Keep reading!
A resilient kitchen counter topped the list of absolute must-haves. The Et Statuario Silestone countertop from Cosentino Canada was such a great selection for our family. The anti-scratch and stain surface means I can cook, plan and work without worry, and the velvety touch of the suede finish elevates the entire look. We used the same material for our backsplash to carry the sophisticated aesthetic seamlessly throughout the space and I’m thrilled with how it all came together.
When I saw the 12” round Prospect pendants by Eurofase – blown glass spheres suspended from looped gold metal framework, I knew they were meant for me. This trio sits above my kitchen island and not only provides the perfect ambiance – think lulled, muted light versus bright and blinding, they also add that extra level of urban refinement that takes this entire space up a notch.
My Trinsic Single-Handle Pull-Down Sprayer Kitchen Faucet in Champagne Bronze featuring MagnaTite Docking has been a beautiful addition to this space. The dock keeps the kitchen pull-down spray wand firmly in place with a powerful integrated magnet, so it stays docked when not in use and I love that I can easily remove mineral build-up with the touch of a finger using touch-clean spray holes. It’s worth mentioning, the price point on this little beauty is incredible and the sleek, minimalistic design blends in perfectly with my vibe.
My new Blanco Precis U super sink has come in handy more times than I can count, especially during lockdown when there always seemed to be an influx of dirty dishes to wash. Trust me when I say that the extra large bowl and floating grid will be a kitchen dream come true for that reason alone. It’s easy to clean, non-porous, and heat and scratch-resistant so you never have to think twice about taking extra special care.
A contemporary wall mount pot filler is one of those luxury features you don’t realize you need until…well…you really need it! The Delta pot filler faucet in champagne bronze is a showstopper for several reasons. It’s easy to fill large cooking vessels quickly and without the walk from sink to stove. That may not sound like a big deal, but large water-filled pots can be deceivingly heavy! The dual shut-off valves allow me to turn the water off at either the wall or the spout, which has proven to be incredibly convenient and the beautiful finish adds a touch of old-world charm that makes it irresistible!
I was initially drawn to the pale pink hue and minimalist design of my kitchen island stools, but when I realized how easy it was to wipe and go, I loved them even more. The form-fitting seat makes them ultra comfortable and the contemporary base gives them a sleek, contemporary feel. This design from Wayfair is no longer available, but I’ve linked a similar option here.
One of the biggest showstoppers in my kitchen has to be my Spicer and Co, vinyl floor cloth. In fact, I get asked about it a lot in the run of a day. A high traffic area like the kitchen needs something durable and stain resistant, but I also wanted something comfortable and curated– a nod to my love of vintage style and pink everything. Take it from this DIY mama, if you want something low maintenance without sacrificing beauty, this was made for you.
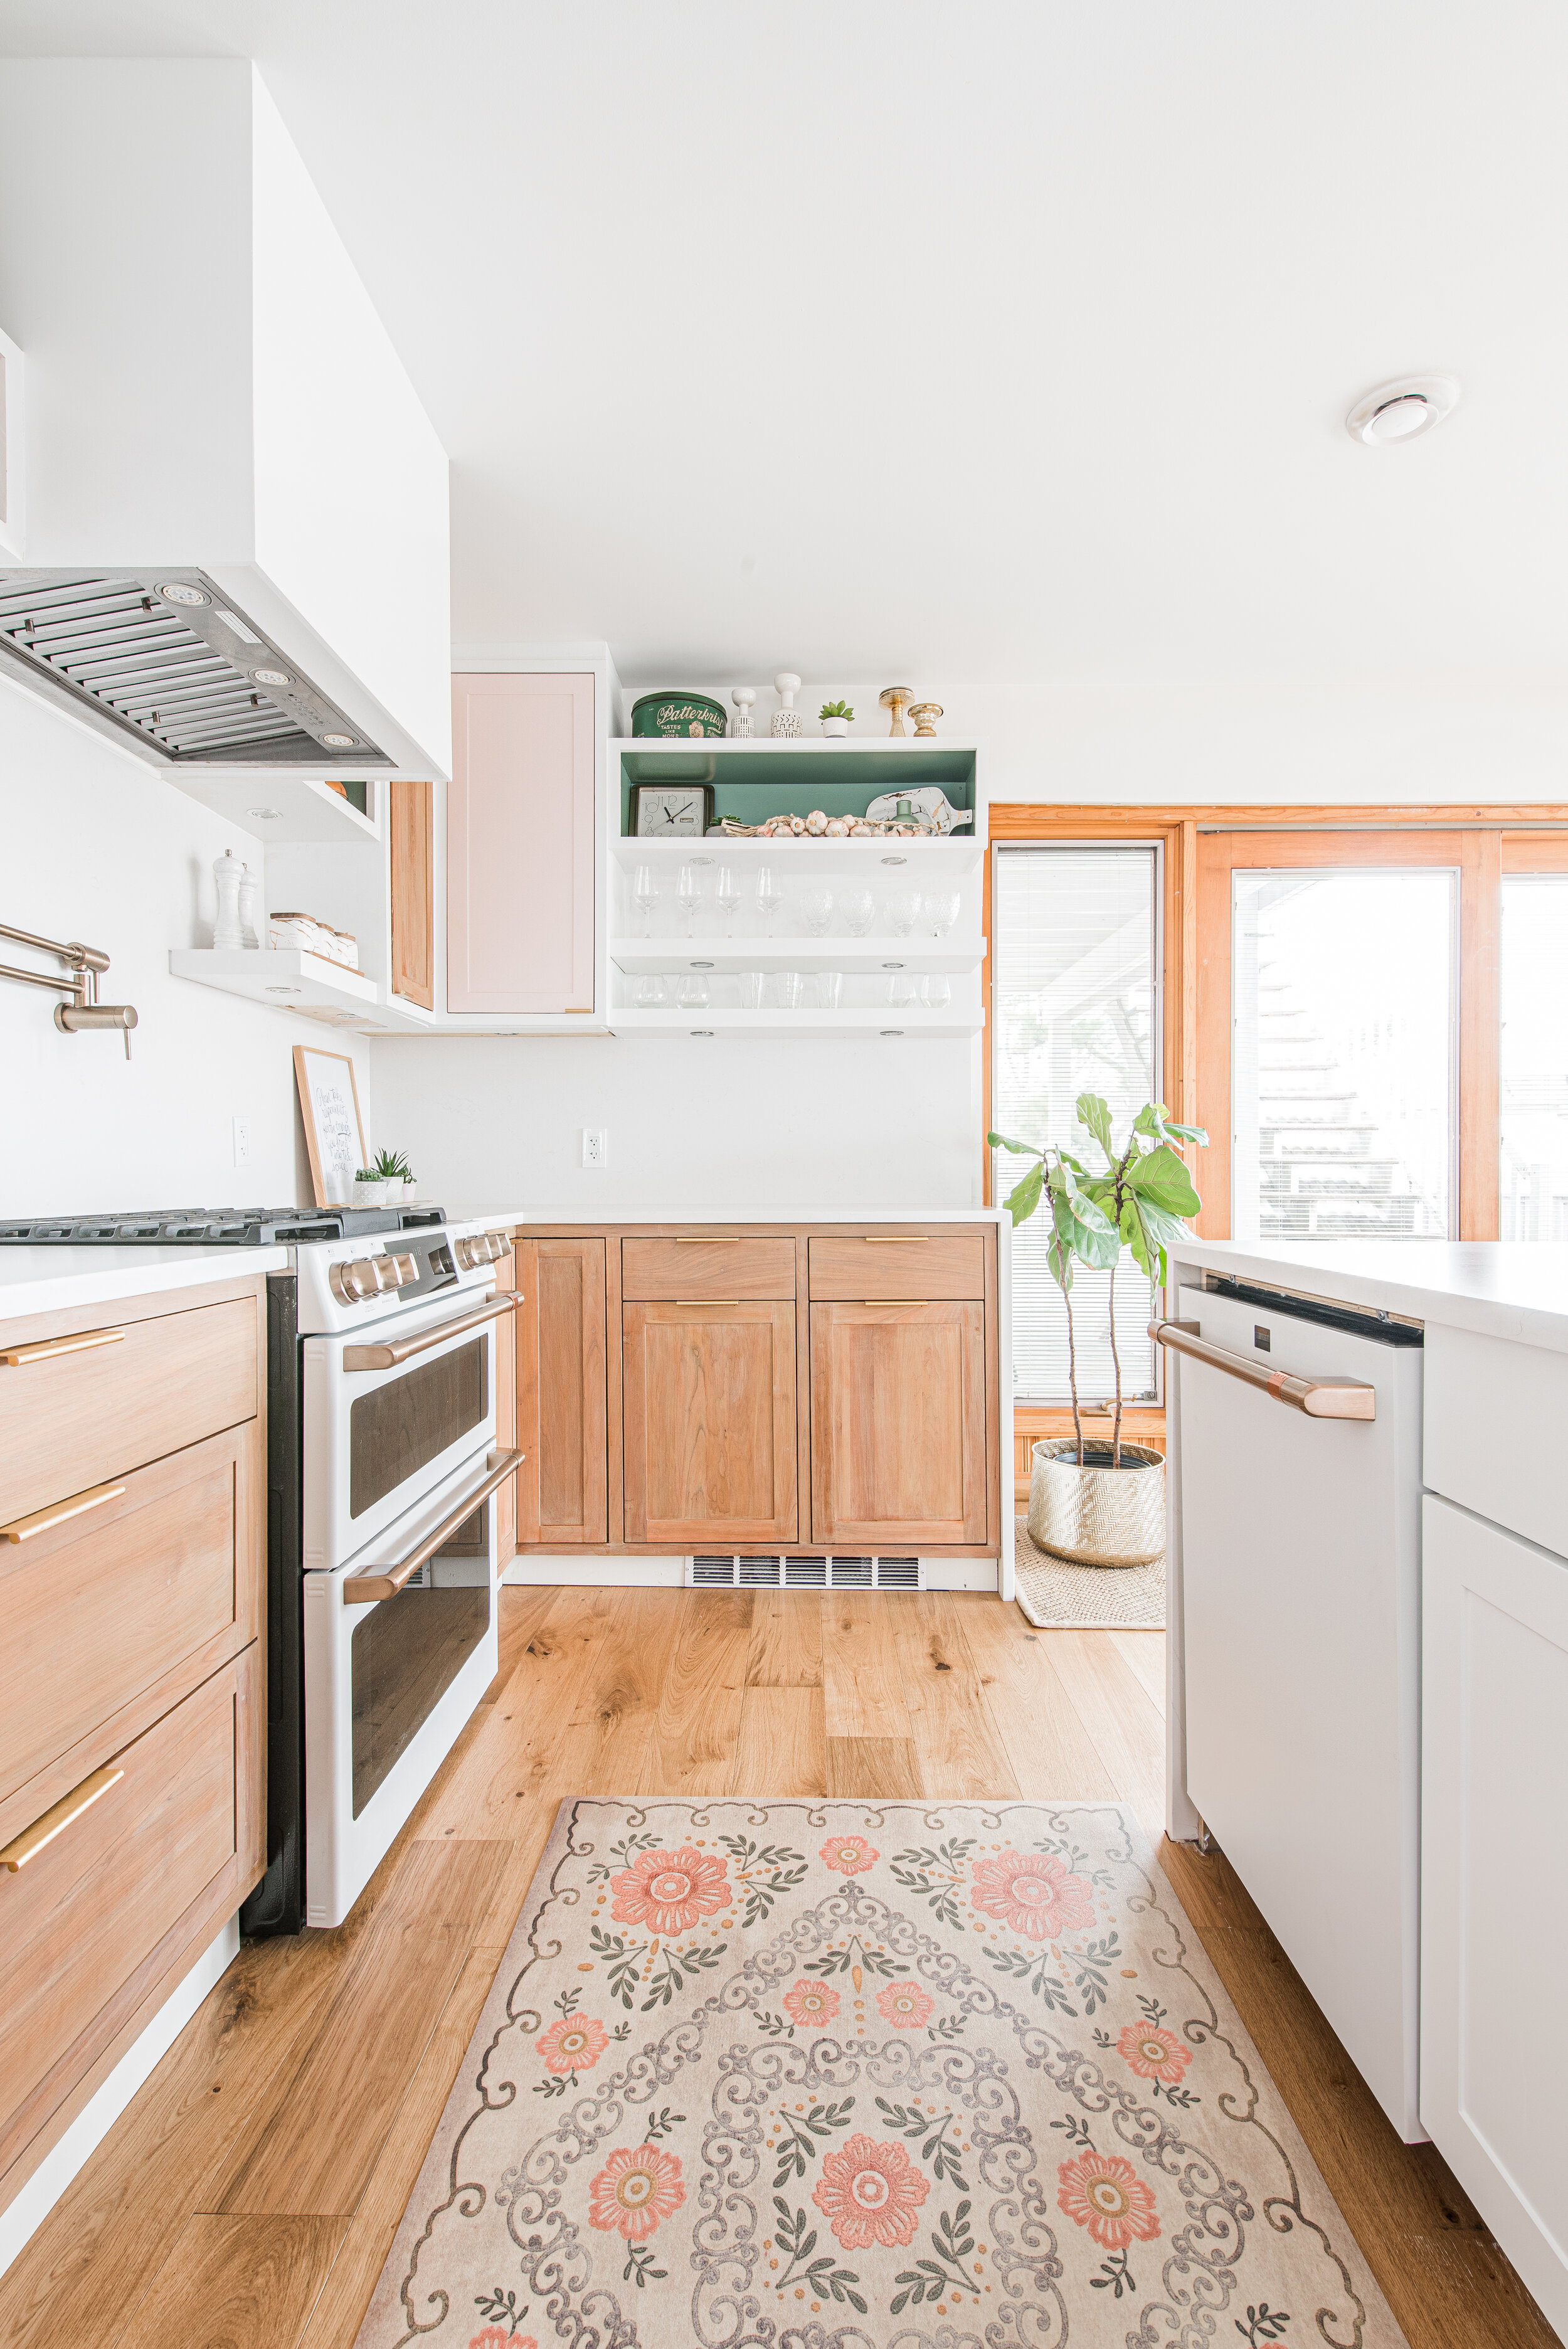
The coveted Café Appliances in matte white have been in high demand lately and for good reason! The polished finish makes them a designer’s dream, but it’s the added functionality that really sets them apart. My commercial-style range is inspired by professional kitchens and comes with a versatile cooktop that has it all– inspiral and multi-ring burners that evenly heat my cookware, and a caterer’s oven complete with precision cooking modes that make cooking dinners, small or large, a treat.
NDR Auto Solutions came to my rescue in a big way when I found out my refrigerator was on backorder and we were weeks away from filming season 4 of DIY mom. Let’s just say that we couldn’t halt production because of a delayed delivery. The NDR team swooped in with the most genius idea – taking a basic stainless steel refrigerator and wrapping it in white vinyl for a nearly identical finish to my Café Appliances. Confession time: I considered keeping this a secret because the dupe is THAT good, but the premise of my show is learning to find alternatives when things don’t go as planned, and guess what? That’s real life in a nutshell.
I wanted to repurpose the kitchen cabinets from the original house because they were in great shape and the quality was amazing, so I decided to put a modern spin on an old classic. I flipped and sanded the cabinets with my Ryobi tools and varnish from Home Depot, to give them a shaker style finish, then filled the holes, and moved the entire kitchen from the front of the house to the back for an open-concept design. For the island, I used the pre-assembled Hampton Bay Edison shaker style cabinets from Home Depot and had them color-matched to the kitchen cabinets for a streamlined look and feel. Then we added these pretty Contemporary Aluminium Edge pulls from Richelieu. The entire room received a chic and modern facelift– a brilliant way to create style on a budget.
I love looking back to see how my home has been transformed. What do you think of these before and afters?
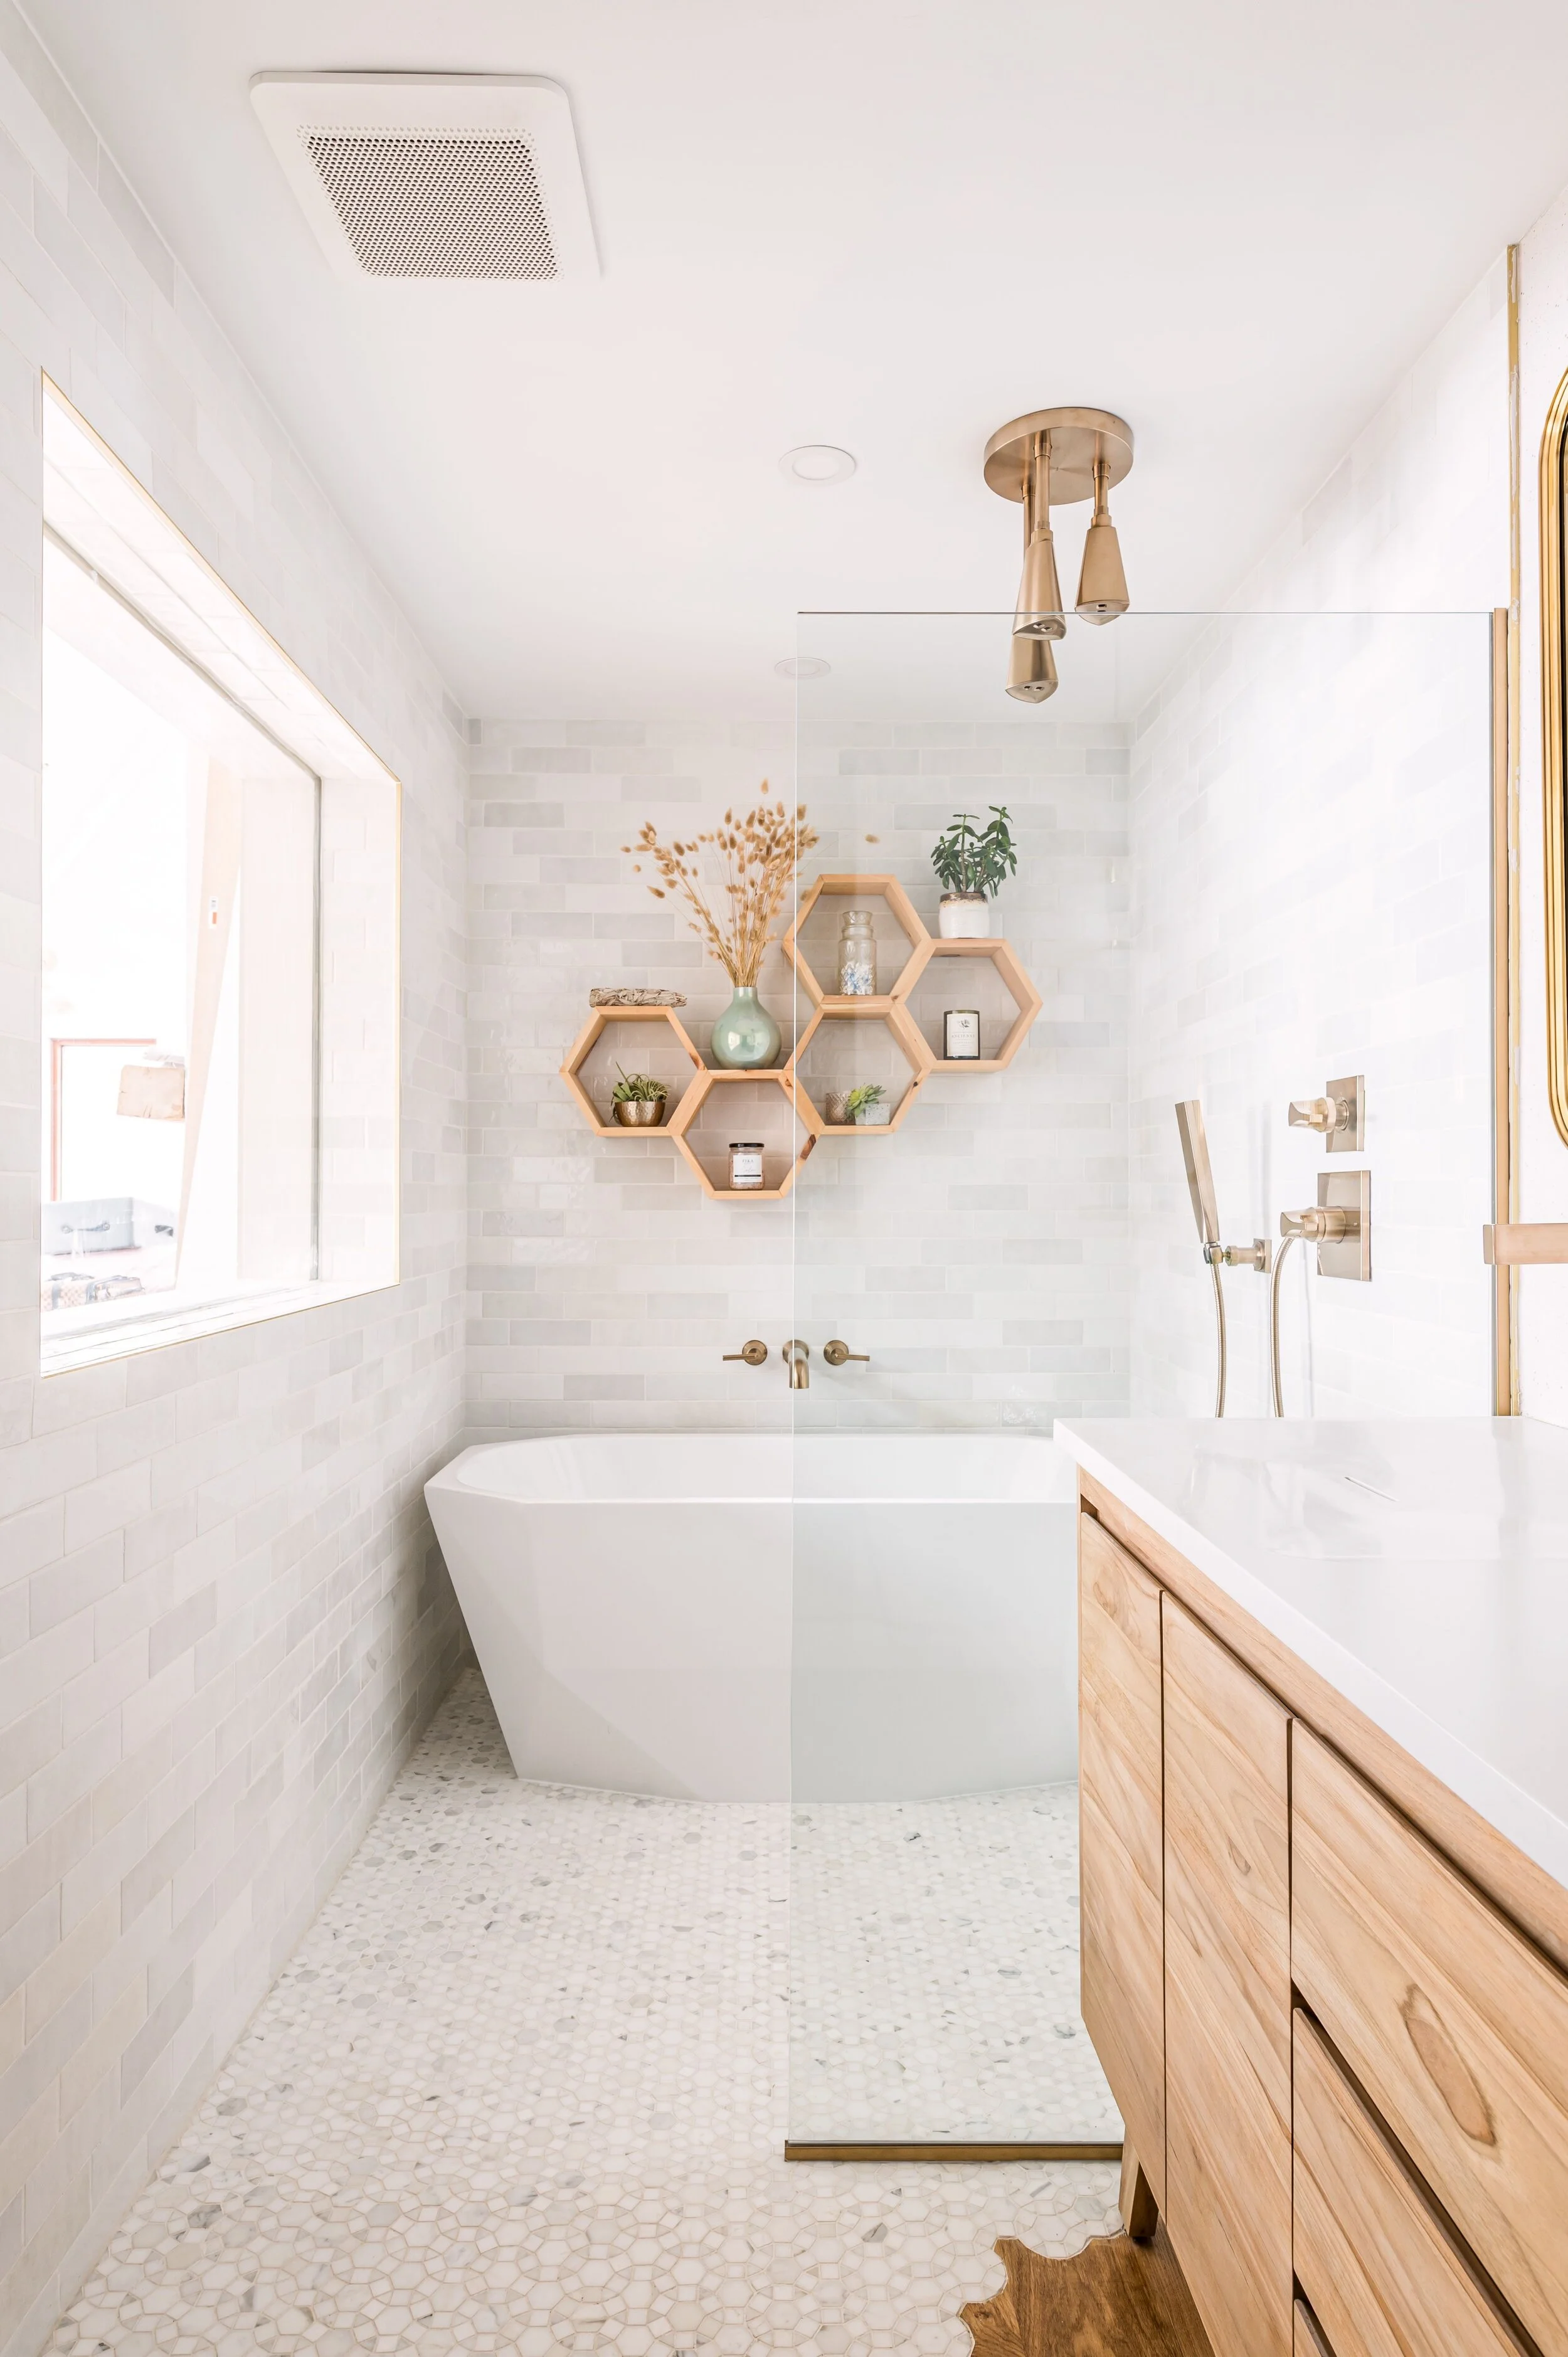
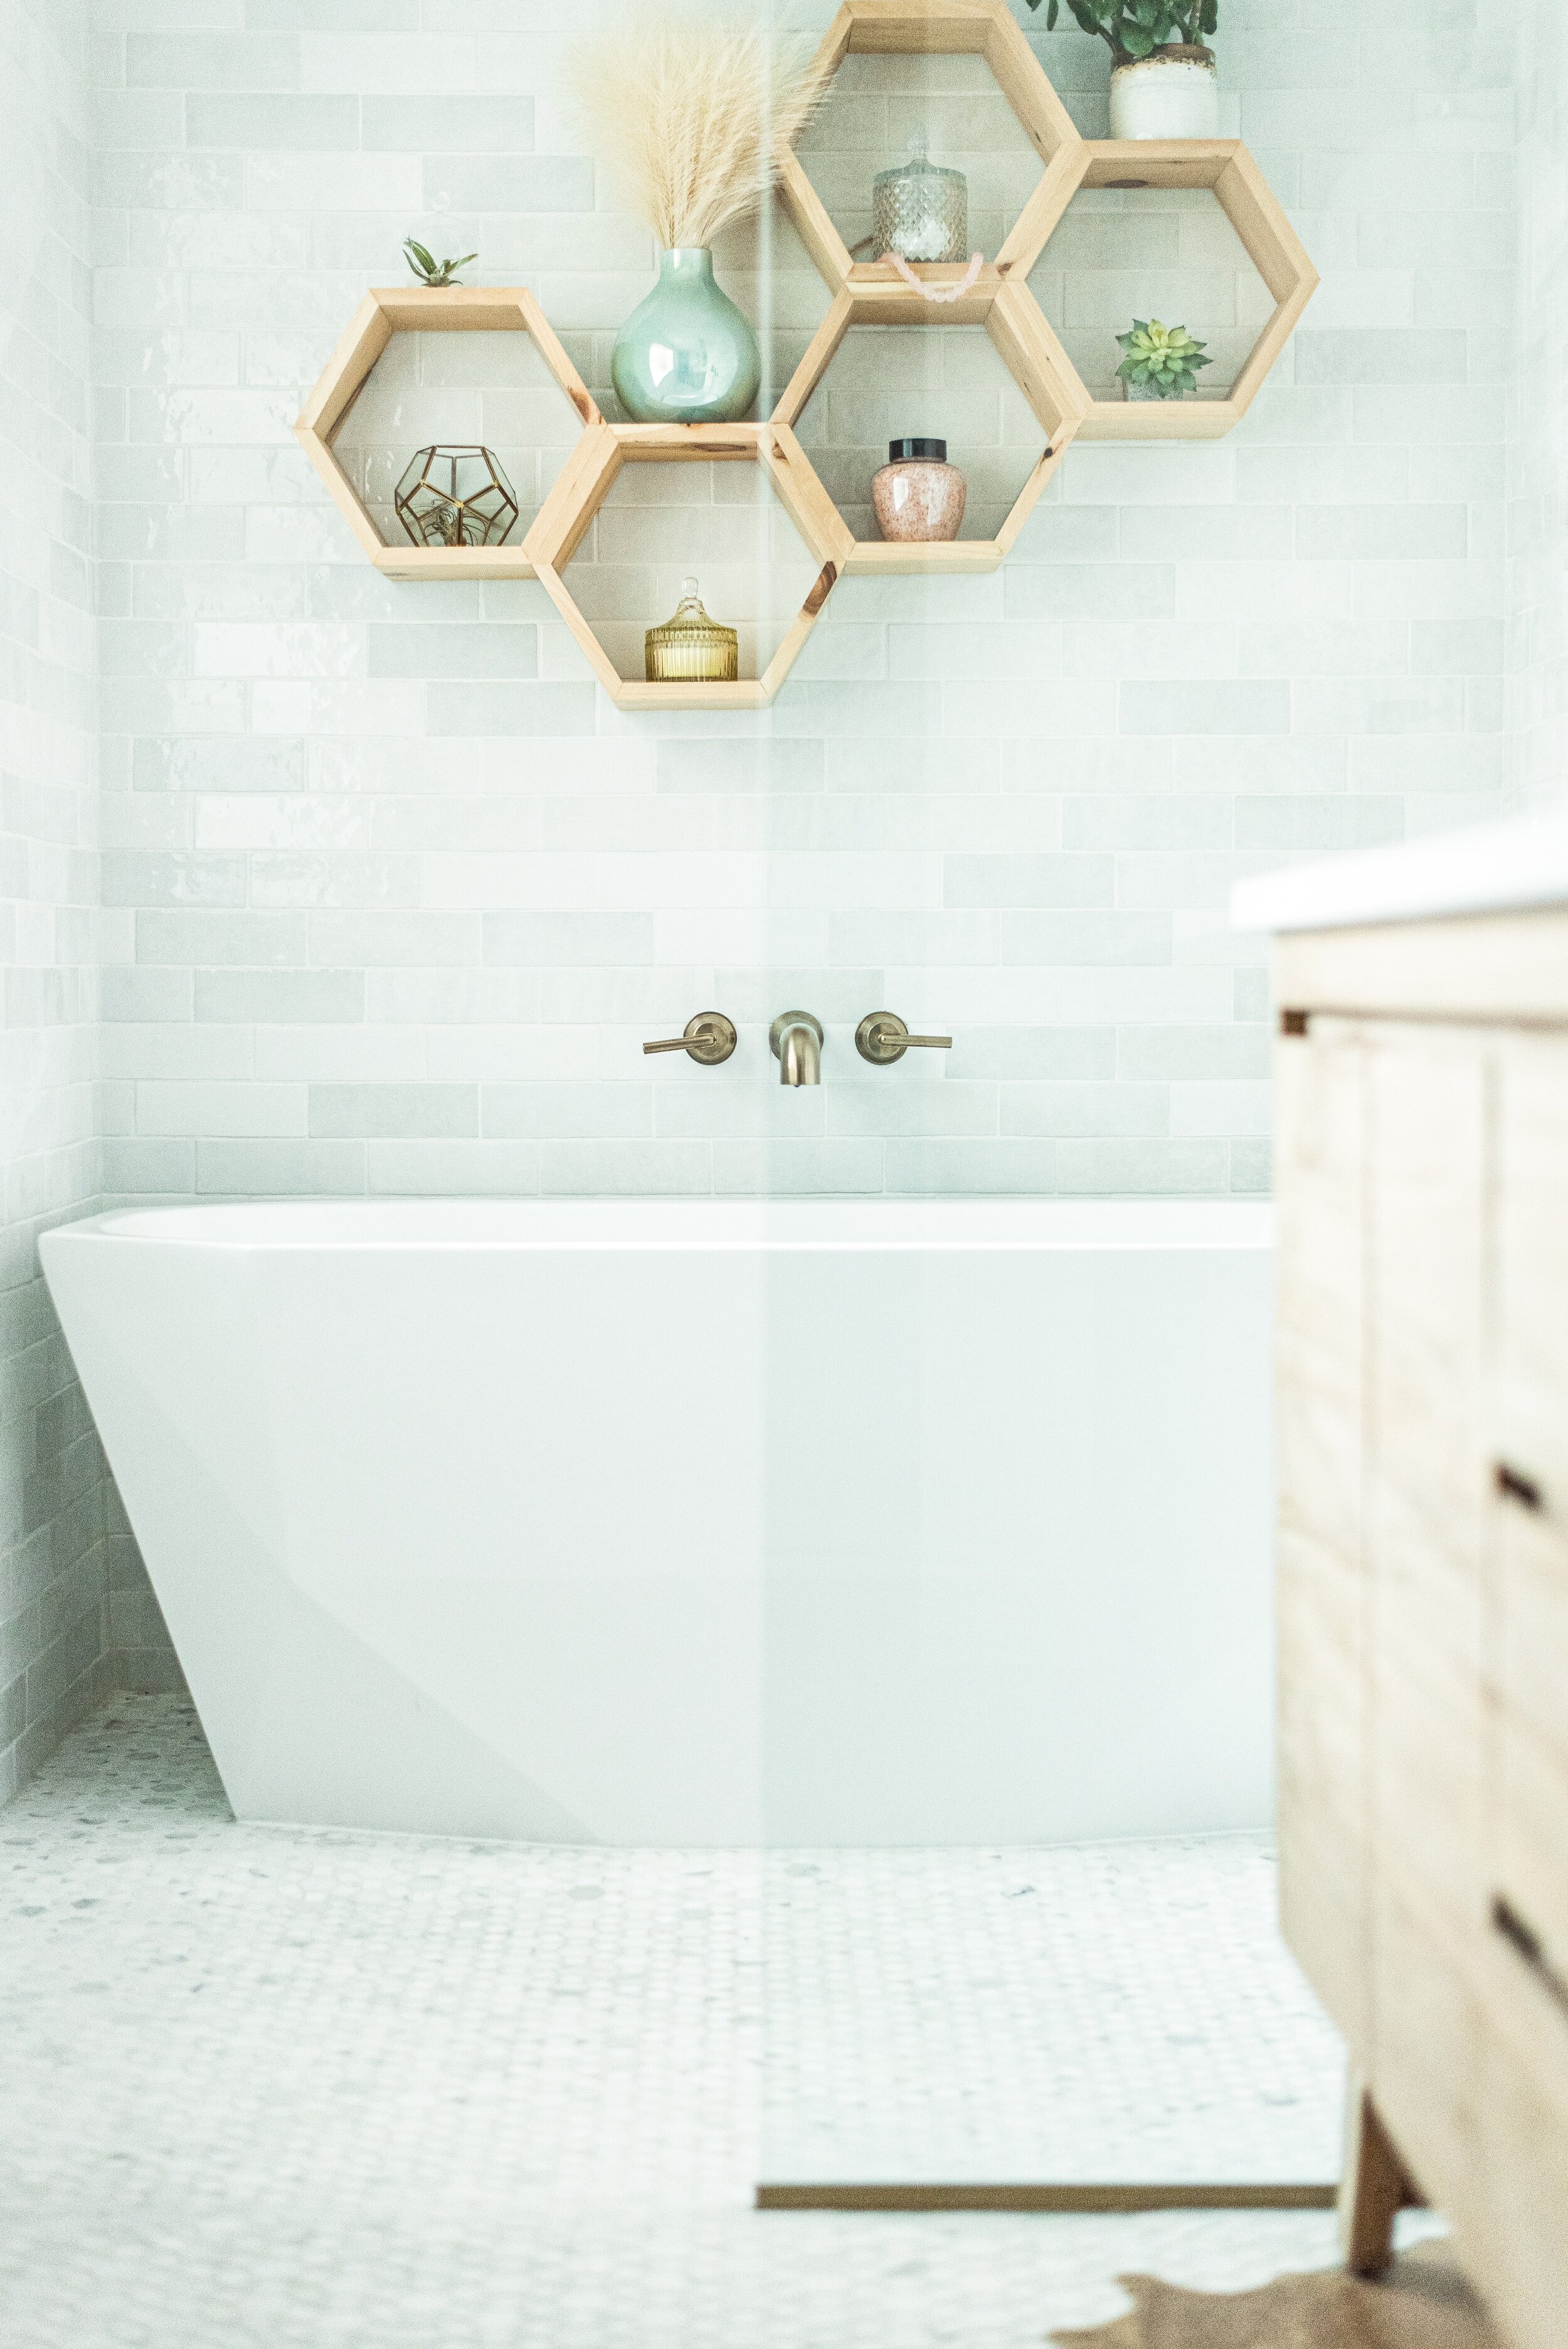
My ensuite bathroom is my happy place. A little haven that allows me to unwind after a busy day with some basic self- care rituals that have proven to be essential for me. Sometimes, it’s a decadent face mask before bed, other times, a long, lingering, sudsy bath or a quick pep talk in front of my vanity before I start my hectic day and have a lot of fires to put out. Lennon and Ziggy love it too (the heated floors might have something to do with that). It’s a good thing I don’t mind sharing!
I get asked a lot about my favorite features in this space and while it’s hard to narrow them down, I’ve come up with a list of highlights. If you’re considering a bathroom renovation and don’t know where to start, you’ll want to keep reading!
My freestanding soaking tub is by far one of the most celebrated features of this room. It was easy to install, crafted from durable acrylic making it incredibly resilient, and comes in a modern, glossy white finish. The best part however has to be the 63 gallon capacity which makes it nice and spacious– perfect for a relaxing night in.
The mosaic Miki Flower tile in Snow White & Crystal White from Centura Tile was the perfect addition, and what was left over, I used in our pantry. We pieced these Artisan tiles from Centura together like an intricate puzzle for a dazzling backsplash that feels like marble.
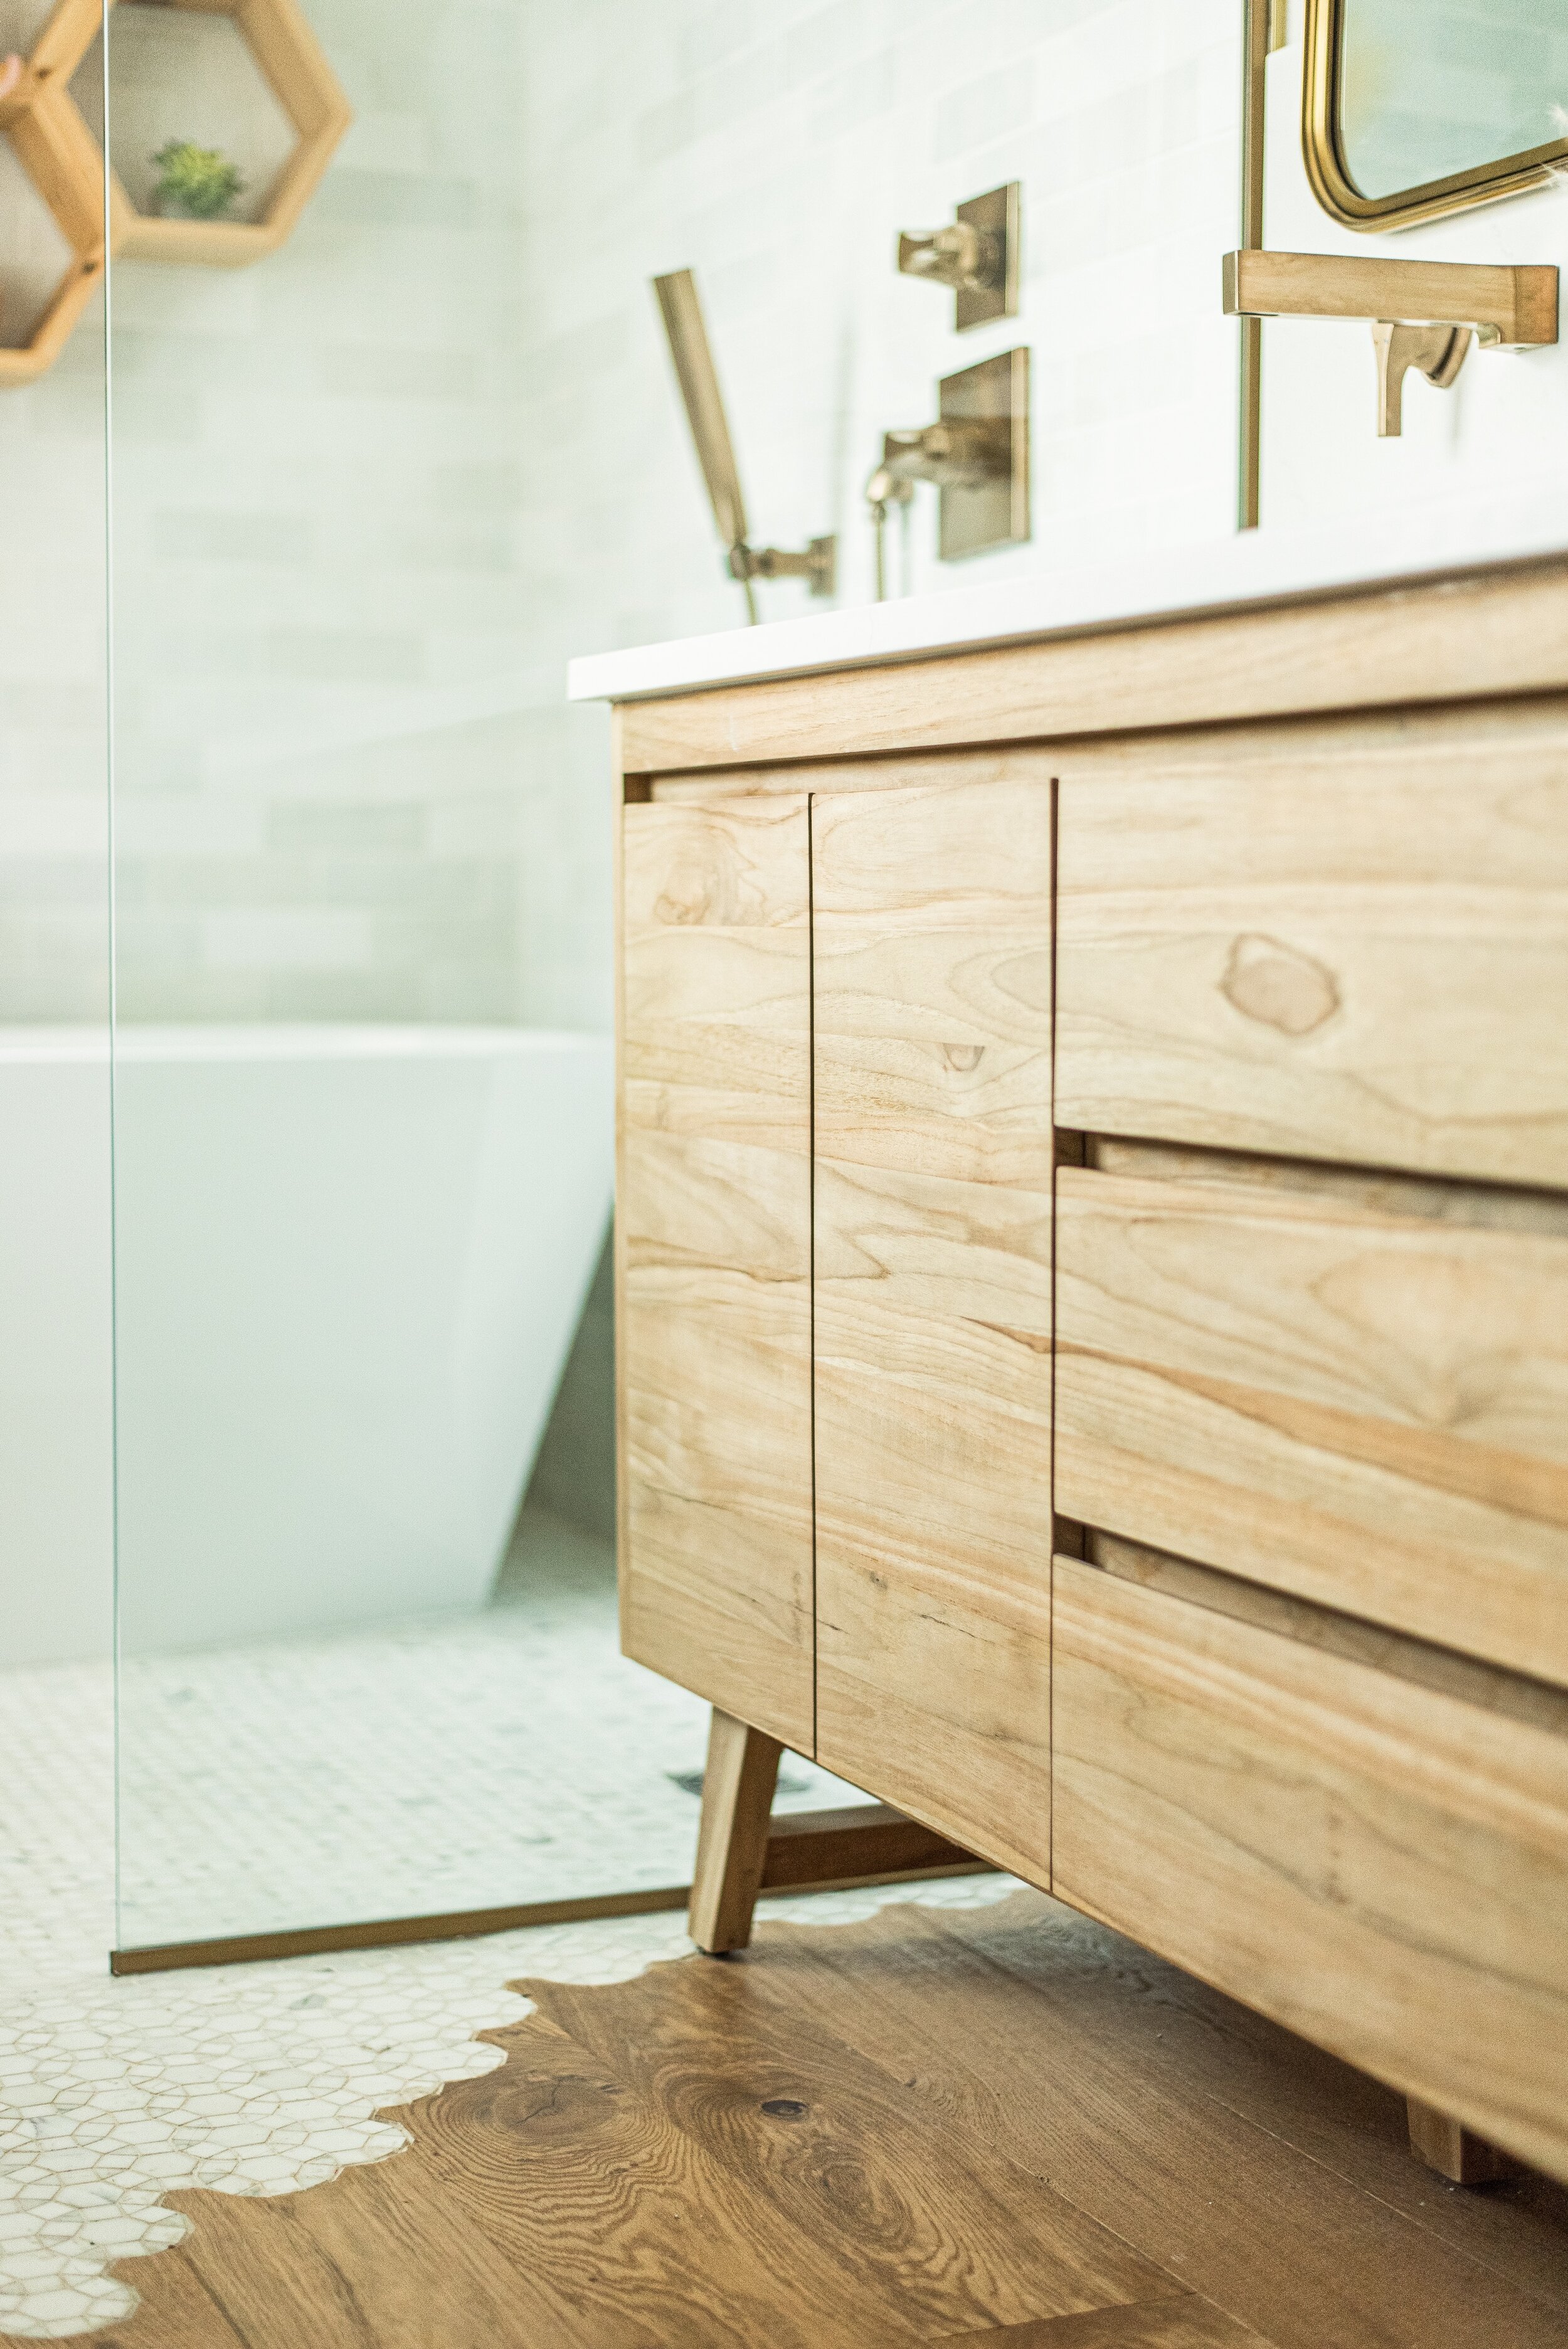
It’s no secret that mid century modern is a vibe I gravitate to. That’s one of the reasons love my 72 inch solid teak Coventry Vanity from Home Depot. The minimalist console vibe feels like an extension of my personal style philosophy– sturdy, spacious, simple design with a classic undertone that makes it timeless.
For a streamlined look, I carried my Torly’s Engineered hardwood flooring in Dorset Oak into my ensuite. I love that the warm, matte wood matches the rest of the house and offers clean lines and wide planks for a modern feel.
My Trinsic wall-mounted tub filler in champagne bronze from Delta offers classic, old-world charm and is guaranteed not to corrode, tarnish or discolor. Long-lasting, durable, and chic– that’s my DIY love language! We chose the same finish for our Delta Zura showerhead and handheld pendant, and I love the warm undertones, the added touch of sophistication, and the reminder that every room in the house deserves special attention to detail.
It’s all in the details! Find this Delta faucet here.
Belisimo Home always has a great selection of high-quality wallpaper. I love that I can take stacks of books home with me, hold them up in various light and sit with them for a while so I can be certain I’ve made the right choice. For my ensuite, I chose a muted style from JF Fabrics’ Bungalow collection– a plain textured wallpaper in a beige hue with metallic gold speckles. I love that it adds warmth and helps create the perfect ambiance for this space.
My custom teak shelves from East Coast Specialty Hardwood provide extra space for storing little trinkets and keepsakes I’ve brought back from my travels. They’re trendy but classic at the same time and they compliment my floors and vanity perfectly.
Finding the perfect pair of mirrors for your ensuite vanity is no small feat. I searched high and low for modern, stylish accent pieces that complimented the space, but offered a custom look at the same time. My Renwil mirrors were the perfect choice! I love the brass finish, decorative hook, and the way they reflect my personal style– swanky and sophisticated with a touch of glam to spice things up.
Simplicity was top of mind when I chose my frameless fixed glass shower screen. The Vigo Zenith model from Home Depot resists dangerous breakage and shards, making it incredibly safe without compromising style. It comes with premium clear seal strips to prevent water from leaking into the bathroom. Genius!
There you have it! A round up of my favorite ensuite features – guaranteed to make your bathroom experience luxurious and relaxing from start to finish!
Running my own renovations and construction projects can be a massive financial undertaking. It is a time and energy consuming task – renos are like a game of chess- you have to always be ready with your next move- they can also give you a big headache if you don’t keep your budget, billing and invoices organized. (Just like I used to say to my dad when I was a kid, chess gives me a headache.)
In this blog, I am going to share some of my tips for building a reno business with the help of QuickBooks. Whether it’s constructing an eco-friendly commercial building or flipping a house, QuickBooks and its digital ecosystem can help you stay organized and keep things moving efficiently. All you have to do is know how to make the most out of your tools.
BEFORE
AFTER
QuickBooks can help you run a more successful construction business by providing you with a consolidated view of your business and tools that make daily tasks more efficient. You can:
Easily invoice from any work site
Bring your bookkeeping on the go
See profitability by project
Work from any job site with the mobile app
Use QuickBooks Payroll and Time to help you track time and pay workers with ease
Allow me to elaborate on the benefits now:
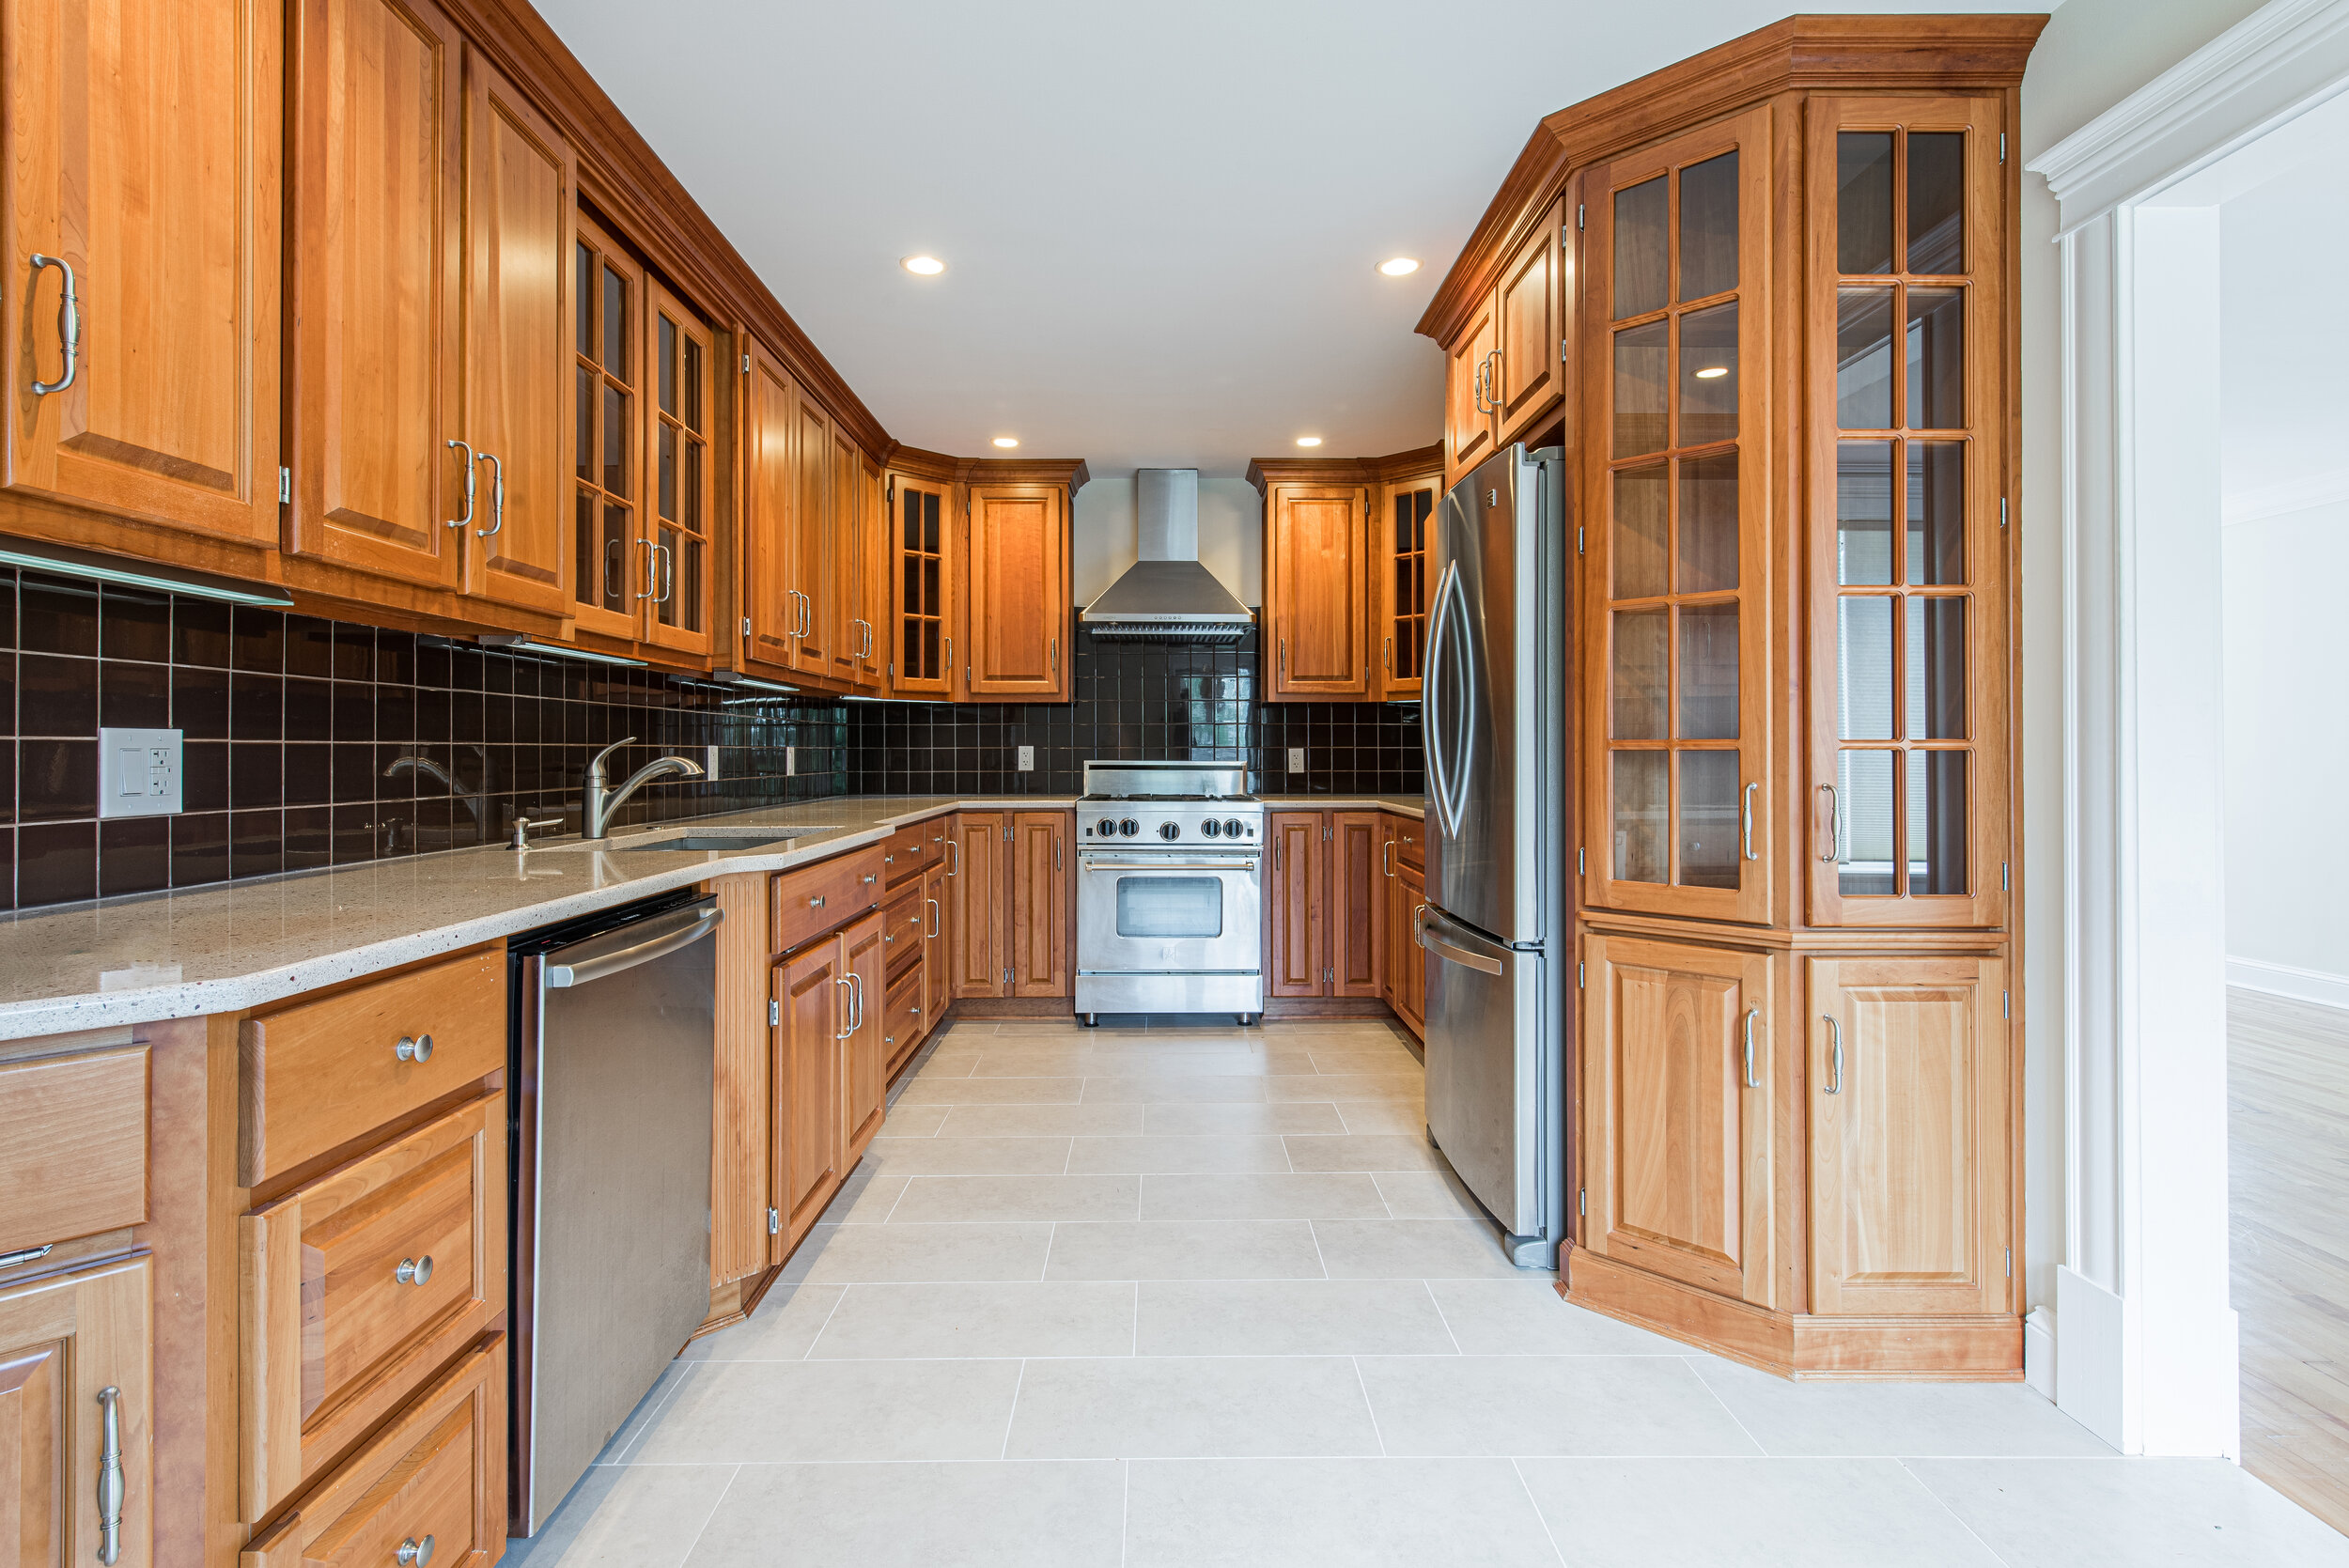
After moving back to Nova Scotia as a single mom, looking to start my own career, I got involved in a family passion: renovating and flipping homes. But I am what you might call a slow flipper. I bought my home on Alderwood Drive in November of 2016 for 281k. The first part of my reno was fast and furious. I gutted the main floor, reconfigured the layout, moved the kitchen to the centre of the home and added an upstairs extension on the back of the house to allow for a principal bedroom with a walk-in closet and ensuite bathroom.
Before I knew it my renovation budget blew up from 100k to 130k to 160k. I was losing track of my receipts and having a hard time keeping track of my spending (and my crew's spending as well).
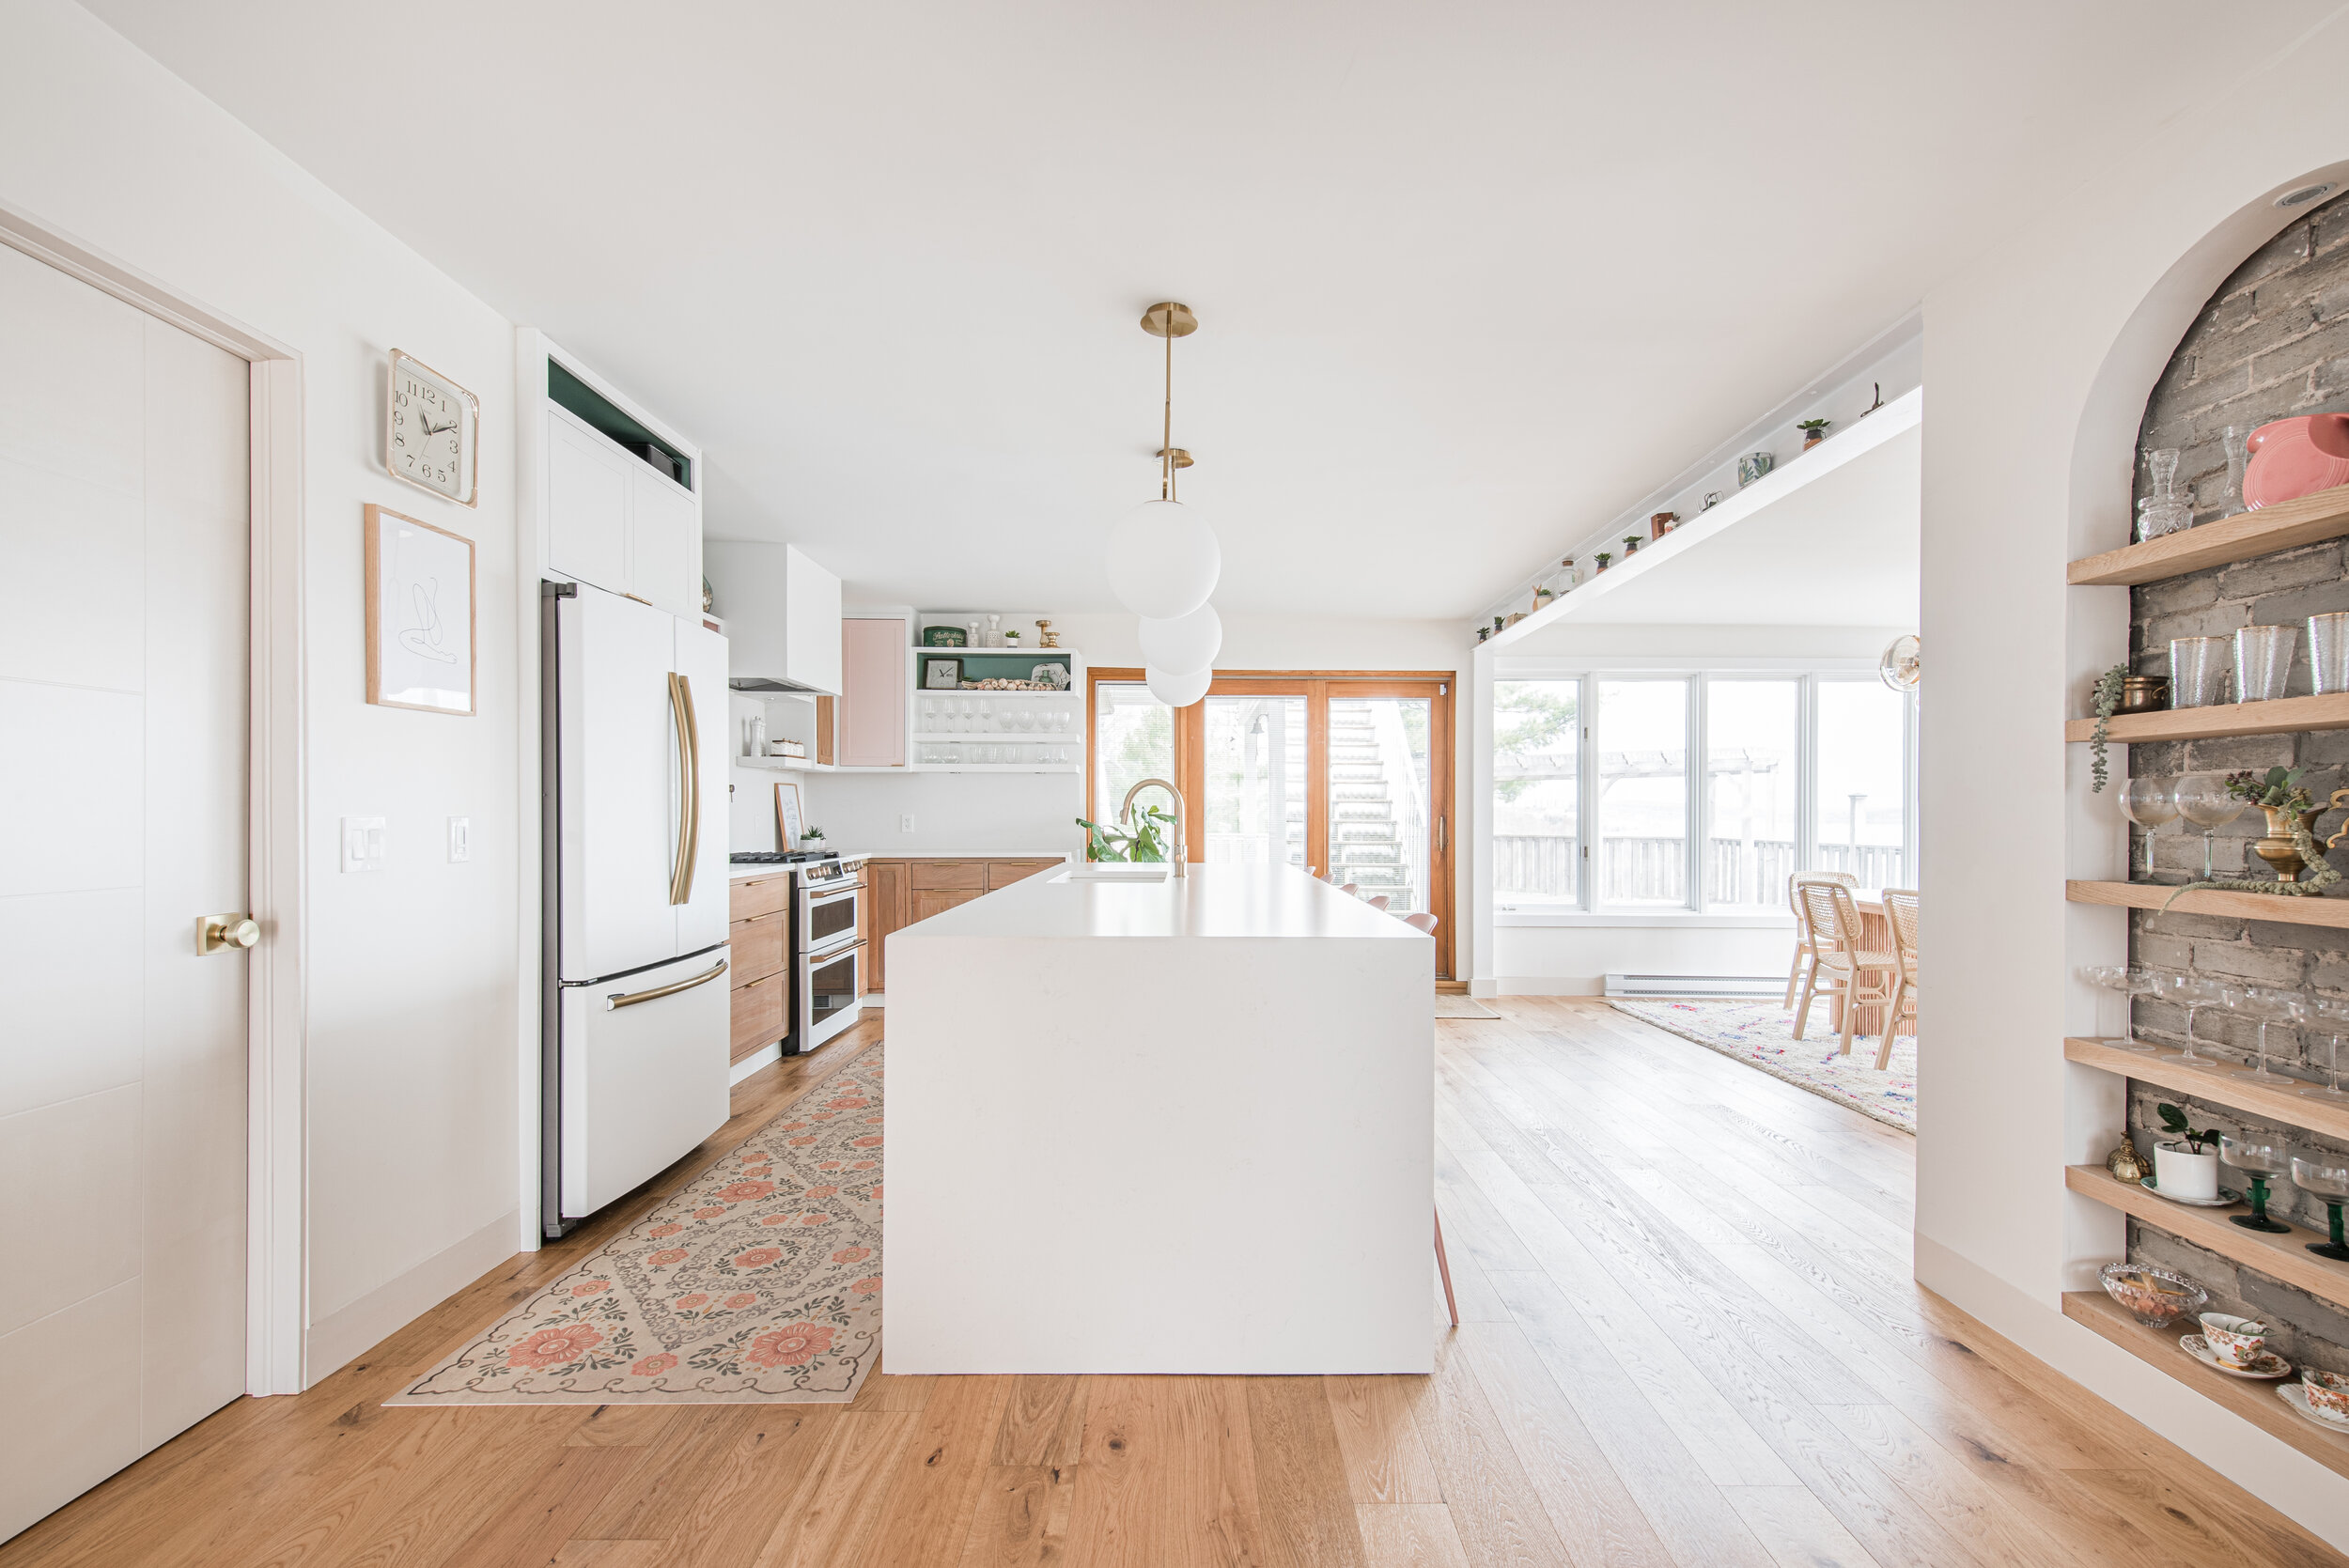
We moved into the house in May of 2017, but the renovations weren’t over. I had transformed a traditional colonial home into an open concept modern living space and now the fun was starting. I was about to unleash my love for DIY and start making things look pretty.
THE ALDERWOOD RENOVATION
But spending needed to be reeled in. So that spring I signed up for QuickBooks and linked it to my bank accounts and credit cards. So every expense could be matched with a receipt and kept track of.
I started using QuickBooks on my phone and my computer and reno life became manageable again.
Over the next 2 years, I moved on to other renovations. Taking on clients in commercial spaces, vacation rentals, and cottages. My business was growing and so was my need to invoice. Seeing incoming payments over outgoing expenditures was a thrill, and invoicing over QuickBooks meant I didn’t have to be sitting at a desk to send off a quick bill. I was able to send invoices from job sites, pulled over in the car, at a school playground or even while resting on the beach.
ATTIC RENOVATION
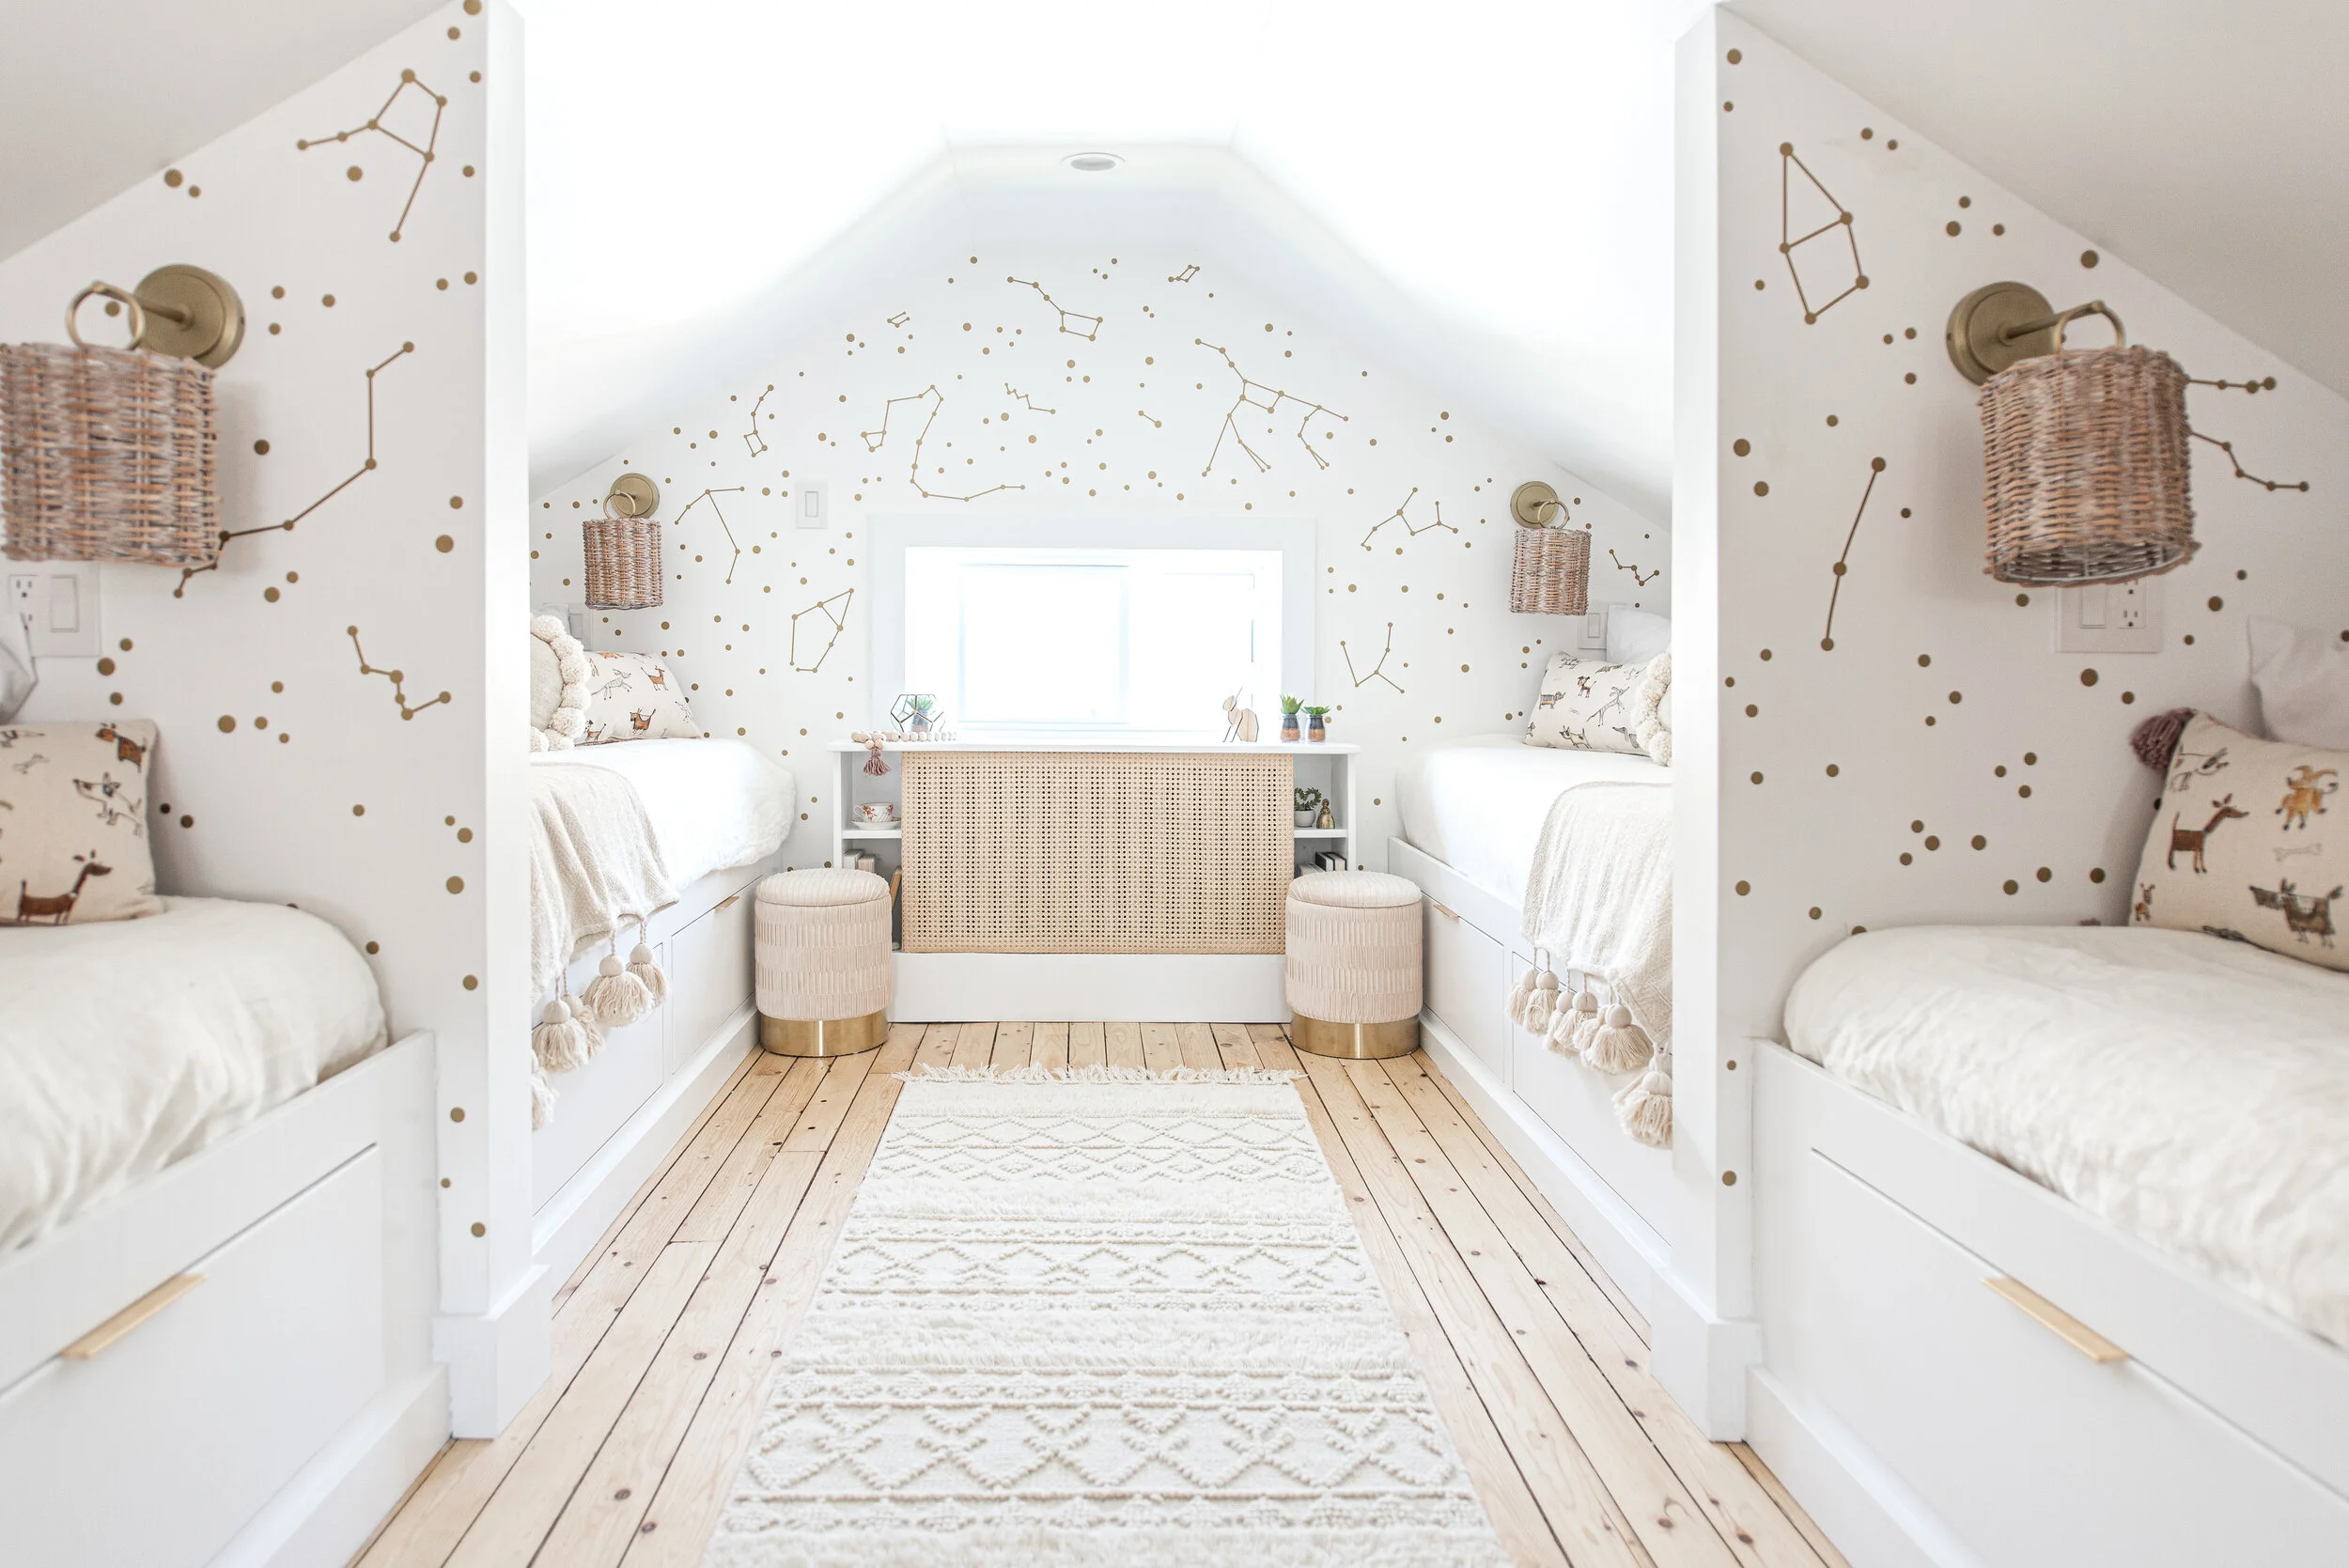
In 2020, I was back to renovating my house again, this time the attic. I put my design and carpentry skills to work making the most out of the sloped ceilings and creating an additional bunk room and kids play space. This time my spending was a lot more reasonable, and I was able to keep track of everything. Which was especially important as it was my first big film production with NSBI funding. That meant we had to be extra diligent with payroll, invoices, receipts and expenses.
The entire attic renovation only took 11k out of my bank account, and my real estate agents told me I added about 100k in value to the house!
BACDKYARD RENOVATION
By the summer of 2020 my backyard renovation was complete, and I decided to list my house on the Halifax market. By this point I am about 467k into this house, and when it went up for 699k on a Thursday night, my neighbours thought I was crazy. No way you will get that much for a house on this street.
That weekend was full of viewings and by Monday at noon when the offers started rolling in, it was clear that my huge reno risks had paid off!
My house closed in November 2020 for 787k! And every penny went straight back into my new property and new renovation.
As with anyone in the home renovation or construction industry, I need software that will keep my reports and projects organized. QuickBooks Online has all the features I need to stay on-top of all my financial records associated with renovating homes.
After multiple renovations and selling and buying homes with QuickBooks as my go-to tool, I feel like I can tackle the complications of job costing, tracking expenses and cash flow, along with invoicing and managing my budgets. With QuickBooks accounting software, I have a greater understanding of what my risk is, and surely my reward as well!
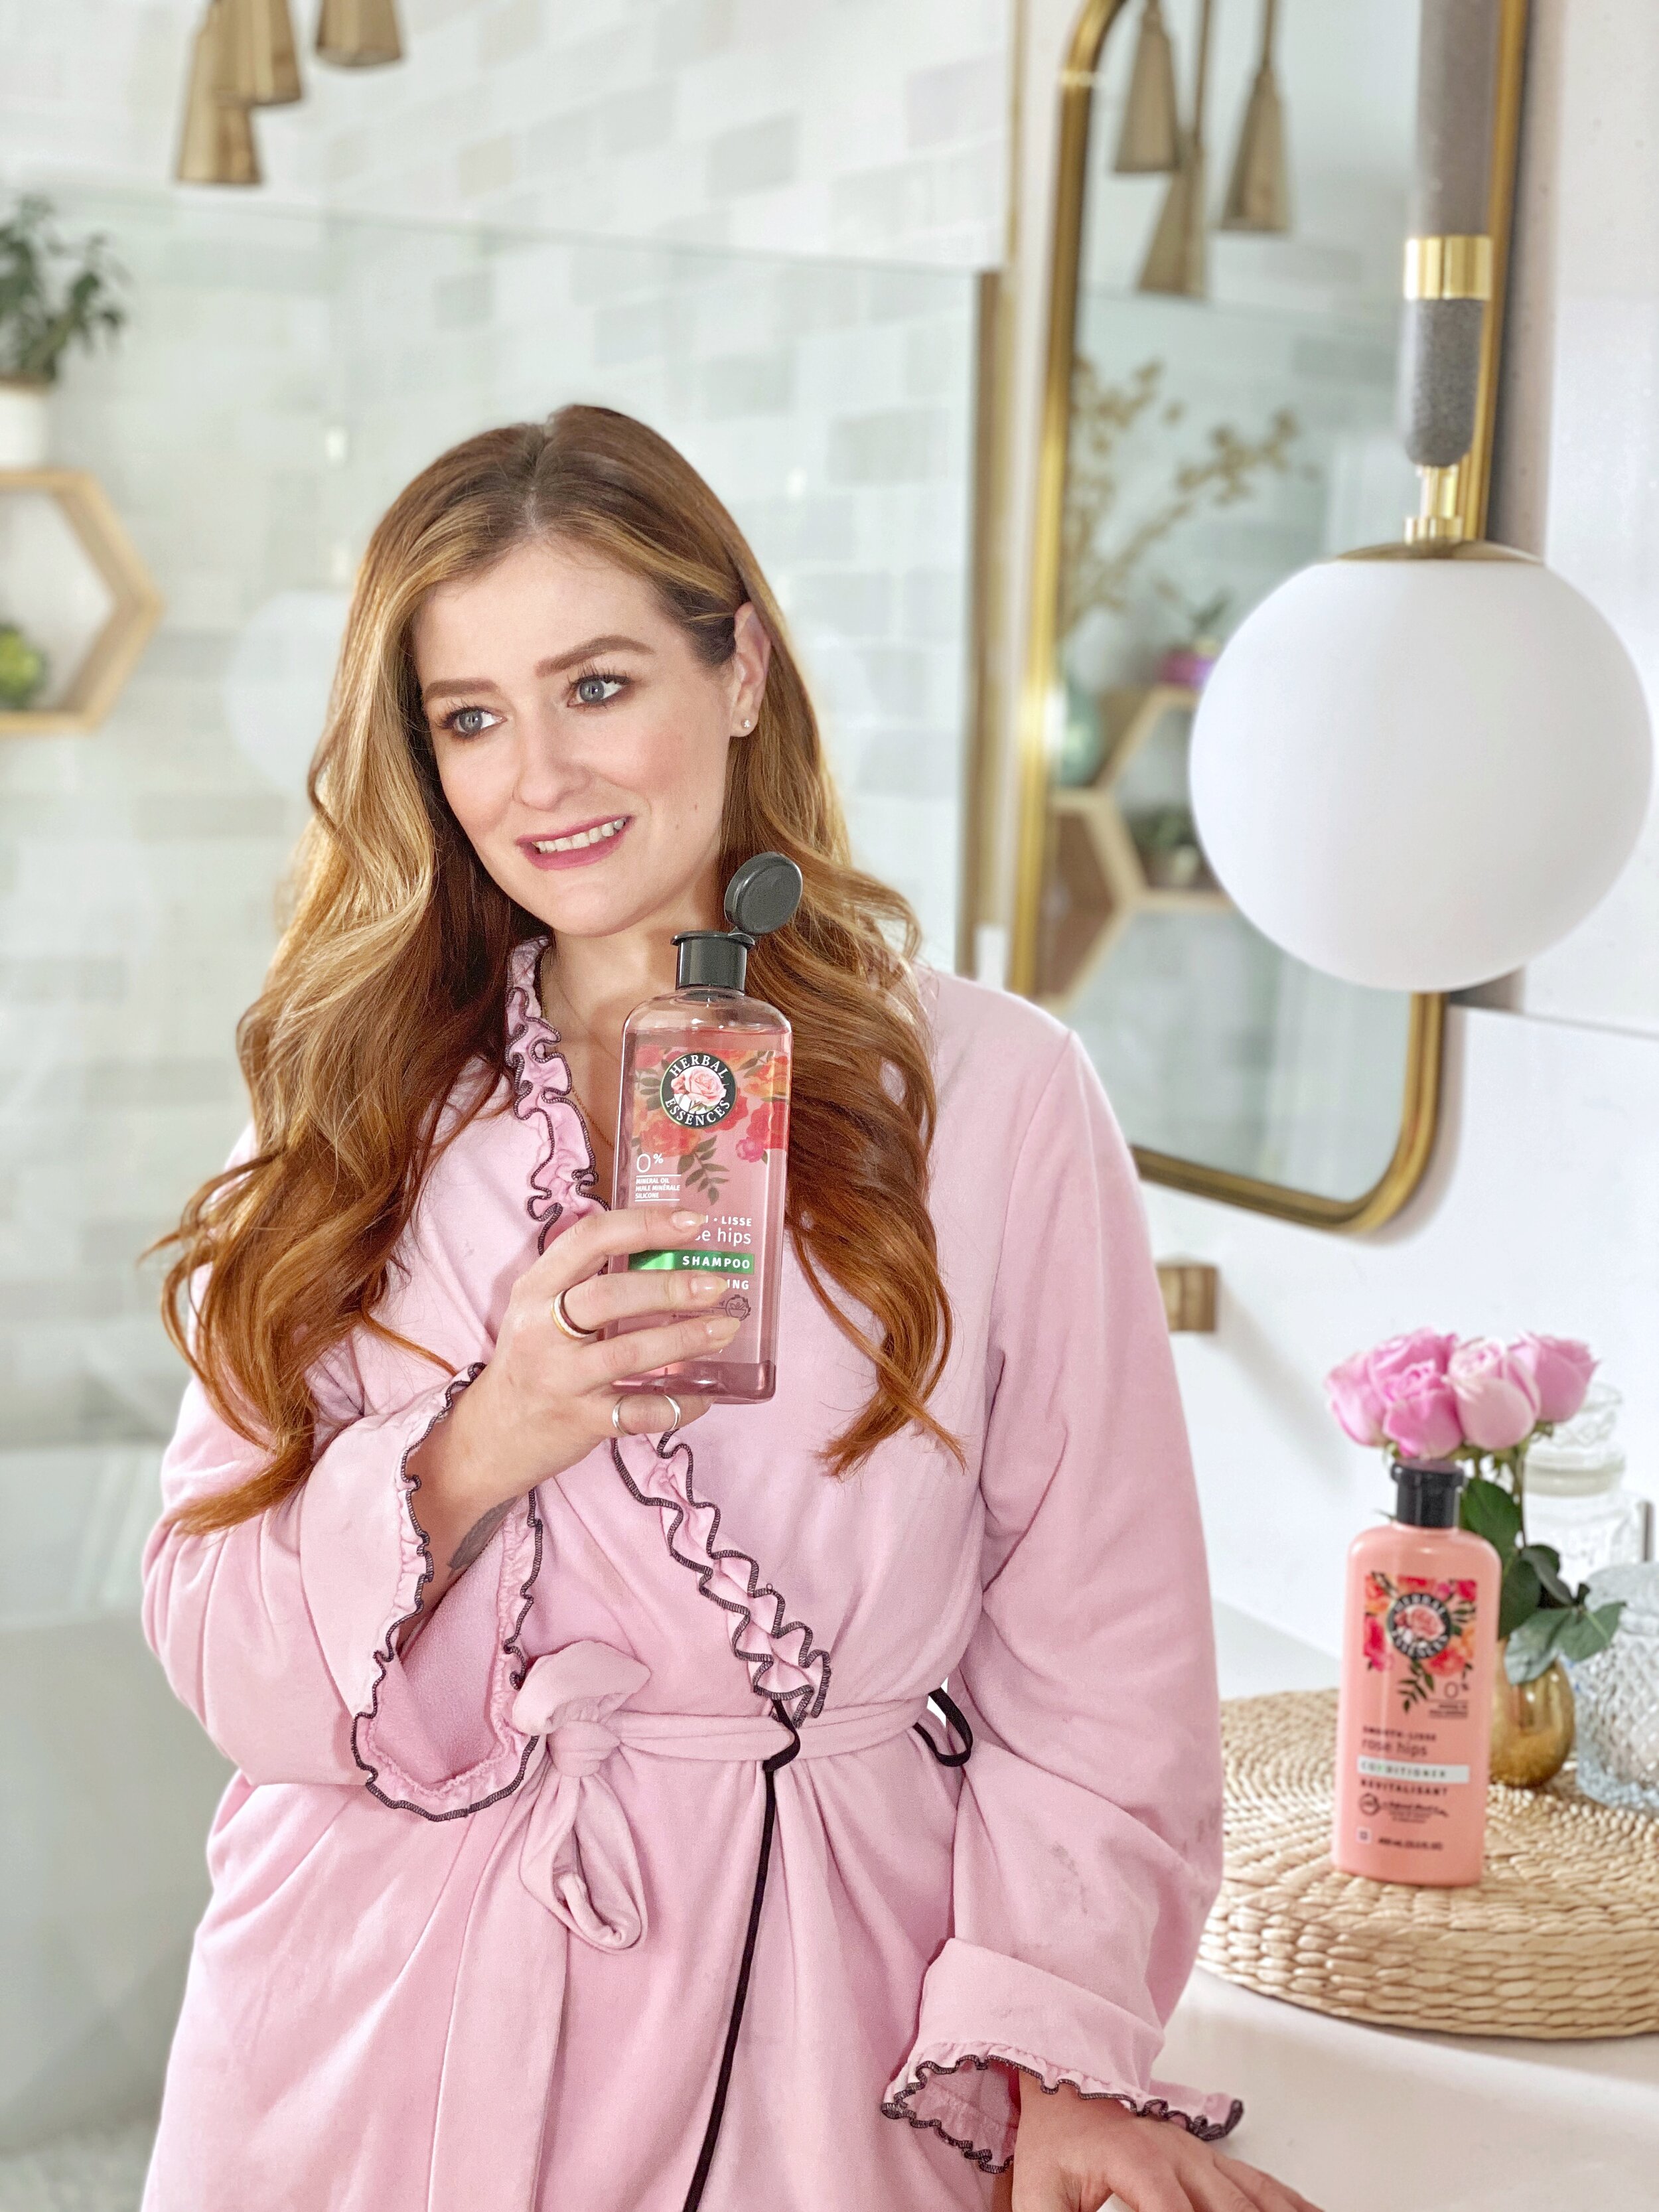
This blog was written in partnership with Herbal Essences. All opinions are my own.
I’m a busy DIY MOM
I run a production company, tv show, am renovating my home, taking time for some charitable projects AND am a single mom. So in order to make any time for myself, I need all the beauty hacks to save me a few extra minutes here and there. This also means my beauty products must work out of necessity, self care and affordability. The little free time I get to myself, I need to make sure the products I buy are necessary, affordable, and also WORK. Who else can relate to being on-the-go 24/7, with next to no time for getting ready?! Or, struggling to get the right products for you because they’re way out of your price range?
That’s why I’m excited to partner with Herbal Essences on my money saving, beauty & hair care hacks for busy women.
• Hack•
Here are some personal beauty hacks that save me time and money:
Find haircare products that bring out your best, natural hair
Find haircare products that bring out your best, natural hair.
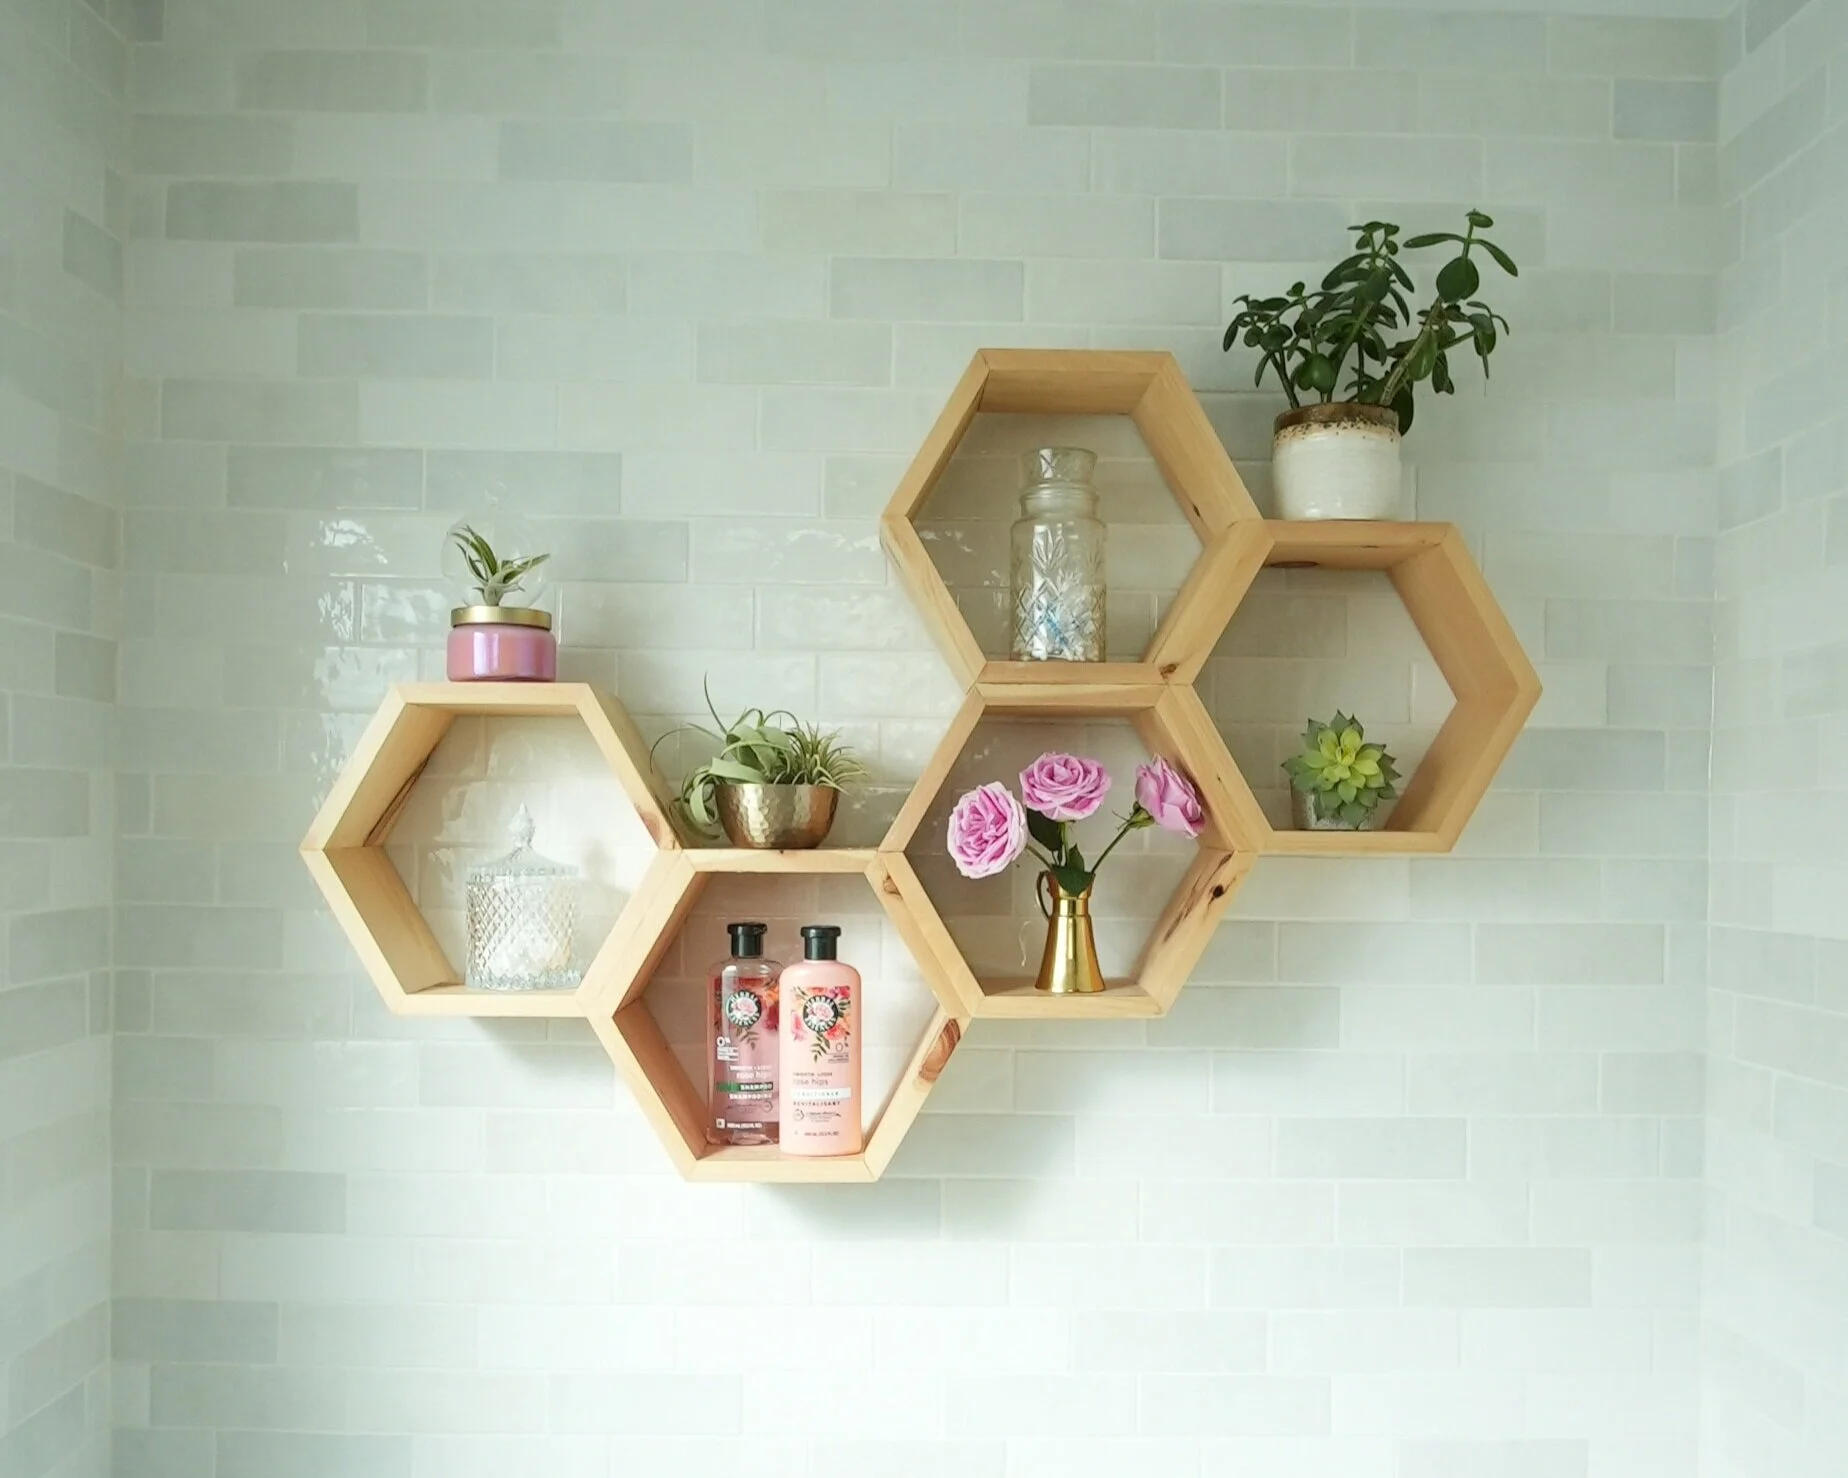
As I said, I’m mostly always on the go. Which means I rarely have time for styling my hair. So, I rely on high-quality hair care products to help nourish my hair – leaving it smooth, silky and soft, without the styling! It’s even better when it’s a low cost option, that doesn’t compromise on quality ingredients and is cruelty free and dermatologist-tested! The Smooth Rose Hips Shampoo & Conditioner from Herbal Essences is a new spin on their classic line-up (and they’ve still kept that iconic scent we know and love!) It leaves my hair feeling restored, nourished and extremely smooth – plus the scent of roses is exquisite! It’s also colour-safe (perfect for my red locks!), mineral-oil free and pH balanced. You really don’t have to compromise on quality ingredients when this comes at such an affordable price. CLICK HERE for a link of where to buy!
Silk Scarves
I’ve recently discovered the magic of wearing a silk scarf in my hair at night. After I have gone through all the trouble of blow drying my hair and curling it, wearing a silk head wrap or scarf extends my blow out for up to 4 days - that adds up to being a huge timesaver as well as a hair strengthener by keeping the heat off my ends a little longer! A great tip to find a silk scarf that works within your budget is to head to your local second hand or consignment shop. Make sure you check the tag- because it’s easy to get fooled by polyester.
No-Beach, Beachy Waves
Since I’m on the go morning to night. I don’t have a lot of extra time for styling my hair. On a typical day I just wash and go- Here is a quick beauty hack you can easily make at home - If you’re feeling beachy, mix a bit of coarse salt with a drop of essential oil and water then spritz it in - towel dry your hair, brush it out and then put it back in a towel and let it set your beachy waves for the day.
Make BB your Bestie.
Did you know you can mix your foundation with moisturizer or sunscreen to create your own BB cream that will give you a glowy fresh no makeup look. It will also save you money by stretching out your foundation. Taking care of your skin is always a money saver so by wearing sunscreen every day and drinking lots of water you will have healthy looking skin for years to come.
Save on Clean up Time by Picking Products that Match your Décor
My final tip is a timesaver- and one that comes from the home décor enthusiast in me. To keep my bathroom looking sweet and ‘insta-ready’, I like to choose products that match my décor- and you all know I’m into those pink touches so Herbal Essences rosy pink bottles incorporate perfectly into my personal style. At an unbeatable price, you can leave the Smooth Rose Hips collection out for the whole family to use!
I’d love to hear your go-to time and money saving hacks – share yours with me by commenting below!