

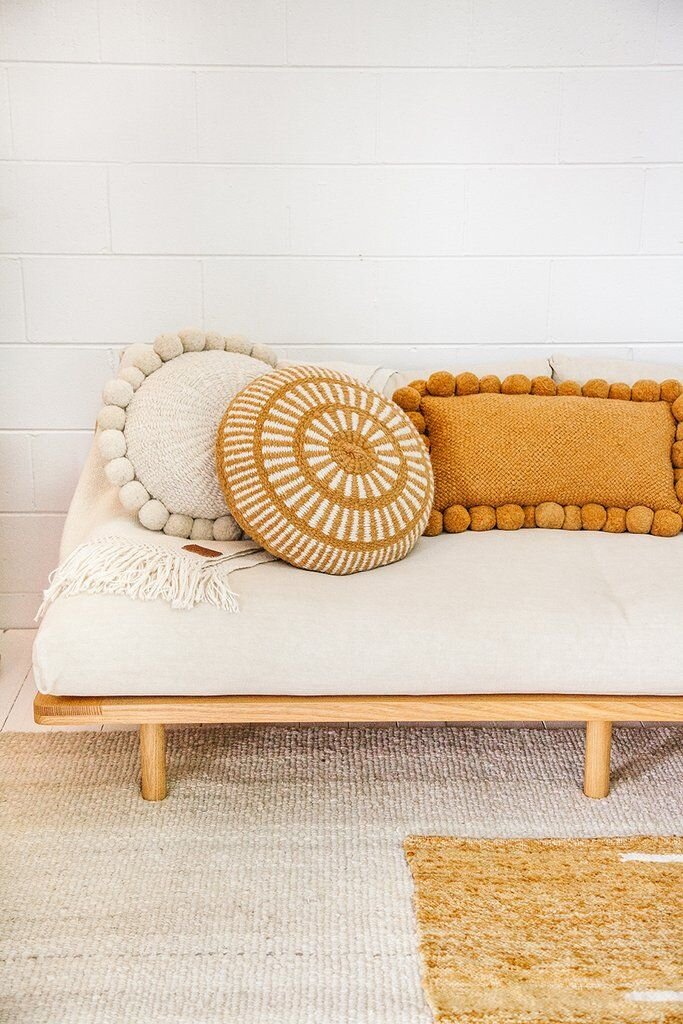
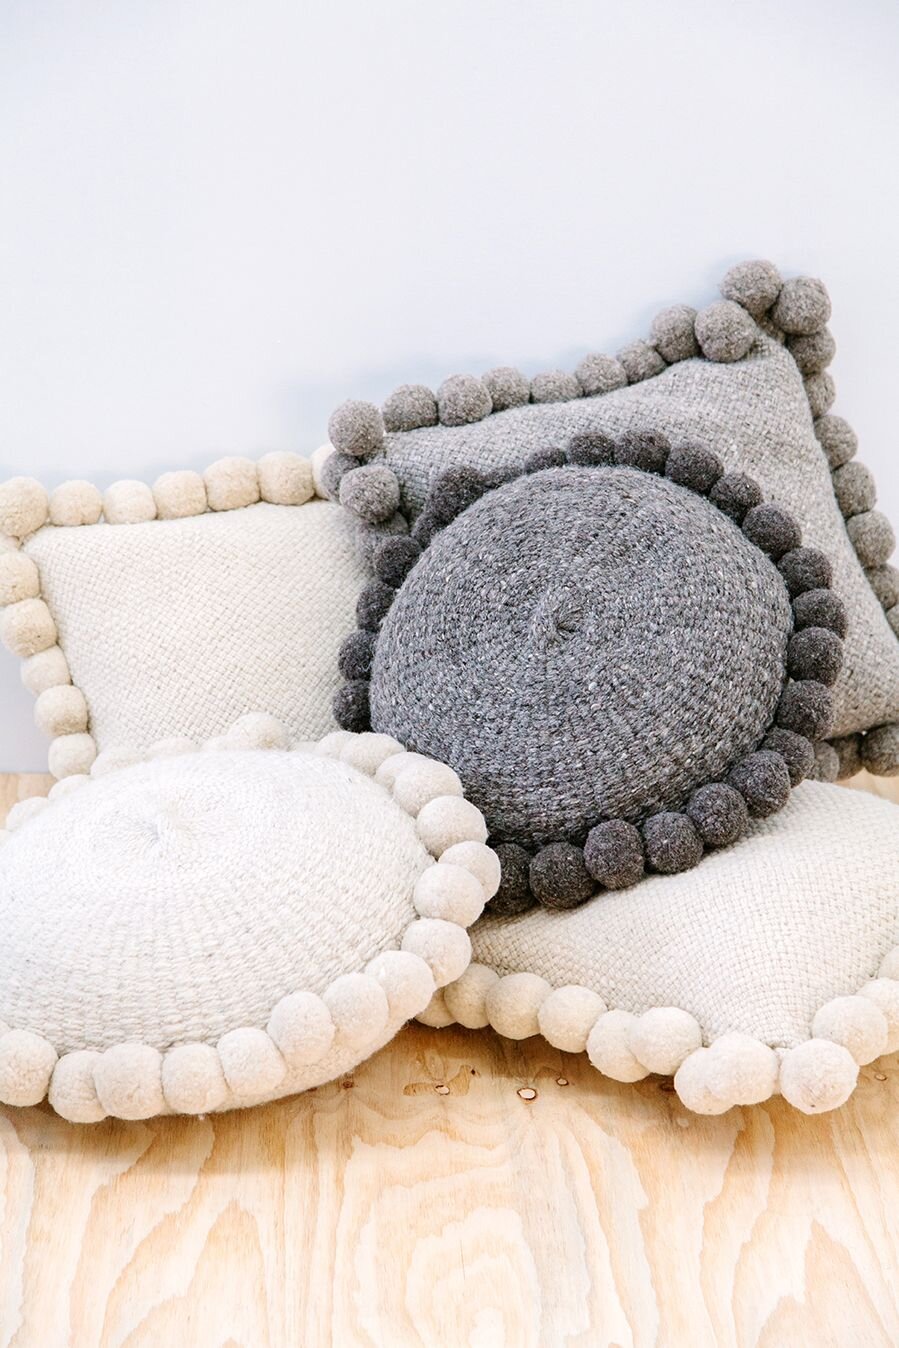
How To Make Your Own Round Pillow with Pom Poms

Making your own pillows is super easy (even for a newbie sewer like me) and it’s a fun way to keep yourself occupied during this time where we are all required to physically distancing and keep to ourselves.
While scrolling through instagram I noticed many home decor influencers had lovely round pillows with pom pom’s on them. I thought they were so cute and fun but checking out the online price of them (upwards of $150 a pillow) I decided to take a crack at making some myself.
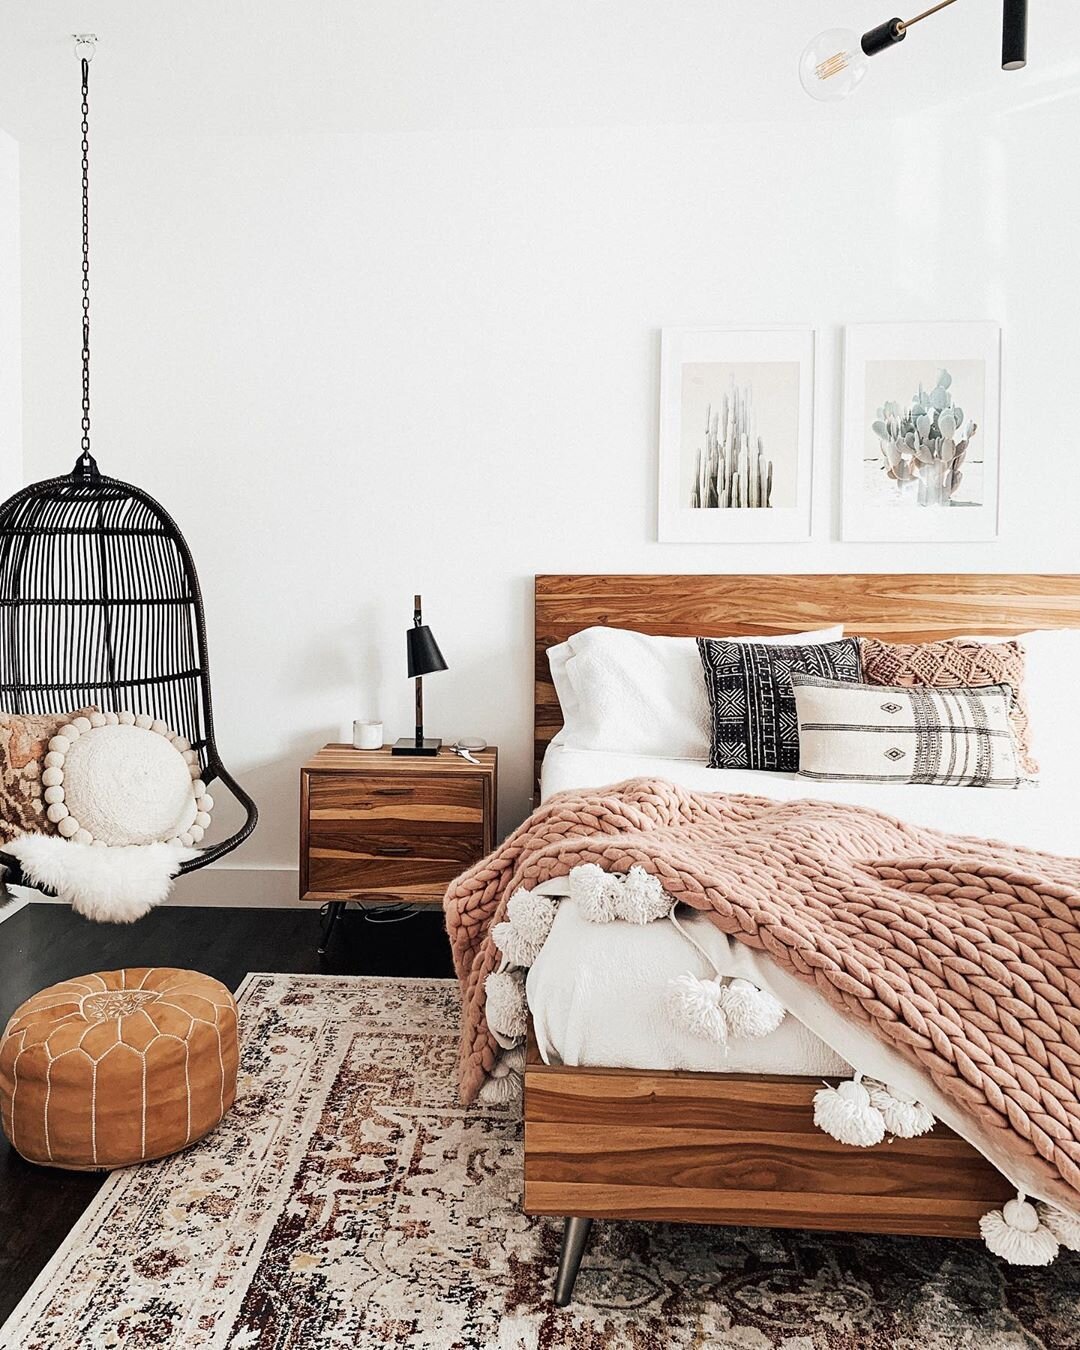
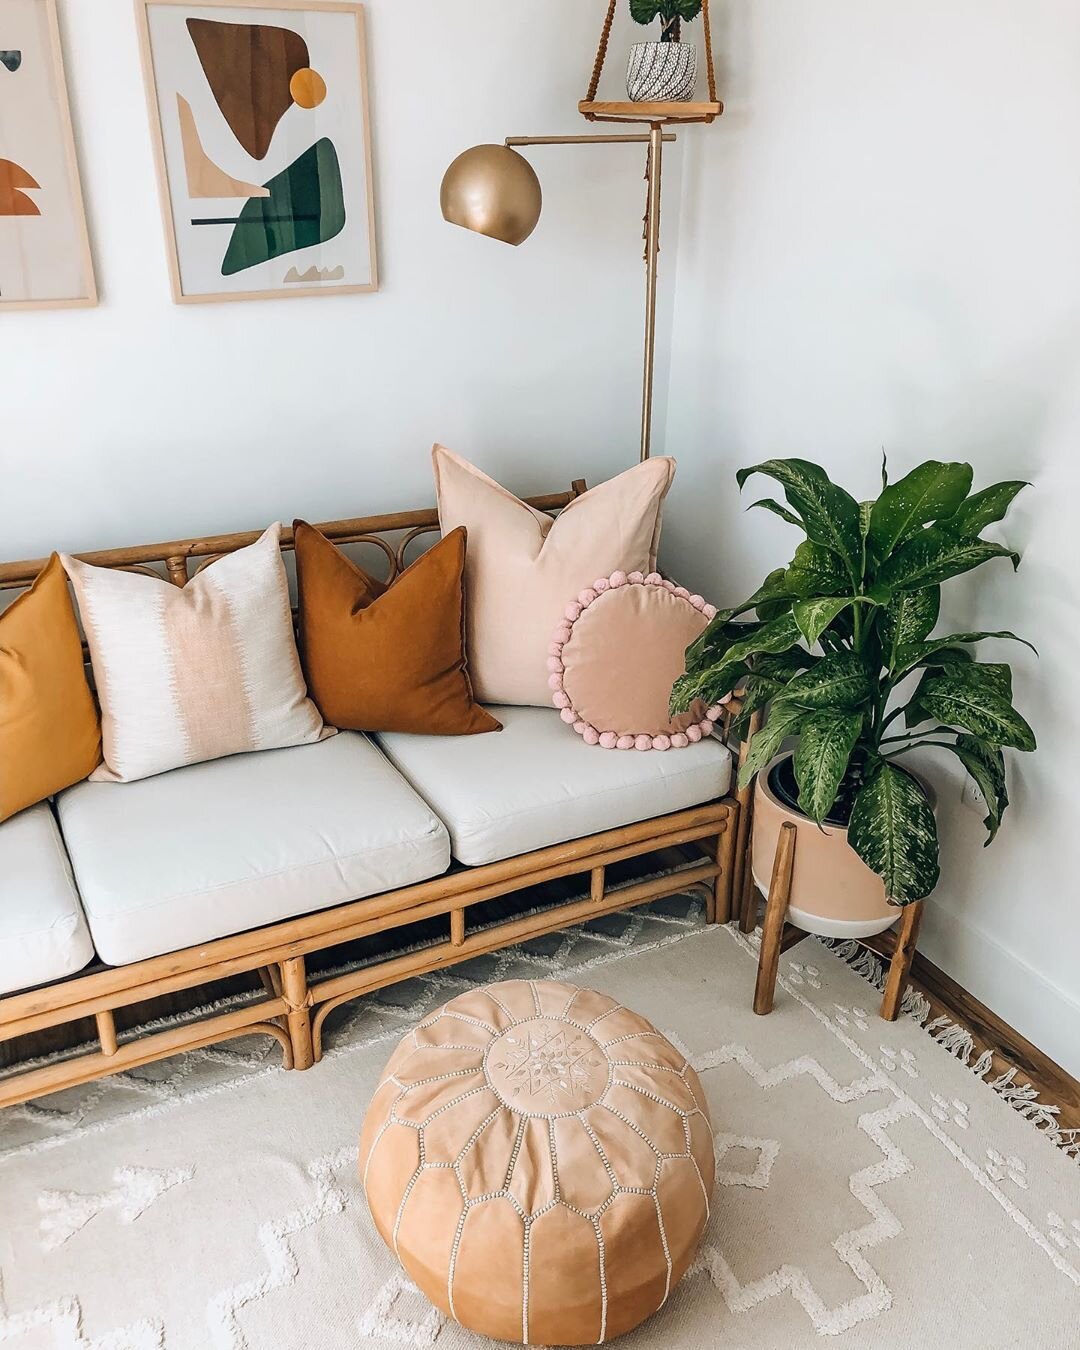
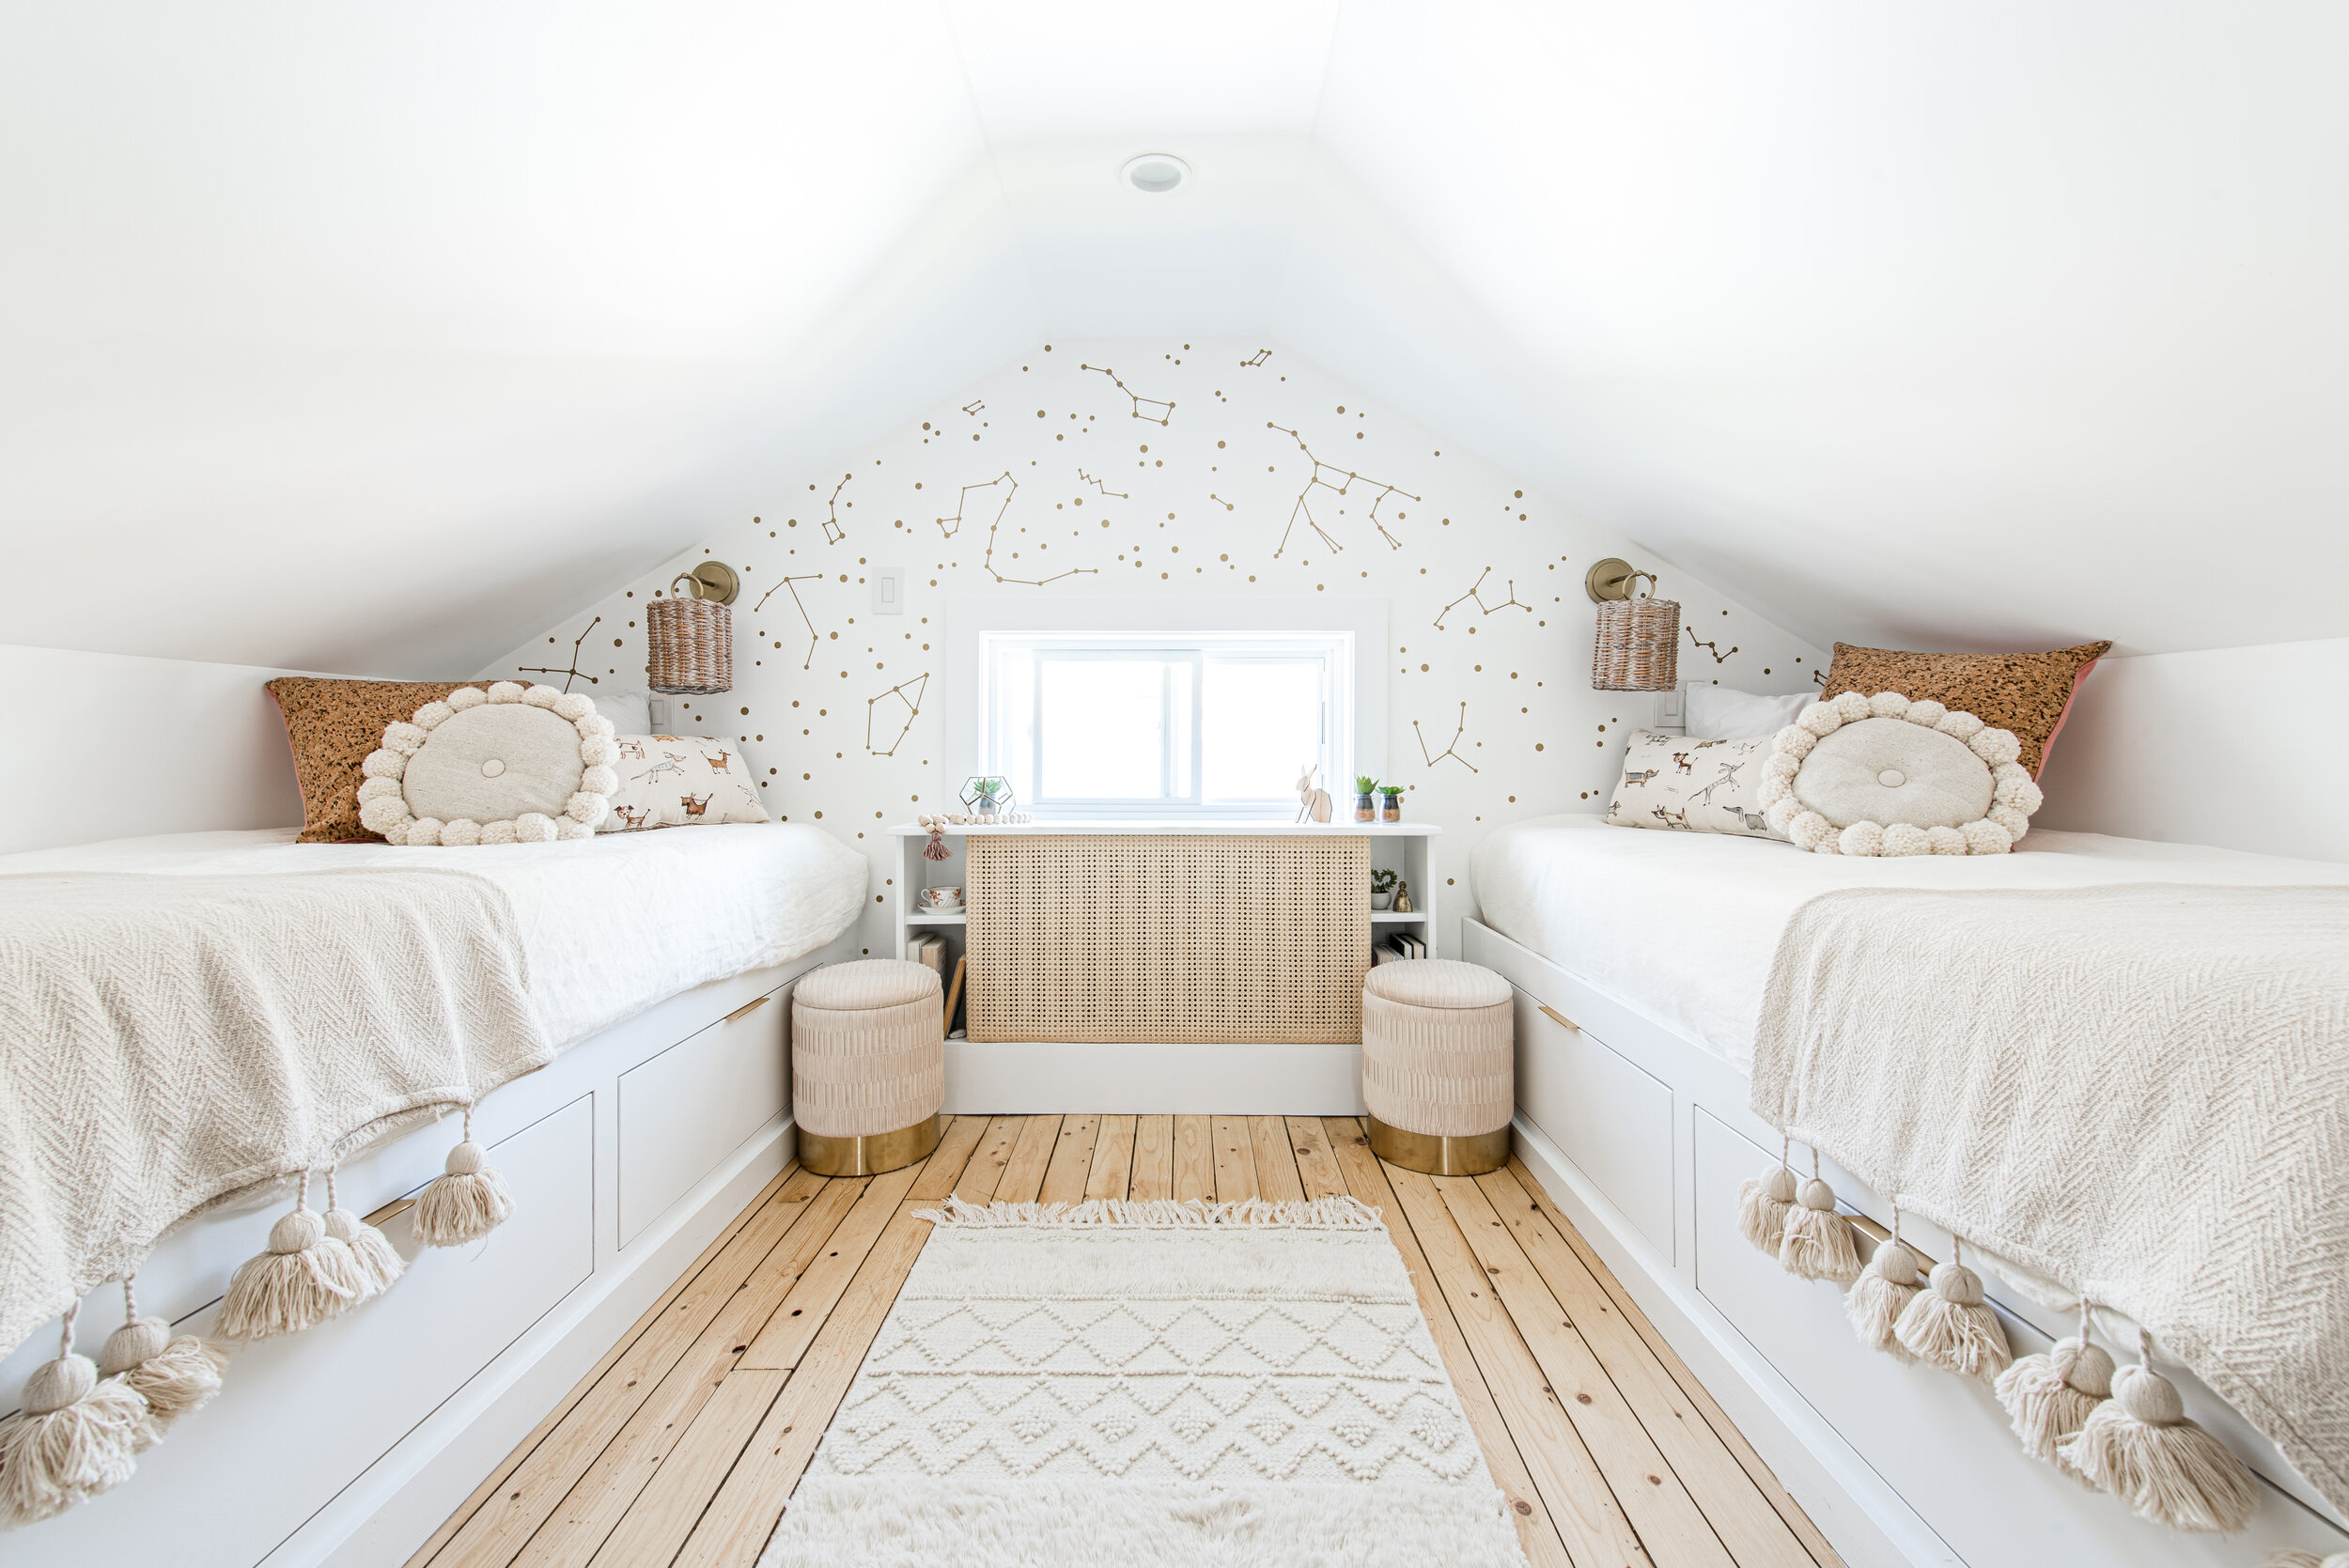
Since I am turning my attic into a 4 bed bunk room, I wanted one pillow for each bunk. THAT’S 4 PILLOWS. The price of buying these pillows would add up quickly. Luckily I discovered how easy and affordable they are to make myself.

What you will need…
I made a 13” round pillow with about 20 2-1/2” pompoms – adjust your amounts based on the size you want to make.
.5m of 54" width fabric for front and back of pillow
Template for making the round shape – if you are going to use stuffing (a large dinner plate or platter will work)
.5m of light to medium weight iron on interfacing – especially if you are working with a lighter weight fabric
A bag of polly fill pillow stuffing
1 package of two self cover buttons
Tailor Chalk for marking- a pencil or pen will work too
Sharp scissors, or rotary cutter, cutting mat & ruler/measuring tape
Basic sewing supplies (sewing machine, needle, thread and pins)
20 pre made Pom Pom’s per Pillow (Check out my pom pom making tutorial here)
Leftover yarn and a large needle to attached Pom Pom’s

DIRECTIONS:
Note: Seam allowances are 1/2". If ironing is needed, use medium dry iron.

STEP 1
Use your template or insert to draw out the circle on the wrong side of your fabric with your tailor chalk, I traced about ½ inch outside the template to allow for the seam allowance.

STEP 2
Cut one piece fabric for the front and one for the back of the pillow
STEP 3
If you are using interfacing, use your fabric as a template for cutting out the interfacing and iron it on to the wrong side of both pieces .

STEP 4
Pin the right sides of the fabric together with your pins facing outwards so they can easily be removed as you sew.

STEP 5
Stitch fabric together with ½ inch seam allowance around your pillow leaving an opening large enough to insert your polly fill stuffing.
STEP 6
Once sewn together, trim your seam allowance closer to the stitching about ¼ inch.

STEP 7
Stuff your pillow with loose polly fill smoothing and pulling apart the stuffing you go so it’s not lumpy.
STEP 8
Hand stitch the opening closed .

STEP 9
Attach your Pom Pom’s with the left over yarn from your pom pom’s (6” to 10” long) and hand sew them it to your pillow. – You will need a larger needle like a darning needle for this so you can thread the yarn through the eye of the needle.

STEP 10
Now you should cover your button with the fabric (including interfacing if using). The button packaging comes with a template for you to use to cut your fabric. Cut out your fabric and wrap the button working from one side to the opposite side tucking the raw edge of the fabric into the “teeth” on the button. Take the back of the button and push down firmly into your now covered button.

STEP 11
Measure to the centre of your pillow and sew on your first covered button. I used yarn for this as it nice and strong, I also used my long damning or upholstery needle to push up through the pillow. Sew Attach the button to the needle and yarn and go back down through the pillow.

STEP 12
You should now have the button on one side…and two pieces of yarn on the other. Tie tightly and knot – trim extra yarn. Now sew the 2nd button on the pillow fitting nicely into the indent created by sewing on the first button.
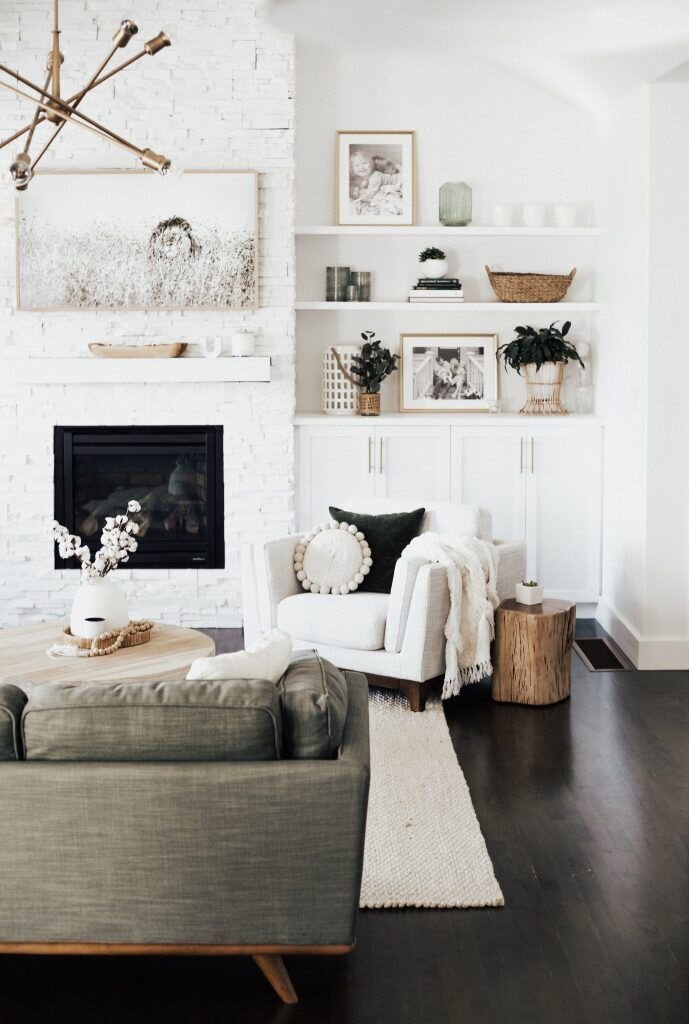
And here it is!! My very own round pillow with pom poms! they are so fun to make and will look great in any space. Check out the finished look of my attic renovation with these gorgeous pillows!
If you love this project share it. If you make one, please let me know how this project went for you!
xox
DIY MOM

MY VERY OWN DIY POM POM PILLOWS