
How to Install a Staircase Runner
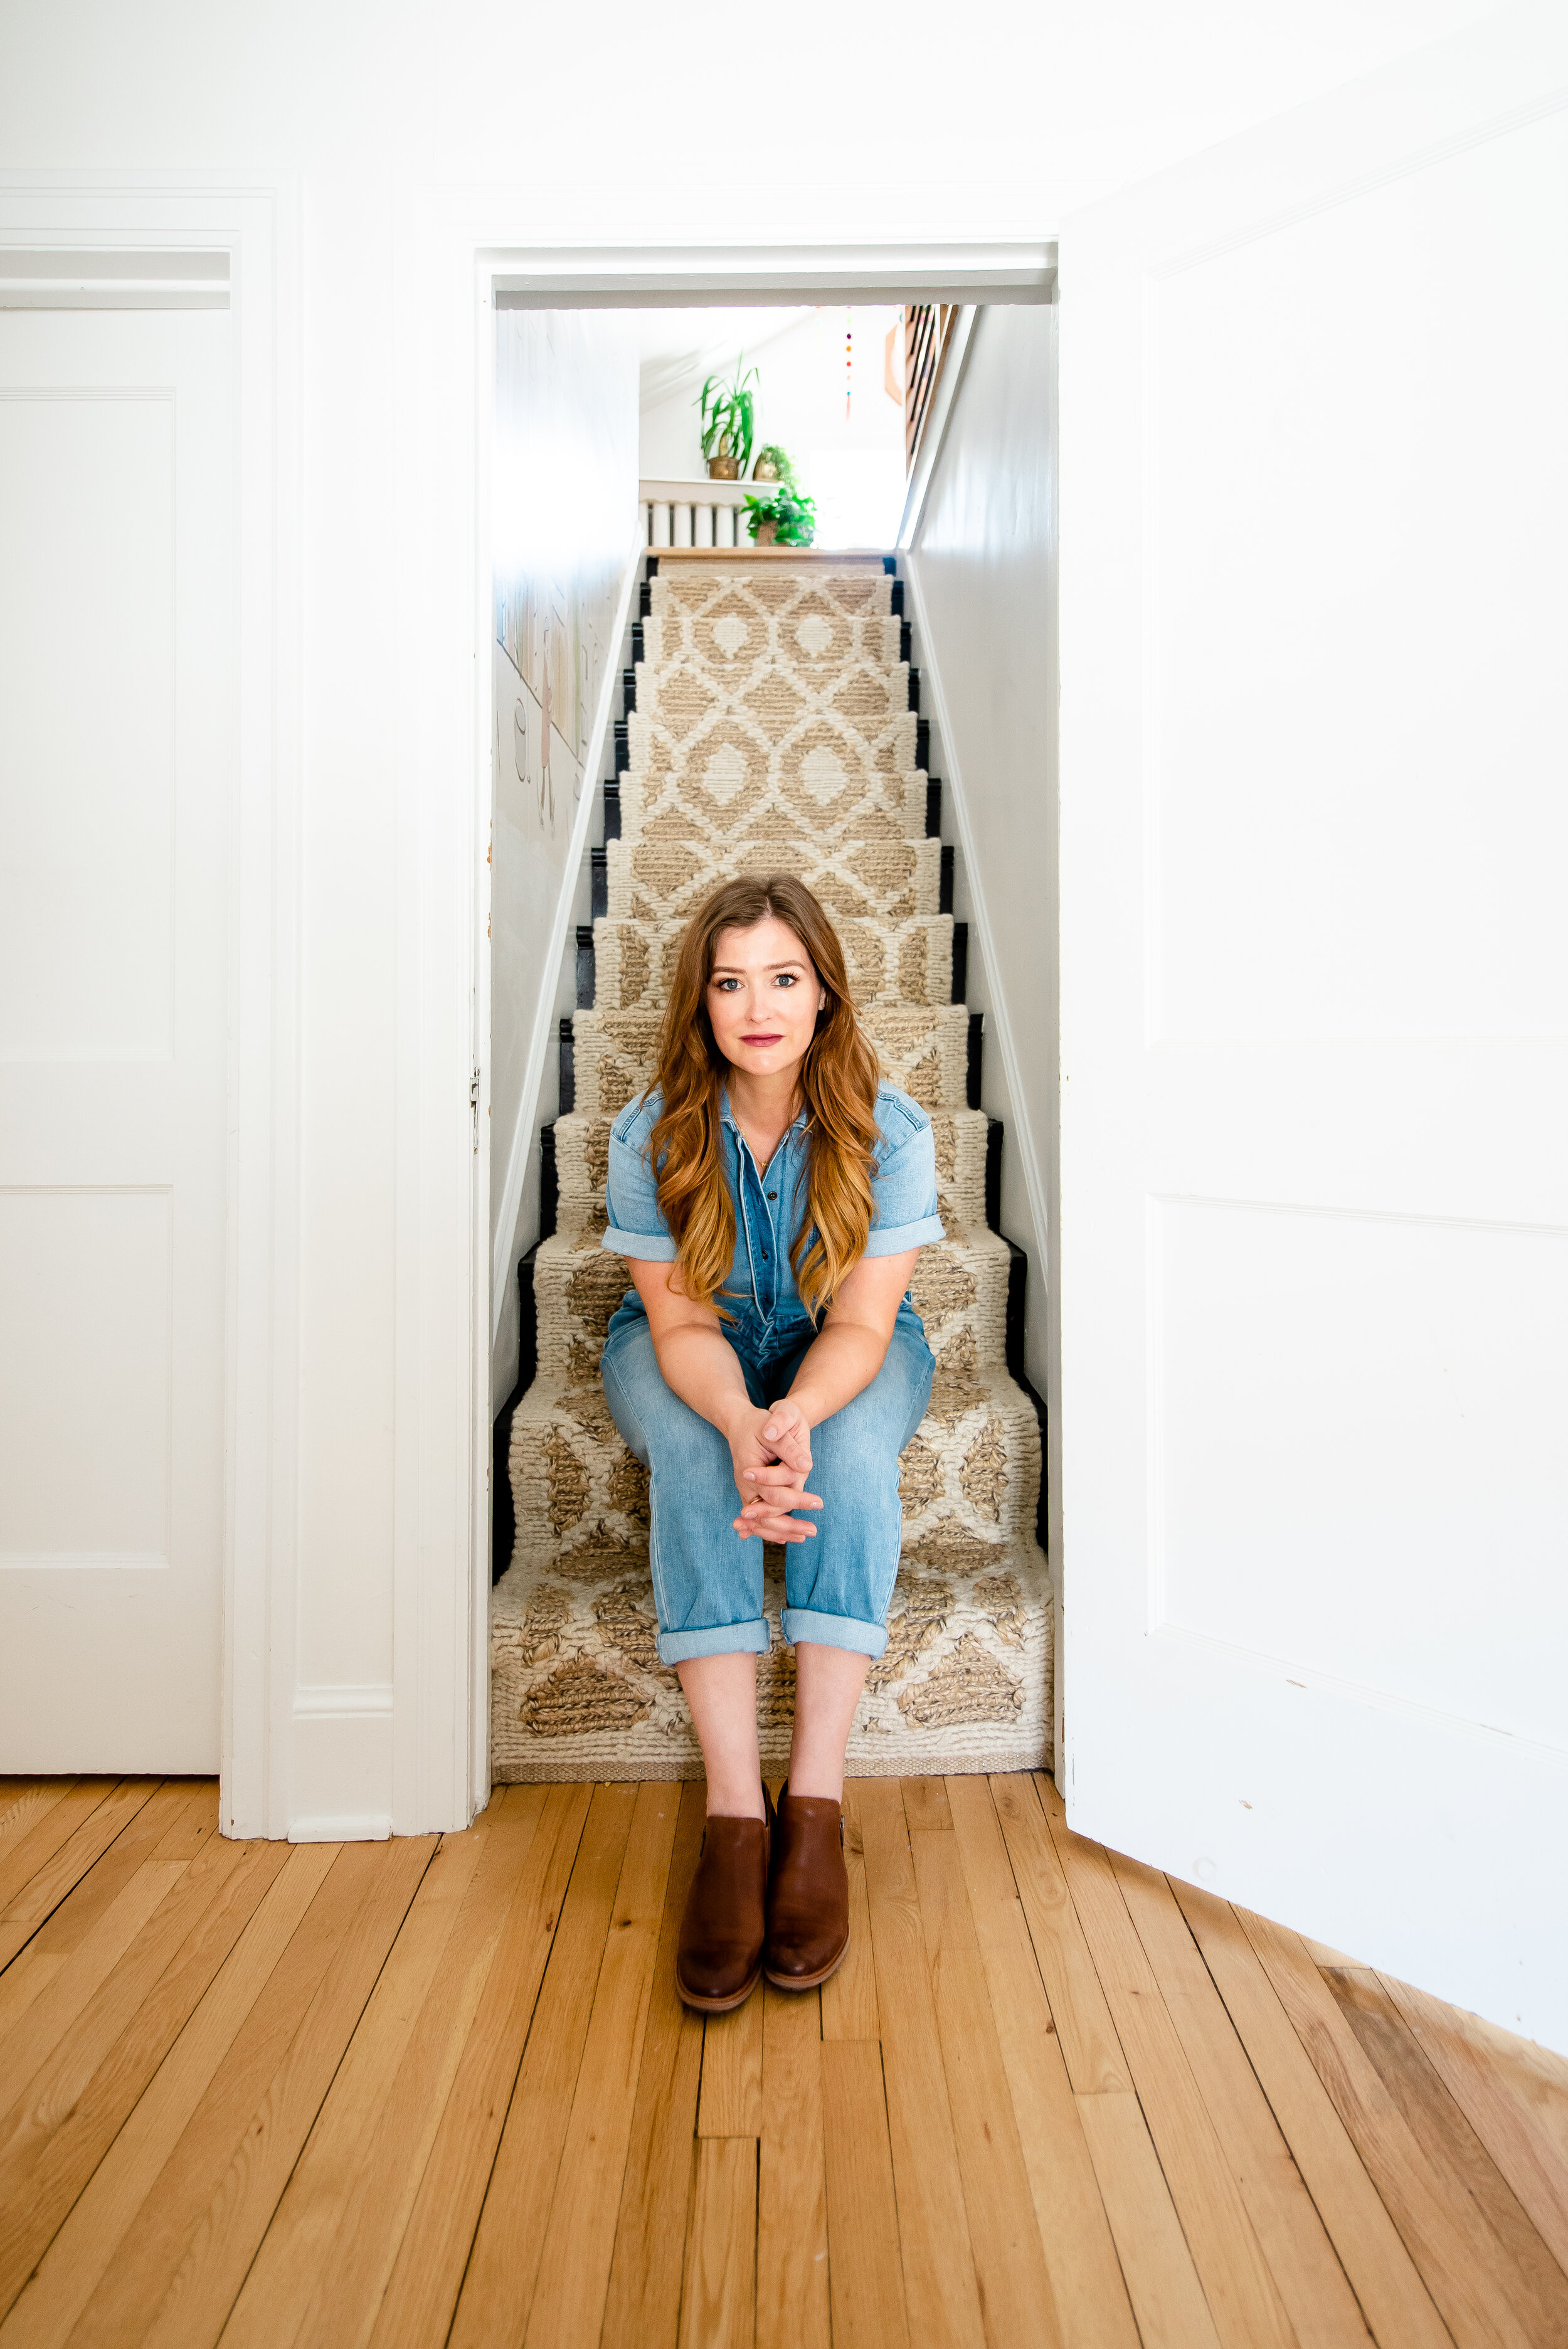
Staircase runners are my M.O. Yep, I love them. I’ve now become and DIY runner installation expert as I have installed 6 runners of all sorts over the last few year. My favourite material to work with has been the Annie Selke, Dash & Albert Rugs. They are easy to maneuver and more manageable for the DIY install. Recently I installed the Capri Soumak Rug on my attic staircase. At first I was a little hesitant. The runner is made of Wool and Jute which makes for a thick and heavy material. But it ended up being my most professional installation yet. Not only did the staples blend in seamlessly with the fabric, but the heavy texture creates added sound barrier, which mean those little feet running up and down the stairs don’t travel through our home!
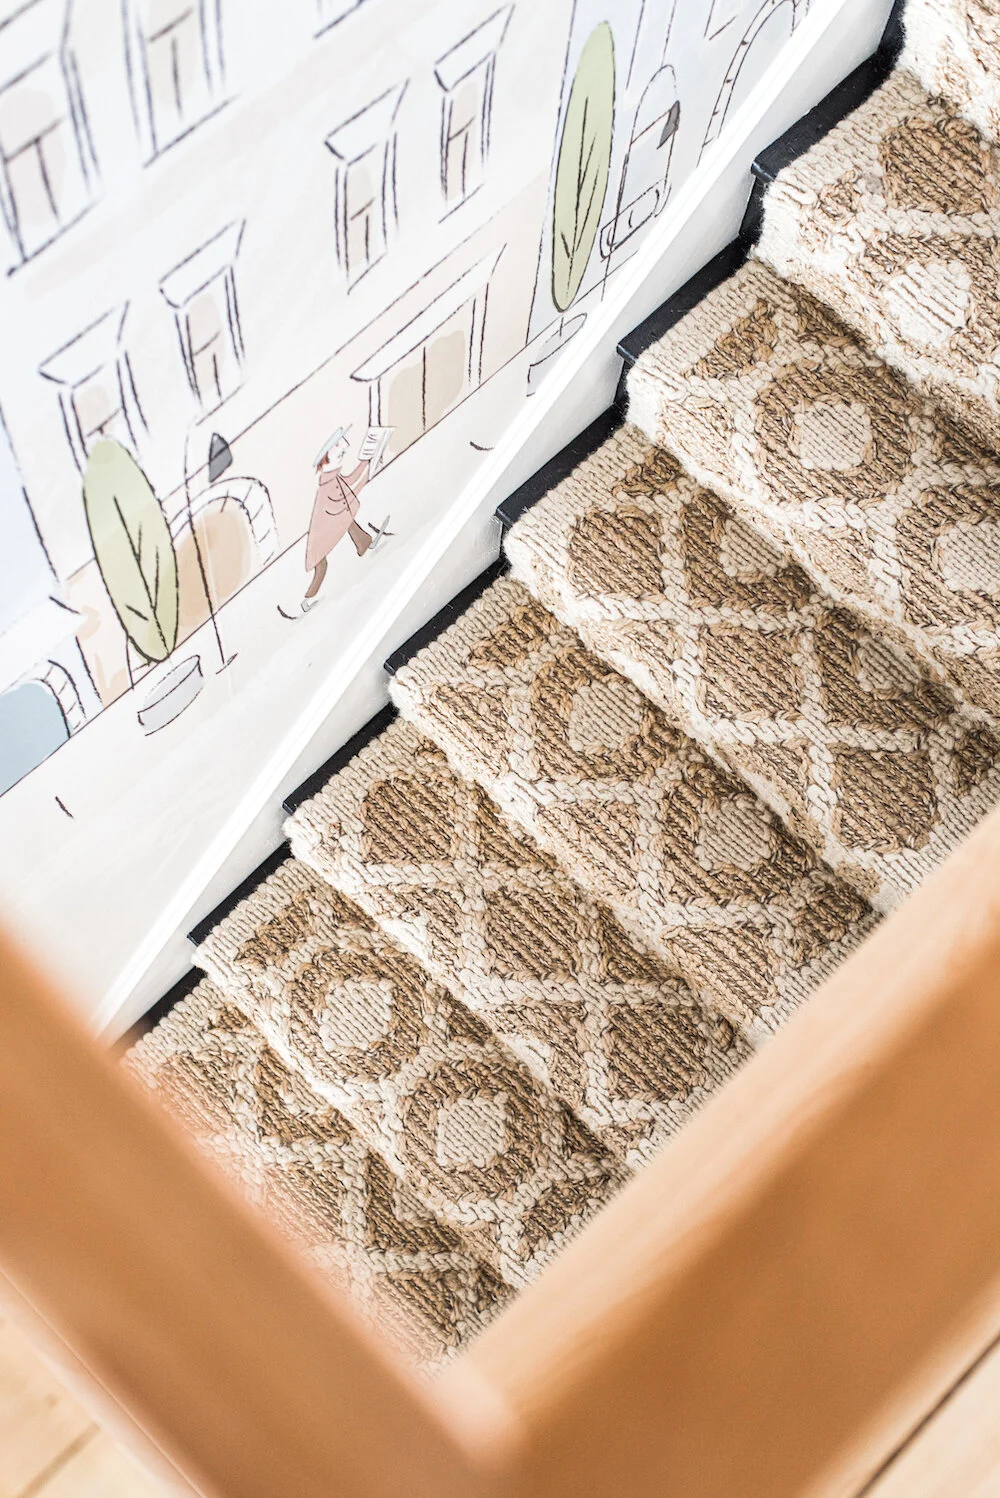
Soft, durable and highly textured in jute and wool. Soumak weaving adds texture, strength and dimension by wrapping each warp yarn with the weft, a technique that can only be done by hand. The pattern of this rug is has added definition through the outline of both color and texture, creating a compelling visual organic statement for the modern interior.

Prior to ordering the runner of my choice, I was able to collect samples from a local retailer in Halifax, Bellissimo!
I always recommend that people bring sample swatches home to see it in the space, because often times your perspective can change when you see the product on site.
Consider the swatch both from the bottom of the staircase and from the top, looking down. High contrast patterns – like navy and white stripes – may cause dizziness. I like large patterns because they look great in photos and on camera!
SUPPLIES
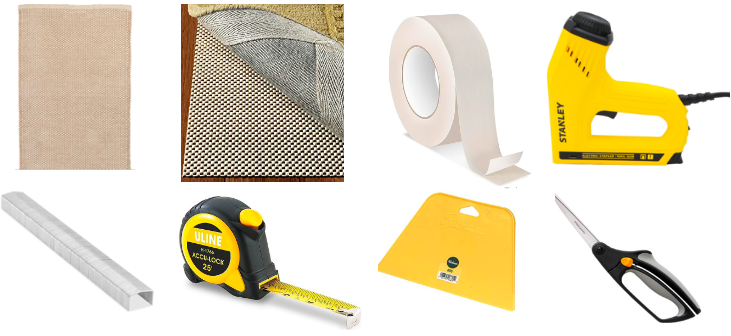
RUNNER
RUG PAD
DOUBLE SIDED CARPET TAPE
STAPLE GUN & STAPLES
MEASURING TAPE
WALLPAPER SMOOTHER
FABRIC SCISSORS
DIRECTIONS

STEP 1.
measure your stairs – The step and the riser. Add those numbers together and times by the number of steps to determine how many stair runner rugs to order.
PRO TIP: Paint part of stairs that will be seen after runner is installed and let dry overnight. [Optional]

STEP 2.
Use a rug pad for added grip, strength and anti slip! Cut your carpet pads to the size of your step; one for each stair.
Cut three strips of double sided carpet tape and apply them to the edges and middle of each carpet pad.

STEP 3.
Secure carpet pads to stairs by removing the non-sticky backing to the tape and pressing the sticky side firmly onto the stairs.

Step 4.
Measure the space between the wall and the carpet on each side to make sure the staircase runner is properly centred.

Step 5.
Secure the runner to the stairs by stapling every inch along the top of the carpet underneath the first ledge. AN ELECTRIC STAPLE GUN MAKES THIS SO MUCH EASIER!
Be sure to include staples on both of the outer edges.

STEP 6.
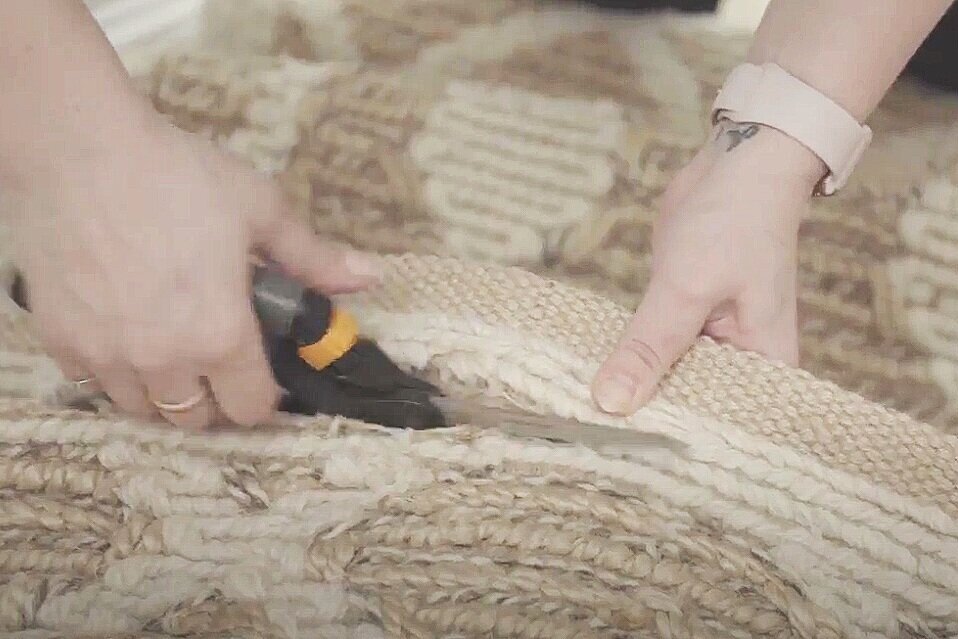
We use a bolster chisel or a wallpaper smoother to pull the runner taut against the corner of the riser and the next tread and staple against the bottom of the riser approximately every inch, including both of the outer edges. Step back and check to make sure your pattern looks straight before moving on.

STEP 7.
To create a waterfall stair runner, staple only where the tread meets the stair and not underneath the lip of the stair. Repeat this all the way down the stairs until you reach the end of the first runner. To achieve a clean edge on the bottom of the stairs, use another runner and repeat the same process from the bottom up.
Repeat the process, until nearing the end of the first runner.
STEP 8.
When you arrive at the last step your runner length will cover, leave the end loose until you have lined up the pattern with the next runner. Cut the finished edge of your carpet runner and secure them on the bottom of the riser with lots of carpet tape and staples!

STEP 9.
Cut the other side of the runner to meet the bottom half of your staircase runner. Once again secure the rough cut ends with lots of carpet tape and staples! This will ensure the longevity of your staircase runner.

STEP 10.
Do a once over on your project. Add staples if needed or hide obvious staples by rubbing the carpet with your wallpaper tool until they blend in with the material.

Congratulations!
You completed your first staircase runner installation! Now wasn’t that a lot easier than you anticipated. Par for the physical exhaustion. I hope you find installing a staircase runner is not as intimidating as you once might have thought. Now that I’ve gotten more comfortable with the project I find I can blast right through an installation in 3-4 hours!
If you enjoyed this tutorial or found it helpful!
Please share it with your friends! Thanks so much :)
xox
DIY MOM